Back to School

My boys started back to school this morning! Browder is now in 3rd grade and Garrison is in Kindergarten! They were both giddy this morning and were still giddy when they got in the car after school. That’ll wear off in about a week when I have to lock Browder in the kids’ “office” to do his homework (in tears because it’s SOOOOOO hard). Overall I think they are excited and I think Browder is a little pumped that Garrison is now “in the trenches” with him! Mallory still has a couple of weeks before she goes back to preschool. Anywho it’s been a super busy week or two getting ready for school. It’ll take another week or two for reality to hit that we are BACK IN SCHOOL! 

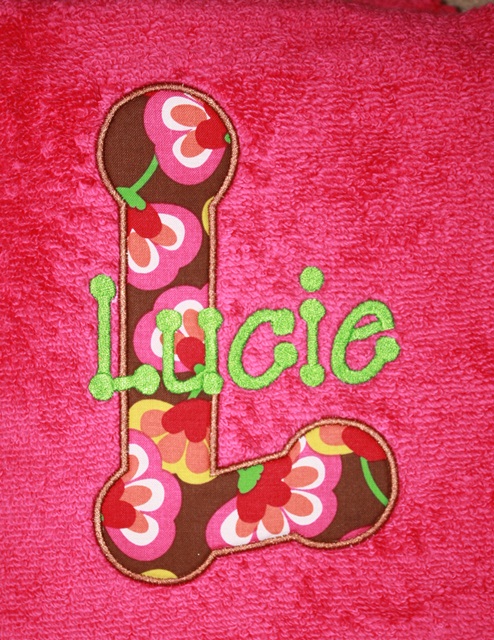
Once again, I’m loving the Monogram Wizard Plus Facebook Group. I’ve learned so many tips and tricks! One thing I read was in regards to monogramming towels. Here are a couple of towels I did last week and they turned out great (better than usual)! I adjusted the BOLDNESS to 120, selected FILL and UNDERLAY for the font. This is Embroidery-Boutique’s Dotty font. Applique Cafe doesn’t sell ANY fonts BTW. I use this one a lot because it shows a lot of fabric. It also matches my Monogram Wizard Plus Kim Single font. With towels, I use iron on tearaway stabilizer on the back and solvy on top and I hoop it all together. Fabric for the L ~ Windam Fabrics Shadow Flower.

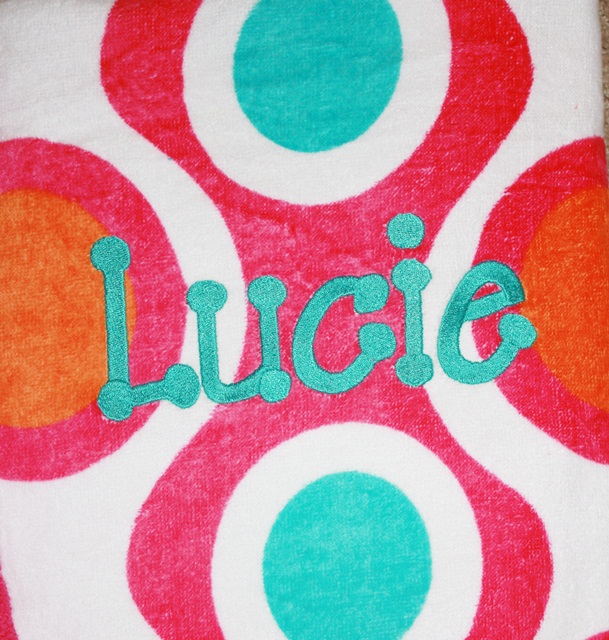
 Here’s another towel with MWP Kim Single font. It looks thicker and better to me with the increased boldness and underlay! I like to use “fill stitch” on towels versus “satin stitch”. It lays the pile of the towel down and won’t “pick” like satin stitch might. I also use fill stitch on most bags and backpacks. Speaking of backpacks, I have gotten my moneys worth out of my Fast Frames in the past couple of weeks. I’ve monogrammed A TON of bags and backpacks!

 I had a few people ask me (and I see it asked all the time) what MWP fonts are good to buy. Here’s a list of the ones I’ve bought and I’ll put a * by the ones I use A LOT. Some of these I got on the website store and some are from Alpha Pak disks that you used to have to buy before the downloadable fonts were available. This list may or may not be 100% accurate as some of the fonts I’ve had forever and can’t remember if they came w/ the software or if I bought them. Arabesque, Cotillion (dressy boy font), *Kim Multi/Single*, *Library*, *Master Circle* (my go-to girl scripty font), MC Center, Party Time (aka Curlz), Playground, Rascal, Recess, *Specs*, Stretch, Worms, Tipsy, Sunny, Penpal. I used to use Tipsy a lot for boys but now I use Library the most. Check out the store to find all of these “extra” alphabets. Some of these came as a set (disks) and I think you can buy them all individually now. There are a few more I’d love to have and will look out for the next Needleheads sale ~ Camp is cute (cowboy-ish), Empire is a great one similar to Master Circle, Silly is cute, Blackboard, Pendant is pretty, and Techie. These fonts are a little pricier than other fonts you buy and merge, but, they are totally scalable and adjustable in MWP and if it’s a font you’ll use a lot (like I use Library and Master Circle every other day), it’s well worth a few extra bucks!

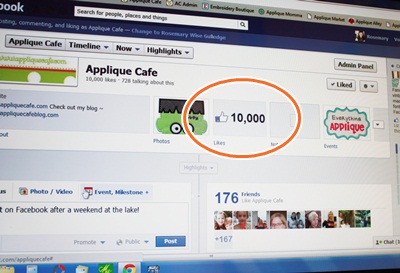
We went to the lake this past weekend with 4 other couples and their families. We had 10 adults and 12 kids and this was our 7th year. We always have fun! Anyway, I came home Sunday and checked Facebook Sunday night. I was going to remind everyone about our sale ending today. Low and behold, I looked and we had an even 10,000 Facebook fans! I was taken aback a little. I try not to take too much stock in that number because of course not all 10,000 fans have embroidery machines. There are other embroidery sites who have 15,000 or even double what we have. HOWEVER, it’s fun and thrilling that 10,000 people *like* our page! That’s a lot of people! We’re already at 10,059 and the number grows every single day! Thanks to all of you who support our little business!

Our 50% off sale ends today, which means it’ll be taken down first thing in the morning! You still have plenty of time ~ www.appliquecafe.com!
 

More on Fast Frames

Yay another post! Today has been a crazy day! Some days I get sucked in to Facebook and then it takes me all day to keep up with all the comments and replies. Today has been one of those days. I managed to monogram a backpack (not the one in this post) and edit these pics for a new blog post on Fast Frames. I also have a great new post on Monogram Wizard Plus but will save that one for tomorrow or another day this week.

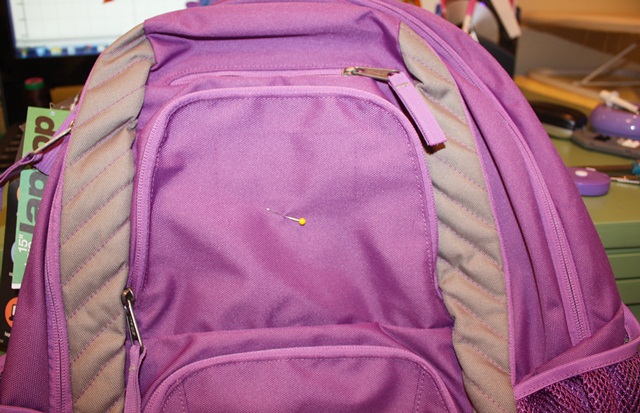
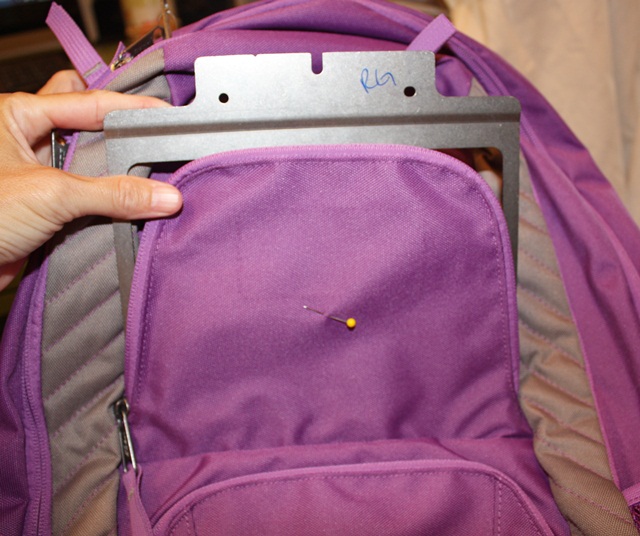
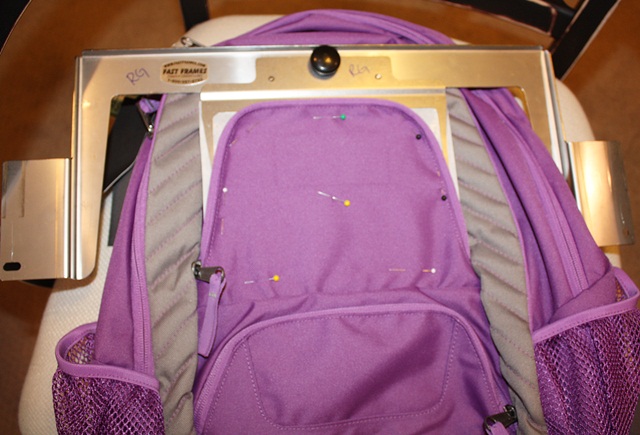
This, my friends, is a backpack (duh). You may be able to tell that my friend who sent this to me to monogram took the tag off (right above my straight pin). Her daughter is going in to 4th grade (I think??) so she said do her name, and that she’s in to peace signs! Sounds like a call for MINI DESIGNS! First I pinned my center of the top part of the front pocket (flap, we’ll call it). 

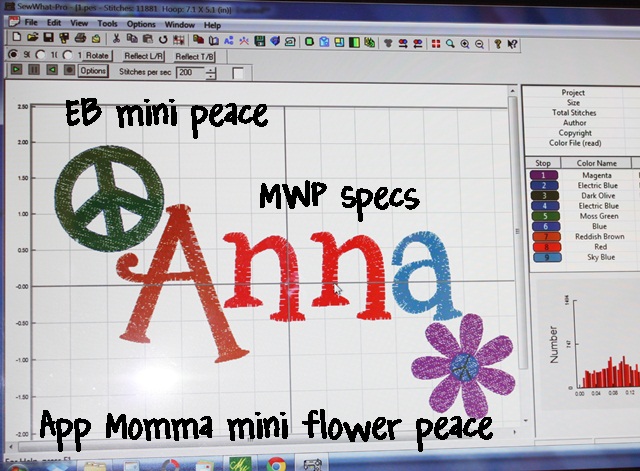
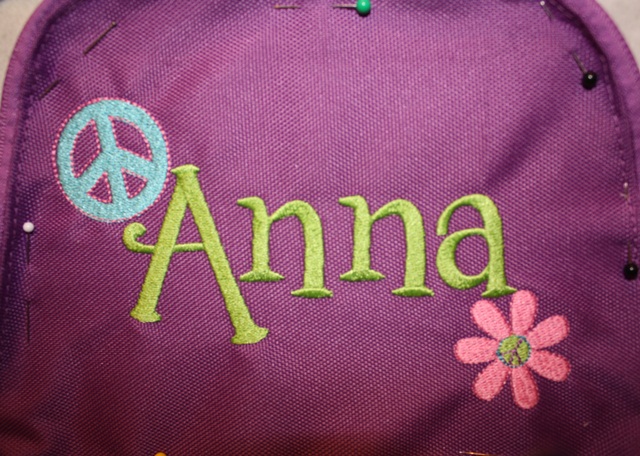
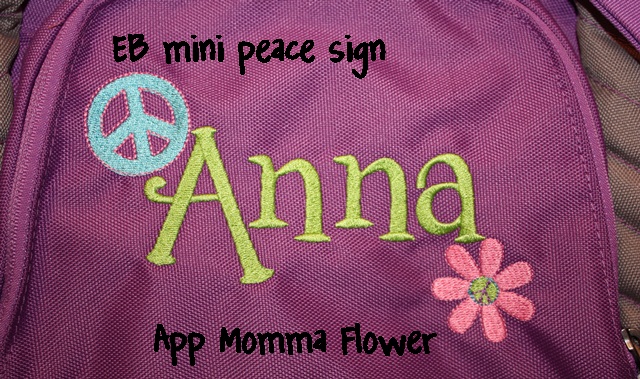
 I got my name together merged with a couple of cute mini designs. The peace sign is from Embroidery-Boutique and the Flower is from Applique Momma (it also has a peace sign in the middle). I used Monogram Wizard Plus Specs font. I love the font and it’s great for initials, but names are tricky. It spaces out rather strangely. I will explain all that in my next MWP post this week, but in the meantime you can see that I layered this name together IN Monogram Wizard Plus so that it all lined up and/or was spaced correctly. Layer 1 – A, Layer 2 – nn, Layer 3 – a. I then saved it and merged it in to my Sew What Pro. I added the mini designs, centered the whole thing and then saved it to my machine. I saved this in a 5×7 hoop space but will use my Fast Frames.

Now it’s time to pick out the right sized Fast Frame. This one measures 7″ x 8″.

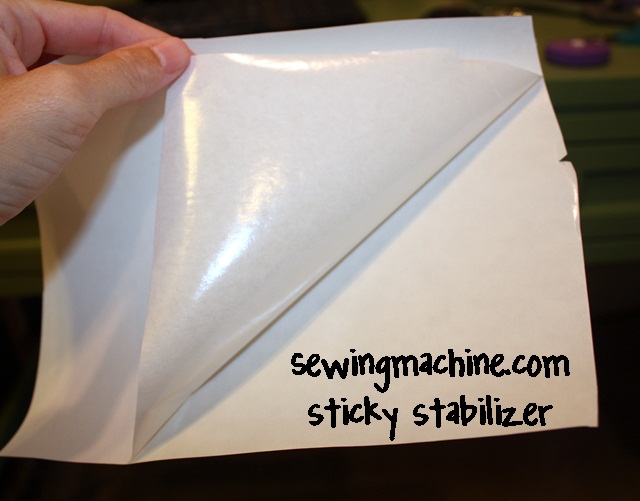
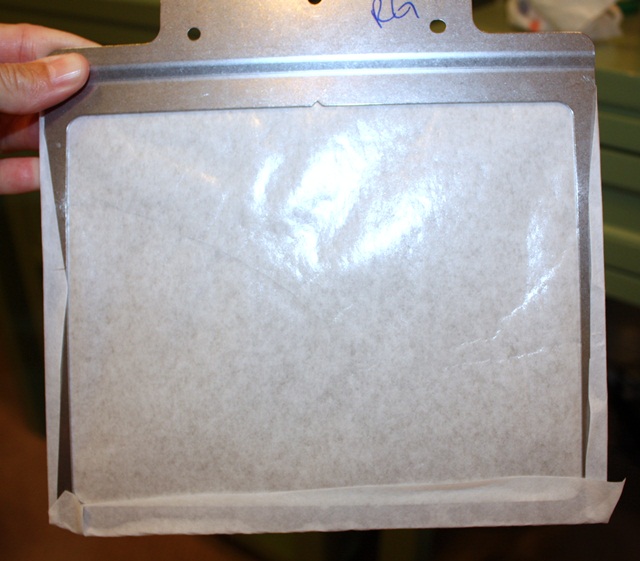
I very loosely cut my sticky stabilizer (from Sewingmachine.com). You want to cut it bigger than your frame so that it’ll overlap the edges of your frame.

Peel the paper side off to reveal the sticky side.

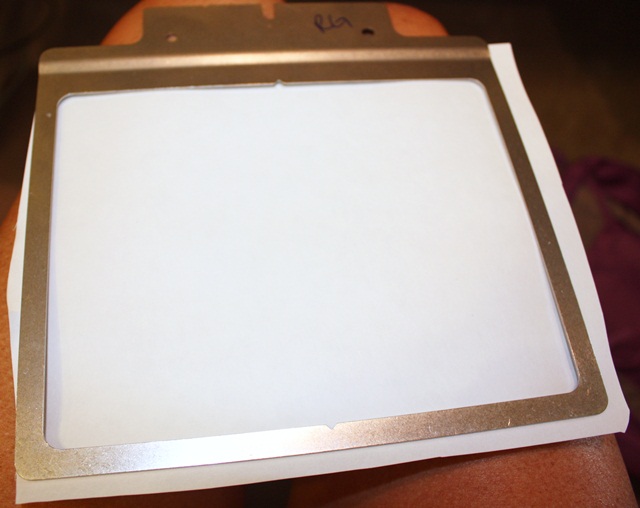
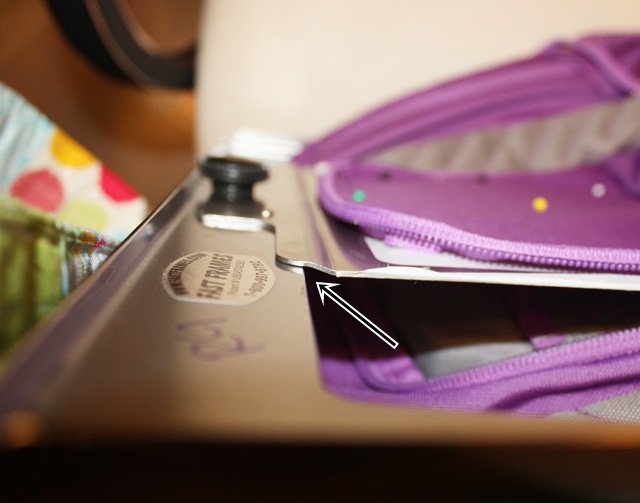
 Stick it to the bottom side of your frame (see photo down below which illustrates a little better what the “bottom” is). Hint: Your frame should slope down from where you attach it.

Wrap the edges around the frame. Doesn’t have to be all neat and perfect.

I then “stick” the backpack flap to the sticky paper on my fast frame. I usually line the top of the flap up with the top of the frame and then pin it in place with straight pins. This also shows me my borders. Since multi needle machines don’t technically recognize fast frames, you have to check the outer border of your design to make sure the needle won’t hit the edges of your frame.

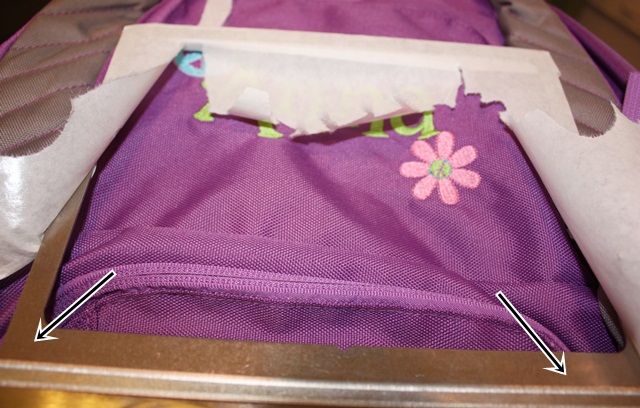
Here is how your fast frame should attach to the frame ~ it slopes down. That’s how you know what the bottom of your fast frame is to attach the sticky paper (believe me, I have stuck it on there upside down and backwards).

 Blah blah blah sew the design AFTER testing your borders and here’s the outcome! I use FILL STITCH instead of satin stitch. Since this is a backpack I wouldn’t want the satin stitch to get snagged or pulled.

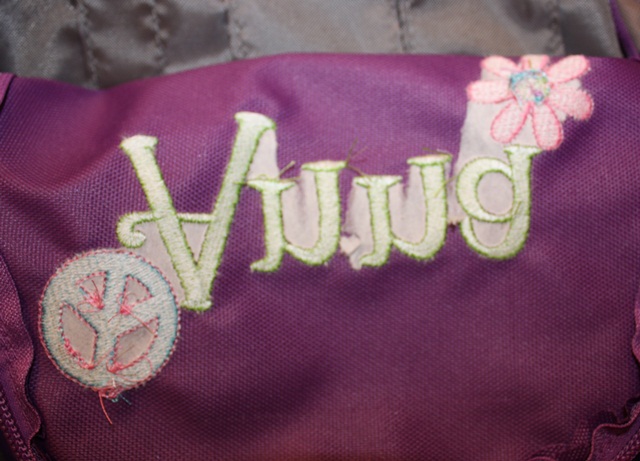
 I peel the sticky stabilizer/fast frame off the flap and as you can see it leaves a little inside the letters. You can peel that away easily. Get under it w/ scissors if need be. The sewingmachine.com sticky stabilizer is just sticky enough and comes off great!

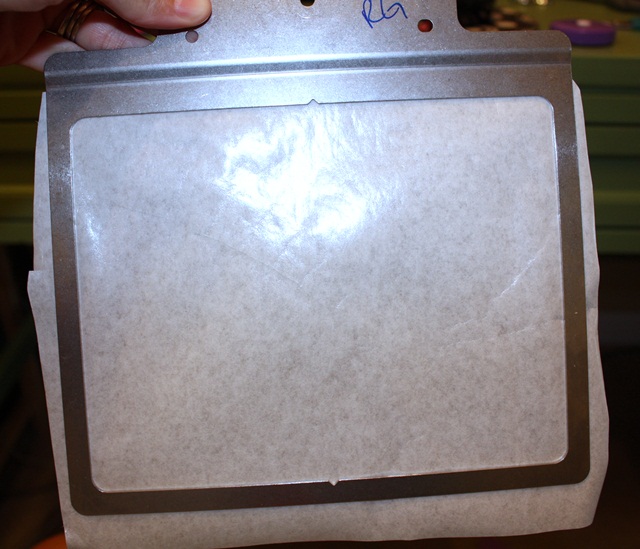
I then peel the sticky paper off my frame. As you can see it comes off very easily with no residue left on the frame.

Here is my finished backpack!

Again, stay tuned for my next post on another Monogram Wizard Plus trick.

Followup to my last post on MWP ~ here is a link to the Facebook Page – click HERE. As far as the Yahoo Group I mentioned… I am not a member of it. I just heard about it on the Facebook page. Evidently it’s a private closed group and they are currently not accepting new members! Check out the Facebook page! So far I’ve seen a few great tips on there!

We are celebrating 3 years of Applique Cafe, so all designs are 1/2 off through next Wednesday, August 15th!


Feeling Crafty!

I recently “ran out” of my blog hosting services from when I switched over to WordPress (from my old Blogger blog). Meaning I paid a big fee to have it converted over which included a year or so of hosting. I am now paying monthly, and I HAVE GOT to start posting more to justify that money. With that being said, I vow to do better! School starts in a couple of weeks and this year I will have 4 mornings free (a few hours each morning) with the 5th morning having only 1 child at home, so I *think* I will have more free time (ha ha we know how that goes).

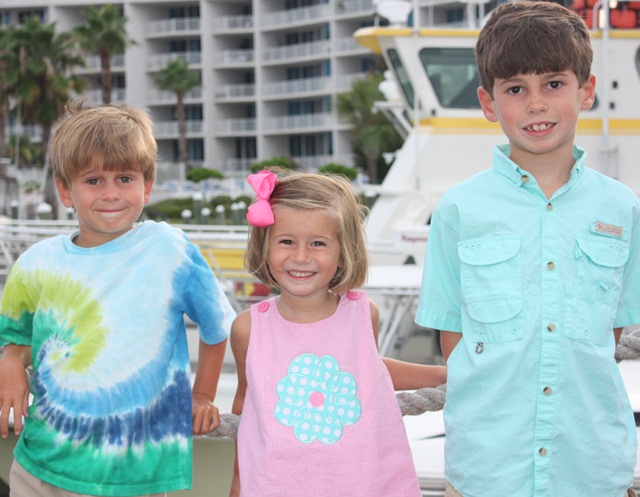
Last week was our last family vacation of the summer. We spent the week in Perdido, FL and for the most part spent some fun time with the whole Gulledge family (Jeff’s parents, sister and bro and their spouses and the kids’ cousins). It was so much fun! When I say “for the most part” I mean that we got a couple of days w/ Jeff’s bro and his new wife and several days with Jeff’s parents. We stayed the whole week. Here’s a pic of the kids on our last night. Mallory has on one of my favorite Applique Cafe designs ~ Loopy Flower. Garrison is about to start Kindergarten while Mallory will do Pre-K 4 and Browder is going in to 3rd grade (sob sob where did my babies go?)

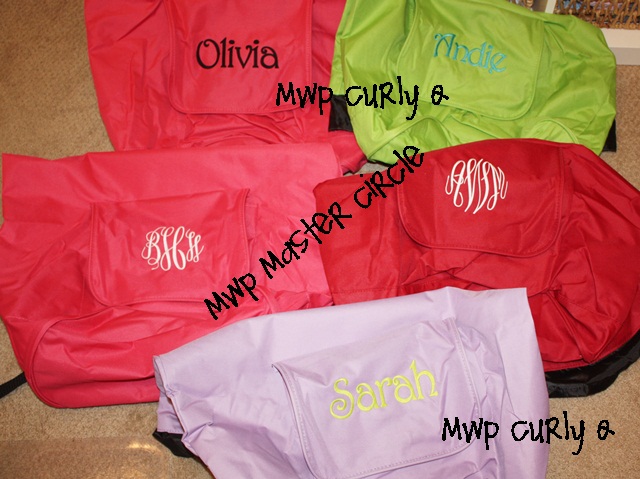
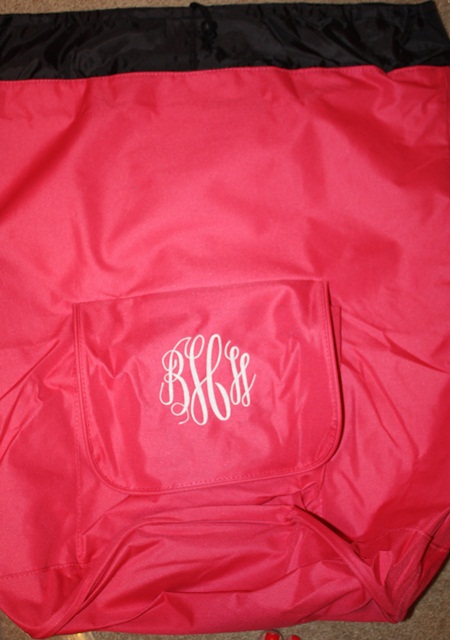
 Here is what I have been doing the past couple of days. Wednesday afternoon I met my mom half way and she took all 3 kids for a few days so that Jeff & I could have a “break” (which translates to me monogramming for 2 days). Yesterday I was super lonely. Today Jeff & I met for lunch and then I ran several much-needed errands, which was nice to be able to do ALONE! Not to mention I treated myself to my last pedi of the summer. Anyway, these are super duper cute backpack laundry bags brought to me (graduation gifts) to monogram. My customer found these at Marshalls (try TJ Maxx?) and I think they were like $8.99/each. I know Bed Bath and Beyond sells them too but maybe only in black?

Drawstring at the top. I took these photos quickly before she came to pick them up yesterday so sorry they aren’t great.

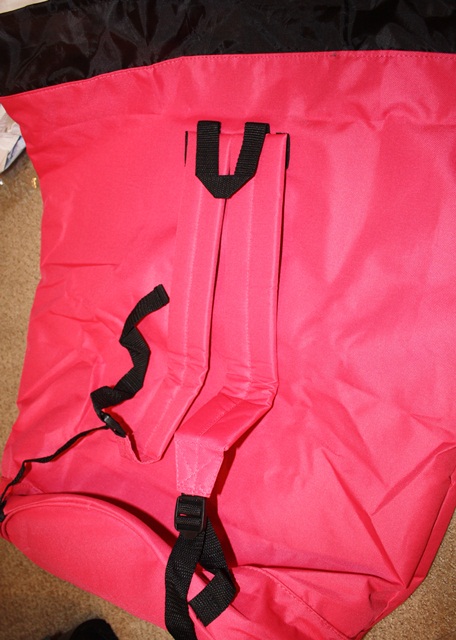
Backpack ~ great for toting to the car to head home from college to wash all those clothes. I didn’t measure these but they were nice and big!

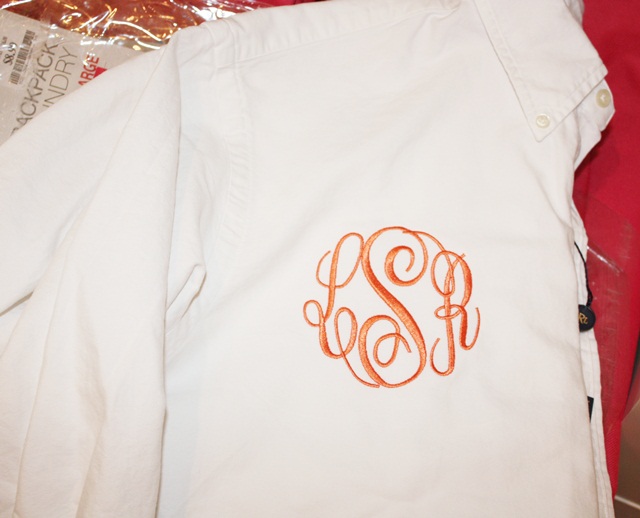
 I also monogrammed this long sleeve polo for my customer’s daughter. I have seen these a lot as bridesmaids gifts ~ the girls wear them on the day of the wedding (button down shirt is usually a plus). I have done several of these for the same customer for her daughters and I think they are cute! On a couple of them I monogrammed a very small block straight-across monogram on the top of the pocket (like a man would wear), but on this one she wanted the full circle swirly monogram (I used Monogram Wizard Plus “Master Circle” which is my favorite monogram font). Just an idea!

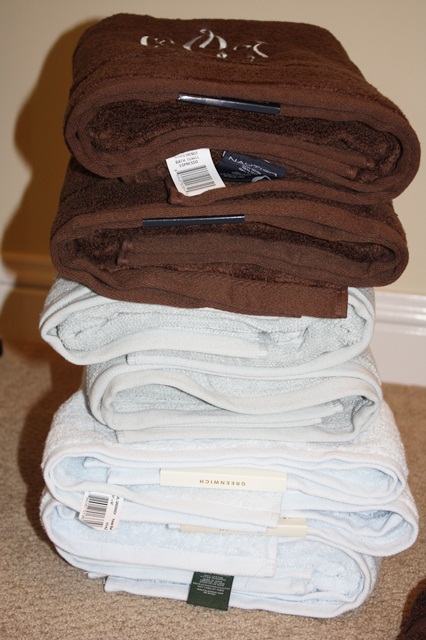
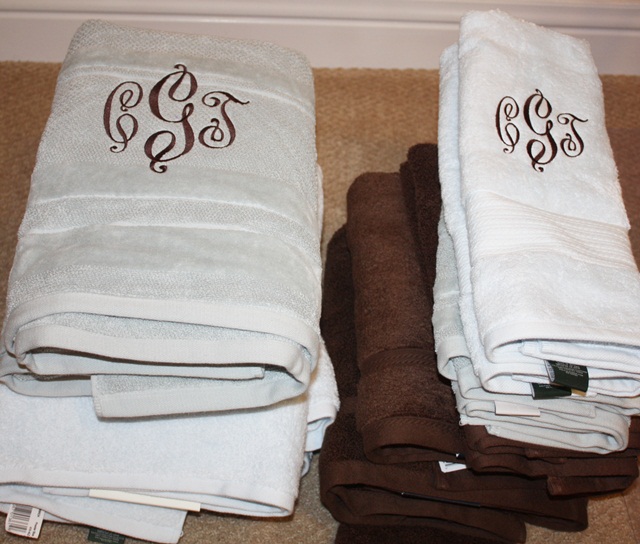
 Last night and today I have been monogramming 14 towels for my new sister in law. All the same font and 2 different colors so pretty easy, but time consuming! Luckily these are “set it and forget it” type items so I was able to multitask while they sewed.

This is Monogram Wizard Plus “Victor” font.

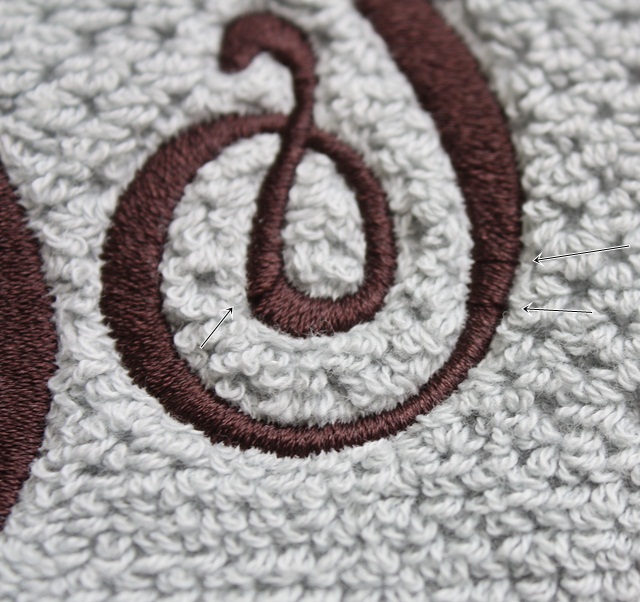
 I did have some trouble and I was so anxious to share this because I’ve seen this complaint a lot on one of the Facebook groups. You may have had this happen before? I did “FILL STITCH” on the towels and had trouble with some looping. After changing needles (literally replacing the needle), switching the thread to a different needle (on my 6 needle), cleaning my bobbin case AFTER changing my bobbin out and then doing a different color towel using different thread and having NO looping, I determined it was the spool of thread! I did a tension test and everything while trying to determine my problem.

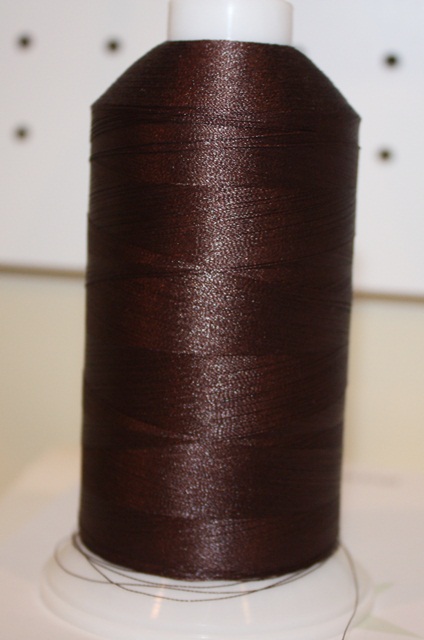
 This is a 5000M spool of thread (a brand I use ALL THE TIME). I noticed that as it was coming off the spool it was twisting some, so I honestly think it was the thread. Today I went to a local quilt store and found an Isacord 1000M spool in the same color and finished the towels without a single loop. So….. if you have problems with looping, it MAY be your tension or any of the other issues I ruled out, OR, it may be the thread. Maybe it wasn’t wound on the spool correctly? I don’t know, but I’m going to try it again with regular appliques or satin stitch and see if it just doesn’t like fill stitch monograms.

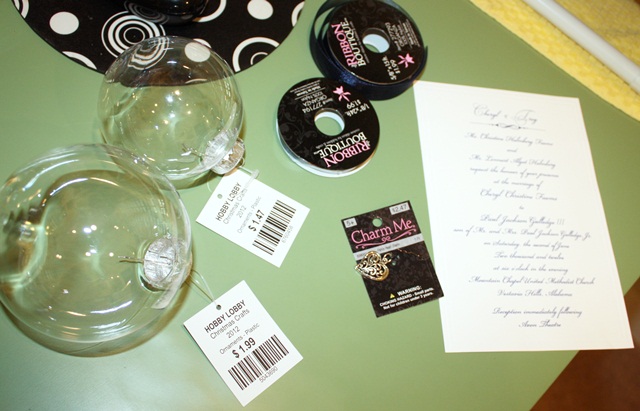
 Now on to my crafty segment! I have been on Pinterest forever. I’ve tried a few recipes and spend hours upon hours each week just checking who’s pinned what without every DOING anything. We are going to Birmingham tomorrow (Jeff & I) to shop a little and have lunch with Jeff’s bro and his new bride (whom I monogrammed all the towels for). Several months ago I pinned a Christmas ornament made with a wedding invitation. SO… I stuck their wedding invite in my drawer and finally today made the trip to Hobby Lobby to get my supplies. I got 2 different size ornaments because I wasn’t sure which size I needed. After trying the bigger one, I went with the smaller one and everything fit great! I’ll keep the bigger one for some other project. With sale prices and coupons I spent less than $7. These look glass but feel more like acrylic. Also, I bought them individually but they did sell them by the box as well and also in a few different shapes (great for vinyl).

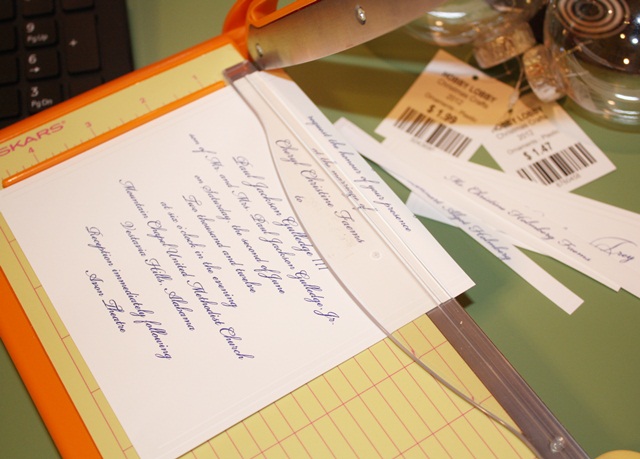
First I used my el cheapo Fiskars paper cutter I got from Walmart and cut the invitation in to strips as best I could, trying not to cut off any of the lettering.

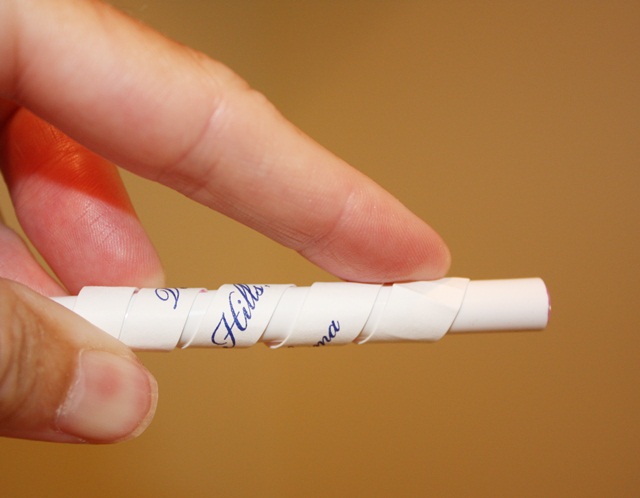
I then wrapped each strip around my (Applique Cafe) pen, making it curl.

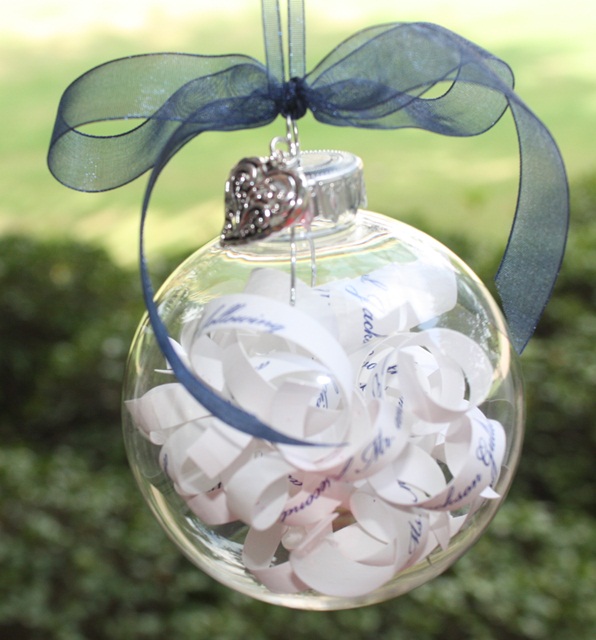
 I then just put each curled strip in to the ornament (the top pops off). I tried to place the strips with their name, etc where they would show. I put the top back on, attached the heart charm (the Pinterest photo used a sea shell) and then tied my ribbon on. I used 1/8″ navy organza ribbon for the hanger and 5/8″ navy organza ribbon for the bow. Their wedding color was navy, hence the navy ribbon. In the Pinterest photo she used white and cream ribbon. I honestly couldn’t remember while at Hobby Lobby whether the invitation was more white or cream, and then remembered NAVY was their color so I went with navy! Anyway, I thought this was a cute little personal gift and I hope they like it! Finally, all those hours on Pinterest paid off!

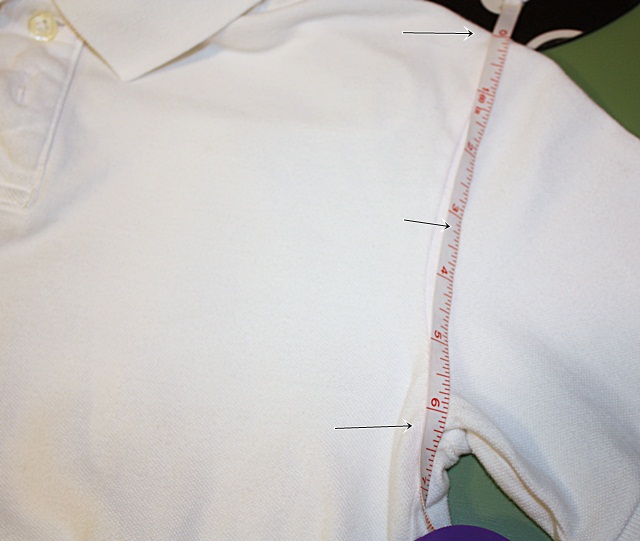
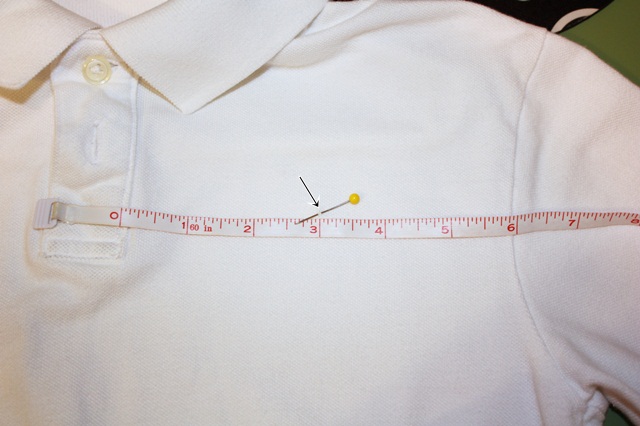
 As a follow up to my Mini Embroidery Design post, I have another technique to measuring your polo type shirts for mini or other designs. A blog reader emailed me her trick ~ she said she measures from the top seam of the arm down to the armpit seam. On my shirt it was a little over 6″. I then stuck a pin where the middle was and then measured from the button placket to there.

A pretty even 6″ so my initials or mini design would go where my pin is! This is a great “rule of thumb” for measuring and much more scientific than my post! Thanks for the tip!

I apologize for this post being all over the place! I guess a random post is better than no post! Have a great weekend!