THE Mighty Hoop

First and foremost, the master bath-de-Gulledge is D-O-N-E!! I know I got behind in my renovation posting and will try to catch up soon. It’s DONE and we have moved back in, but it needs some decorating before I post my final AFTERS. Here is a little peek at the before/after of the tub/vanity area. Again, nothing has been hung (tv, decor, artwork, etc.) so it’s a bit of a blank canvas right now. We are enjoying it immensely but had a bit of a crazy week last week so I haven’t had a chance to add some color yet! I’m pretty sure HGTV will be calling me soon…..IMG_9267-vert

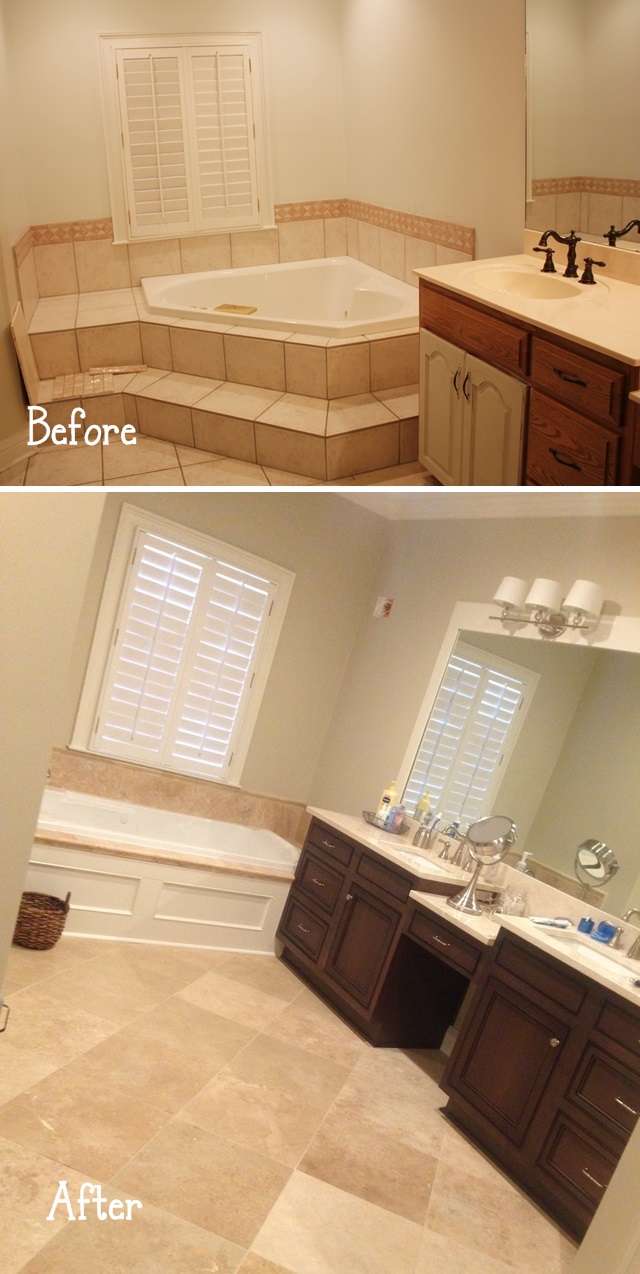
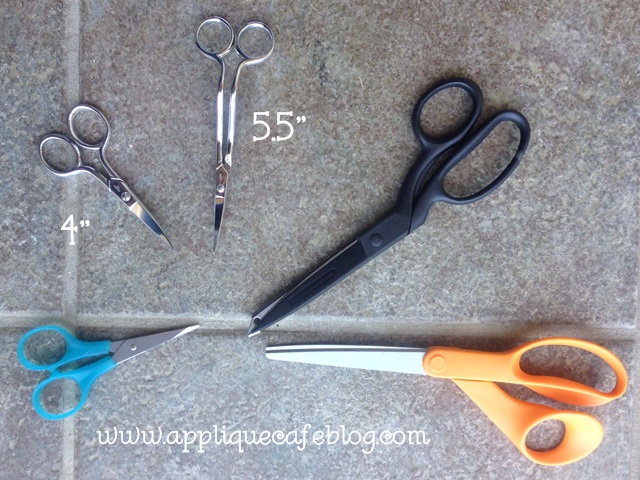
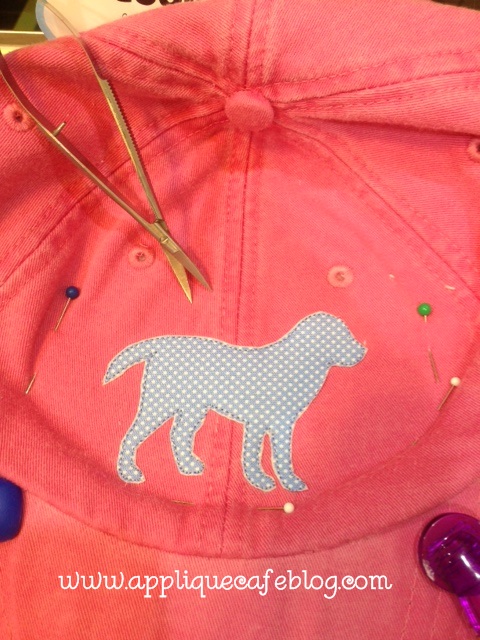
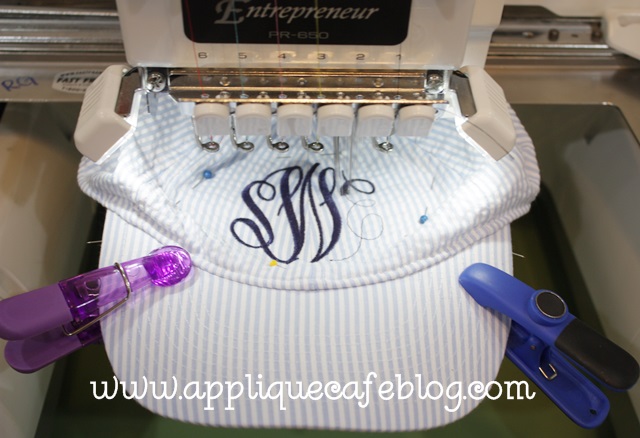
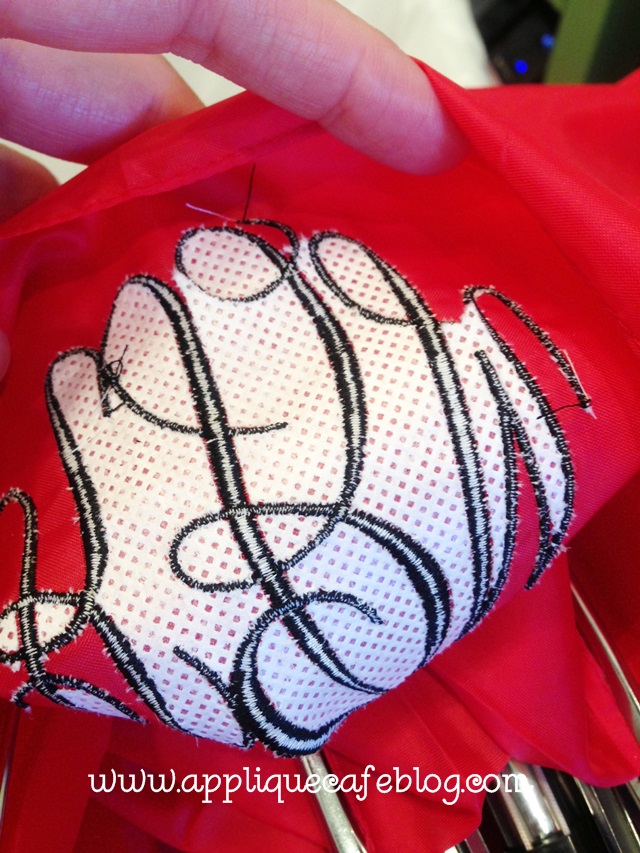
Totally random, but I noticed a blog comment today that had to do with SCISSORS so I thought I would add that in here! For all these year I have preached about the Gingher 4″ curved embroidery scissors. They sell them at Joann and probably most sewing stores. Well…. maybe it’s my old age and poor eyesight lately, but I’ve started using the 5.5″ double curved scissors (Ginghers also) and I.LOVE.THEM! I think what happened was that my 4″ got dull after years of use so I got a new pair. They are sharp, but a little tighter and don’t trim as easy. It may be that they are not broken in yet? Anywho… I started using the bigger ones and now I like those better! Not sure what it is about the extra curve and 1.5″?? The big scissors below I use for cutting fabric and my big pieces of stabilizer. The blue handle ones are Brother scissors I think (they came w/ my machine in the little tool box). I use those for trimming the stabilizer around the applique (back) when I’m done, and also for when I am trimming inside of a design. They aren’t super sharp, so I pierce the fabric with them at an angle and then cut with my Ginghers.

photo (28)

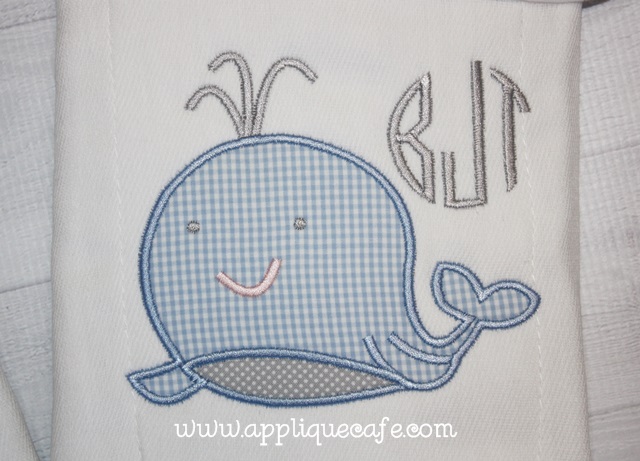
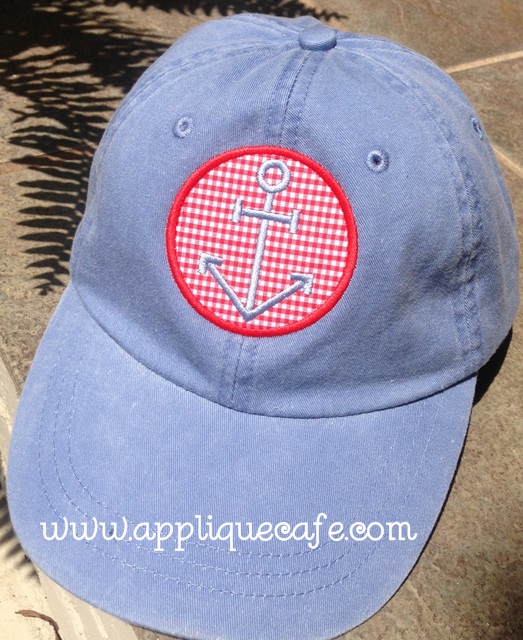
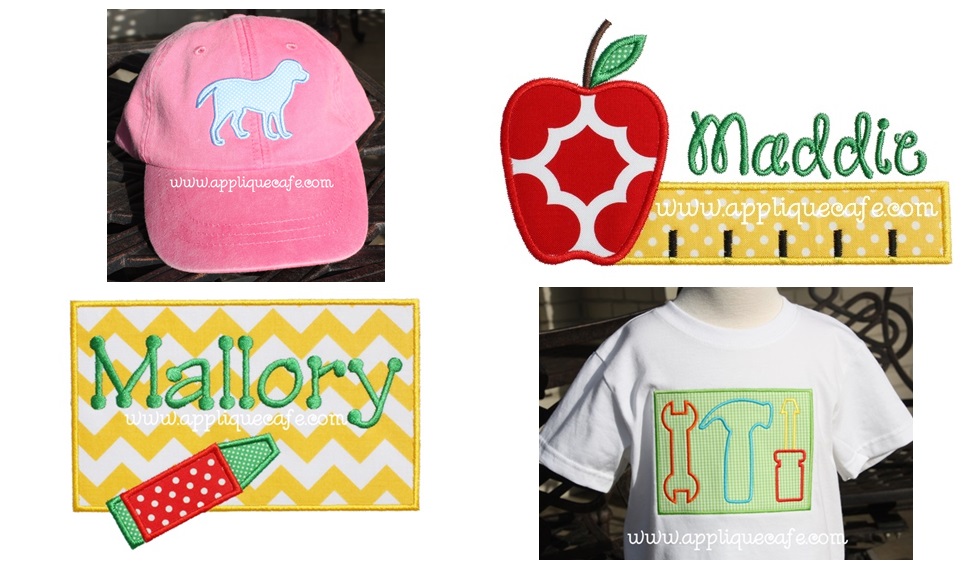
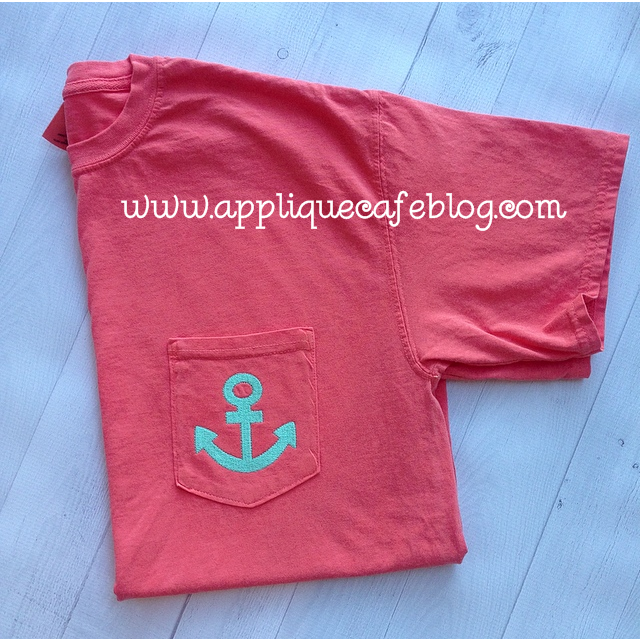
I haven’t been doing much work lately b/c of the craziness going on at Casa de Gulledge ~ renovations, travel soccer management and family stuff (my dad was in the hospital for several days last week and goes home tomorrow from the therapy rehab facility). I have a friend in ATL who asked me to do a few baby gift items for her and told me the colors were navy blue light blue, gray and white. I REALLY like those colors together after sewing a few things! It has also been raining here in Montgomery for like the past month, so these pics were taken inside and don’t do the items justice! LOVE the colors! 🙂 Anchors and whales were the theme also.

IMG_9312 IMG_9310

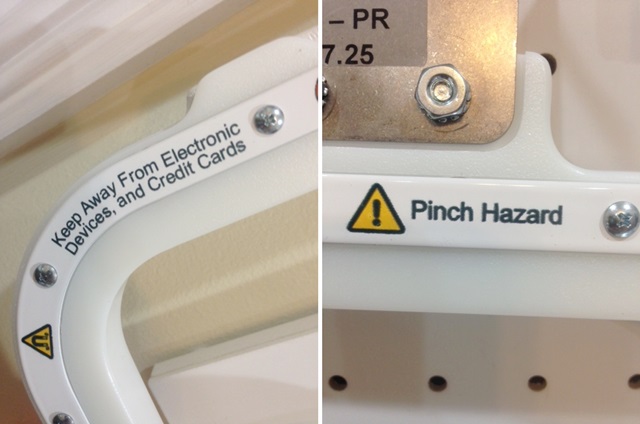
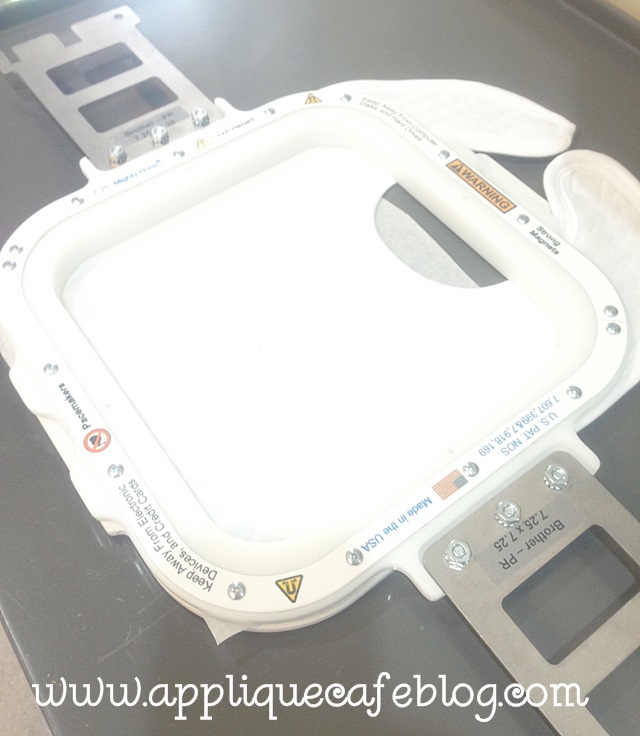
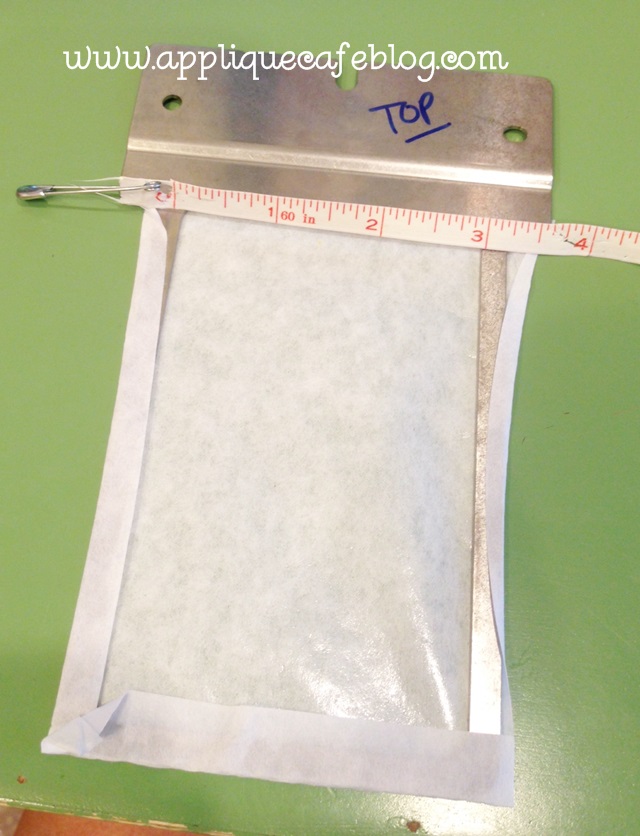
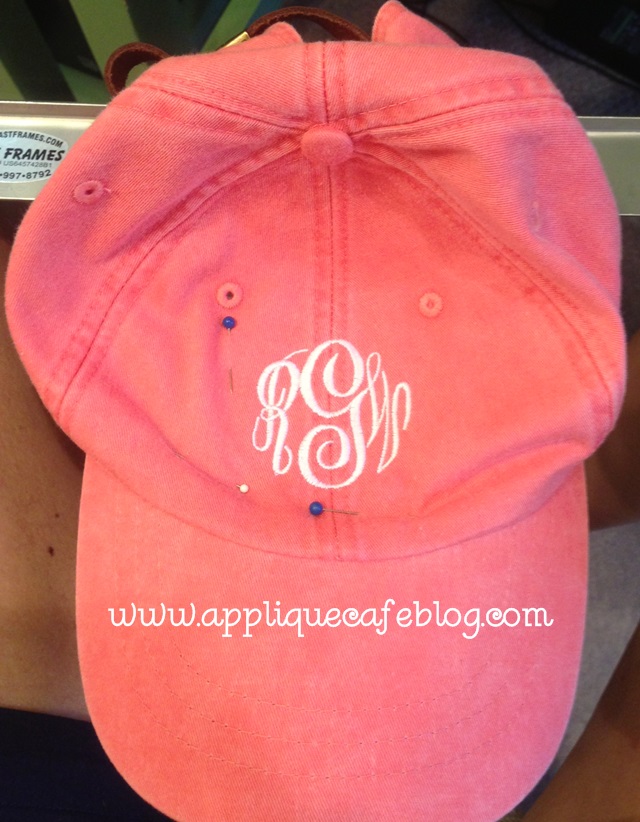
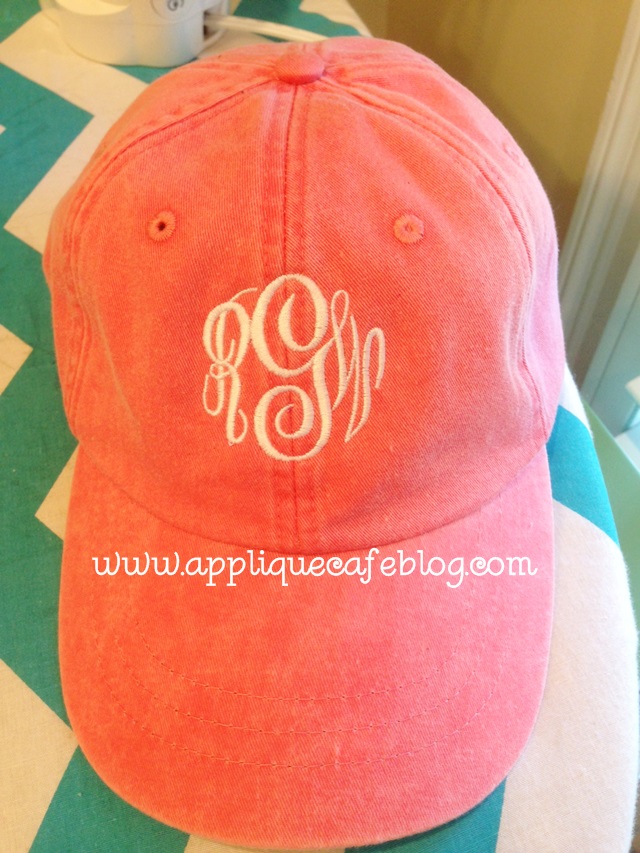
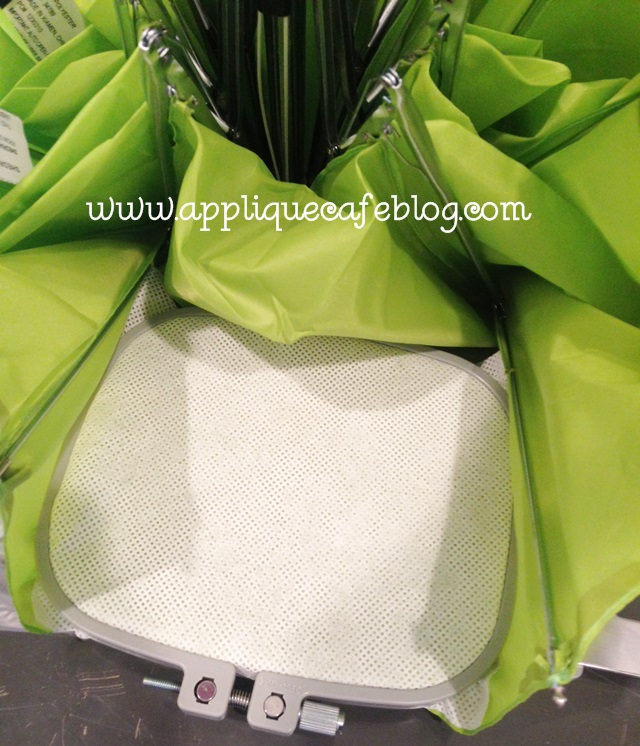
Now on to the title of my post…. MIGHTY {magnetic} HOOPS! I recently got the 7.25″ x 7.25″ and finally got around to trying it out! It is SO EASY to use and I’ve taken a few pics along the way for this post!! First of all, they are magnetic and REALLY STRONG, hence the warnings….. I haven’t gotten pinched yet but I can see how it can easily happen! They are STRONG. I like the size of the 7.25″ x 7.25″ also b/c I typically stitch 5×7 designs and it gives me a little extra room for initials or a name. There is also a pacemaker warning on it…..

photo 2 (15)-horz

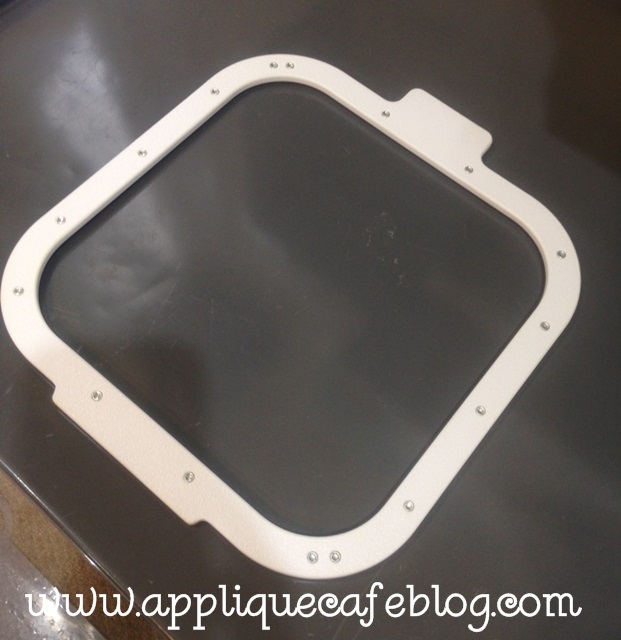
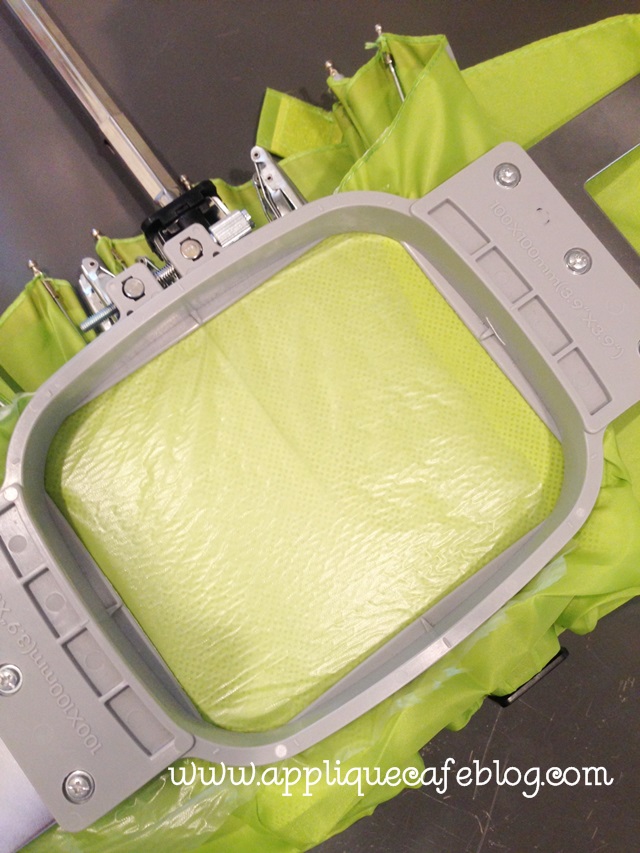
Here is the bottom frame. All you have to do is get it in place and the magnets do the rest!

photo 1 (11)

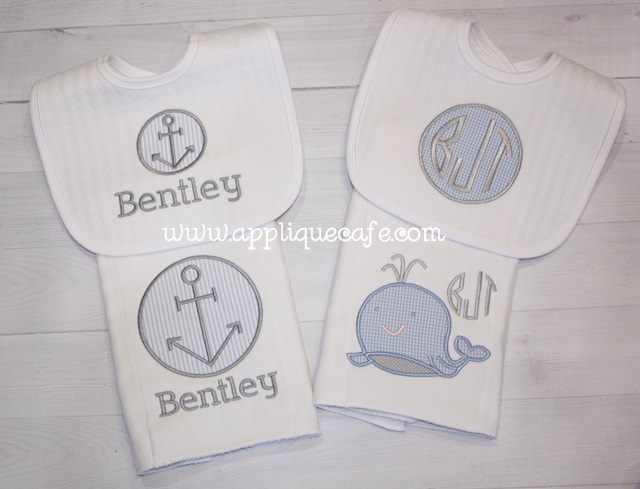
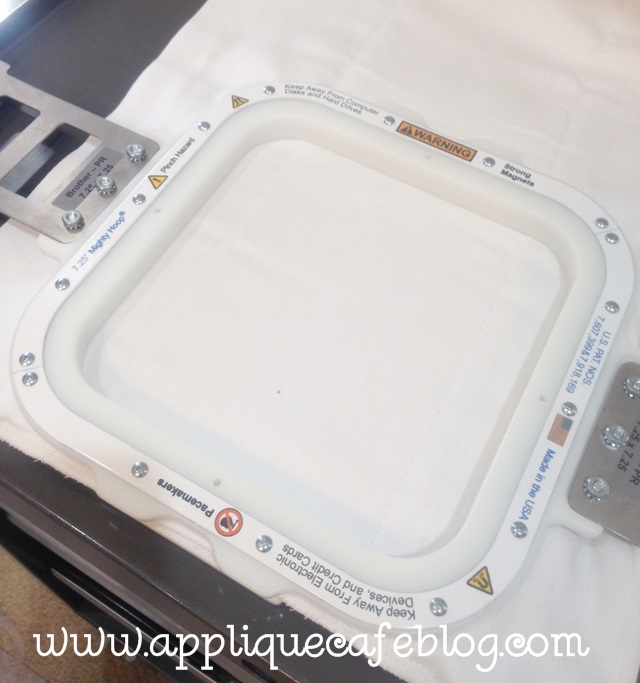
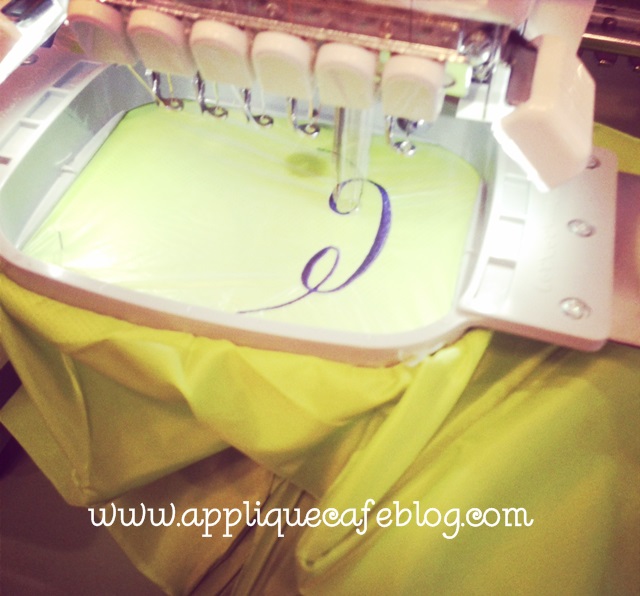
I did my burp cloths using the MIGHTY HOOP and it was super easy! Burps can be thick and hard to hoop. With the MH, no wrinkling or hoop burn! As you can see, I got the burp cloth on top of the bottom of the hoop. You just have to make sure it’s straight.

photo 2 (12)

Just hold the top of the hoop frame over it, and BAM it snaps in place. Very easy!

photo 1 (13)

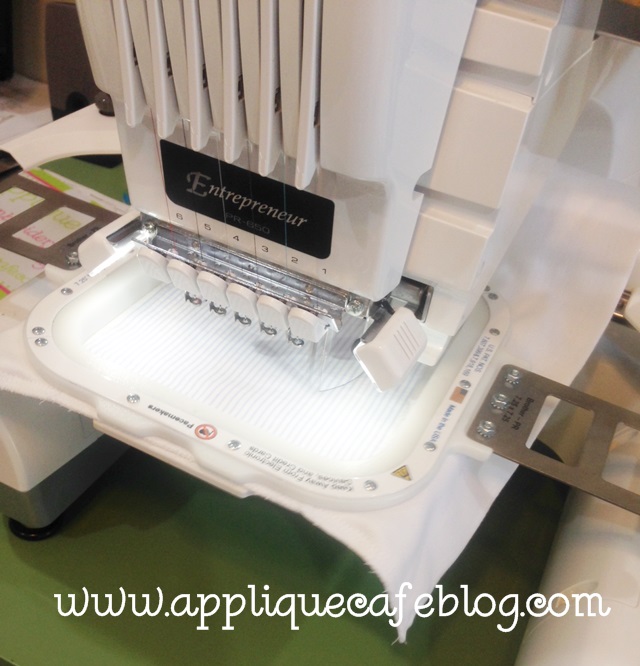
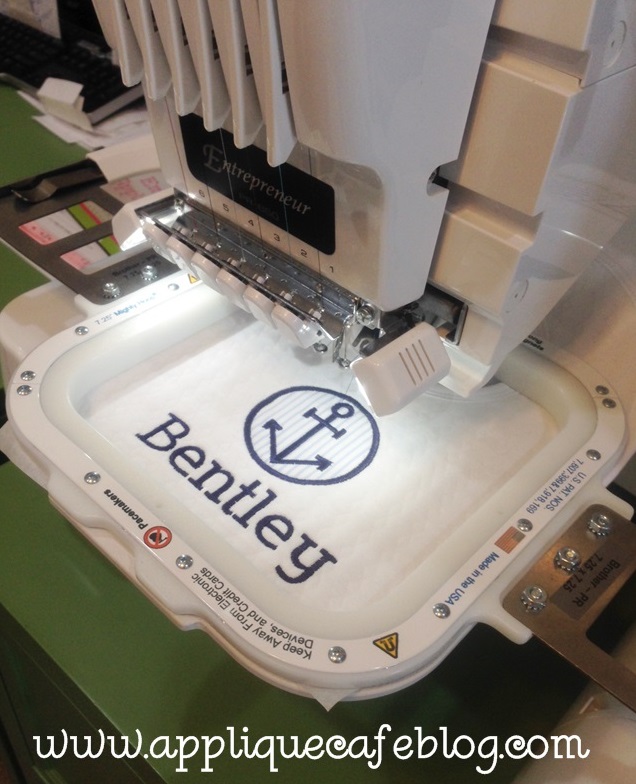
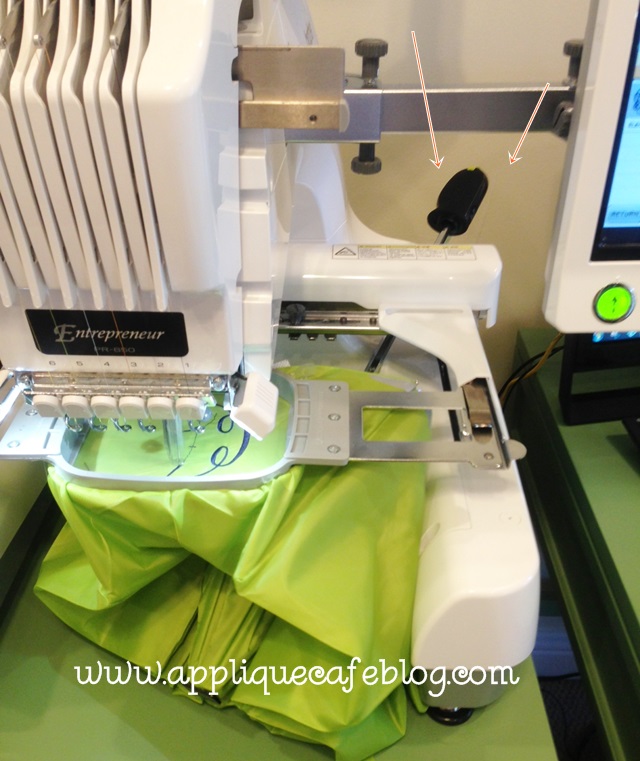
They go on the machine just like Fast Frames. You just have to make sure you check your boundaries to make sure the needle is not going to hit anything. Unlike Fast Frames – no sticky stabilizer is needed!

photo 2 (14)

You may notice that Bentley is in navy blue down below. When I did the baby gifts the first go-around, I had navy and gray in my head (which looks great together also by the way…). If anyone knows of a baby boy named Bentley, I have a bib and burp cloth available…..

The MIGHTY HOOP also works great on bibs!

photo 3 (11)

photo 4 (12)

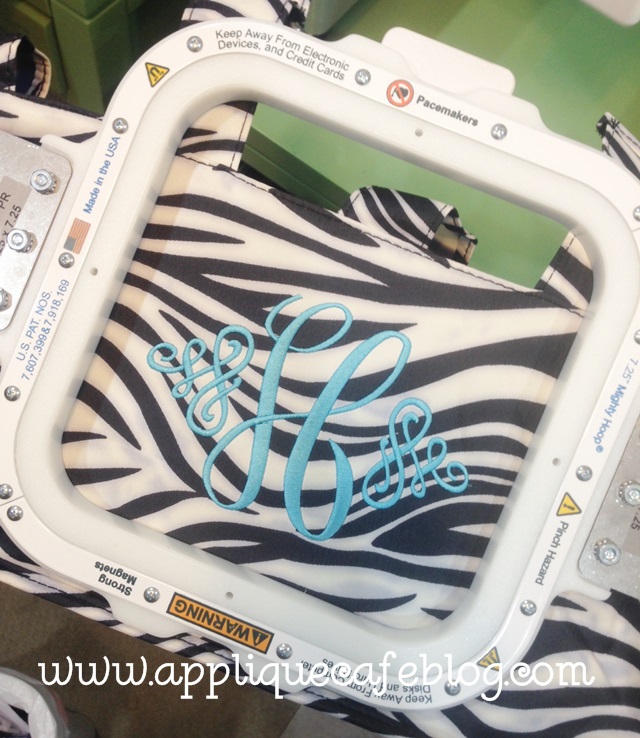
I also used the MIGHTY HOOP on a Market Tote. I typically use Sticky Stabilizer and Fast Frames, but the MH was easy and worked great and I didn’t have to peel “sticky” off of anything!

photo 4 (11)

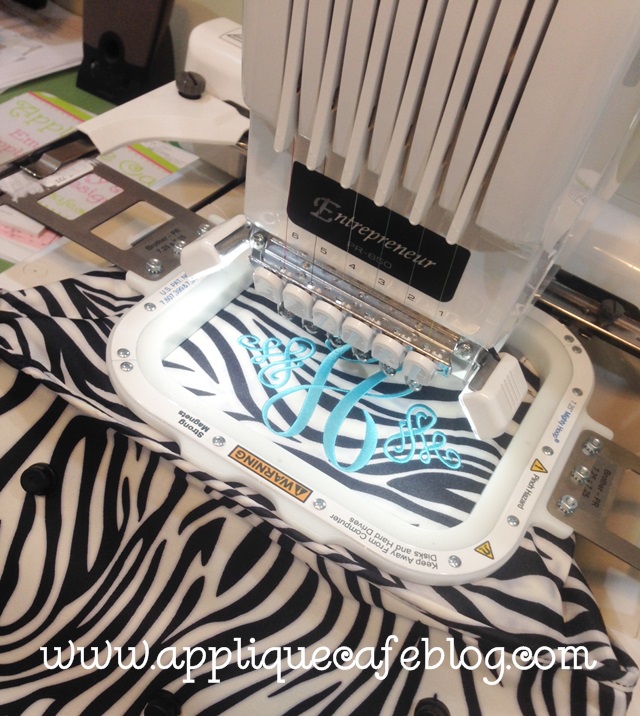
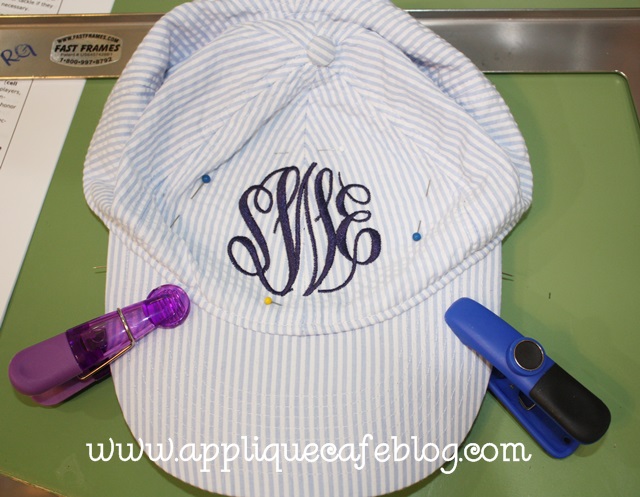
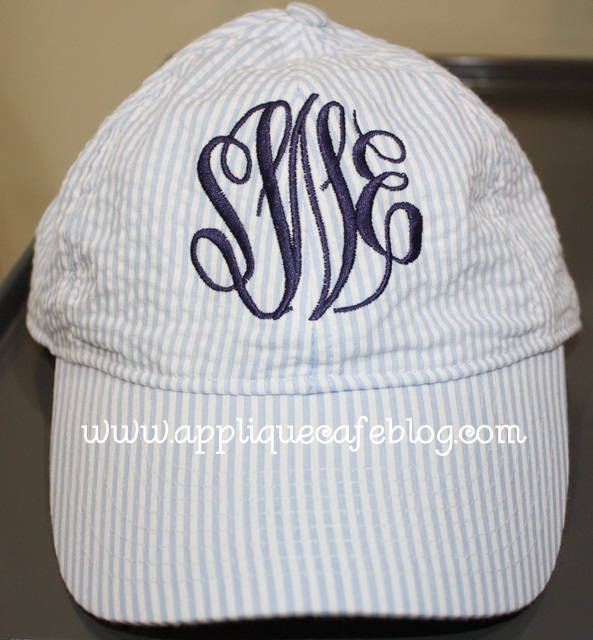
This is Monogram Wizard Plus “MC Center” H (I made it wider than usual) plus some motif ends which are also done in Monogram Wizard Plus!

photo 5 (5)

I got my Mighty Hoop from Sewingmachine.com (search: mighty hoop) and you can find demo videos on Youtube HERE! They also have some videos at Sewingmachine.com under Product Demonstration Videos – click HERE. They sell a variety of sizes sort of like the Durkees. Anyway, I look forward to using them more as I get time to do more work!

Did anyone get to go to the Everything Embroidery Market last weekend in Chattanooga? I was so sad to have missed it! I realized several weeks ago that with the renovation and our soccer schedule that I was not going to be able to wiggle my nose and appear there for the weekend. On top of all that with my dad being in the hospital, I would not have made it anyway. I have seen tons of pictures and have heard nothing but great reviews, so I hope you all had fun and that they will do it again!

Have a great weekend! OH… I will work on the ORGANIZATION post ASAP with the feedback I got from my last post! I got some GREAT Tips!! One idea I had was to go ahead and get your next project ready while your machine is sewing. DON’T jump on Facebook because you will get sucked in to “15 Ways To Bond With Your Daughter” and then next thing you know 45 minutes has passed and you’ve done 1 burp cloth. Go ahead and iron the stabilizer on the bib you plan to work on next. Go ahead and iron the applique fabric and iron Heat N Bond Lite on it so it’ll be READY! If you have extra hoops, you could go ahead and hoop it! I would get a lot more done if I could discipline myself to think ahead and actually do stuff while my machine is sewing! photo (22)

One more time…. have a GREAT weekend! We have been out of town for soccer tournaments the past 2 weekends, so we are looking forward to being HOME. 🙂

The Year of Hats

I am declaring the summer of 2014 The Year of Hats, or the Season of Hats, or the SUMMER OF HATS? I’m doing hats every week and this will be my 3rd blog post this summer on doing hats. Check out the first 2 HERE and HERE. I’ve also done 2 posts so far on VISORS, so check them out HERE and HERE.

I have mostly done monogramming on hats, but recently did our new Anchor Patch (which comes in a “small size” great for hats).

photo 5 (4)

This week we listed a new Mini Dog Applique AKA “Stitch” so I sampled it on a hat as well. It was a little trickier because I had to trim around the small legs of the dog. I typically use Gingher 4″ curved scissors to trim my appliques, but busted out the “Snips” for this hat. I used my 5.5″ X 6″ Fast Frame + sticky stabilizer and pinned the front of my hat to the frame. I use the seam on the front of the hat for my center and it’s best to get the front of the hat as flat as possible and pinned down securely. I also use chip clips to clip the bill of the hat (which is flattened) to the frame.

photo 1 (10)

Here it is after I’ve unpinned. I not only use a layer of fabric, but I fuse it to a layer of medium cutaway stabilizer with Heat N Bond Lite so that the seam doesn’t show through my fabric. Fabric alone would probably work, but adding a layer of stabilizer keeps it firm and you can’t see the hat color or seam through the fabric.

photo 2 (10)

Finished product! Please note that the dog polka dot fabric is not wrinkled. For some reason the camera captured the dots weird and it looks that way, but it’s flat and smooth!

photo 3 (7)

More hats. These cute seersucker striped hats came from the J. Crew Outlet and were about 6 bucks each. My sister in law bought all they had and I have 3 more to do today. Again, flatten the bill, chip clip it to the fast frame and smooth and pin the front of the hat.

IMG_8975

I used Monogram Wizard Plus “Master Circle font and this is roughly 2.75” tall. I think I increased it a couple of times once I got it on my machine and saw that I had a little more room.

IMG_8976

This is what it looks like from the bottom. Most hats come with a “lip” or mini liner (the white part) that folds down – I usually pin it back before I pin the hat to the frame. The chip clips keep the bill flat and in place on the frame.

IMG_8977

Finished product!

IMG_8978

Here is another type of Fast Frame that I was told worked great with hats. It’s a 6″ thin radius frame and this one is from Ken’s Sewing Center. I believe you can also get a 4″ thin radius frame which might also work great for hats. Make sure you get THIN. Most 7 in 1 Fast Frame sets come with a regular radius frame, but I believe the thin will allow you to get closer to the bill on the front. They also sell these frames at Sewingmachine.com, but are currently not on the website. I was told they should be available next week online. Again, I don’t have one yet, but was told they work great for hats!

radius frame

We listed a few new designs this week and are having a quick little July 4th SALE at Applique Cafe.

july 4 sale

Here are our new designs for this week, which include a couple for BACK TO SCHOOL!! We also added a new “Patch Applique“. I love the TOOLS and these new patch designs are only 1 fabric and super easy to sew.


IMG_8989-tile

Have a safe 4th of July!!

Umbrellas and Hats

Good afternoon friends! Yesterday I opened the mail to find a copy of Creative Machine Embroidery magazine and was pleased to find that my BLOG was noted in the magazine as “One to Follow“!! While sometimes I struggle to find the time to blog, or struggle to come up with anything to blog about, it has always been my passion to share what I’ve learned with all of you! I know sometimes it’s boring (WAKE UP!!!) and sometimes I go a month 2 weeks with nothing posted, but please know I’m here and hope to bring you helpful info as often as I can!! Thanks for reading and thanks for the comments and encouragement! 😉

photo (27)2

Now, as promised…. I monogrammed a hat Friday using FAST FRAMES and took some pictures to show you. I posted the other day about doing a visor on my BROTHER PR650 using the cap frame. You can do hats with the cap frame also, but if you don’t have a cap frame or want to unpack it from the box, you can use fast frames. I’m not promising this will work on all hats, but the ones I’ve done have been NOT-stiff and easy to work with.

I used the below frame, as the monogram for my hat was around 2″ tall and wide. You could always do your monogram bigger. I did this hat for myself. A) I rarely wear hats but thought it might come in handy this summer {I typically wear a visor if anything on my head}. B) Being someone in the business of monogramming, I never wear anything monogrammed!!! As you can see I’ve used sticky stabilizer on my fast frame and wrapped it around the edges. Am I the only one who stares at my frames to determine which side is the top and bottom….

photo 4 (5)

The first thing I did was get the liner out of the way so I don’t monogram it. I simply pinned it out of the way! As you can see, this is one of those cute “pigment dyed” hats that are so popular right now (like the Comfort Colors tees). It’s ADAMS brand and I got this from a friend, but have recently discovered Apparel N Bags website where you can buy the Comfort Colors tees, these hats and other cute things!

photo 3 (10)

I flattened the bill of the hat out so that I could attach the face of the hat {where the monogram will go} to the fast frame and sticky stabilizer. As you can see below, I pinned my monogram area in place and tried to line up the center seam of the hat with the center of the fast frame. This takes some practice and I had to adjust and move the hat several times to get it right. As I said, my monogram is only around 2″ so I didn’t need much space.

photo 5 (4)

This is what it looks like underneath. My lining is pinned down, and the face of the hat is also pinned in place.

photo 1 (15)

My hat is on the machine now ready to sew. Just make sure the excess hat is out of the way on all sides! Also, since this is a FAST FRAME and my machine doesn’t recognize it as any particular hoop, I checked my borders to make sure my monogram would fit INSIDE the area on the face of the hat. You don’t want your needle to hit the frame on either side!! I lined my lead needle up with the center seam on the hat.

photo 2 (14)

My monogram is complete. I used Monogram Wizard Plus “Master Circle” font.

photo 4 (9)

When done I remove the hat and frame from my machine, unpin it and remove the hat from the sticky stabilizer. I then remove any sticky stabilizer from inside the hat, unpin the liner and it’s ready to wear! Again, some hats have seams like the one below which shows you where to center the design!

photo 5 (9)

Here’s the finished product!

photo 1 (14)

I am a little obsessed with the color of the hat and the below T-shirt, which is Comfort Colors Bright Salmon! The hat may be Poppy or Nautical Red (Adams brand)? These are all samples for my upcoming class at Ruthie’s Notions {this coming weekend!!}. In lieu of initials, I put our 3″ Mini Embroidery Anchor on the below Comfort Colors tee. I’m also using my vinyl backdrop I got recently from Bubble Gum Backdrops on Etsy! This is a 36″ X 36″ pale wood vinyl backdrop. It really makes the t-shirt pop!

photo 2

Also this week, I monogrammed a few UMBRELLAS! EEEekkkk!! Scary I know! They were really pretty easy to do and I took pictures along the way! First of all, I did use my 4×4 hoop as opposed to fast frames. The material of an umbrella is so thin that I was afraid sticky stabilizer would not come off easily or cause the umbrella fabric to tear in the process of removing it. I used waffle tearaway and water soluble “solvy” stabilizer on top.

photo 5 (10)

Here’s what it looks like from the inside. I love the waffle tearaway when I need a little more substance than regular iron on tearaway! I “stuck” it in place with a little temporary spray adhesive (Sulky KK2000).

photo 4 (10)

I put the hoop on the machine and rotated the design upside down so it would sew correctly. Again, I used Monogram Wizard Plus “Master Circle” font.

photo 1 (16)

As you can see below, the handle of the umbrella simply rested underneath the arm. I kept an eye on it so it didn’t hit anything causing the machine to mess up.

photo 2 (15)

This is what it looked like when I was done. I did 3, so these pictures have different initials on them. I removed the hoop and stabilizer from both sides, including inside the letters.

photo 1 (13)

The waffle stabilizer is very easy to pick off. {I think I need some lotion!!!!}

photo 2 (13)

Finished product! This would make a great personalized gift!!

photo 3 (12)

I hope this is helpful! Please have a blessed week and live each day to the fullest!