School is back in session! My kids started back on the 14th of August and it’s been a blur since then. Everyone said “Ohhhhh they will all be at the same school this year {my youngest started Kindergarten}! It’ll be SOOOO much easier and you will have more time!!!!” I don’t know if I agree with this? I feel crazier than ever. As my M-I-L says, I meet myself coming and going. Throw a puppy in the mix and it’s a recipe for chaos! Did I mention I will be 29 41 this month? I have found that if I don’t write it down, it is NOT getting done. Is this ADD? Old age? Yesterday at Target I picked up this handy dandy “NOTES” notebook for 3 bucks. I might go back and stock up. Today I neatly wrote down everything on my to do list, and low and behold it all got done in a timely matter! Success!!
Which leads me to this post…. I took all of these great pictures back on August 9th during my back-to-school-backpack-a-thon. Today is September 5th and I am JUST now sitting down to share them. Sorry school is back in session and you needed this info a month ago. Tuck it away for next year. Or as they say on Pinterest, Pin Now, Read Later.
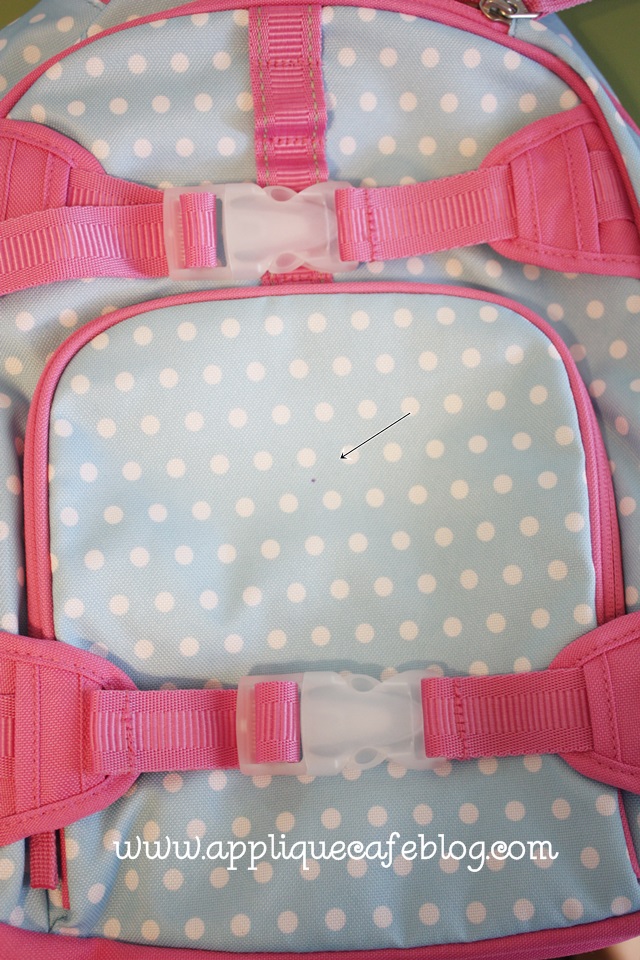
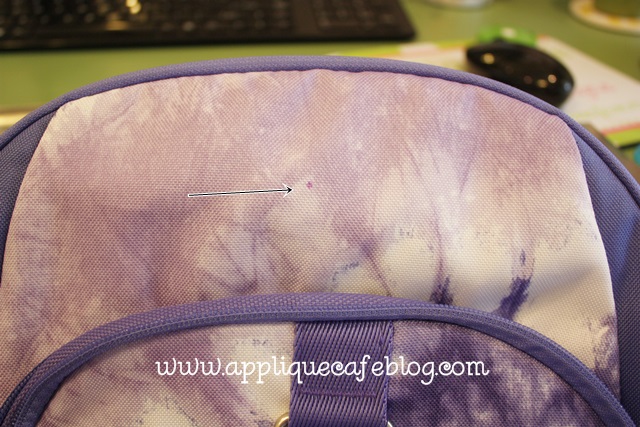
Here is a backpack I’m going to monogram. The perfect place to monogram it is on the front pocket, and as you can see below I’ve marked (after measuring) my center with my handy dandy air erasable pen.
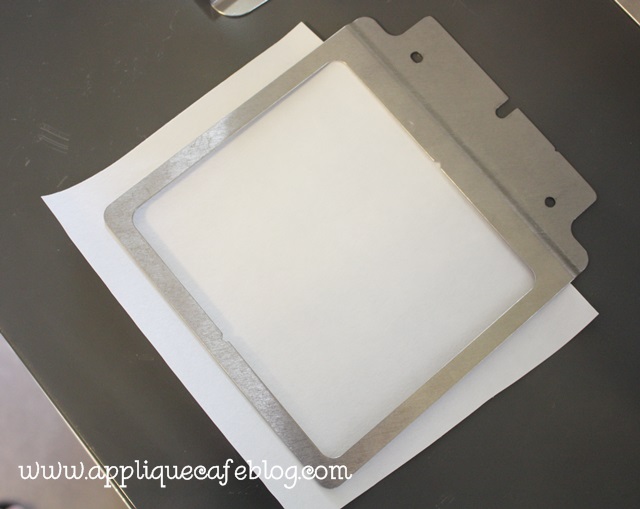
I have a Brother PR650 6 needle machine and Fast Frames, so that’s what I’m going to use (no hooping required). If you have a single needle machine and no fast frames, you could still follow along but hoop a piece of sticky stabilizer instead. Here I have cut a piece of sticky stabilizer a little bigger than my frame. p.s. I buy my sticky stabilizer from sewingmachine.com (commercial backing).
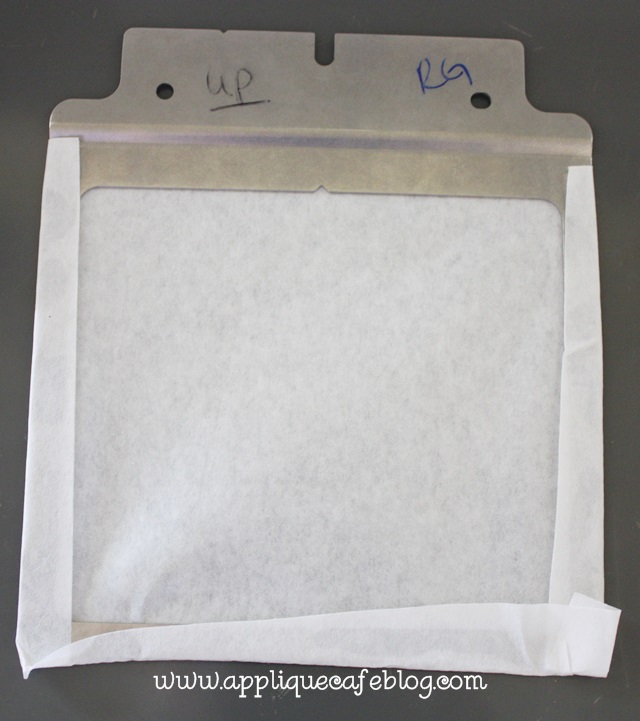
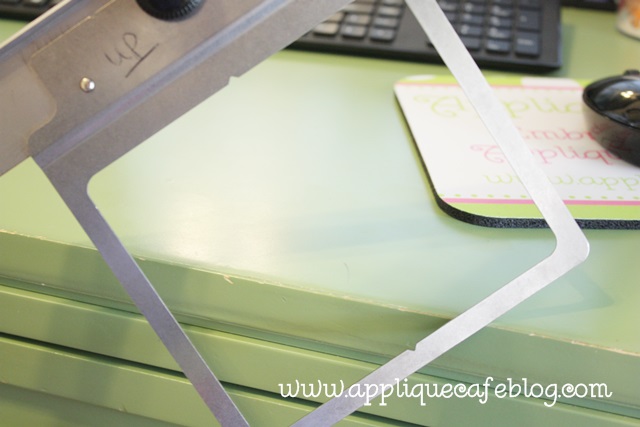
As you can see here, I wrote “UP” on the top of my fast frame. I don’t know about you, but I have to figure out which way is up or down every single time. There is a science to which way is up which you will see later. Here I have also pulled off the paper side of the sticky stabilizer and I’m going to now stick the stabilizer to the frame from the bottom.
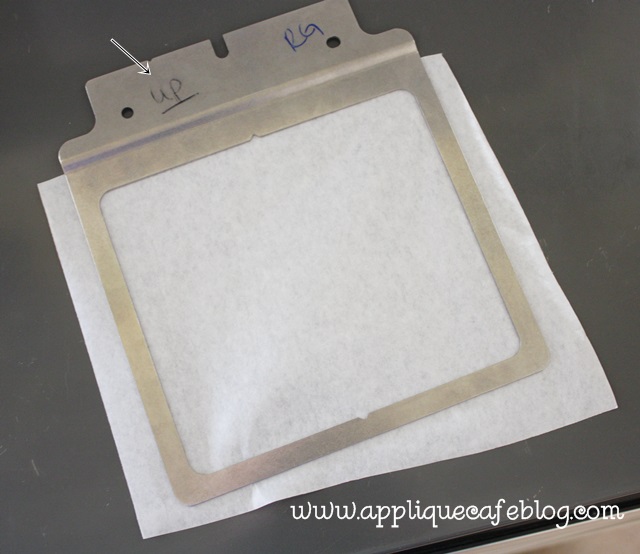
I’ve stuck the stabilizer to the frame and wrapped the excess around the top loosely. No need to smooth it down! Doesn’t have to be perfect or neat either. Don’t worry, it’s not going anywhere! p.s. I put my initials on my frame too so no one steals it from my sewing room. No really I take these to classes sometimes.
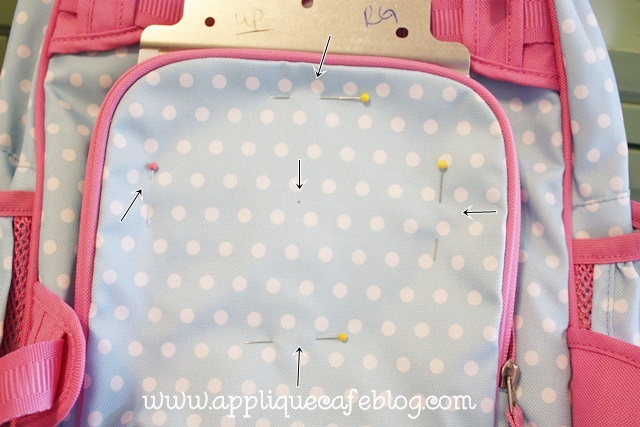
I am now ready to stick my backpack front pocket to the sticky-stabilized-fast-frame. As you can see below, the backpack pocket flap is “stuck” to the sticky stabilizer, but I also pin it in place INSIDE the inner frame of the fast frame. This keeps the backpack in place AND it shows me where my inside borders are. If my monogram goes outside the pins, it is likely to hit the frame which is NOT good. So… stay within the pins! As you can see below my center mark is not exactly in the center of the frame, but it’s close and I will have plenty of room for my monogram. You just need to make sure it’s straight on the frame!
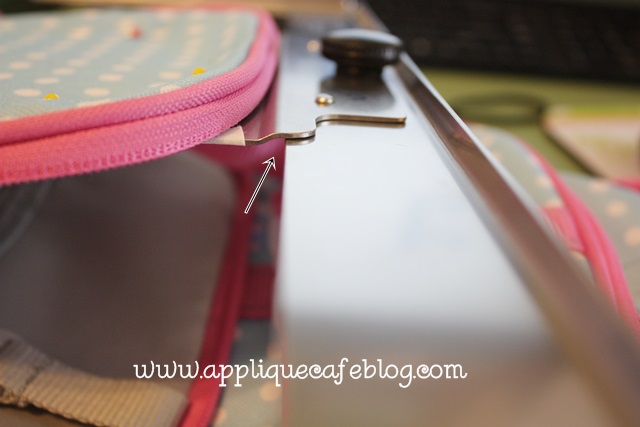
Here is the science behind the frame and how it attaches. As you can see there is a small dip where the frame attaches, therefore everything is level on the machine. If you attach it upside down, the frame will be tilted up and you’ll know it b/c it will bounce around more and it’ll be louder than usual.
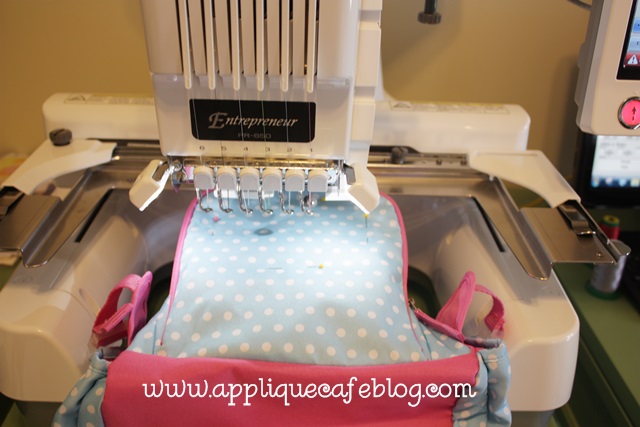
Now… I’ve attached the fast frame on to my machine. My machine thinks this is my largest hoop, so it doesn’t know how much space I have. These machines don’t recognize Durkee hoops or Fast Frames, so it’s up to you to test your boundaries before you sew anything.
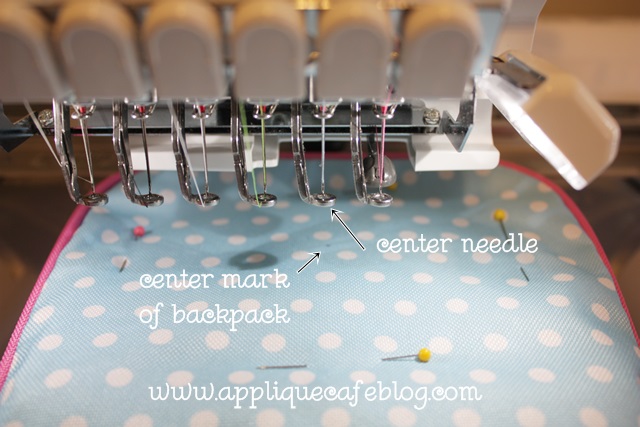
Before I test my boundaries I need to make sure my monogram is going to be centered on my backpack. The way I do that is to line up my CENTER NEEDLE with the center spot (remember the air erasable pen mark) on my backpack. This is confusing to some people! Your center needle is the needle to the LEFT of the needle threader apparatus. It also lines up with the bobbin arm on the machine. After you’ve done your editing (assigning colors, adjusting size, rotating, etc) and you hit EDIT END on the machine, then you will use the arrows to line up your center needle with the center on the item/garment.
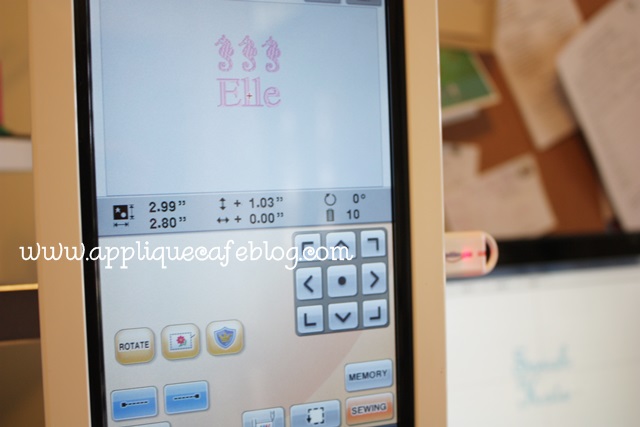
Those arrows are shown below. If you need to start over, just hit the center dot on the machine (in the middle of the arrows). As you can see here, I have moved the design (Elle + 3 Seahorses) up to line the center needle up with the center on the backpack. The red + on the screen is the center of the “hoop”, but don’t think too much about that b/c it’s too confusing.
Most of the time you can eyeball it to see if it’s centered.
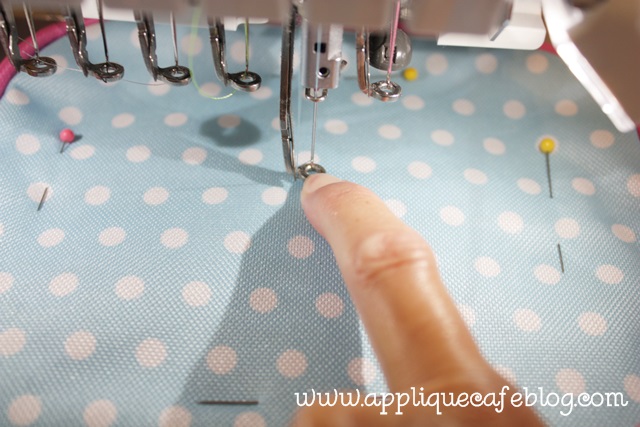
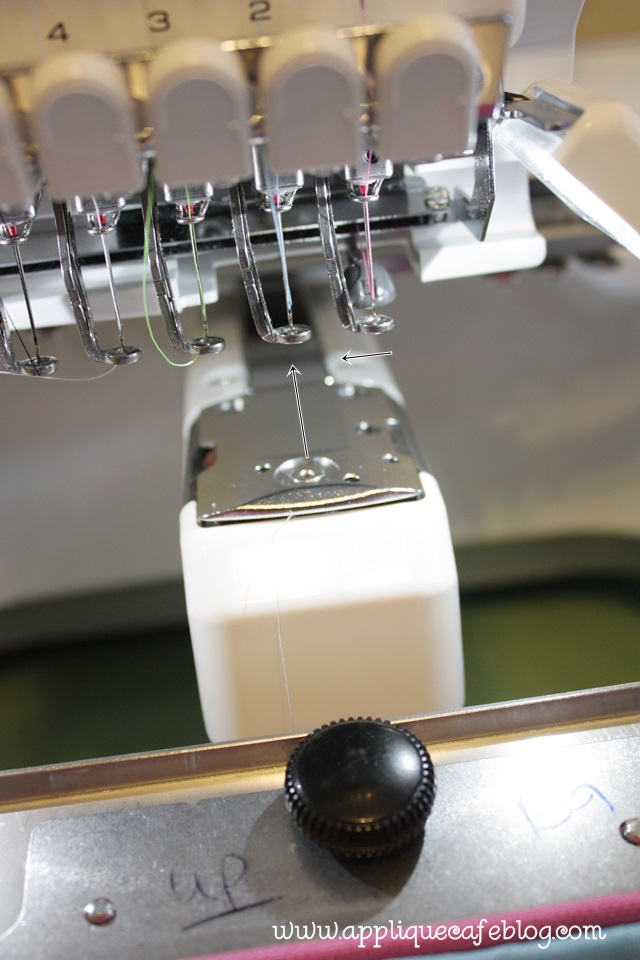
You can also pull the needle bar down to make sure it’s centered. The needle will only come down so far, BUT, if you turn the knob on the very back of the machine, the needle will come all the way down and you will be able to tell if it’s centered.
So your needle is centered which will center your design. NOW you need to check your boundaries to be sure that while stitching, the needle is NOT going to hit any of the edges of your fast frame. This is super important!! If your needle hits an edge of your fast frame, it CAN and WILL mess up your machine. Below is the button to check your boundaries.
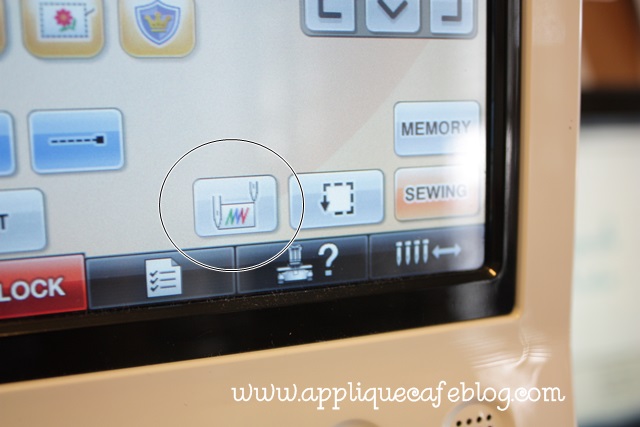
Press the edges and your needle will move around to show you where the edges of the design are. Another option is to press the button (up above) to the right of the check-your-boundaries button. It will trace the design for you and you can see where the needle will hit. Either way will work!
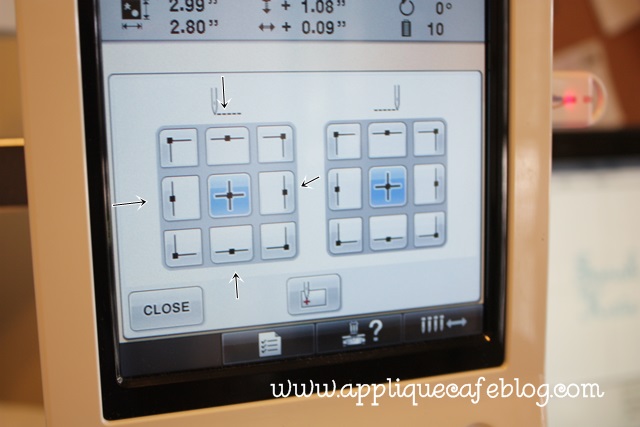
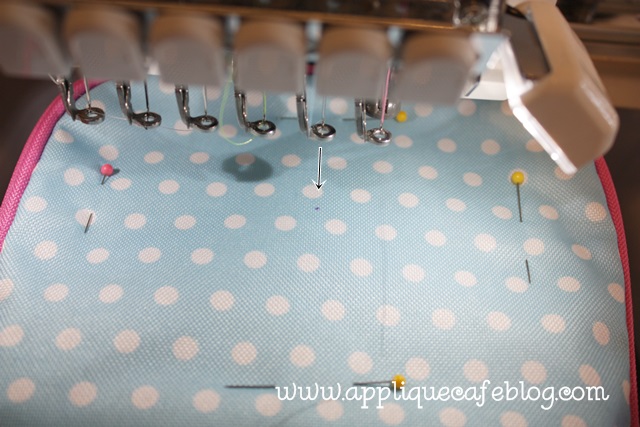
Below I have hit the left side button and it is showing me where the left of my design will hit. I’m within the pins so I’m good. Another reason the pins come in handy! As you can see, I have plenty of room!
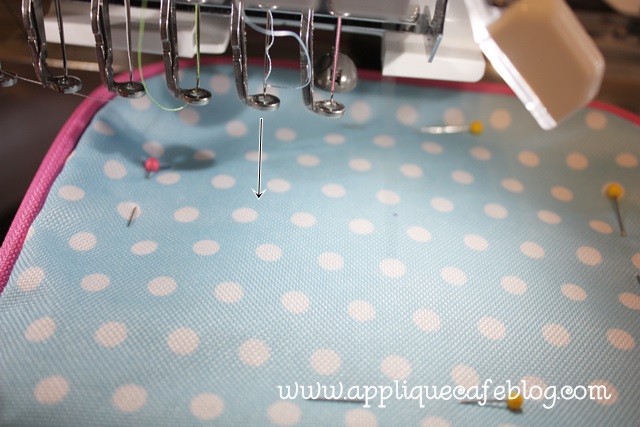
If you are confused as to which needle is the center needle, as I said earlier, your center needle is to the immediate left of the needle threader thing and also it LINES UP WITH THE BOBBIN ARM. I’m sure there is a more technical name for the arm? As you can see below, needle 2 is currently my center needle. This can change to needle 1, 3, and so on and so forth depending on which needle you threaded or used last.
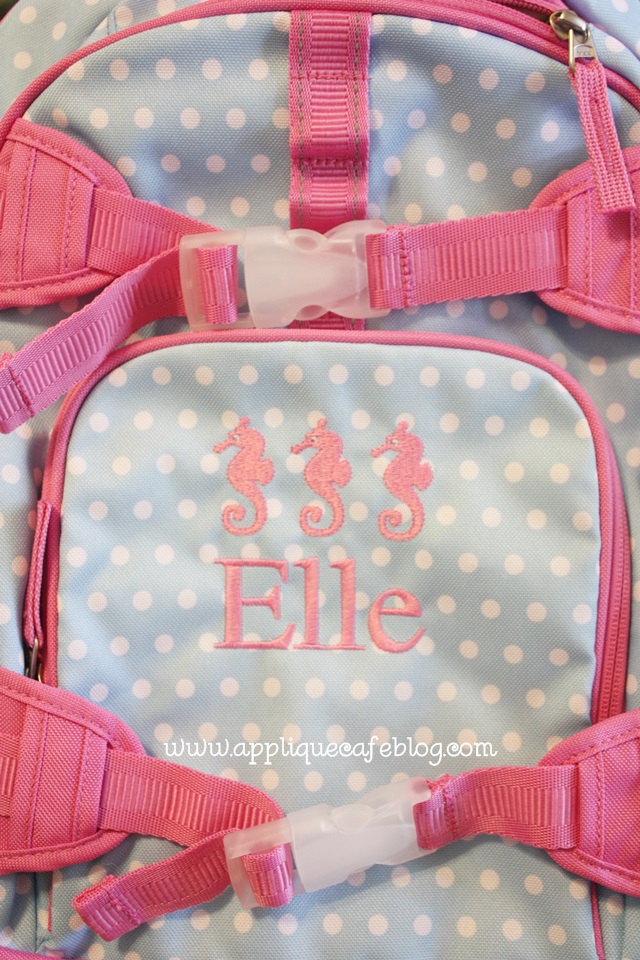
I have sewn my design, which is our Mini Seahorse Embroidery Design X 3 and “Elle” done in Monogram Wizard Plus “Library” font. The design fit well within my pins with room to spare.

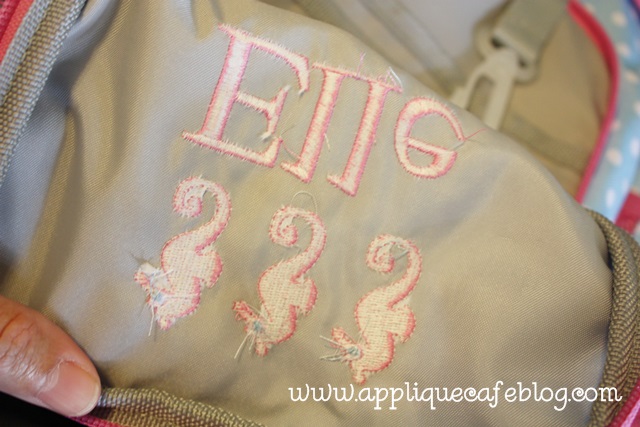
Almost done! Once I remove the straight pins and fast frame with sticky stabilizer from the flap of the backpack, you can see I have a little excess sticky stabilizer. No problem! I peel it all off. Use scissors to get it started inside those holes if you need to. Just be careful not to puncture anything.

While it’s not necessary to remove all of the stabilizer, I always do and it looks a little neater. Again, I use sticky stabilizer from Sewingmachine.com and it comes off with ease.
Finished backpack! The pinks don’t appear to match, but they do!
When you’re done, you also need to remove all the sticky stabilizer from the fast frame. The kind I use is not excessively sticky and peels right off.
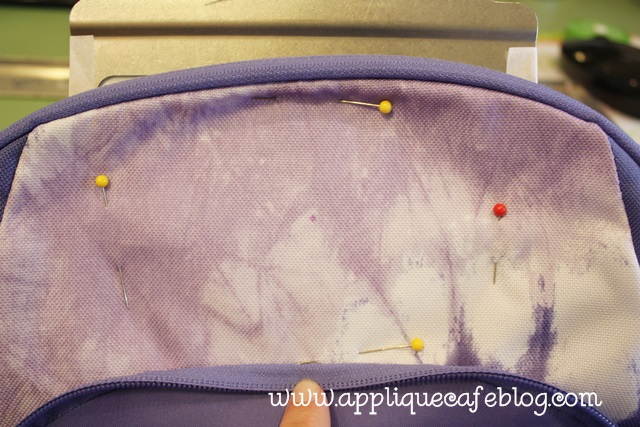
One more quick example! Mark my center.
Pin it in place on to the sticky-stabilizer-fast-frame.
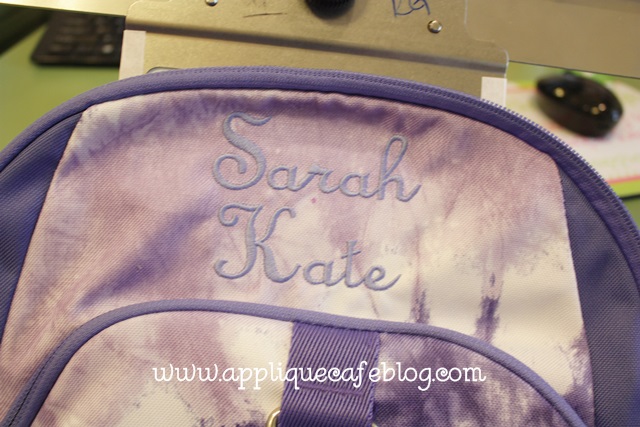
Monogram. Remove pins.
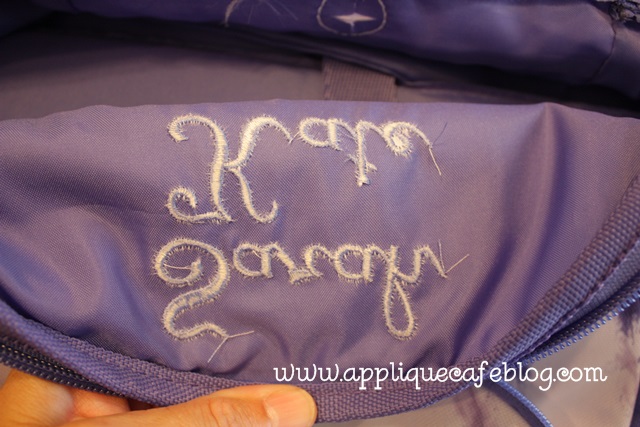
Peel away excess stabilizer.
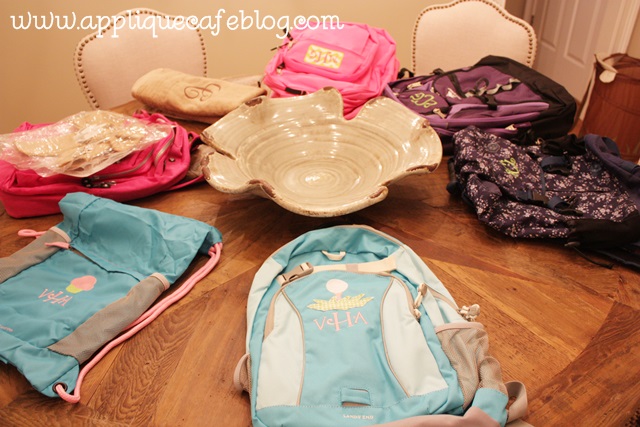
Here is my table-o-backpacks and a few other things! I was busy that week before school started and I think I actually did about 16 backpacks in a matter of a few days! Some were just monogrammed and some were appliqued. Mini embroidery designs are great too!
Again, sorry this is coming to you AFTER school has started! File it away for next year! Please comment with any questions! Have a great weekend!
Last p.s….. Applique Cafe fans ~ our site is 30% off through Tuesday, September 10th! We will be adding 4 new designs hopefully tomorrow!


Recent Comments