Photo Editing Update

Good afternoon! If you read my recent blog post {about my computer crash of 2016}, I have an update for you! I’ve blogged before about photo editing and which programs I use – search PHOTO EDITING on my blog.

Photoscape – I use this for adjusting photos, cropping, lightening, combining pics, adding watermark, resizing, etc. = pretty much everything. It’s FREE!

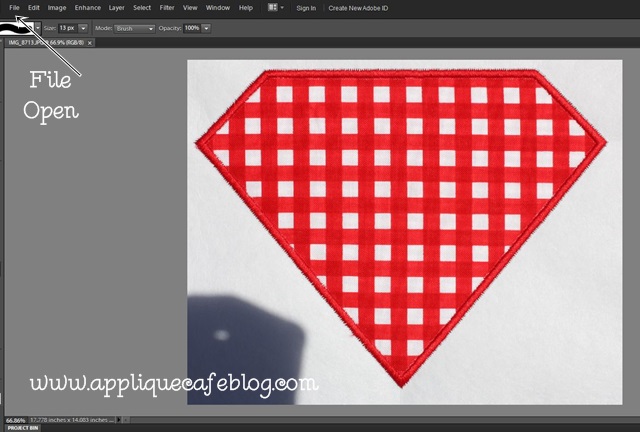
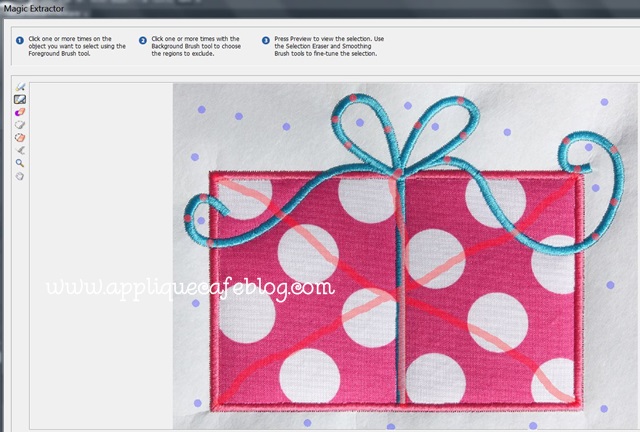
Before the *CRASH*, I also used Photoshop Elements 10 to remove the background of my design photos for the website. I was unable to get PE10 back after the crash because a) I couldn’t figure out how to download it again for the life of me because I have zero record of my serial number and b) I now have Windows 10 and PE10 is an older version and unfortunately not compatible with Windows 10. I DID download a trial version of PE14, and I played around quite a bit with removing the background. I watched lots of YouTube videos. I am just not that photo savvy folks! By the way, PE10 had a handy dandy Magic Extractor tool that made it super easy to remove your background (I did a blog post on this too). Around the time they came out with PE12 I think, they decided to leave that handy dandy tool off, so PE12 and after (or maybe 11 or somewhere around then) you have to remove your background using some other very difficult {to me at least} methods.

SO………………. I finally had sense enough to google “removing backgrounds from photos” and discovered Clipping Magic! It’s essentially the Magic Extractor from PE10 but has a lot more features and is MUCH easier to use. The only downside is that you pay a monthly fee, but it is totally worth it to me! $3.99/mo gets you 15 projects/month and credits carry over. $7.99/mo gets you 100 projects, and $14.99/mo gets you 500 projects/mo. I went with the cheapest version since I only really need this for new designs and we MIGHT do 15 in a good month!

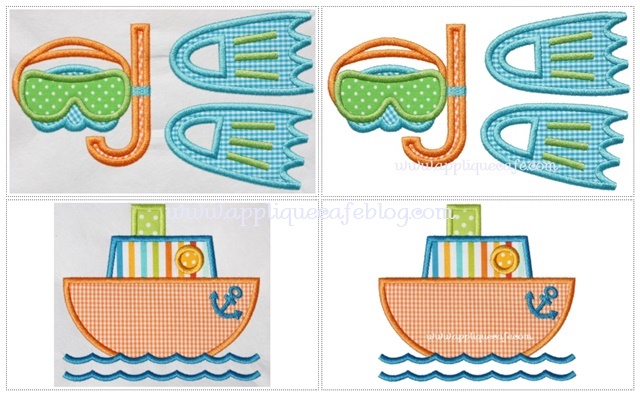
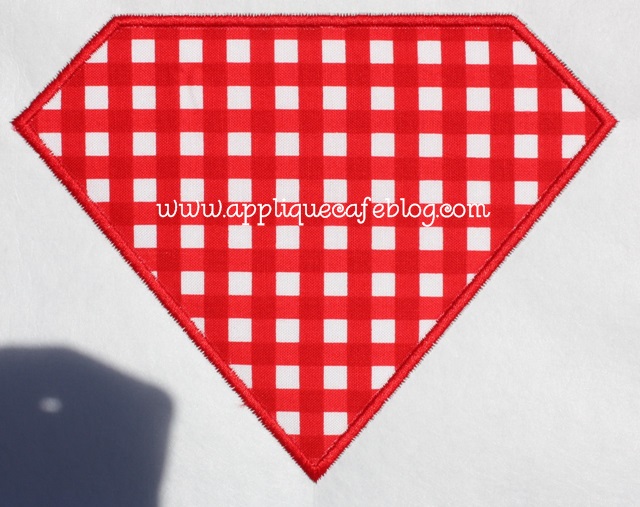
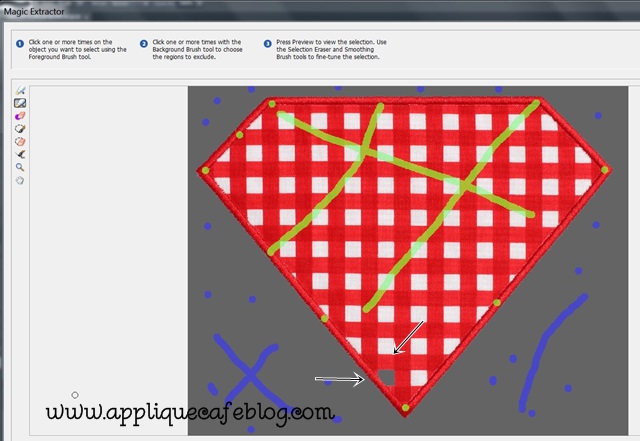
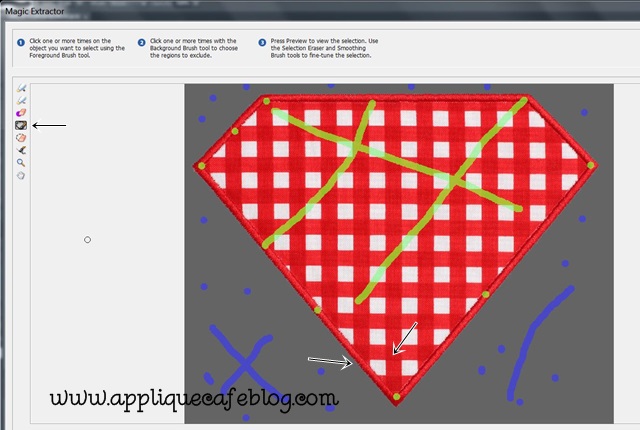
It is SO EASY! You just click on the parts you want to keep with GREEN, and parts you want left off (the background) in RED. As you do this, it forms a border around the parts you want to keep – see the yellow line. You can also adjust this easily! Here are a couple of examples…

clip magic

clip magic 2

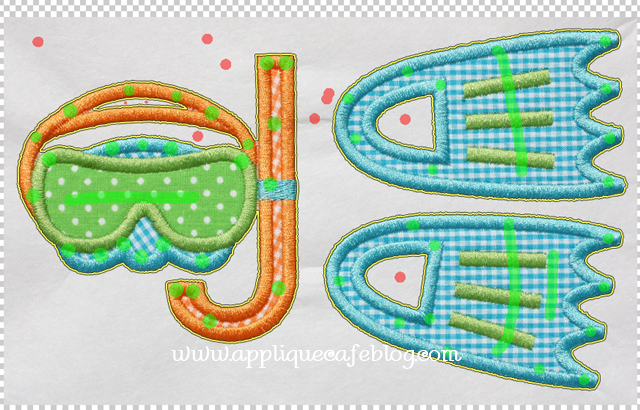
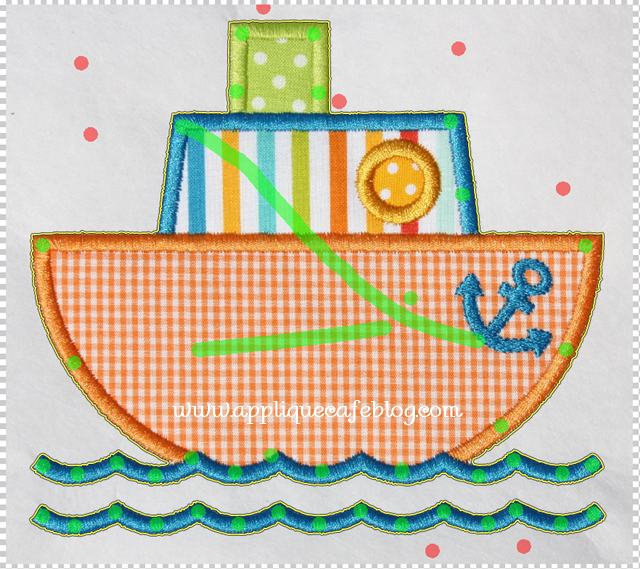
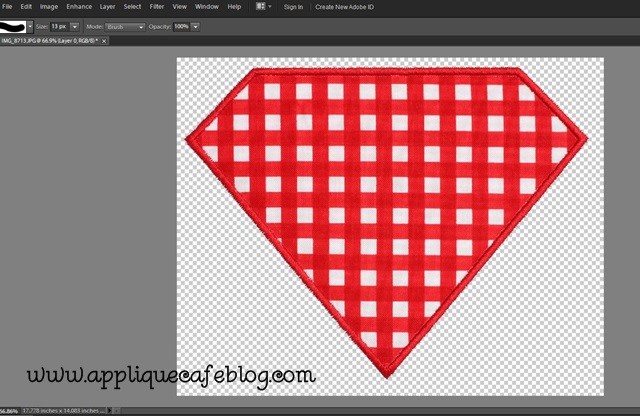
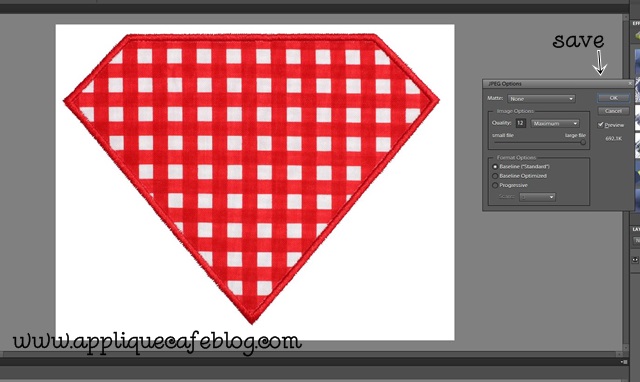
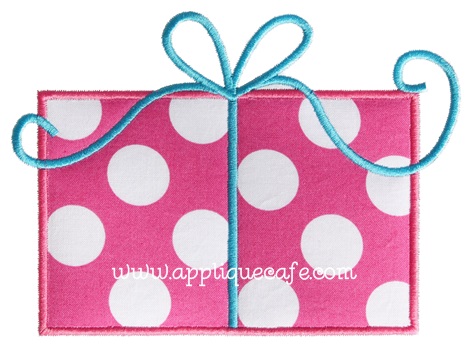
Here is my before and after! Check out their website too to see other features and neat things Clipping Magic will do! I use it for design photos, but you might see some other use!

clipping magic

The Gulledges are in SURVIVAL MODE around here. It’s May, which means we have 28 events on our calendar and school is wrapping up. Sunday was Jeff’s birthday AND Mother’s Day (plus we had our last soccer tournament all weekend in Decatur, AL). My triplet nieces and nephew turned 16 yesterday (and all 3 passed their driving test!). My middle child “G” turned 10 today. Jeff and I celebrate 15 years of marriage Thursday (Whoop!) and Browder will turn 13 (GASP) on the 25th. And school gets out May 20th for my oldest and May 27 for my youngest 2. Then it’s SUMMER!

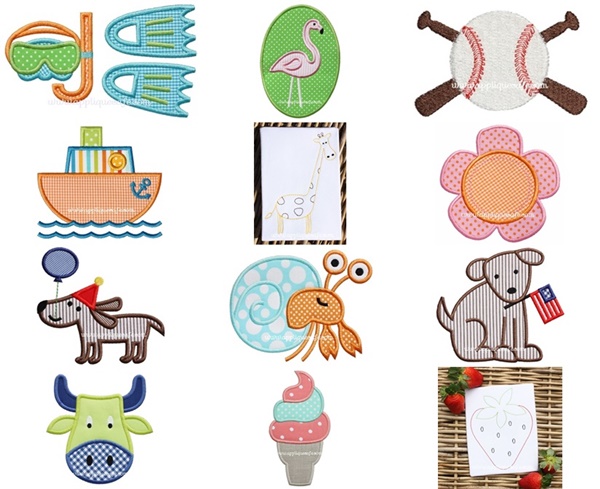
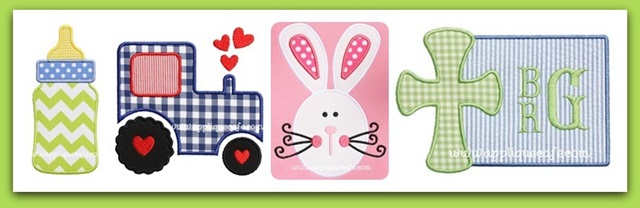
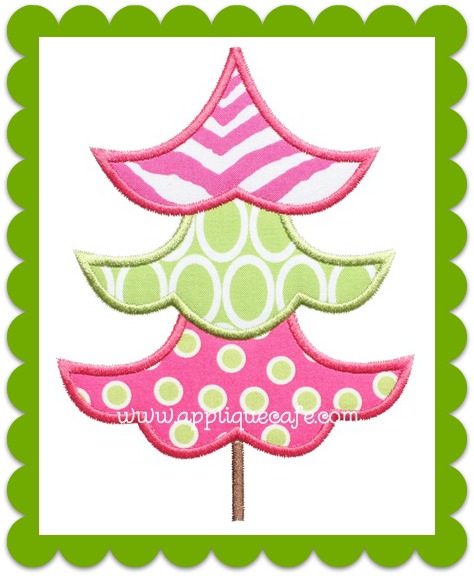
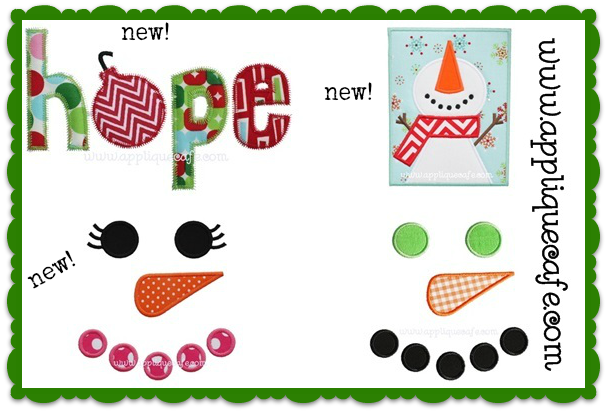
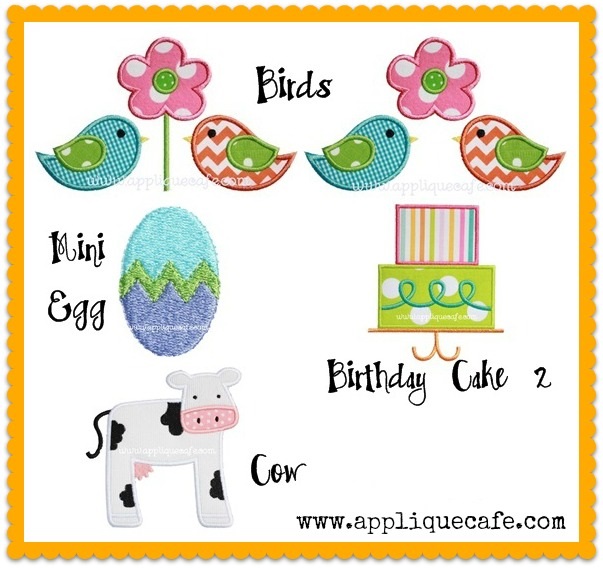
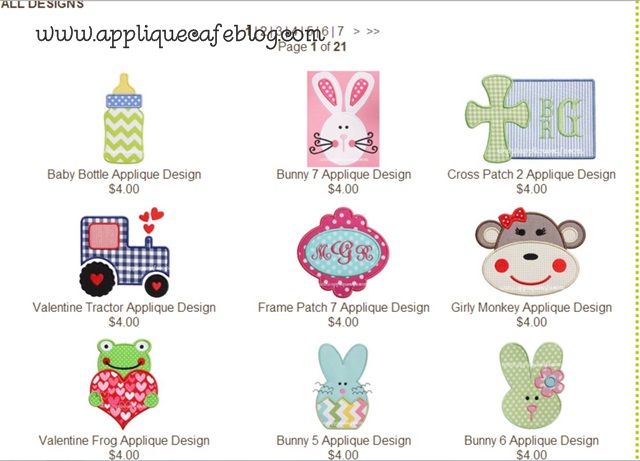
Applique Cafe NEWS: All of our DESIGNS are on sale through May 17th, and you can see what’s new below! Lots of cute stuff for SUMMER!

may sale

beach toys 2 300-tile

Until next time…..

Pic Monkey

Happy Monday-post-Spring-Break! I have actually gotten a lot done today. Another quick post I wanted to share with you about photo editing software. I’ve shared before and most of you know I use Photoscape for photo editing (resizing, brightening up a photo, cropping, adding my watermark, etc.). It’s free and super easy to use. I also use Photoshop Elements 10 to remove the background of my photos. See THIS POST for more on that. I have also been using Pic Monkey lately and I love it! It’s how I jazzed up the following few photos. Yes, it’s a lot of photo software! I like each of them for different reasons, so why not!

Here I combined 4 design photos using Photoscape, but I added the lime border in Pic Monkey. baby bottle 300-horz

My favorite thing about Pic Monkey is the scallop borders (“craft scissors”) you can add!

carrot 2 300-horz christmas tree 9 plain 500

They also have lots of cute font options to add text!

zig zag hope 300-tile birds 300-tile

Here is just a smidge of font options you can chose from.

pcfonts

There are lots of border options, but I love the craft scissor options!

pcframes

You may not have noticed the link on the right side of my blog, but that’s the best way to get to Pic Monkey! You can use it for free and look around. I paid the $33 for a year of “Royale” which gives you lots of options! You can use Pic Monkey to edit photos from your computer, create photo collages and also design stuff from scratch. I use digital paper a lot I find on Etsy and add photos and borders.

pcpage

Anyway, there’s the scoop on that! Click the link on my blog shown above to take a look!

Removing Photo Background

Happy hump-day! In my previous post (Before and After), I explained how I took some of my old design photos from Applique Cafe (which were pretty bad…  eek!) and some I re-sewed, and some I just removed the background. One person commented asking how to remove a background of a photo, so here it is. Again, I use Photoscape photo program (free) for minor edits like cropping, rotating, and adding text (i.e.: my watermark www.appliquecafe.com). I also use Photoshop Elements, which is the cheaper version of Photoshop, to remove the background on my design photos. Why use 2 programs, you ask? Because I am not savvy enough to figure out how to do everything in PE {and because I was using Photoscape wayyyyy before I got PE so it’s just easier for me}. Here’s an example again of BEFORE & AFTER of an old design photo. Left photo was probably taken inside and I failed to brighten up the photo (which you can also do in Photoscape). The fabrics were blah too, so I re-sewed it and the right picture is the AFTER after I removed the background! Much improved, eh?

mittens 600-horz

So last night I was editing a re-sew of our Diamond Patch Applique Design, so I thought I’d SNIP (another cool tool) some photos to show you kind of how it works. If you don’t have Photoshop Elements (Photoshop probably does the same thing), then this might not make sense.

This is my photo edited in Photoscape. I rotated the design to make sure it was straight, then cropped the design to remove all of the excess background. I use 2 layers of medium cutaway to sample designs usually, so the white you are seeing is stabilizer, and the shadow is my hand taking the photo. I’m removing the white (& shadow) background so it’s fine!

IMG_8713

I open Photoshop elements, then click FILE, OPEN, and open my edited DPAD (Diamond Patch Applique Design) photo which is saved on my computer. Easy peasy!

pe

Next I click IMAGE (3rd from the left above), and then at the bottom of that list is MAGIC EXTRACTOR. It will then pull up this screen below. I’m going to use the top left + button to select the part of the photo I want to keep and it shows up in the lime green (normally red but I changed it to green since my design was red). I normally just click around the satin stitch of the design and it puts dots around the design. You can draw across like I did. Also, you can adjust the size of the dots on the right. For tiny parts of a design I make the brush small. This is telling PE I want to KEEP the diamond patch in the photo. NEXT, I select the – button below the + button, and I again, select the parts of the photo I want to REMOVE. It appears as blue-ish purple-ish dots. You can also draw like I did. Doesn’t matter!

If you mess up and select the wrong part of the photo, the NEXT button is an eraser. You can use it to erase anything you’ve messed up on (like if the “keep” went over in to the part you want to remove – just erase the messed up part). That’s all you do for now.

pe2

I missed this in my photo, but there is a PREVIEW button on the right side of the screen (and shown below). It will then erase the blue parts and show you what is going to be left. As you can see below, it erased all of the background of my photo and kept the red part. BUT, as you can see in the bottom left corner, it got confused since this is red & WHITE check, and it removed the white little part of my fabric. You will get this sometimes with polka dot fabrics, ginghams, or anything with white or light fabric. Not a big deal!!

pe3

Below the eraser from your 1st step in removing the background, there is a paint brush button. This will ADD BACK anything that PE has removed. So I move my mouse/cursor over the area of the fabric that it removed, and it ADDS it back for me! Likewise (and I didn’t show this), there is another eraser button below that. It will remove any part of the photo that didn’t get removed in the 1st step. Maybe my shadow didn’t get removed all the way? You can use that eraser to remove it, and it will “gray” the area out and remove it. Now we are ready to SAVE.

pe4

When you are done with the 2nd round of editing above (and sometimes it removes the background perfectly so there is no editing to be done), you are ready to SAVE, so click OK (which is above PREVIEW on the right not shown. There is also a CANCEL button in case you want to cancel and start over. When you hit OK, your photo will look like the below. The patch is showing and the background appears as gray checks and that is the part that was removed.

pe5

HERE is the panel that I didn’t show above – PREVIEW, OK and CANCEL! Once you click OK you are ready to save your file. Save it on your computer where you know where it is. Update: TO SAVE, YOU HAVE TO GO BACK TO FILE, SAVE OR SAVE AS, AND SAVE IT AS A JPG FILE! 

pe6

I then pull the file back up in Photoscape and resize it to the sizes I need for my website, and I add text (my watermark – www.appliquecafe.com). My photo is now ready to upload to my website. Here is what it looks like below! MUCH better.

diamond patch 500

Here is another example of another design which is a tad bit harder. As you can see, the “ribbon” goes outside of the present so I’m going to use that + to click on all parts I want to keep. It shows as red lines and dots. Blue dots are parts I want to remove. As you can see, I put dots on all parts (including INSIDE the bow and loops) so that PE will remove that part of the photo.

pe7

This is what it looks like after the background was removed and I’ve added my watermark. This is what I upload to my website!

present 500

Removing the background in PE can be an easy and sometimes tedious process. It really depends on the design and colors used. Light colors are sometimes removed with the background so you really have to + and select a lot of the design. Darker colors on a white background are usually easy! It takes lots of practice and a steady hand, but hopefully this post will help! As you can see below, it makes my website look so much better and consistent with the backgrounds removed. I DO have several designs sewn on colored backgrounds (like the Bunny below) which is fine. Most of my designs done that way are white (snowman, etc).

pe8

Let me know if you have any questions and I will try to explain! It really takes just trying it out and a lot of patience!! Some days I remove backgrounds with ease and PE seems to be on a roll and cooperating with me. Some days it removes all the wrong parts and can be very frustrating! Like I said, I am SURE Photoshop Elements will also rotate photos, crop and all that too. I’ve just always used Photoscape so I use both programs for photo editing!

Have a great rest of the week!!

UPDATE: I did some research and I am using Magic Extractor in PE10. PE12 is now available, and I read where it cut out the Magic Extractor feature! Not sure about PE11. I did find another way to extract the background in PE11 – found a video about it. I have not tried it in PE10 to see if it’s in there. So, check your version if you have Photoshop Elements!