The Year of Hats

I am declaring the summer of 2014 The Year of Hats, or the Season of Hats, or the SUMMER OF HATS? I’m doing hats every week and this will be my 3rd blog post this summer on doing hats. Check out the first 2 HERE and HERE. I’ve also done 2 posts so far on VISORS, so check them out HERE and HERE.

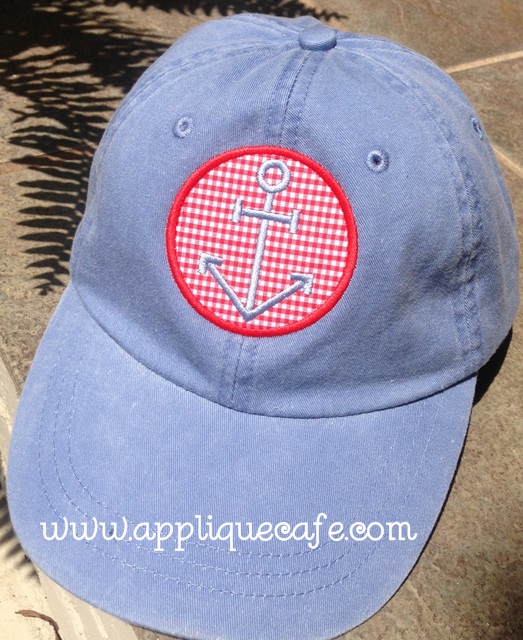
I have mostly done monogramming on hats, but recently did our new Anchor Patch (which comes in a “small size” great for hats).

photo 5 (4)

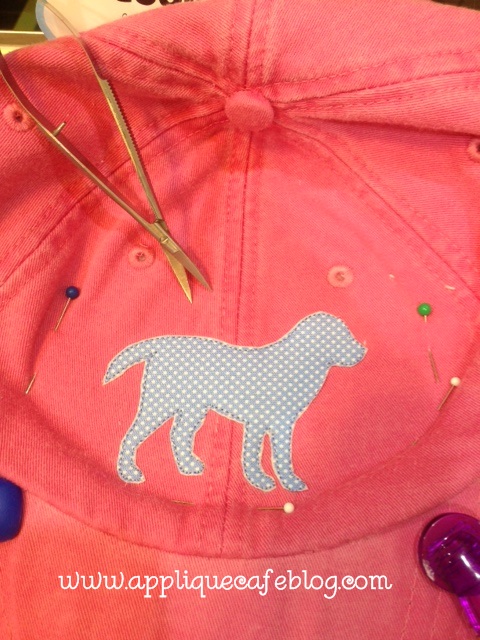
This week we listed a new Mini Dog Applique AKA “Stitch” so I sampled it on a hat as well. It was a little trickier because I had to trim around the small legs of the dog. I typically use Gingher 4″ curved scissors to trim my appliques, but busted out the “Snips” for this hat. I used my 5.5″ X 6″ Fast Frame + sticky stabilizer and pinned the front of my hat to the frame. I use the seam on the front of the hat for my center and it’s best to get the front of the hat as flat as possible and pinned down securely. I also use chip clips to clip the bill of the hat (which is flattened) to the frame.

photo 1 (10)

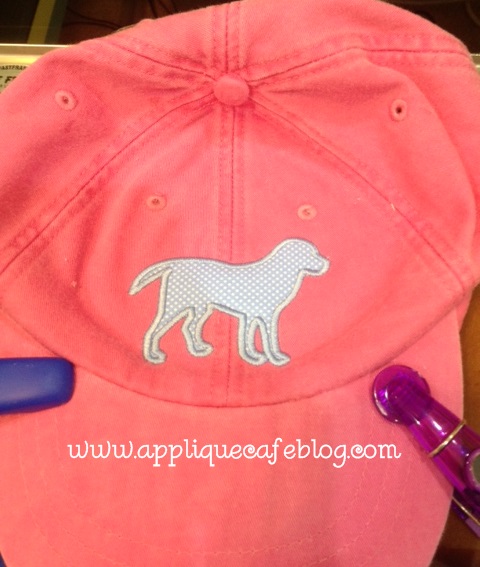
Here it is after I’ve unpinned. I not only use a layer of fabric, but I fuse it to a layer of medium cutaway stabilizer with Heat N Bond Lite so that the seam doesn’t show through my fabric. Fabric alone would probably work, but adding a layer of stabilizer keeps it firm and you can’t see the hat color or seam through the fabric.

photo 2 (10)

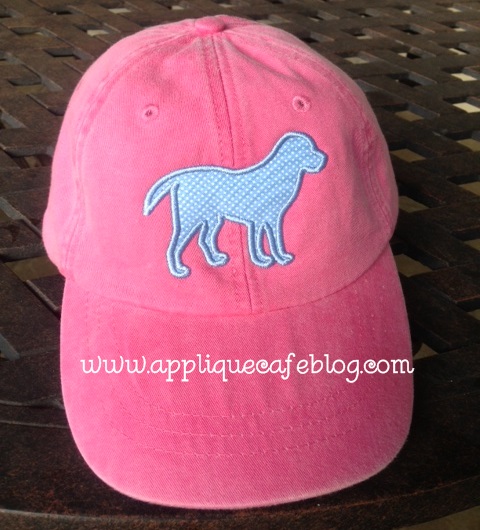
Finished product! Please note that the dog polka dot fabric is not wrinkled. For some reason the camera captured the dots weird and it looks that way, but it’s flat and smooth!

photo 3 (7)

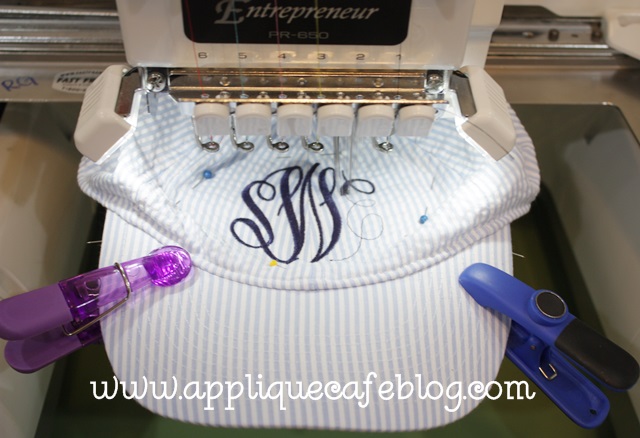
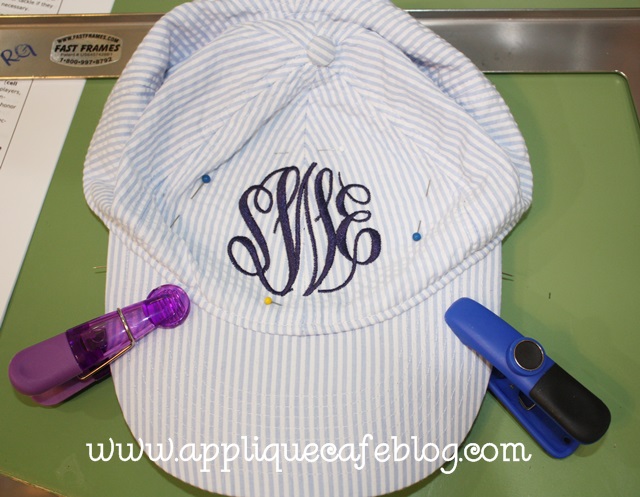
More hats. These cute seersucker striped hats came from the J. Crew Outlet and were about 6 bucks each. My sister in law bought all they had and I have 3 more to do today. Again, flatten the bill, chip clip it to the fast frame and smooth and pin the front of the hat.

IMG_8975

I used Monogram Wizard Plus “Master Circle font and this is roughly 2.75” tall. I think I increased it a couple of times once I got it on my machine and saw that I had a little more room.

IMG_8976

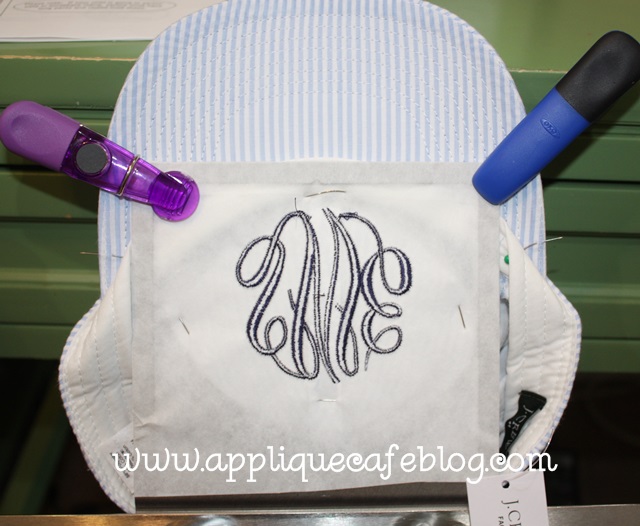
This is what it looks like from the bottom. Most hats come with a “lip” or mini liner (the white part) that folds down – I usually pin it back before I pin the hat to the frame. The chip clips keep the bill flat and in place on the frame.

IMG_8977

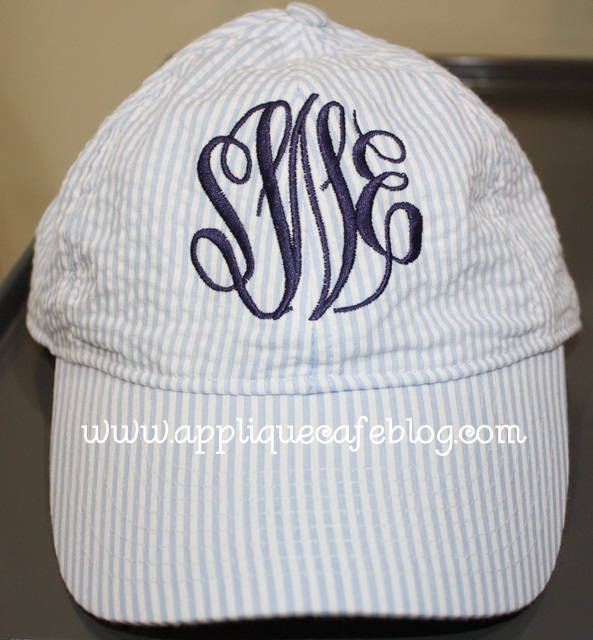
Finished product!

IMG_8978

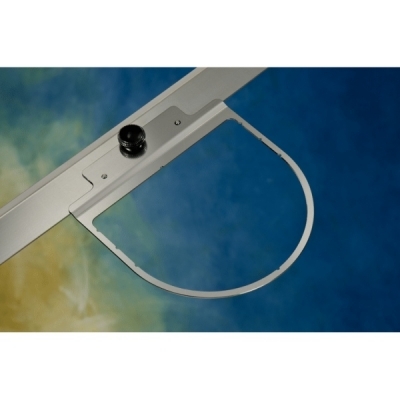
Here is another type of Fast Frame that I was told worked great with hats. It’s a 6″ thin radius frame and this one is from Ken’s Sewing Center. I believe you can also get a 4″ thin radius frame which might also work great for hats. Make sure you get THIN. Most 7 in 1 Fast Frame sets come with a regular radius frame, but I believe the thin will allow you to get closer to the bill on the front. They also sell these frames at Sewingmachine.com, but are currently not on the website. I was told they should be available next week online. Again, I don’t have one yet, but was told they work great for hats!

radius frame

We listed a few new designs this week and are having a quick little July 4th SALE at Applique Cafe.

july 4 sale

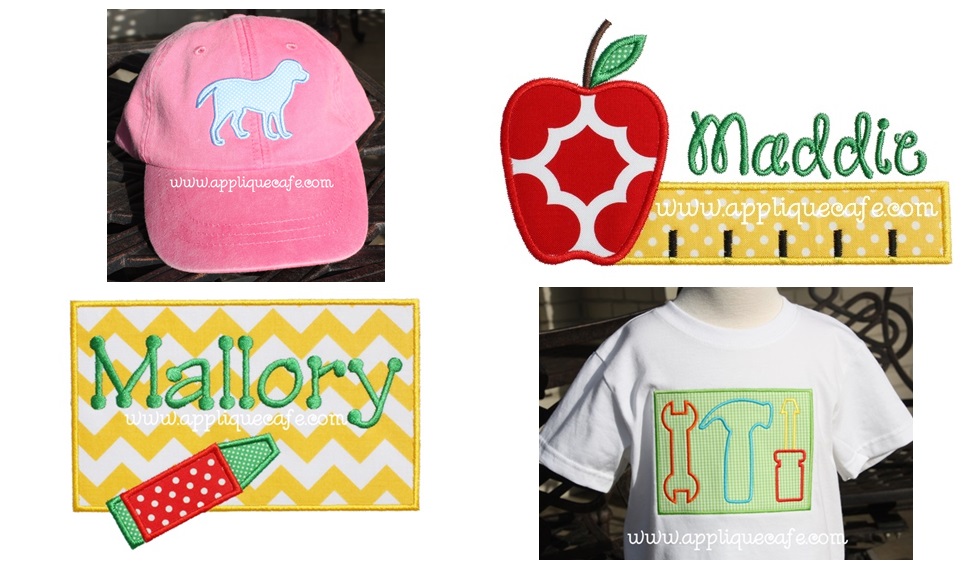
Here are our new designs for this week, which include a couple for BACK TO SCHOOL!! We also added a new “Patch Applique“. I love the TOOLS and these new patch designs are only 1 fabric and super easy to sew.


IMG_8989-tile

Have a safe 4th of July!!
Visors, Part 2

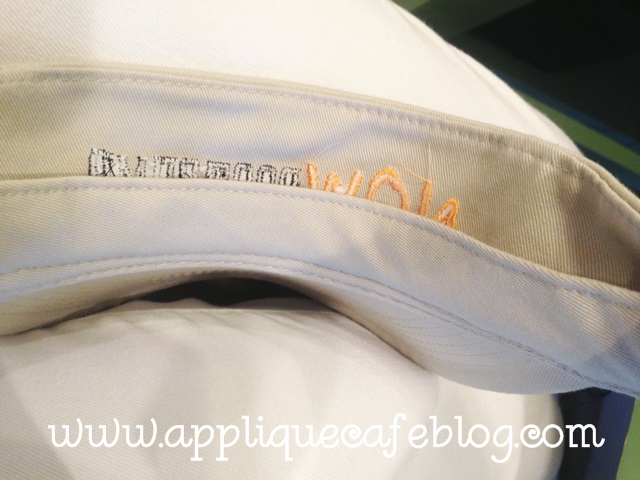
Another post! 2 in a row. This is a follow up to my previous post on MONOGRAMMING VISORS using a CAP FRAME. Check out that post if you are just tuning in. A friend brought over several youth visors today so guess what I did all afternoon? My original thought was that the 6 year old daughter would love a monogrammed visor this summer. This thought came after she wore mine at the pool yesterday. It didn’t take long for my niece to claim one (and want it monogrammed right then and there) and the boys to claim theirs too. So that’s what I did all afternoon, and I figured out a trick or two I wanted to share!

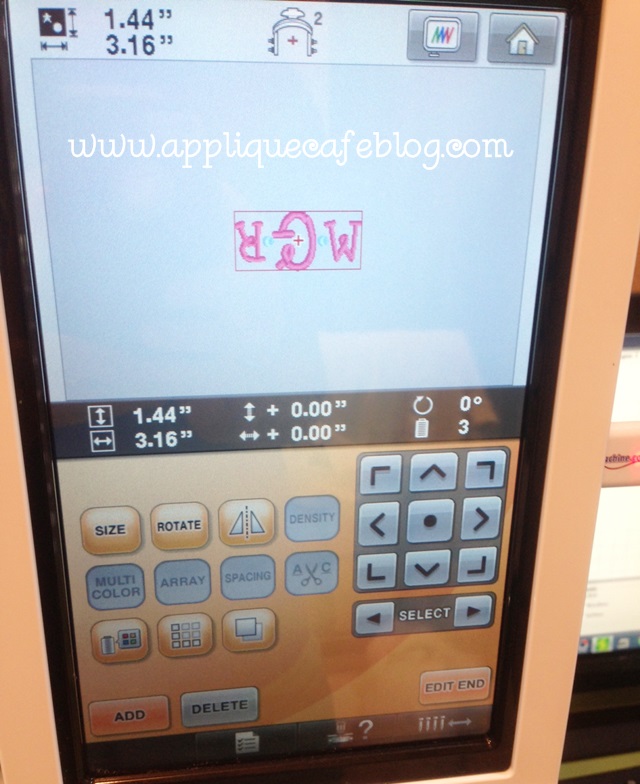
First, when using your CAP FRAME, your machine (multi needle) knows you’ve installed the cap frame on there and assumes you are monogramming hats or caps. A) When “hooping” your cap or hat on a cap frame, the hat is actually upside down on your machine. SO…. your machine automatically flips your monogram upside down. B)When “hooping” a visor using your cap frame, the visor is actually right side up. This creates a problem when your machine flips the monogram upside down. Today I found myself rotating the design to right side up several times while editing my design on my screen (selecting and assigning colors, etc.)

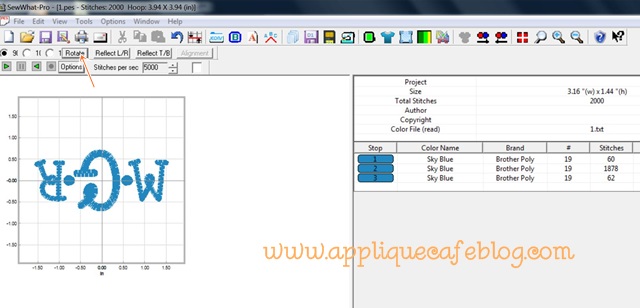
LIGHT BULB!!!! After the 2nd visor, I formatted my monogram in Monogram Wizard Plus and saved it on my computer. I then opened the saved monogram in Sew What Pro, rotated it upside down, and saved the file to my thumb drive to stick in my machine. Are you confused yet?? Now, when I put the upside down monogram on my machine to stitch on my visor, when I’m done editing, it will flip it upside down for me, which makes it RIGHT SIDE UP for my visor!
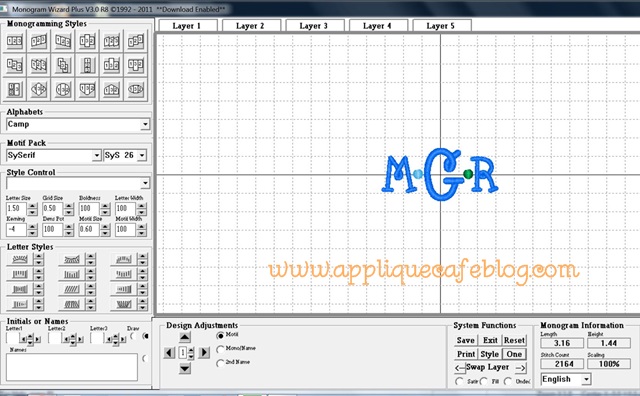
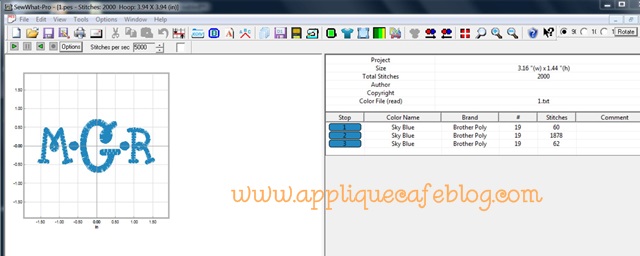
Here is my MWP screen and I used Camp font. I also inserted dots in between my letters using SySerif Motif 26 so I could use 2 thread colors on my lime green visor. If you have MWP and don’t have the free motifs (punctuation), go to the Needleheads Sewing Studio and download them for free. So I saved this file on to my computer just like this.

VISORS

I then opened the saved file in my Sew What Pro. I couldn’t figure out a way to rotate a design upside down in MWP. If there is a way, let me know!?

visors2

I rotated the design and saved it as upside down!

visors3

Another LIGHT BULB moment…

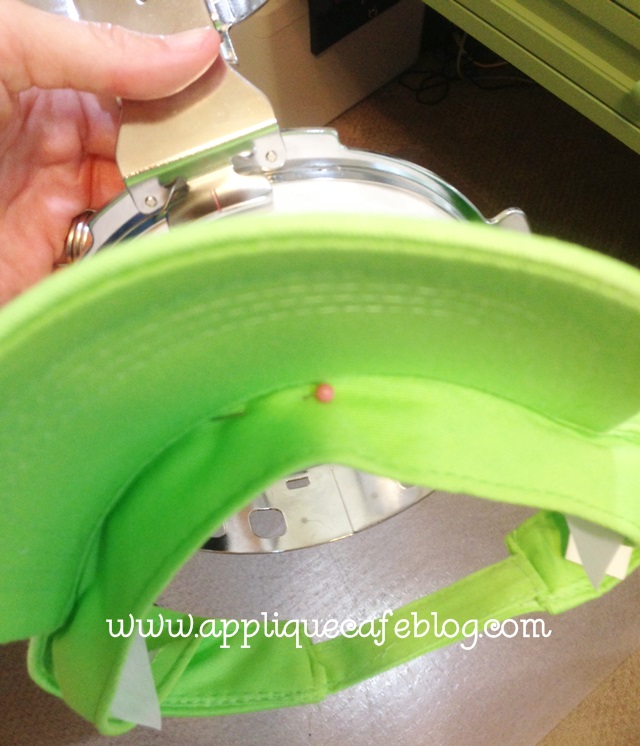
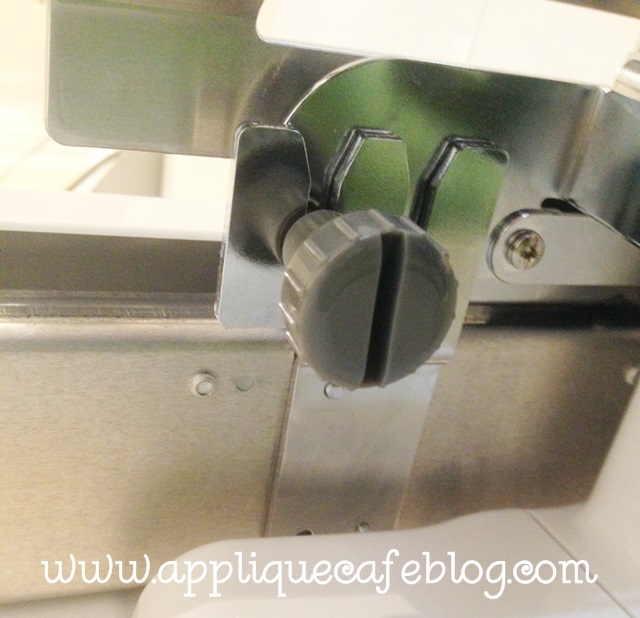
If you check out my last post on VISORS, I explain how when hooping a visor on the cap frame, the clamp that folds over barely grips the top of the visor. Here is a pic:

photo 2 (7)

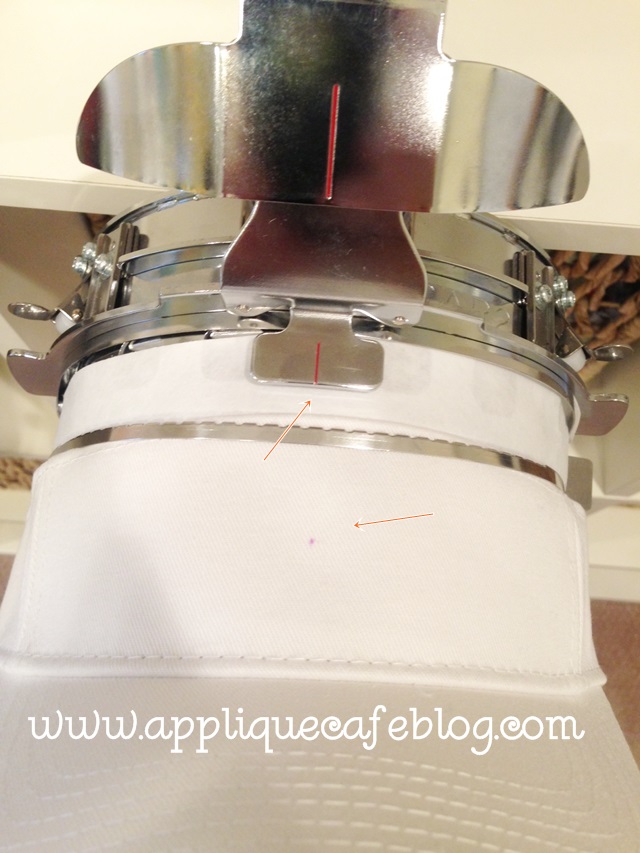
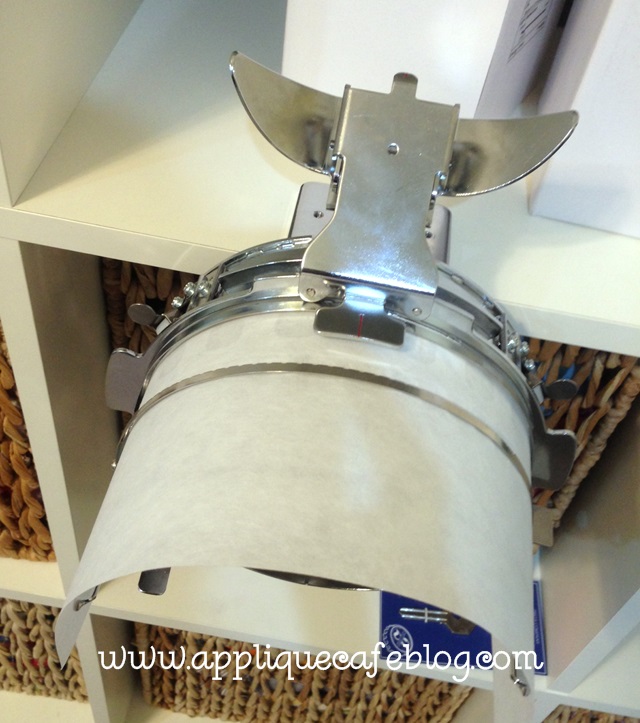
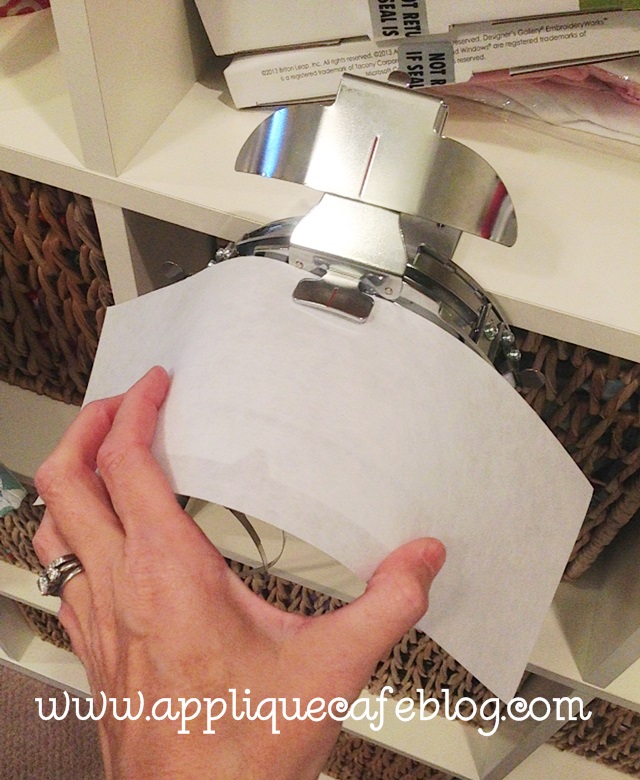
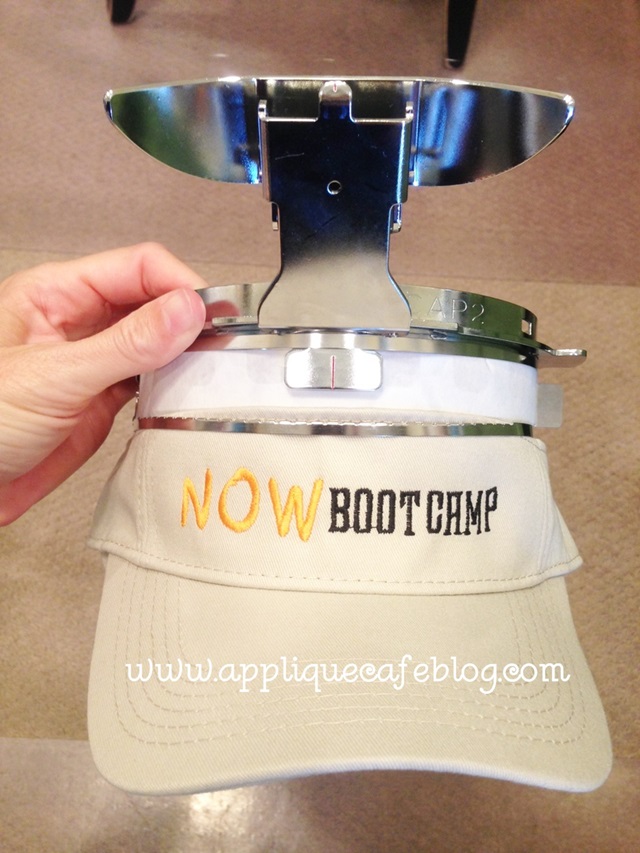
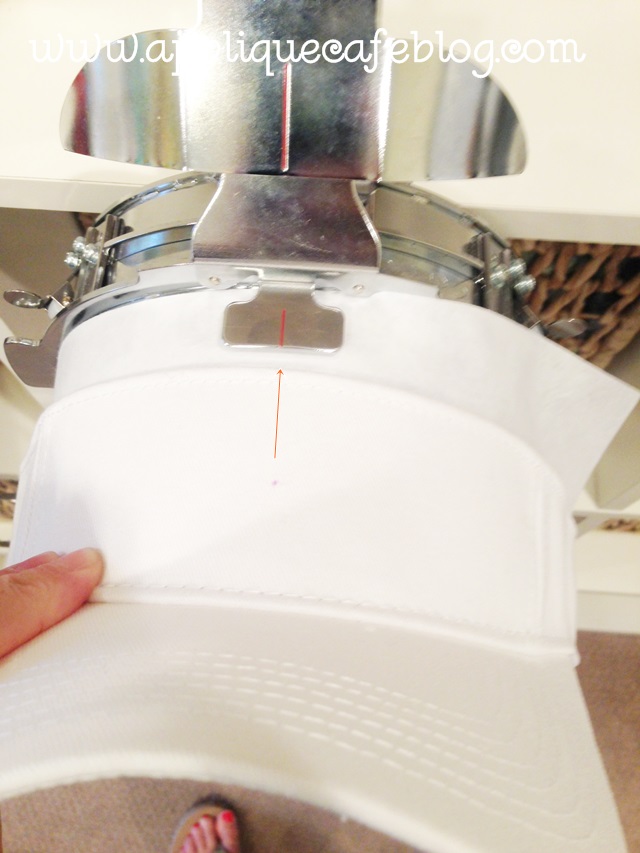
Today I found that this gives little room for your monogram on the visor. You are limited to like 2″ in height anyway, and with the visor up that high on the frame, I was having to shrink my monogram to make it fit and centered. So…. I decided to instead “hoop” the tearaway cap stabilizer strip and then pin my visor lower on the stabilizer on to the frame. It worked!! Below you can see where I clamped down my stabilizer on the frame. You can buy tearaway cap backing in pre-cut strips from sewingmachine.com.

photo 2 (6)

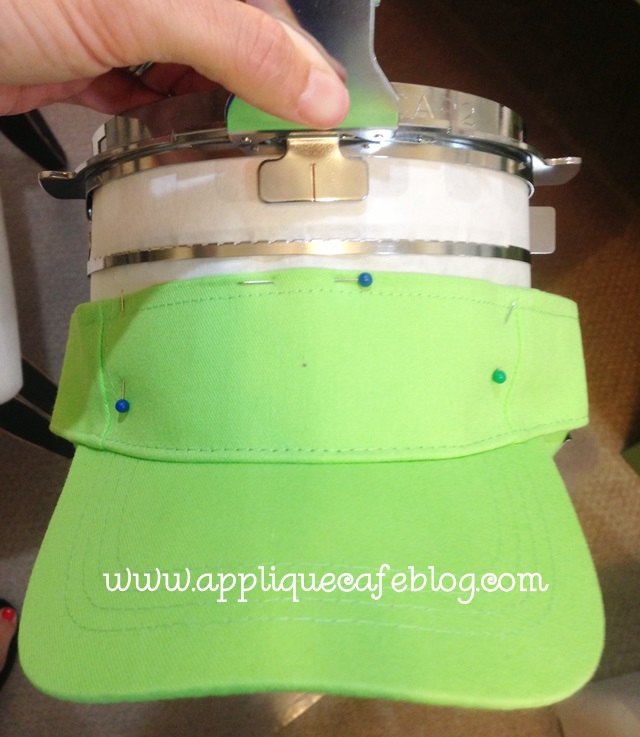
I then pinned the visor to the stabilizer to keep it in place. You have to be gentle and careful, but it works.

photo 3 (4)

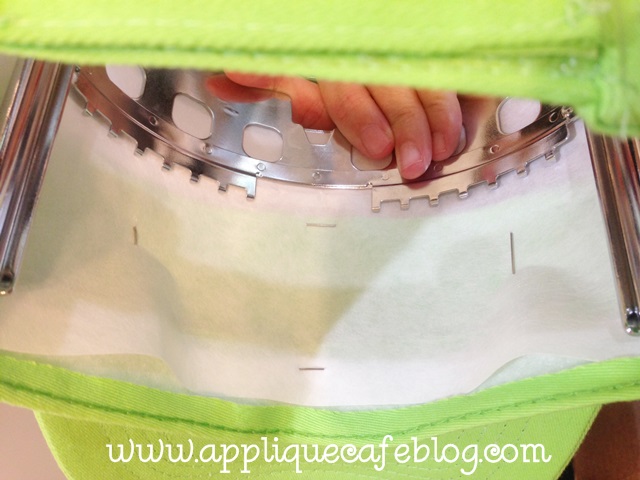
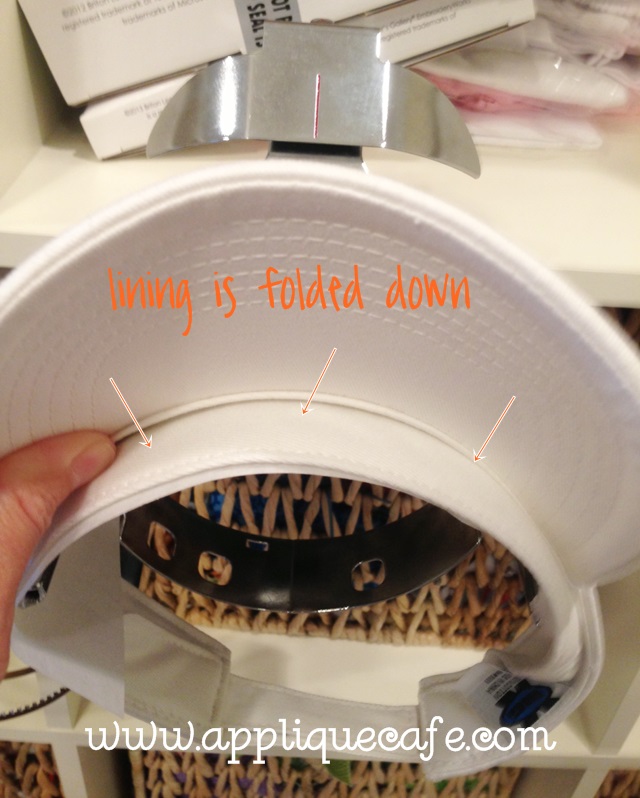
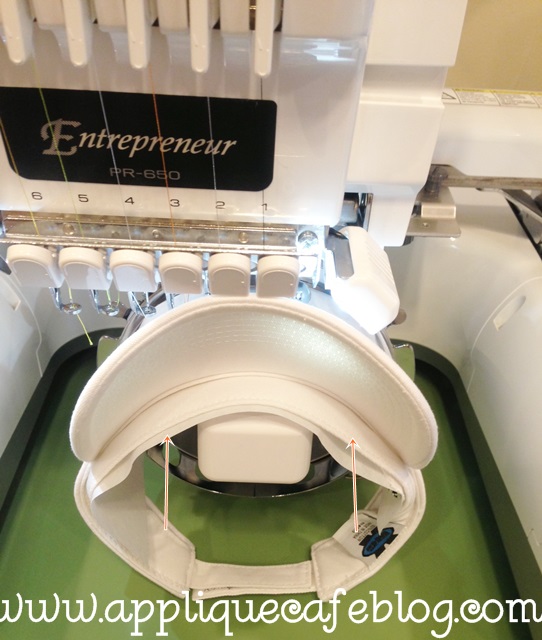
The little lining strip is folded down on the visor and I pinned that to the stabilizer also.

photo 4 (2)

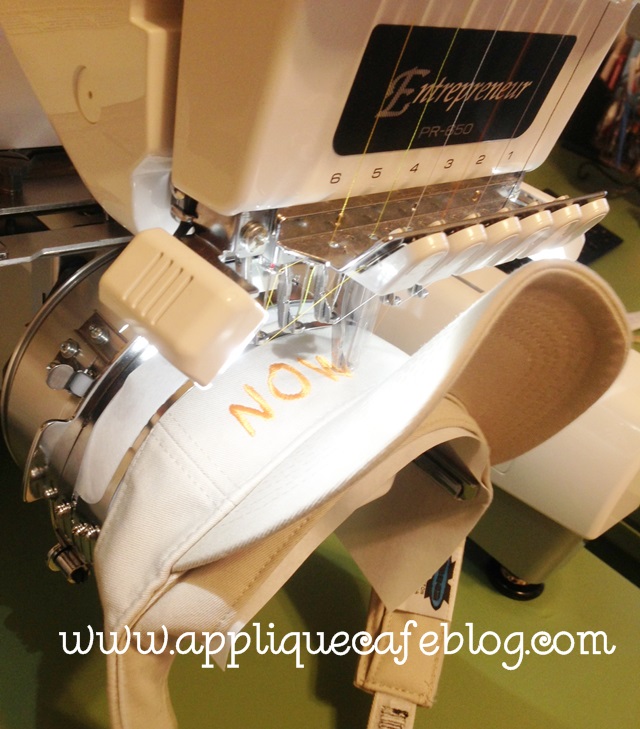
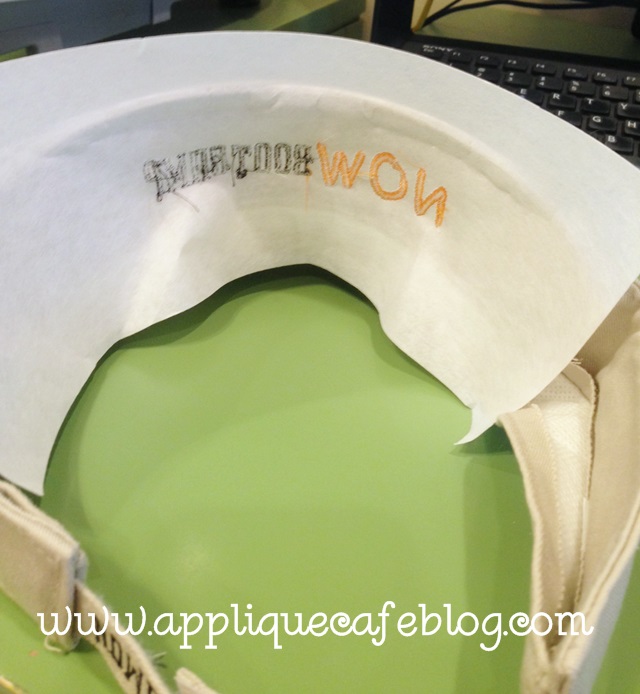
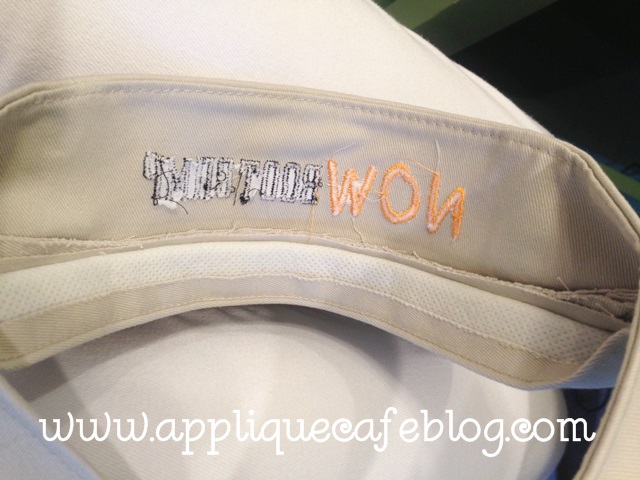
Here is what it looks like underneath. 

photo 5 (2)

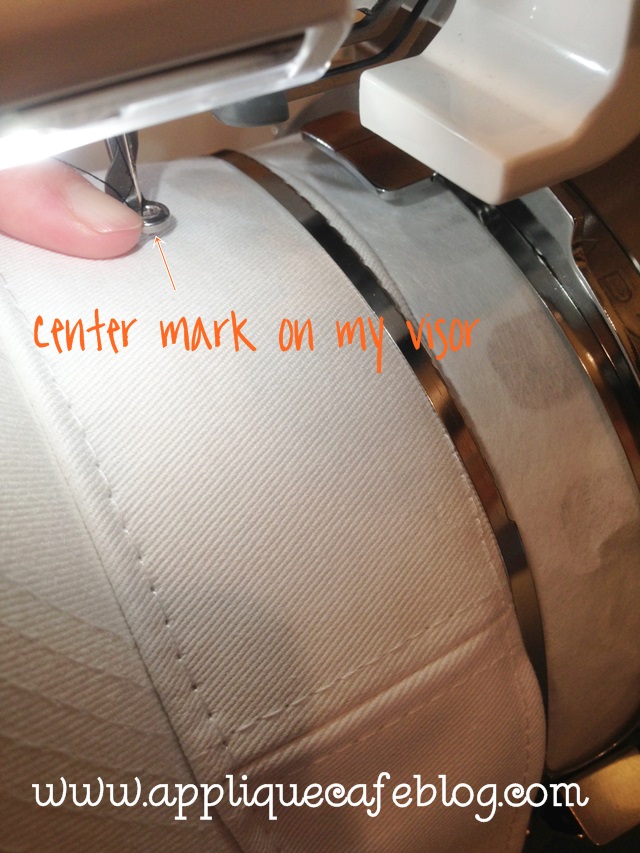
Here is a shot of the visor on the frame on my machine. I will line up the needle with the center mark on my visor before sewing.

photo 2

First I want to assign colors to my monogram. As you can see below, I put the design on my machine and it’s upside down like I saved it  in SWP  and it will stay upside down for thread color editing.

photo 2 (7)

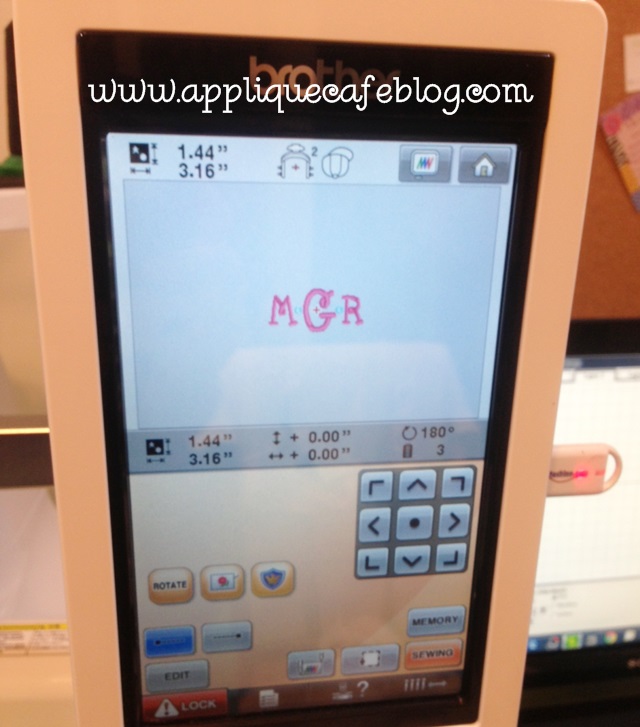
I’ve assigned my colors, hot pink letters and turquoise dots. 

photo 1 (7)

When I click Edit End, my machine automatically flips the design upside down thinking it’s a cap. For me, it flips it right side up for my visor since I saved it upside down. I line my needle up with the center mark on my visor and now I’m ready to sew!

photo 1 (6)

Here it is when it’s finished sewing. I unpin and remove all of the stabilizer.

photo 3

Here is my lovely assistant modeling Mallory’s new visor!

photo 4

And here are my 3 kiddos in their summer visors!! I used MWP Natural Circle font on the boys and MWP Happy on Mallory’s other visor.

photo 5

Comment or email me with any questions! If you are familiar with the cap frame and visors then hopefully this will make sense and help! Recap: save your monogram upside down for visors AND clamp the stabilizer on your cap frame, then pin the visor to the stabilizer!

Visors and Cap Frames 101

Well, I said I was going to do a post on monogramming hats with fast frames (as opposed to a cap frame). I have 1 photo of a hat I did recently and I also have a real {cute} hat to monogram. I plan to post photos of the process, but visors came first today. I do monogramming for a local store and on tap for today were several logos on shirts & visors. I tried and tried and even asked on Facebook how to monogram a visor WITHOUT the cap frame, but I could.not.figure.it.out. I think it has to do with the size of the monogram (or logo in my case) and how flimsy the visor is. So…. I dug out my cap frame after not having used the thing in at least 2 years. I was dreading it and cursing along the way, but it ended up not being as hard as I thought! Lucky for you I took a gazillion cell phone pics along the way….

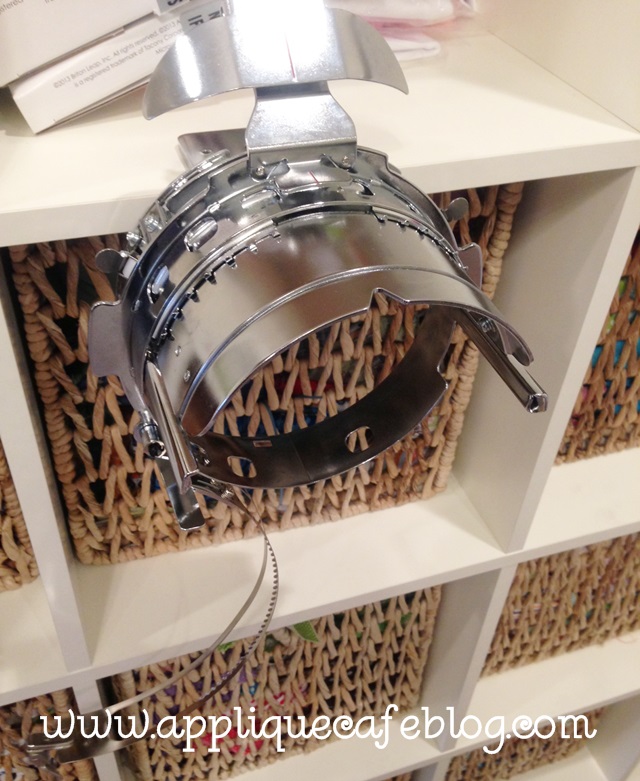
The cap frame consists of 3 parts and the sewing field is typically 2.5″ X 5″ if you get the cap hooped perfectly. The part below is the CAP HOOP HOLDER FRAME. I got my cap frame from Sewingmachine.com, which has a GREAT video on how to use your cap frame. I watched the video to refresh myself on the process, and I remembered from my training with Steve that you hoop visors upside down. WATCH the VIDEO!! I will explain the upside down thing more later. The holder frame attaches to a table or any surface ~ I attached mine to my Ikea Expedit shelf.

photo 2 (9)

This is the mechanism that helps you get the cap or visor hooped.

photo 3 (7)

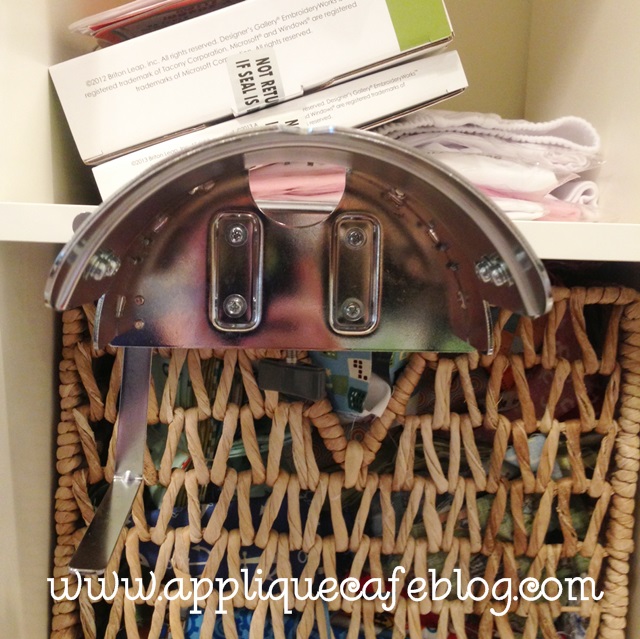
Here is a photo of the actual CAP FRAME or CAP HOOP clamped on the holder. As you can see, there is a piece hanging down which is what secures or clamps on to the visor or hat. This part is hard to explain! Hopefully the photos will help, and again, WATCH THE VIDEO!

photo 4 (7)

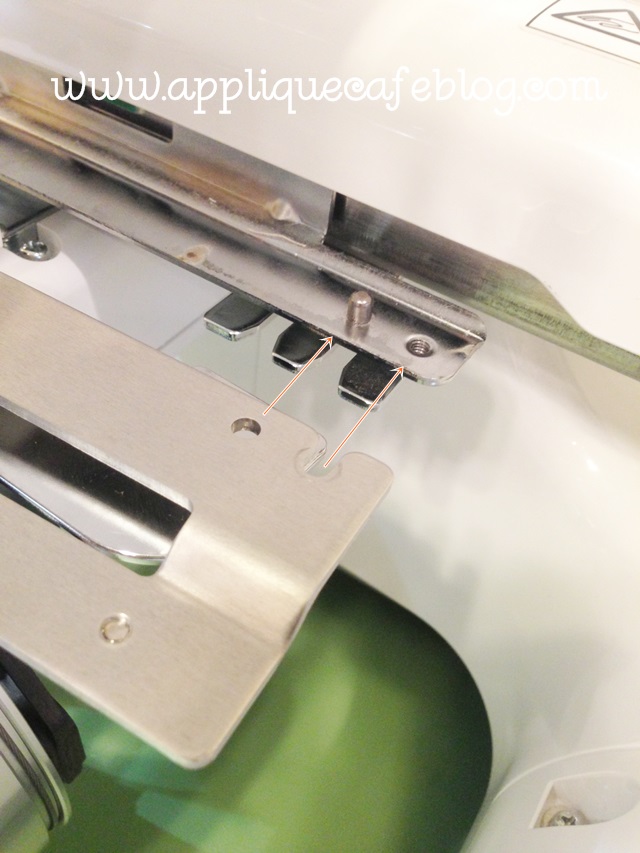
There is also a DRIVER which fits on to your machine. You take the arm of the machine off by loosening the small screws and removing them and the arm. You then put the driver on which fits around the bobbin case area of the machine.

photo 3 (9)

photo 1 (12)

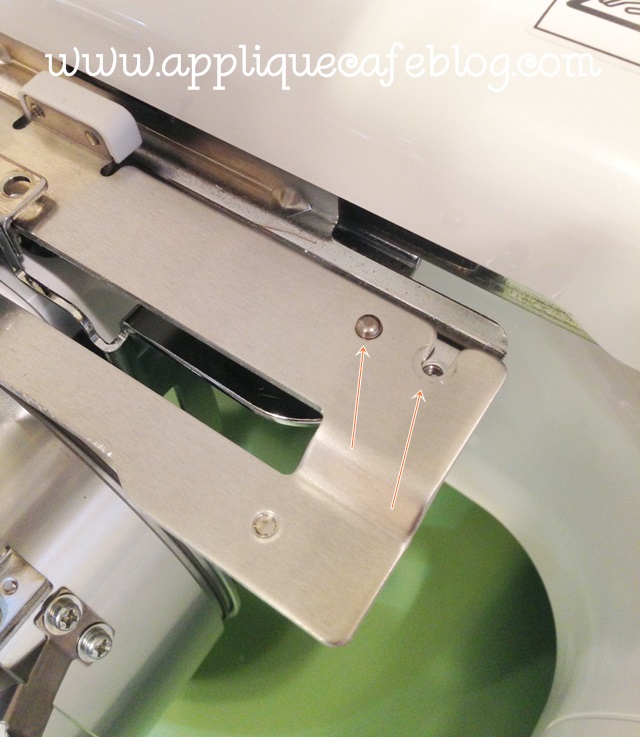
This is what the driver looks like when it’s attached. Screws are tightened. There are 2 small screws on top and 2 bigger ones on bottom.

photo 3 (4)

This is what it looks like from underneath. I know this is a bit confusing and hopefully you may know how to install the cap frame already. This is the bigger screw tightened on the bottom, and there are 2 of these.

photo 2 (12)

Your machine came with a handy dandy tool box, and you must insert this RISER. Since the cap or visor is curved, this helps the cap or visor glide back and forth as it is monogramming. The photo below also shows you how the drive fits on to the machine.

photo 2 (6)

Now it’s time to get my visor ready. I’ve marked the center and am ready to get the visor hooped.

photo 1 (9)

I use cap backing stabilizer and lay it across the hoop {which is on the holder}.

photo 1 (8)

Most visors have a little bit of lining ~ fold that down.

photo 3 (6)

Try to line up the center mark on the visor with the center line on the cap hoop/holder.

photo 2 (8)

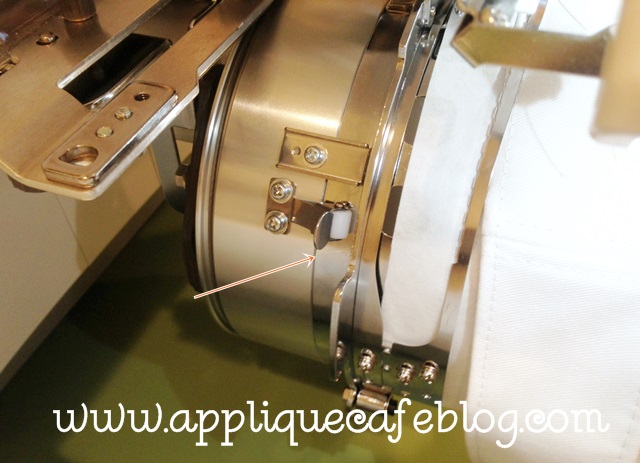
The huge silver piece you see below usually clamps down on the bill of a hat. We are doing a visor, so we hoop upside down and nothing goes inside that clamp. Pull the clamp over that was hanging down in a previous photo, and what you want to do is barely grip the top of the visor to keep it in place. There are teeth on the clamp that hangs down, so they will easily grab and secure the top of the visor. You want to clamp down as close to the edge as possible. If you don’t, you lose some of your sewing area.

photo 2 (7)

You are now ready to put the hooped visor on the machine. As you can see below, the lining is out of the way.

photo 5 (6)

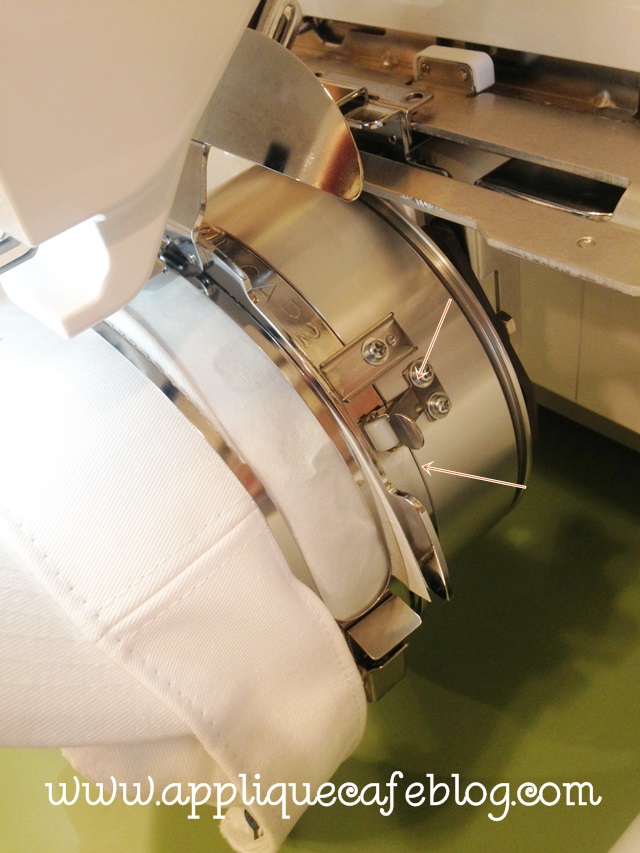
The hoop is locked in place and secure on both sides.

photo 5 (5)

photo 4 (6)

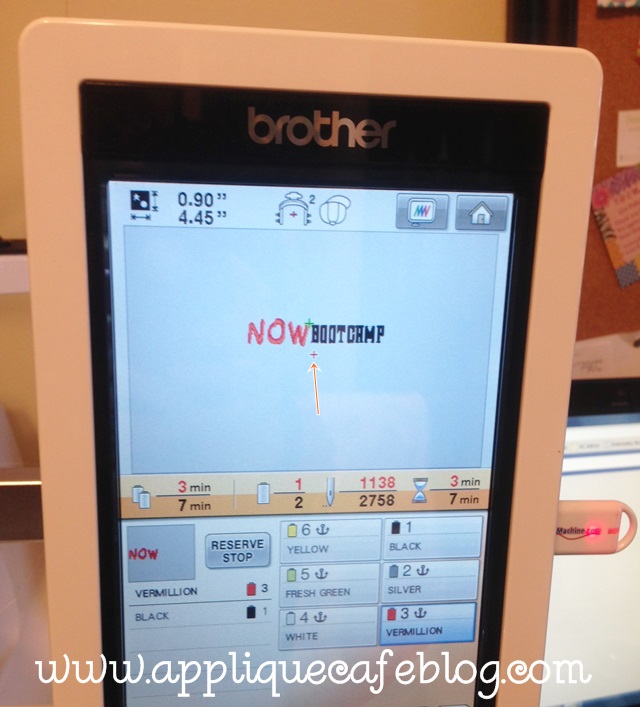
With the CAP FRAME on the machine, your machine knows it’s on there {as opposed to the regular machine arm and standard hoops}. As you can see on the screen, it shows an image of the cap frame and it shows an upside down cap/hat. The logo is also automatically turned upside down so that it will stitch correctly on the cap. We, however, are doing a visor! That visor is hooped the opposite way so you have to rotate the logo or design to stitch normally and not upside down.

photo 1 (7)

Double check to make sure it is right side up! Mine flipped upside down again in editing so make sure it’s rotated the right way.

photo 2 (11)

I’ve assigned my colors and am ready to line up my needle and sew. I line up the lead needle and make sure it is lined up with the center mark on my visor. That way the logo will be centered on the visor.

photo 3 (5)

The visor is now stitching, and you can see below how everything looks.

photo 1 (11)

Here is another photo of how the cap hoop/frame is locked in place (on both sides).

photo 1 (10)

Here are 2 photos of the visors after I’m finished. I did a white and khaki one, both with the same logo. I trimmed the jump stitches in between the letters.

photo 1 (6) photo (26)

I’ve taken the visor off the frame and will pull away the cap stabilizer which is tearaway and comes in strips.

photo 3 (8)

I usually pull away all of the stabilizer inside the letters.

photo 4 (8)

Flip the lining back up and your visor is ready!

photo 5 (8)

Here are the finished products!

photo 4 (4)

Are you either thoroughly confused, or scared to death?? It’s really easier than it seems, and I highly recommend the video! I have not used my cap frame in like 2 years, but it only took me 15 minutes or so to get it all set up and the visors embroidered.

I will work on my blog post ASAP on monogramming a regular hat or cap using FAST FRAMES! Stay tuned!!