Quick Post…

I’ve gotten TONS of response from the HNBL post and I’d like to follow up on some questions (quickly, before I head to church). I can go in to more detail later if need be!
Mainly, “what kind of stabilizer do you use?”
Answer: MEDIUM CUTAWAY

You can check out this post to see where I went over HOOPING:
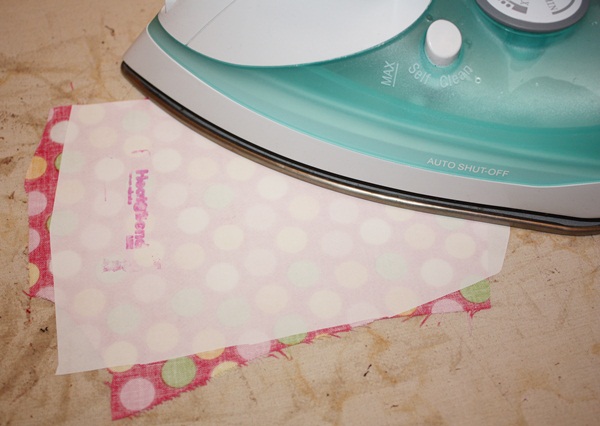
I use medium cutaway on all shirts and I hoop all shirts. Well, I did use a fast frame, sticky stabilizer and added medium cutaway on ONE SHIRT recently, but that’s a different post. 99.9% of the time I HOOP. Shirts, that is. I buy my cutaway from www.sewingmachine.com2.2 or 2.0 oz precut squares and the 15″ x 25 yard roll. They call these type stabilizers “commercial” and they are super cheap! I highly recommend checking them out!
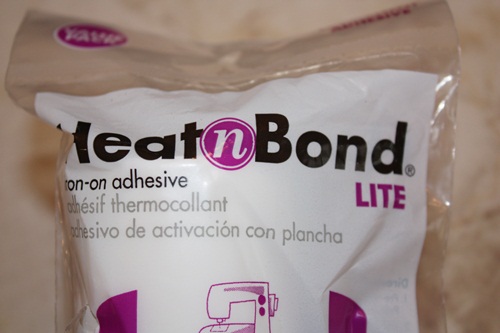
The other main question was on the Comfort Cover. There are several brands of them and I included links in my post last week. I USE Comfort Cover from www.Sewingmachine.com. I have used Floriani Dreamweave before too, and Sulky makes a version of it too. It’s basically a protective add-on to your shirt. It protects the thread and it protects sensitive skin from the back of the applique and thread. You’ve probably seen it on the back of Carter’s clothing with appliques and I noticed it on a J. Khaki (Belk) dress Mallory has that has an applique on it. It does come off in the wash sometimes, or it does come loose I should say. But… I think it’s a nice touch and it has come off of my Carter’s stuff before, so I think it’s just the nature of the product and your washing machine! Not that it comes off every time and is a waste of your time and money, but I have heard that it eventually comes off and that’s fine. It’s really personal preference as to whether or not you want to use it. I’m sure if you had a heat press you could fuse it on there better than my Shark iron!!
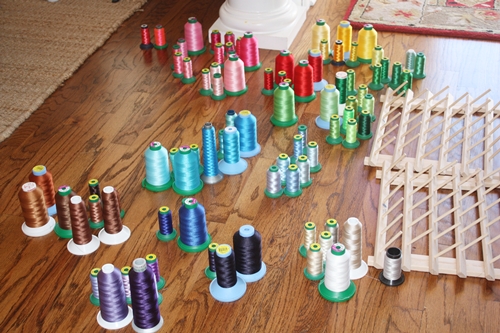
We showed our house this week (for the umpeenth time) and I took a picture.
This is our dining room when I’m in the thick of WORK:
This is our dining room when the house is shown! The machine stays, but the rest of the thread, iron, ironing board, fabric, stabilizers, trash can, computer, pens, scissors, shirts, football?, etc etc etc is PUT AWAY!! You can imagine how old this gets!
For this reason I’m not doing a whole lot of customer work right now. It’s really a matter of timing and if I happen to have a little bit of work to do and I think it’s possible to take more in (when you call). Right now I have 4 shirts to do for this week and I’ve had a couple of  people ask about bringing stuff. My goal is to NOT let 50 shirts pile up. A, I have no place to put them (my closet is full), and B, that is added stress with the house for sale AND if for some reason it sells and I’ve got 50 shirts piled up to do. When we do sell the house I would imagine I’ll be out of commission for a while!
If I continue to get Q’s about the stabilizer and such I’ll try to do a better post! I enjoy all the comments and have gotten tons of comments and questions on Facebook!

The SECRET to a Better Applique!

I’m calling this a SECRET because I see and hear every day that there are people out there, embroidery people nonetheless, who don’t know about this product.
It’s called HEAT N’ BOND LITE!! Add it to your get-it list!! It will change the way you do applique and rock your world! It will IMPROVE your applique and make all the difference in a good looking shirt, and maybe a so-so looking shirt. (I’m not an employee of Therm-O-Web nor do they pay me to promote this product. I get nothing from this product but great looking appliques!)
Did I mention I love this product? That’s why I have a drawer full of it friends (see below)! I buy mine at Joann (without an ‘s’). When they have SEWING NOTIONS at 50% off, I go in and stock up. I also get 50% off coupons all the time in the mail and on my phone (Iphone App is available) so I always take advantage and stock up! You can also buy it at some Walmart stores (although I have never seen any in ours), and by the yard at Hancock Fabrics. They may sell it off the bolt at Joann but I’ve honestly never asked or looked for it. I’ve also talked to Steve at www.Sewingmachine.com about this product and I used it when I did my little class there in October. They will hopefully be selling it soon. Anyway….
It comes in this package and is simply a roll ~ one side is paper and one side is shiny and a little textured.
Make sure you get LITE and not ULTRAHOLD. I’ve been using HNBL for a long long long time and it has never gummed up my needle.

First… you’ve sewn your marking stitch for the applique you are working on. Mine is the zig zag tiara. HNBL works especially well with zig zag designs because without it, your fabric will most likely fray.
I cut my piece of fabric large enough to cover the design.

I iron my piece of fabric. Notice my iron is on about medium heat.

I cut my piece of HNBL so that it’s about the same size as my fabric. As you can see mine hangs over a bit which is why my ironing board looks the way it does. Notice the HNBL is paper side up.

Iron the HNBL light with the shiny side down. Again, you are ironing on the paper side.

Peel the paper away, and your fabric will now have the HNBL on it. Throw the paper away! It now appears shiny and is like a coating on the fabric which the camera didn’t quite capture.

I lay the fabric shiny side down on the marking stitch and now you’re ready for the tackdown stitch. (I do not use any type of spray adhesive to stick the fabric to the shirt at this point. Some people do but I do not.)

Now it’s time to trim around the tackdown stitch. You might be able to see in this picture that the fabric underside is shiny. That’s the HNBL. It also helps in this trimming process ~ there aren’t any loose threads, as the HNBL is like a coating on your fabric. (Notice my Gingher 4″ curved embroidery scissors – love them!)
The applique is ready for the final stitch, and in this case it’s zig zag! As you can see the cut is very clean!

Here is the applique after the zz stitch. You might notice the fabric is a little bubbled up. I’m not done yet…

Again, the applique is finished, but now it’s time to FUSE the applique.
Iron over the applique. I keep my iron on medium heat. I iron over the applique and also let it sit on it for a second or two. If the applique fabric doesn’t seem like it’s fusing (still bubbly), I spray it with the iron water and then iron over it again. The applique fabric will “harden” a tad and you will be able to tell that the fabric is “set”.
You might see a difference here ~ the applique is FLAT. The fabric is fused to the garment.
Lastly, I finish the back side of my applique with Comfort Cover, aka Floriani Dreamweave (there are a variety of different brands of this product, including Sulky).
Here is your finished product!
Does your applique look like this??
I recommend this product all the time to people and no, I am not getting paid to do so! I have found it works great so I recommend it whenever possible! If you’re appliques are bubbly, you need this! If your appliques sometimes come loose after washing, you need this! EVERYONE NEEDS THIS!! Get some if you don’t have some and see how much better your appliques turn out!

Thread and Hoops!

I hope this doesn’t look too gross? Yesterday was New Year’s Day. In the SOUTH, we take the ham bone from the ham we’ve been eating every other meal for the past week, throw it in a pot and throw in a bag of BLACK EYED PEAS!! We don’t/didn’t do the “greens”, but hopefully the BEP’s will bring us good luck in 2011! If this picture didn’t make you shut down my blog, then read on…
Today I “organized” my thread on the floor. I have both 1000M spools and 5000M spools. I’m working on a thread order so I had to sort all the colors and figure out what I needed. I use mostly Poly X thread from www.kenssewingcenter.com (and I have a gift certificate to use) and also Isacord from www.sewingmachine.com (most of my 5000M spools are Isacord). I like both brands and my machine seems to like them too. I have REAL thread charts for both brands with real thread samples, so it makes ordering very easy. I’m trying to build up my collection of 5000M spools, especially on the colors I use most.
Isn’t thread fun??
Tonight I made a Walmart run for diapers (Mal still sleeps in them unfortunately) and a dust pan. I came out with diapers, a dust pan, an 8 pack of paper towels, a pack of hot dogs, a pack of Oreos, a turtleneck for Mallory, a sippy cup and this super duper soft fleece pullover for G. I didn’t even have a buggy so the dust pan was literally hanging from my finger and I had stuff tucked under every part of me that would bend. You know exactly what I’m talking about!! Anyway… this fleece top was $5.00. This is why I love what I do! I can add a monogram to a $5.00 fleece top and I have a cute soft warm fleece for my G! The stitching is all light blue.
And now we come to my new best friend, the 9×9 HOOP!
This hoop is from Allbrands and if you have a 6 needle Brother machine, then this hoop is a must! It’s not made by Brother, but rather by Durkee and is compatible with several Brother and Babylock machines (see listing). This is a photo of the hoop on my machine. As you can see, my arm is expanded as wide as it’ll go just about ~ this hoop is probably as wide as the XL hoop that comes with the machine. It clips on just like any of the other hoops.

Here is a picture of the hoop hooped onto a size 4T turtleneck. It actually works great for smaller sizes too. I use medium cutaway and the 15″ x 25 yard roll from sewingmachine.com is great for this hoop!

Here is the 5×7 hoop on top as a comparison. The 9×9 hoop is about the same width b/c the 5×7 hoop is also 9″ wide. But, as you can see, it gives you more room vertically. Even though the 5×7 hoop is really 9″ wide, your machine will only allow you to use 7″ horizontally. With the 9×9 hoop, your machine recognizes it as the XL hoop so while you have to watch your boundaries like you do with Fast Frames, it gives you more than 7″ to work with across the shirt.
Here is a picture of my needle position as far up as it’ll go. The top of my design will be here and the needle will not hit the hoop.
Here is the finished shirt. I did not put a name on this shirt, but as you can see, there is plenty of room below the cross to put a name. Had I wanted a name on the shirt below the cross with a 5×7 hoop, I would have had to hoop vertically which would mean my shirt would be sideways on the machine! We all know this is a pain!
I was turned on to this hoop by some friends on Facebook, finally ordered it and use it all the time! As my friend HBS says, it’ll make your 5×7 hoop jealous!