New Wholesale Blanks!

Happy Wednesday! I hope everyone is feeling better than I am. We live in Montgomery, AL, so the weather is “cray-cray” as they say. One day it’s 30 degrees and the next it might be 80. We’re back to pretty cold and cloudy today so my sinuses are a mess, I can’t breathe and I haven’t slept in 2 nights. I’m a little jacked up right now on DayQuil and Starbucks so pray I sleep tonight!!

I did some shirts last week and had to share this one. This customer of mine is very specific and EASY and this was her idea, not mine! She wanted a double circle with this cute Tricycle fabric in the middle. I’m guessing she has pants or shorts to match. Sorry the photo isn’t great, but you get the idea. I just merged 2 circles together in Sew What Pro. Getting the size right was a little tricky and luckily it worked out with the tricycle.

IMG_7135

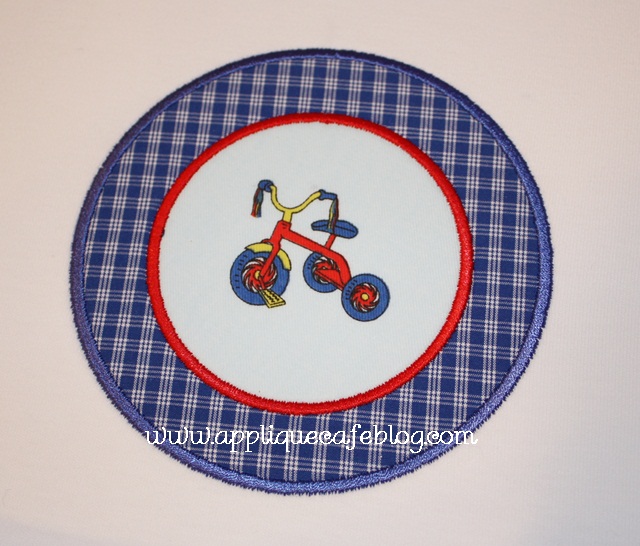
Super cute fabric! I thought I had some to tell you what it was, but I can’t find any and my customer has already picked up (it was her fabric). I’m guessing Fabric Finders?

IMG_7134

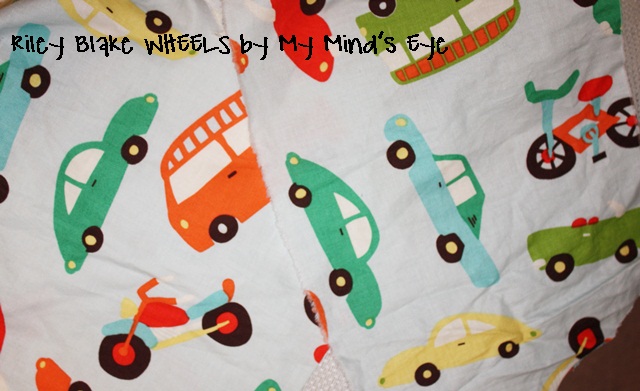
I think in the past I’ve done something similar with this fabric (below) using a rectangle patch and one of the cars, buses or bicycles. If you have fabric similar to this and can’t find the right design to match, consider using your fabric in a patch!

IMG_7158

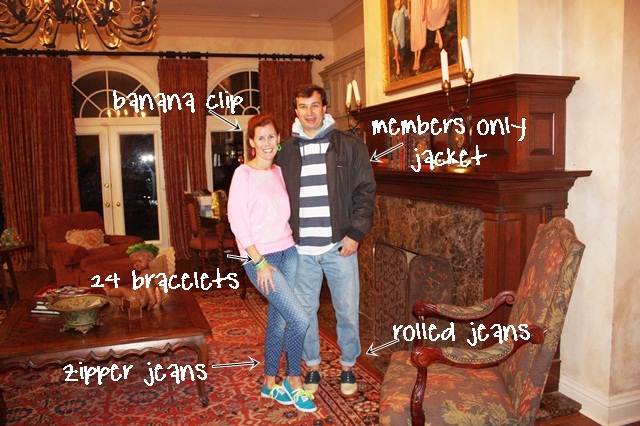
Jeff & I went to a friend’s 40th birthday party this past weekend, and the theme was 80s & 90s. It was HILARIOUS! The music was great too! Jeff rounded up his outfit and sporto-rolled his old jeans, and I hit Walmart (yes, Walmart) for most of mine. I hate you can’t truly appreciate the banana clip in my hair! My top was neon pink and actually glowed in the dark. Did we really dress like this?? We are headed to an 80’s Prom party next weekend so that should be fun too. I found a dress on Etsy and can’t wait to get it. Think MAUVE, huge puffy sleeves and a huge bow across the back!

IMG_7146

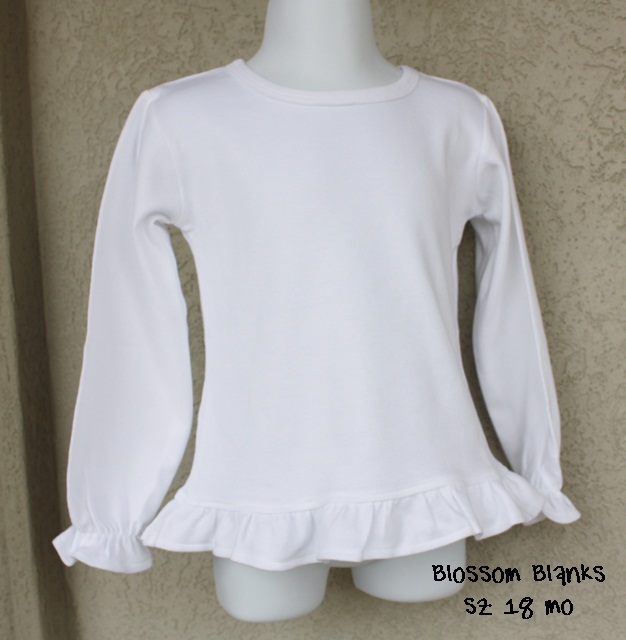
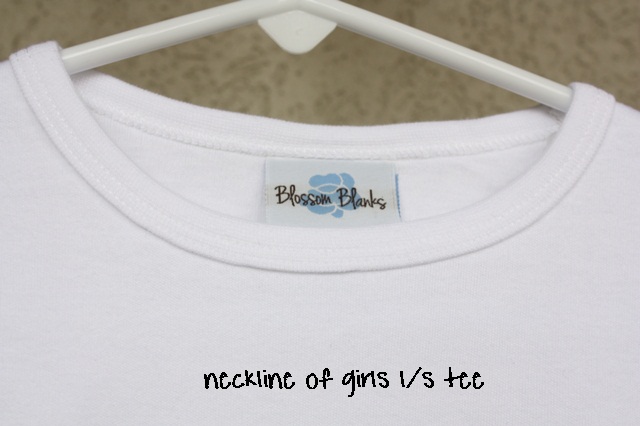
Now on to a NEW BLANKS supplier. I got an email a week or two ago from Blossom Blanks based out of Birmingham, AL. Jenny offered to send me a few blanks to try out and I got them yesterday. They are really cute! I was going to do a few samples on them and post then, but decided to go ahead and post some photos today. A little info on Blossom Blanks ~ they are a family owned business based out of Birmingham, AL and at this time they are strictly wholesale (business license and sales tax ID required). Their shirts are 100% organic cotton and very soft. With any cotton there is some shrinkage and their sizing accommodates for that. Right now they offer long sleeve tees for boys and girls and onesies (long sleeved). They are taking pre-orders for short sleeve tees for boys and girls (ruffle) and onesies and also baby gowns (late February) and girl angel sleeve tees (March). They only offer white at this time but intend to add color as they grow! Check out their website for their Gallery of photos and for more information!

Here are my pics, and again, it’s a little cloudy today so take that into account!

This is the girls ruffle long sleeve tee.

IMG_7159

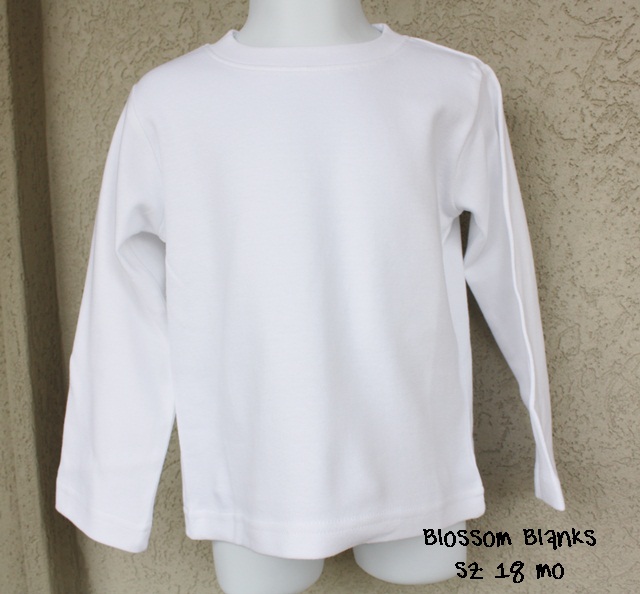
This is the boys long sleeve tee.

IMG_7160

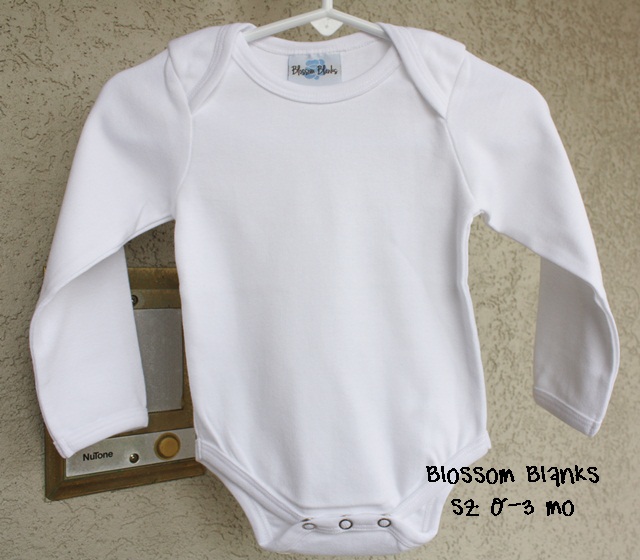
This is the long sleeve onesie.

IMG_7161

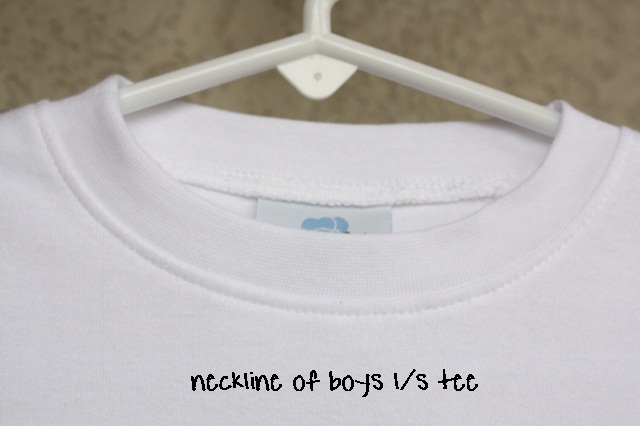
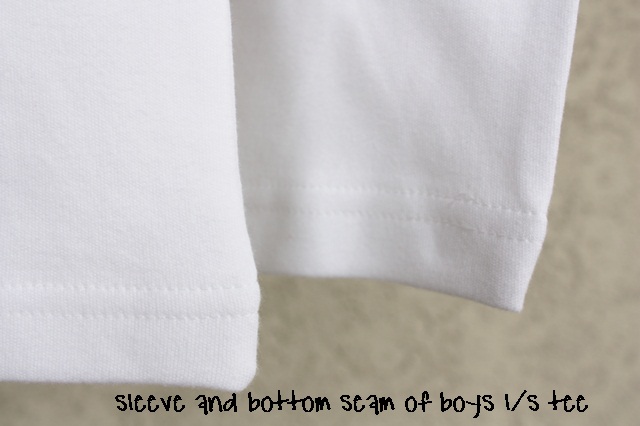
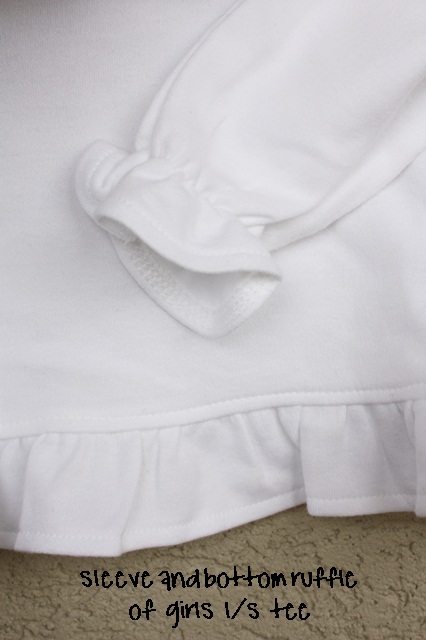
Here are some closeups of some of the detail on the tees and onesie.

IMG_7162 IMG_7163 IMG_7164 IMG_7165 IMG_7166

Again, check out Blossom Blanks for more information! You’ll find a size chart and can get pricing information as well as see photos of some cute kids in these blanks! They are also on Facebook.

Don’t forget that our Applique Cafe sale ends tomorrow (Thursday, 1/24)! We listed 5 new designs yesterday shown below.

purse 3 300-horz

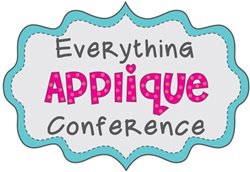
 Also, have you heard there is going to be a 2nd annual Everything Applique Conference this year? The date is set for May 17-18th in Birmingham, AL again. Follow the page on Facebook to keep up with all of the class information, registration info, etc.

420864_110773135718590_912374706_n

More on Fast Frames

Yay another post! Today has been a crazy day! Some days I get sucked in to Facebook and then it takes me all day to keep up with all the comments and replies. Today has been one of those days. I managed to monogram a backpack (not the one in this post) and edit these pics for a new blog post on Fast Frames. I also have a great new post on Monogram Wizard Plus but will save that one for tomorrow or another day this week.

This, my friends, is a backpack (duh). You may be able to tell that my friend who sent this to me to monogram took the tag off (right above my straight pin). Her daughter is going in to 4th grade (I think??) so she said do her name, and that she’s in to peace signs! Sounds like a call for MINI DESIGNS! First I pinned my center of the top part of the front pocket (flap, we’ll call it). 

 I got my name together merged with a couple of cute mini designs. The peace sign is from Embroidery-Boutique and the Flower is from Applique Momma (it also has a peace sign in the middle). I used Monogram Wizard Plus Specs font. I love the font and it’s great for initials, but names are tricky. It spaces out rather strangely. I will explain all that in my next MWP post this week, but in the meantime you can see that I layered this name together IN Monogram Wizard Plus so that it all lined up and/or was spaced correctly. Layer 1 – A, Layer 2 – nn, Layer 3 – a. I then saved it and merged it in to my Sew What Pro. I added the mini designs, centered the whole thing and then saved it to my machine. I saved this in a 5×7 hoop space but will use my Fast Frames.

Now it’s time to pick out the right sized Fast Frame. This one measures 7″ x 8″.

I very loosely cut my sticky stabilizer (from Sewingmachine.com). You want to cut it bigger than your frame so that it’ll overlap the edges of your frame.

Peel the paper side off to reveal the sticky side.

 Stick it to the bottom side of your frame (see photo down below which illustrates a little better what the “bottom” is). Hint: Your frame should slope down from where you attach it.

Wrap the edges around the frame. Doesn’t have to be all neat and perfect.

I then “stick” the backpack flap to the sticky paper on my fast frame. I usually line the top of the flap up with the top of the frame and then pin it in place with straight pins. This also shows me my borders. Since multi needle machines don’t technically recognize fast frames, you have to check the outer border of your design to make sure the needle won’t hit the edges of your frame.

Here is how your fast frame should attach to the frame ~ it slopes down. That’s how you know what the bottom of your fast frame is to attach the sticky paper (believe me, I have stuck it on there upside down and backwards).

 Blah blah blah sew the design AFTER testing your borders and here’s the outcome! I use FILL STITCH instead of satin stitch. Since this is a backpack I wouldn’t want the satin stitch to get snagged or pulled.

 I peel the sticky stabilizer/fast frame off the flap and as you can see it leaves a little inside the letters. You can peel that away easily. Get under it w/ scissors if need be. The sewingmachine.com sticky stabilizer is just sticky enough and comes off great!

I then peel the sticky paper off my frame. As you can see it comes off very easily with no residue left on the frame.

Here is my finished backpack!

Again, stay tuned for my next post on another Monogram Wizard Plus trick.

Followup to my last post on MWP ~ here is a link to the Facebook Page – click HERE. As far as the Yahoo Group I mentioned… I am not a member of it. I just heard about it on the Facebook page. Evidently it’s a private closed group and they are currently not accepting new members! Check out the Facebook page! So far I’ve seen a few great tips on there!

We are celebrating 3 years of Applique Cafe, so all designs are 1/2 off through next Wednesday, August 15th!


Feeling Crafty!

I recently “ran out” of my blog hosting services from when I switched over to WordPress (from my old Blogger blog). Meaning I paid a big fee to have it converted over which included a year or so of hosting. I am now paying monthly, and I HAVE GOT to start posting more to justify that money. With that being said, I vow to do better! School starts in a couple of weeks and this year I will have 4 mornings free (a few hours each morning) with the 5th morning having only 1 child at home, so I *think* I will have more free time (ha ha we know how that goes).

Last week was our last family vacation of the summer. We spent the week in Perdido, FL and for the most part spent some fun time with the whole Gulledge family (Jeff’s parents, sister and bro and their spouses and the kids’ cousins). It was so much fun! When I say “for the most part” I mean that we got a couple of days w/ Jeff’s bro and his new wife and several days with Jeff’s parents. We stayed the whole week. Here’s a pic of the kids on our last night. Mallory has on one of my favorite Applique Cafe designs ~ Loopy Flower. Garrison is about to start Kindergarten while Mallory will do Pre-K 4 and Browder is going in to 3rd grade (sob sob where did my babies go?)

 Here is what I have been doing the past couple of days. Wednesday afternoon I met my mom half way and she took all 3 kids for a few days so that Jeff & I could have a “break” (which translates to me monogramming for 2 days). Yesterday I was super lonely. Today Jeff & I met for lunch and then I ran several much-needed errands, which was nice to be able to do ALONE! Not to mention I treated myself to my last pedi of the summer. Anyway, these are super duper cute backpack laundry bags brought to me (graduation gifts) to monogram. My customer found these at Marshalls (try TJ Maxx?) and I think they were like $8.99/each. I know Bed Bath and Beyond sells them too but maybe only in black?

Drawstring at the top. I took these photos quickly before she came to pick them up yesterday so sorry they aren’t great.

Backpack ~ great for toting to the car to head home from college to wash all those clothes. I didn’t measure these but they were nice and big!

 I also monogrammed this long sleeve polo for my customer’s daughter. I have seen these a lot as bridesmaids gifts ~ the girls wear them on the day of the wedding (button down shirt is usually a plus). I have done several of these for the same customer for her daughters and I think they are cute! On a couple of them I monogrammed a very small block straight-across monogram on the top of the pocket (like a man would wear), but on this one she wanted the full circle swirly monogram (I used Monogram Wizard Plus “Master Circle” which is my favorite monogram font). Just an idea!

 Last night and today I have been monogramming 14 towels for my new sister in law. All the same font and 2 different colors so pretty easy, but time consuming! Luckily these are “set it and forget it” type items so I was able to multitask while they sewed.

This is Monogram Wizard Plus “Victor” font.

 I did have some trouble and I was so anxious to share this because I’ve seen this complaint a lot on one of the Facebook groups. You may have had this happen before? I did “FILL STITCH” on the towels and had trouble with some looping. After changing needles (literally replacing the needle), switching the thread to a different needle (on my 6 needle), cleaning my bobbin case AFTER changing my bobbin out and then doing a different color towel using different thread and having NO looping, I determined it was the spool of thread! I did a tension test and everything while trying to determine my problem.

 This is a 5000M spool of thread (a brand I use ALL THE TIME). I noticed that as it was coming off the spool it was twisting some, so I honestly think it was the thread. Today I went to a local quilt store and found an Isacord 1000M spool in the same color and finished the towels without a single loop. So….. if you have problems with looping, it MAY be your tension or any of the other issues I ruled out, OR, it may be the thread. Maybe it wasn’t wound on the spool correctly? I don’t know, but I’m going to try it again with regular appliques or satin stitch and see if it just doesn’t like fill stitch monograms.

 Now on to my crafty segment! I have been on Pinterest forever. I’ve tried a few recipes and spend hours upon hours each week just checking who’s pinned what without every DOING anything. We are going to Birmingham tomorrow (Jeff & I) to shop a little and have lunch with Jeff’s bro and his new bride (whom I monogrammed all the towels for). Several months ago I pinned a Christmas ornament made with a wedding invitation. SO… I stuck their wedding invite in my drawer and finally today made the trip to Hobby Lobby to get my supplies. I got 2 different size ornaments because I wasn’t sure which size I needed. After trying the bigger one, I went with the smaller one and everything fit great! I’ll keep the bigger one for some other project. With sale prices and coupons I spent less than $7. These look glass but feel more like acrylic. Also, I bought them individually but they did sell them by the box as well and also in a few different shapes (great for vinyl).

First I used my el cheapo Fiskars paper cutter I got from Walmart and cut the invitation in to strips as best I could, trying not to cut off any of the lettering.

I then wrapped each strip around my (Applique Cafe) pen, making it curl.

 I then just put each curled strip in to the ornament (the top pops off). I tried to place the strips with their name, etc where they would show. I put the top back on, attached the heart charm (the Pinterest photo used a sea shell) and then tied my ribbon on. I used 1/8″ navy organza ribbon for the hanger and 5/8″ navy organza ribbon for the bow. Their wedding color was navy, hence the navy ribbon. In the Pinterest photo she used white and cream ribbon. I honestly couldn’t remember while at Hobby Lobby whether the invitation was more white or cream, and then remembered NAVY was their color so I went with navy! Anyway, I thought this was a cute little personal gift and I hope they like it! Finally, all those hours on Pinterest paid off!

 As a follow up to my Mini Embroidery Design post, I have another technique to measuring your polo type shirts for mini or other designs. A blog reader emailed me her trick ~ she said she measures from the top seam of the arm down to the armpit seam. On my shirt it was a little over 6″. I then stuck a pin where the middle was and then measured from the button placket to there.

A pretty even 6″ so my initials or mini design would go where my pin is! This is a great “rule of thumb” for measuring and much more scientific than my post! Thanks for the tip!

I apologize for this post being all over the place! I guess a random post is better than no post! Have a great weekend!