Well, I said I was going to do a post on monogramming hats with fast frames (as opposed to a cap frame). I have 1 photo of a hat I did recently and I also have a real {cute} hat to monogram. I plan to post photos of the process, but visors came first today. I do monogramming for a local store and on tap for today were several logos on shirts & visors. I tried and tried and even asked on Facebook how to monogram a visor WITHOUT the cap frame, but I could.not.figure.it.out. I think it has to do with the size of the monogram (or logo in my case) and how flimsy the visor is. So…. I dug out my cap frame after not having used the thing in at least 2 years. I was dreading it and cursing along the way, but it ended up not being as hard as I thought! Lucky for you I took a gazillion cell phone pics along the way….
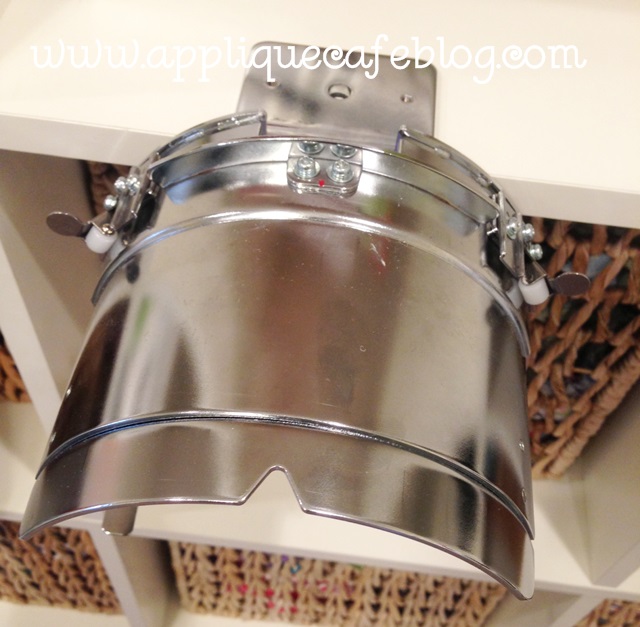
The cap frame consists of 3 parts and the sewing field is typically 2.5″ X 5″ if you get the cap hooped perfectly. The part below is the CAP HOOP HOLDER FRAME. I got my cap frame from Sewingmachine.com, which has a GREAT video on how to use your cap frame. I watched the video to refresh myself on the process, and I remembered from my training with Steve that you hoop visors upside down. WATCH the VIDEO!! I will explain the upside down thing more later. The holder frame attaches to a table or any surface ~ I attached mine to my Ikea Expedit shelf.
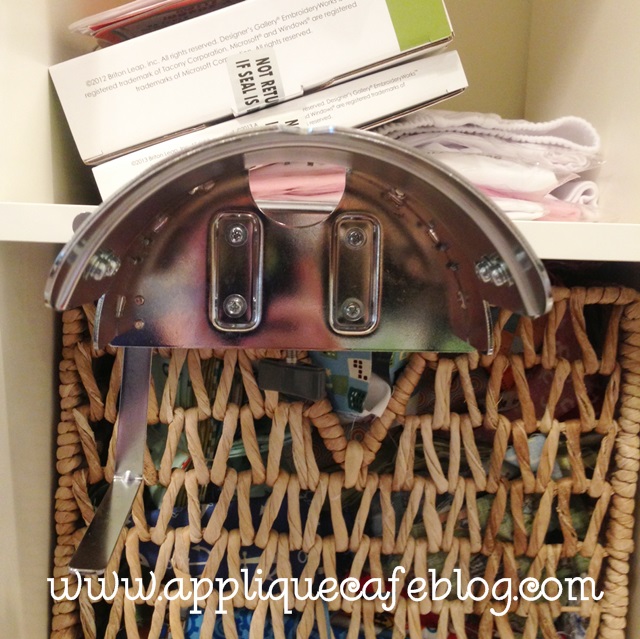
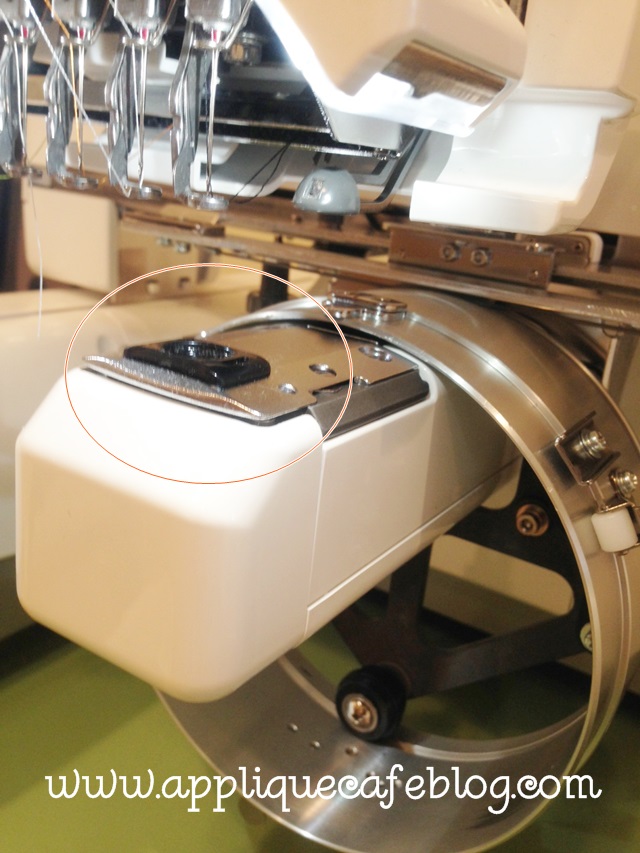
This is the mechanism that helps you get the cap or visor hooped.
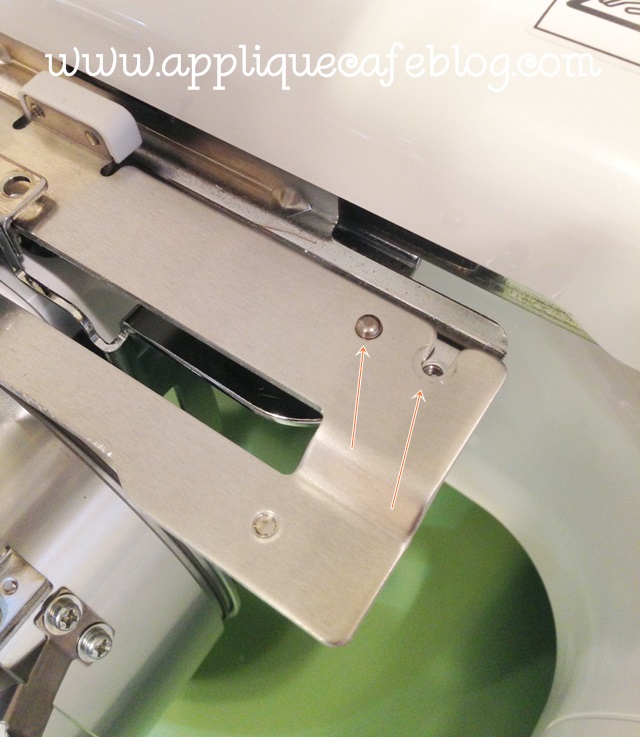
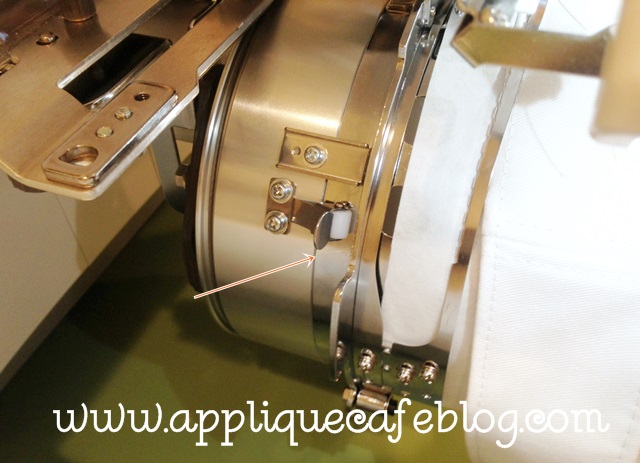
Here is a photo of the actual CAP FRAME or CAP HOOP clamped on the holder. As you can see, there is a piece hanging down which is what secures or clamps on to the visor or hat. This part is hard to explain! Hopefully the photos will help, and again, WATCH THE VIDEO!
There is also a DRIVER which fits on to your machine. You take the arm of the machine off by loosening the small screws and removing them and the arm. You then put the driver on which fits around the bobbin case area of the machine.
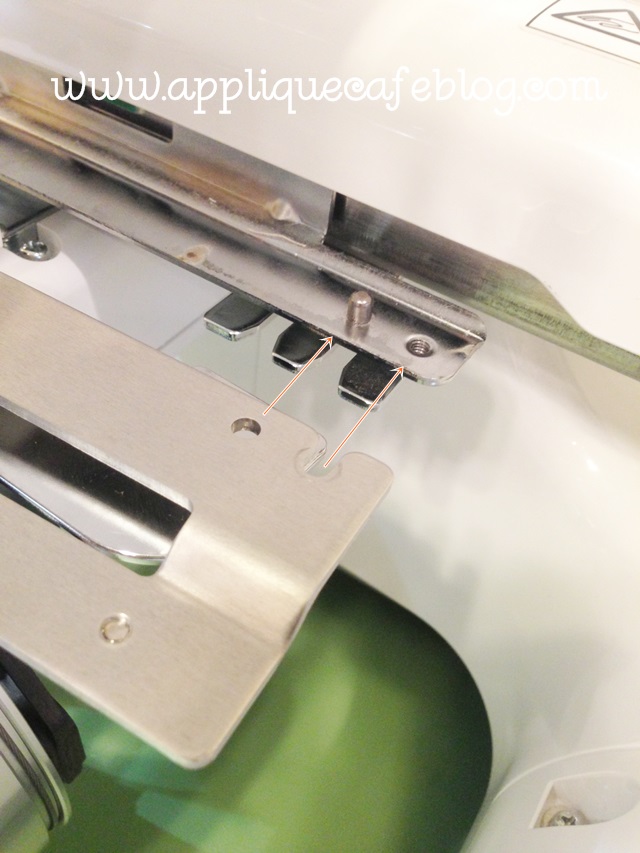
This is what the driver looks like when it’s attached. Screws are tightened. There are 2 small screws on top and 2 bigger ones on bottom.
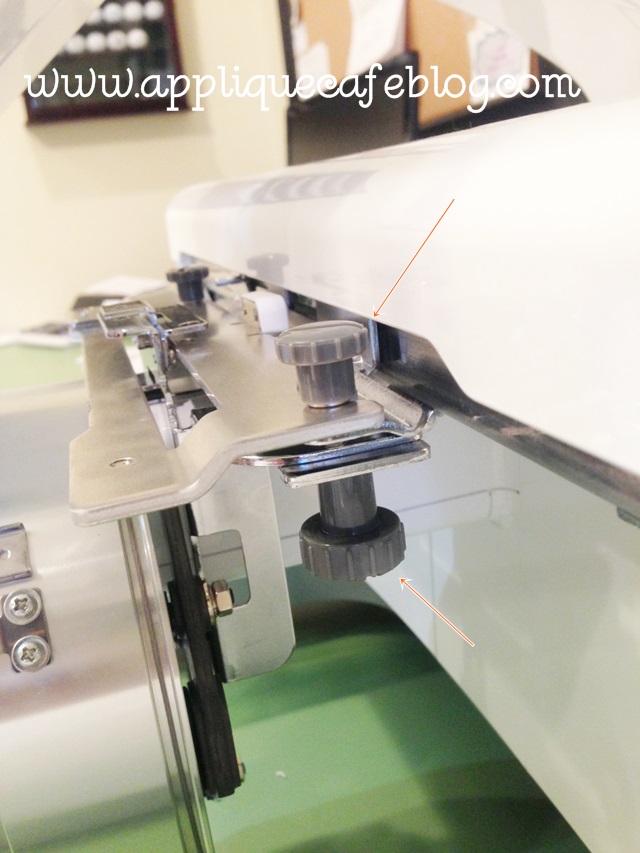
This is what it looks like from underneath. I know this is a bit confusing and hopefully you may know how to install the cap frame already. This is the bigger screw tightened on the bottom, and there are 2 of these.
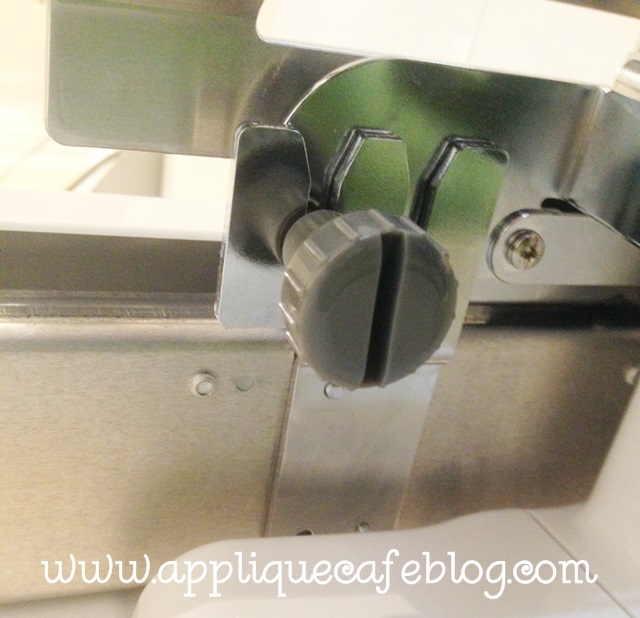
Your machine came with a handy dandy tool box, and you must insert this RISER. Since the cap or visor is curved, this helps the cap or visor glide back and forth as it is monogramming. The photo below also shows you how the drive fits on to the machine.
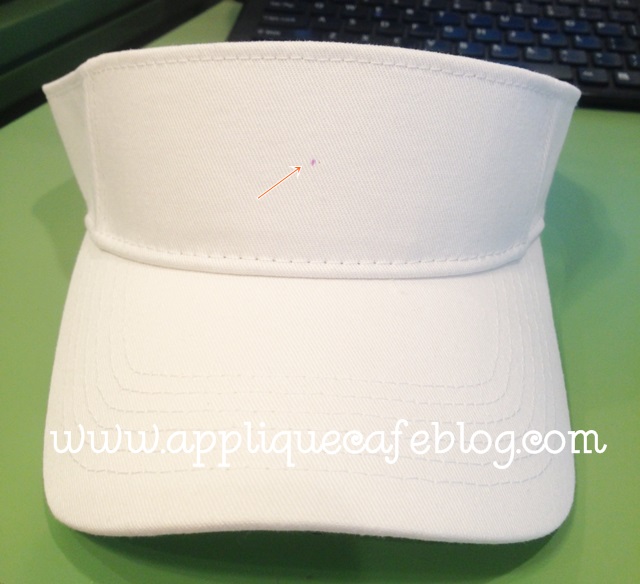
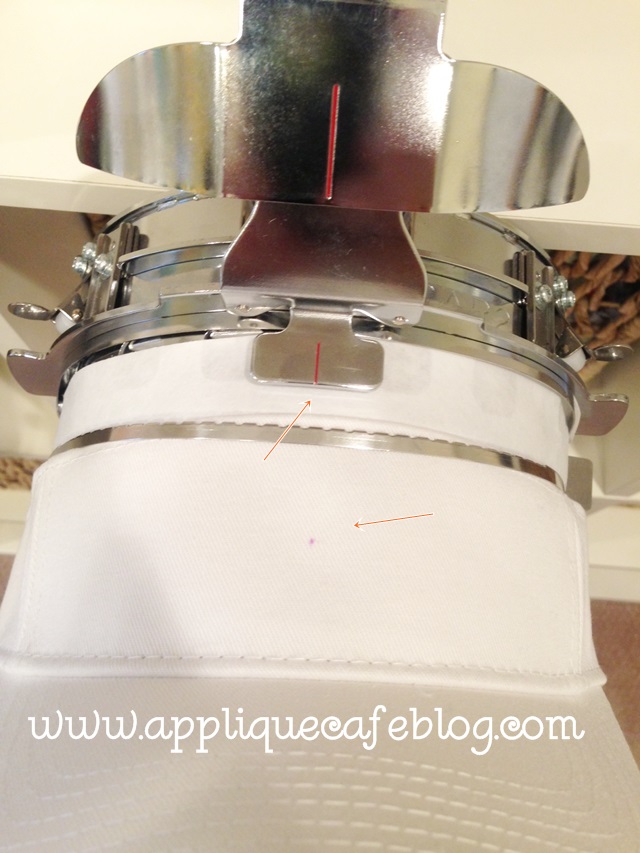
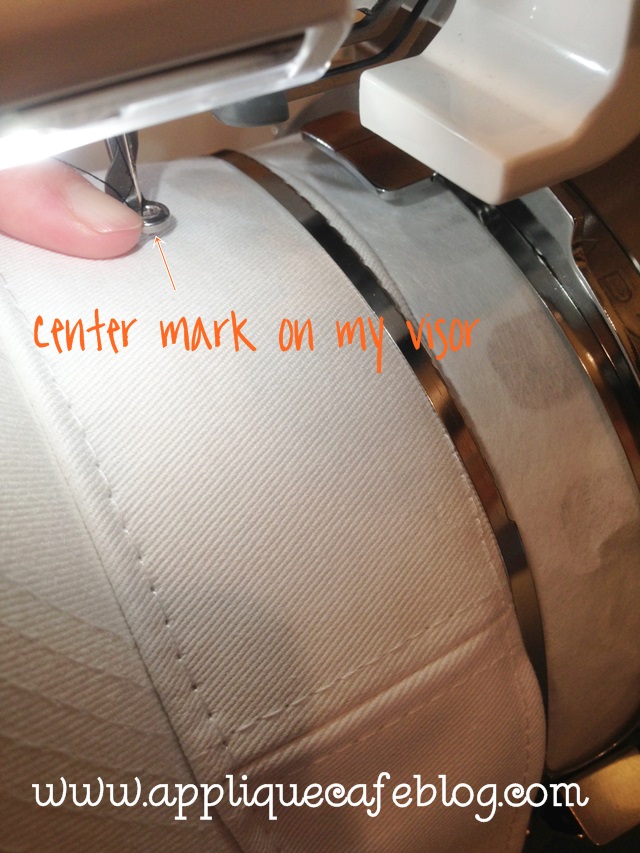
Now it’s time to get my visor ready. I’ve marked the center and am ready to get the visor hooped.
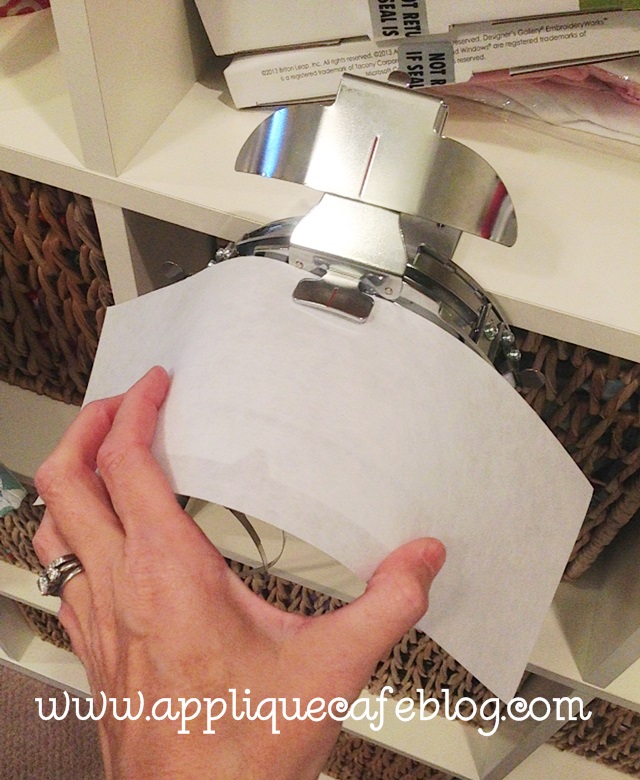
I use cap backing stabilizer and lay it across the hoop {which is on the holder}.
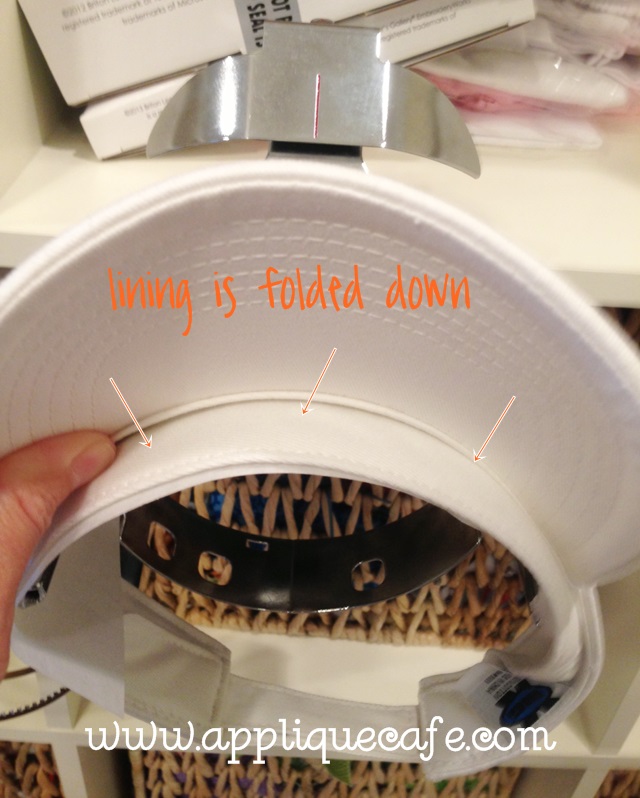
Most visors have a little bit of lining ~ fold that down.
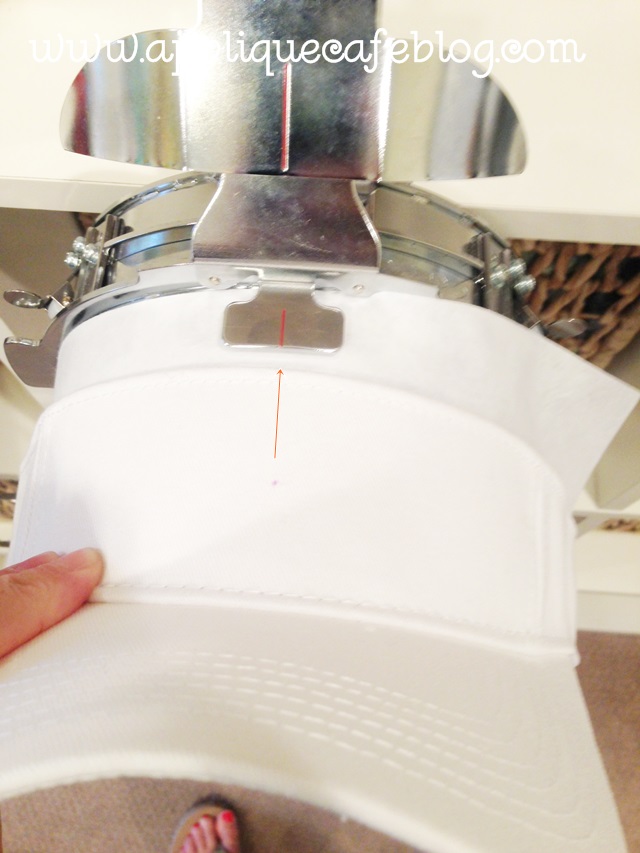
Try to line up the center mark on the visor with the center line on the cap hoop/holder.
The huge silver piece you see below usually clamps down on the bill of a hat. We are doing a visor, so we hoop upside down and nothing goes inside that clamp. Pull the clamp over that was hanging down in a previous photo, and what you want to do is barely grip the top of the visor to keep it in place. There are teeth on the clamp that hangs down, so they will easily grab and secure the top of the visor. You want to clamp down as close to the edge as possible. If you don’t, you lose some of your sewing area.
You are now ready to put the hooped visor on the machine. As you can see below, the lining is out of the way.
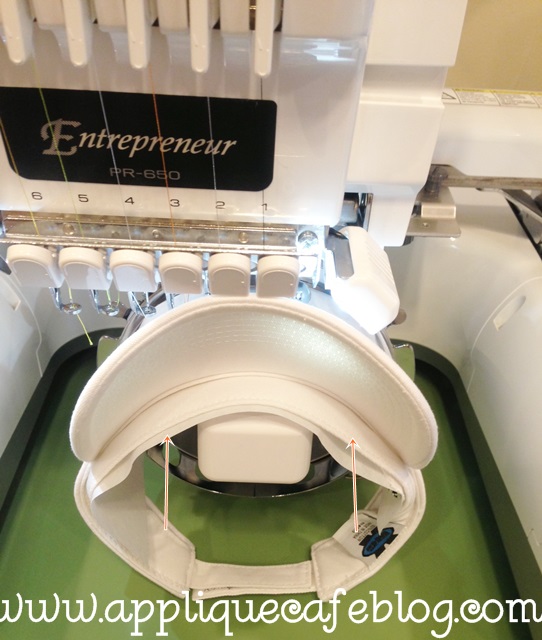
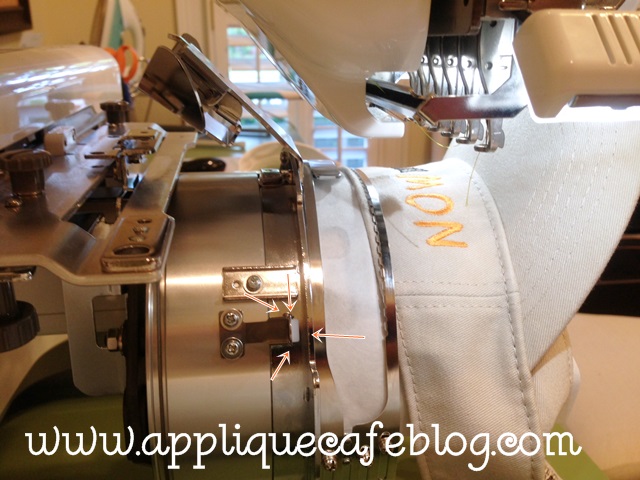
The hoop is locked in place and secure on both sides.
With the CAP FRAME on the machine, your machine knows it’s on there {as opposed to the regular machine arm and standard hoops}. As you can see on the screen, it shows an image of the cap frame and it shows an upside down cap/hat. The logo is also automatically turned upside down so that it will stitch correctly on the cap. We, however, are doing a visor! That visor is hooped the opposite way so you have to rotate the logo or design to stitch normally and not upside down.
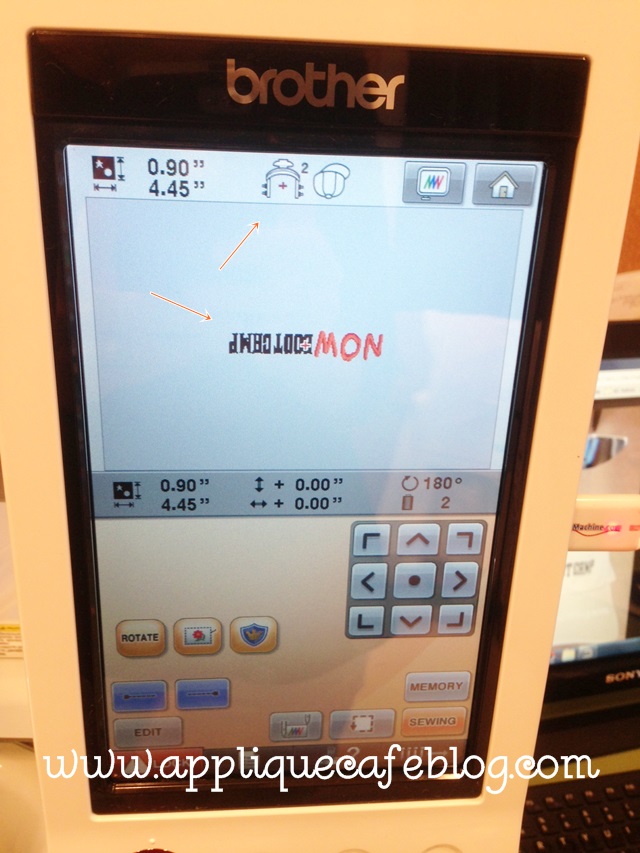
Double check to make sure it is right side up! Mine flipped upside down again in editing so make sure it’s rotated the right way.
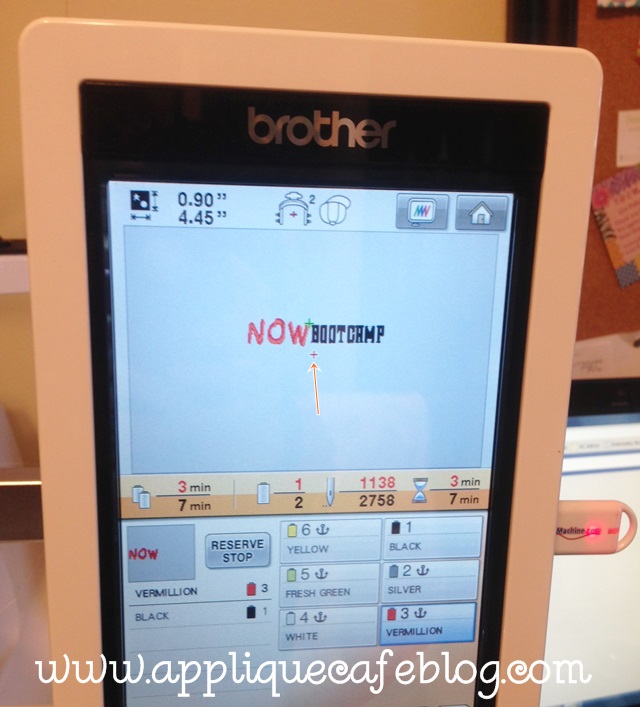
I’ve assigned my colors and am ready to line up my needle and sew. I line up the lead needle and make sure it is lined up with the center mark on my visor. That way the logo will be centered on the visor.
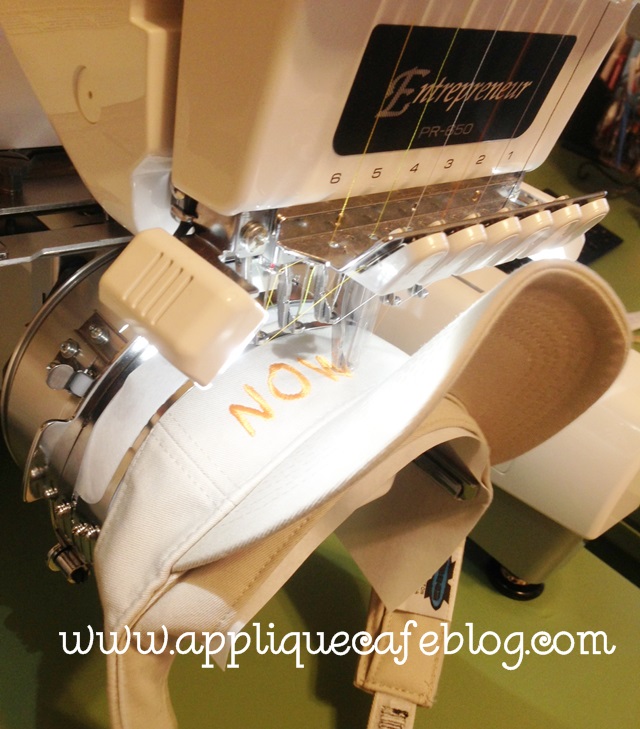
The visor is now stitching, and you can see below how everything looks.
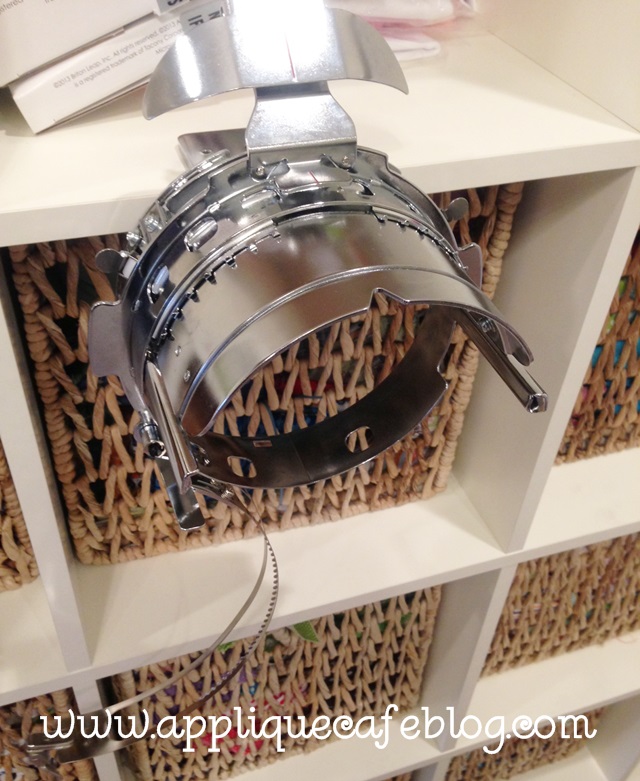
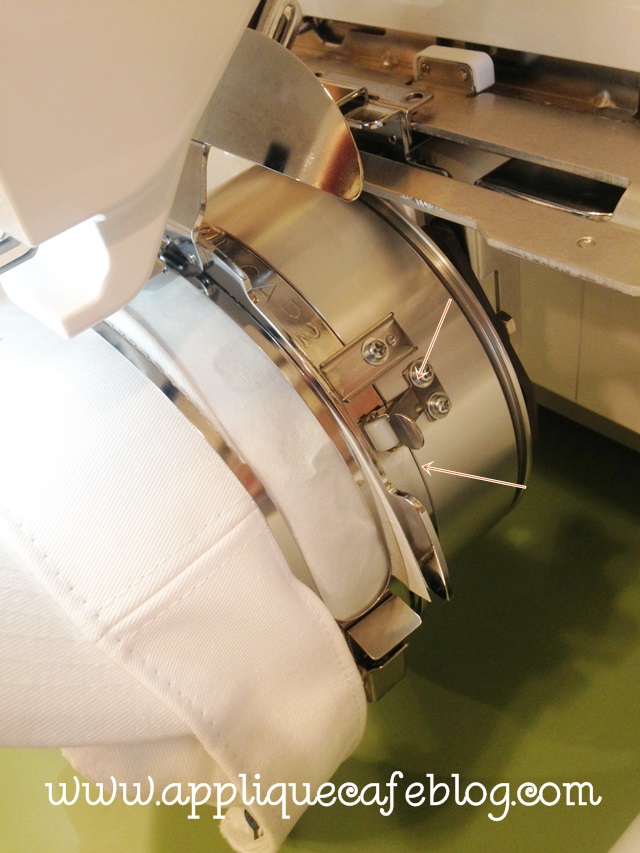
Here is another photo of how the cap hoop/frame is locked in place (on both sides).
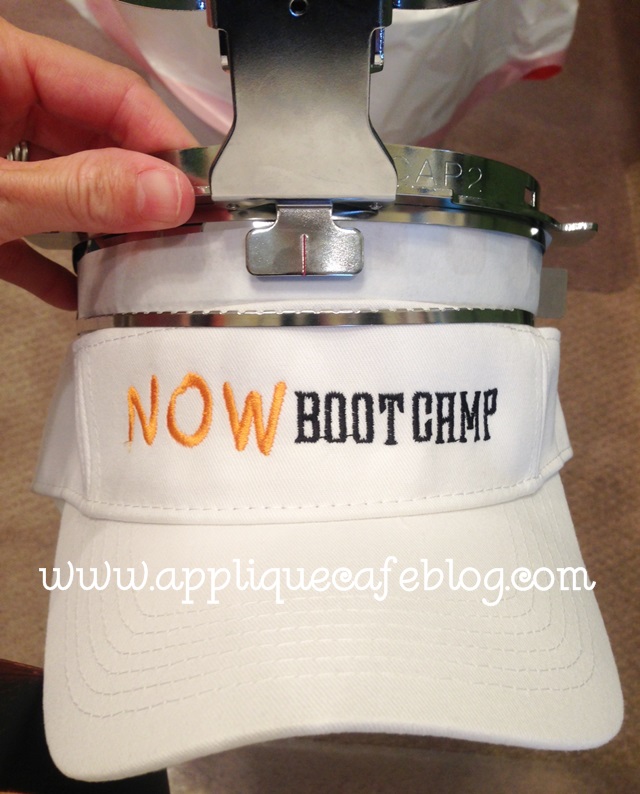
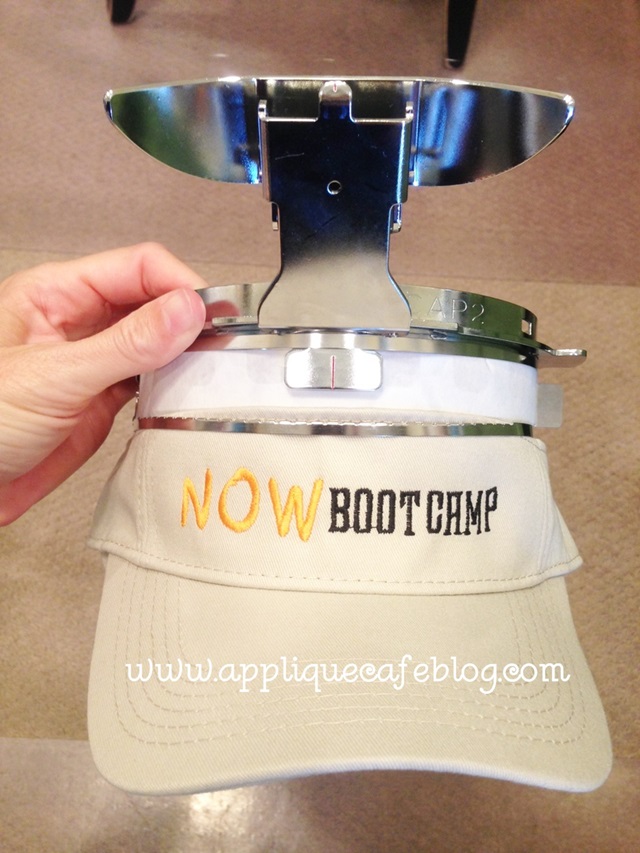
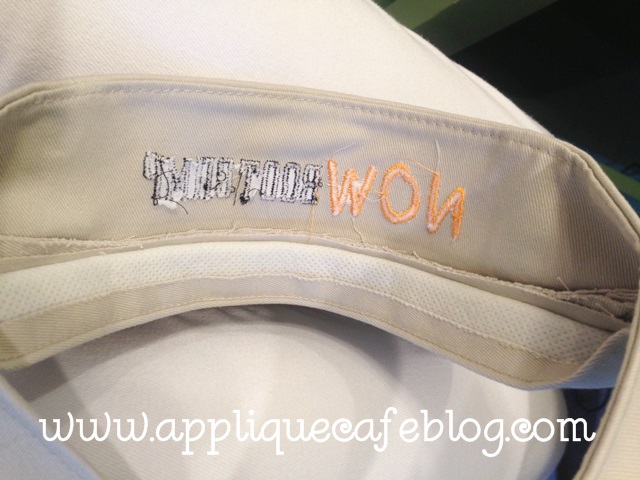
Here are 2 photos of the visors after I’m finished. I did a white and khaki one, both with the same logo. I trimmed the jump stitches in between the letters.
I’ve taken the visor off the frame and will pull away the cap stabilizer which is tearaway and comes in strips.
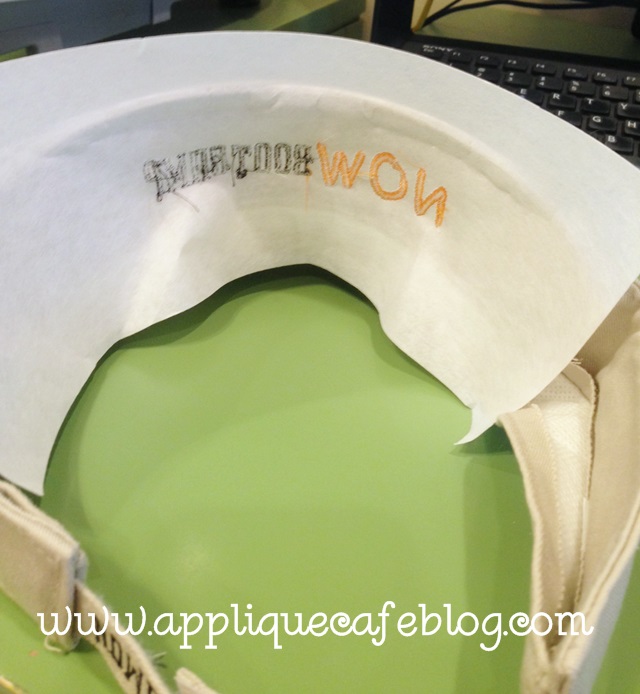
I usually pull away all of the stabilizer inside the letters.
Flip the lining back up and your visor is ready!
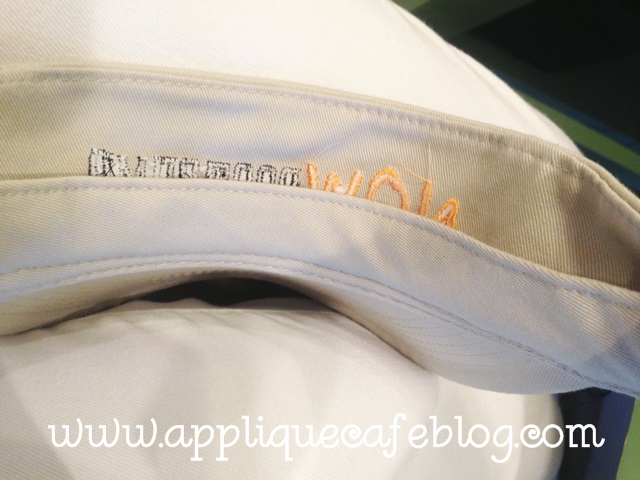
Here are the finished products!

Are you either thoroughly confused, or scared to death?? It’s really easier than it seems, and I highly recommend the video! I have not used my cap frame in like 2 years, but it only took me 15 minutes or so to get it all set up and the visors embroidered.
I will work on my blog post ASAP on monogramming a regular hat or cap using FAST FRAMES! Stay tuned!!
Recent Comments