Happy Thursday! It has been a busy week with customer orders and getting ready for my class Saturday morning at Beth’s Heirloom Sewing! It’s going to be a small class of 15 which I am excited about and I HOPE I do a good job! The class filled up quickly so I’ll be doing another NEXT Saturday as well.
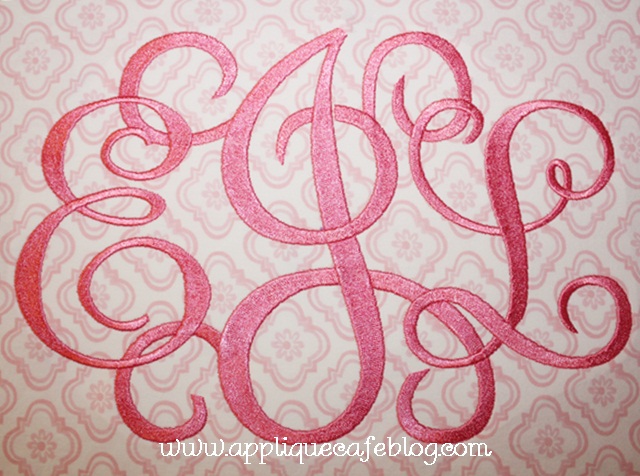
Here are a few things I’ve been up to this week. First, a friend brought me a couple of cute Pottery Barn Kids pillowcases to monogram for her daughter’s room. She had “pinned” a font she liked on Pinterest so I was able to do something similar with Monogram Wizard Plus’ PENDANT font + Sydney “E”. I didn’t like the wings on the Pendant E (it was too much) so I merged in the Sydney E. I did the 3 letter monogram in layers in my MWP software. Layer 1 – I, Layer 2 – E, Layer 3 – L. After the fact, someone pointed out that if you use lower case letters in Pendant, they don’t have all the wings. Next time! I just got the font so this was my first time using it. This monogram was big ~ 5.96″ tall X 8.88″ wide, so it was 33,980 stitches and machine time said 59 minutes. I did fill stitch since the monogram was so big and on a pillowcase. It really didn’t seem like it took that long and it turned out very pretty!!
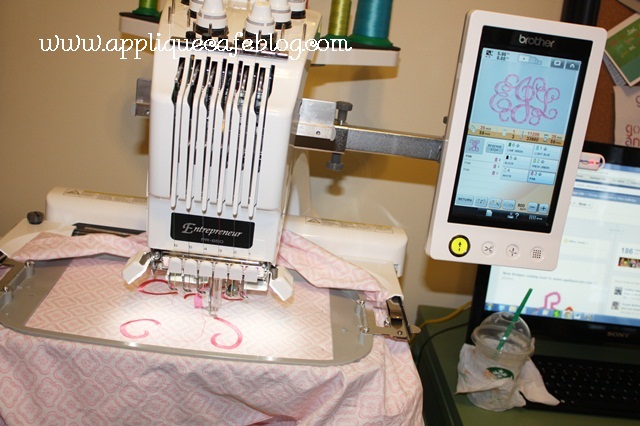
I used 2 layers of medium cutaway and my biggest 8×11 hoop.
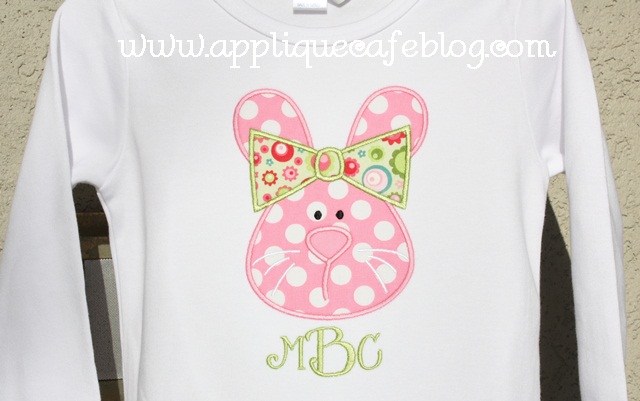
Here are a few shirts I did for a relative of a friends soon to be sister in law. Got that?. This is our Girl Bunny design with Michael Miller Candy Ta Dot and Riley Blake My Mind’s Eye Quite Contrary in green. The font is Monogram Wizard Plus Specs.
This is our Mermaid design with the name in MWP Curly Q. I think the dot fabric is Riley Blake?

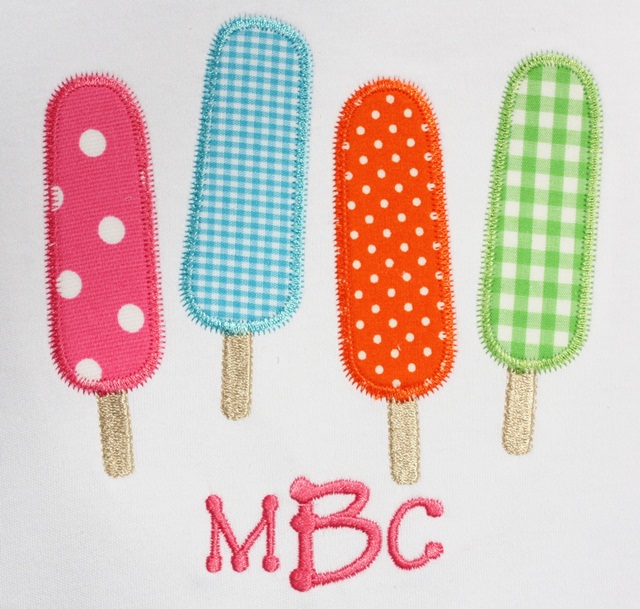
Lastly, our Zig Zag Popsicles which I LOVE! I used MWP Kim Single font.

I love all of these colors together for SUMMER!
OK…. I have seen a post or two on Facebook about maintenance with 6 needle machines. Let me start by saying I am not a Brother expert or a certified service person, nor do I play one on TV. I thought I would pass along a few things that I learned when I bought my machine from Steve at Sewingmachine.com. They ARE a certified service center for Brother so I feel like his tips are noteworthy. I’m sure all dealers are different! You can find lots of great videos on their website under VIDEOS!
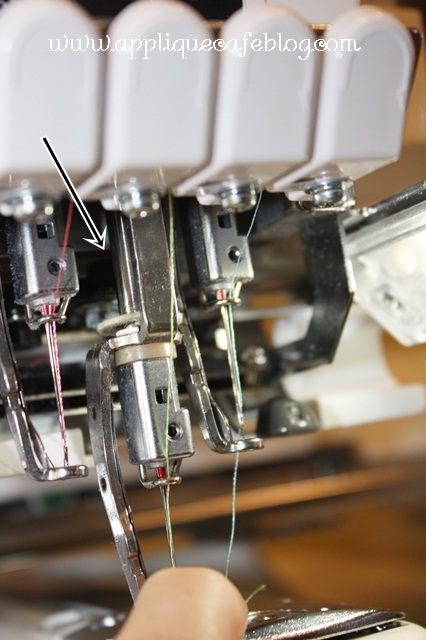
First of all, when I got the machine Steve showed me how to oil the needle shaft. I put a drop of oil from my oil pen on the needle shafts (all 6 of them) once every couple of weeks (when I realize I haven’t done it in a while!!). You just pull the needle down, put a drop of oil and then pull the needle up and down another time or two so that the oil disperses on the shaft. You have to go through and select the different needles. For instance, if needle 1 is selected, then it will pull down and also needle 2 will pull down, but needles 3-6 will be locked. So, you have to then switch to needle 3 and oil 3 and 4. Then switch to 5 and do 5 and 6. I saw a picture on Facebook this week of someone who had removed the whole front panel of the machine to expose all the needle “workings”. Not sure if she was doing that to oil the shafts but I learned to just oil them the way I just explained.
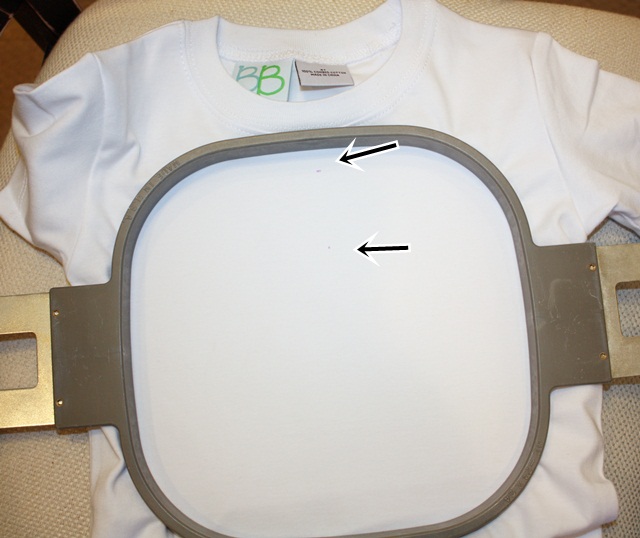
Every now & then you should really remove the throat (bobbin) plate and give it a good cleaning. Just unscrew the 2 screws with the tool that was included in your tool kit. When you take the plate off you might see all kind of lint and tiny thread pieces. I do this usually when I change out all my needles and “clean” my machine. Again, I change my needles every few weeks or so usually when I realize I have not changed them in a while, and also if I’ve done a lot of embroidery with sticky paper I change them out. I use Schmetz Embroidery Needles ~ 75/11.
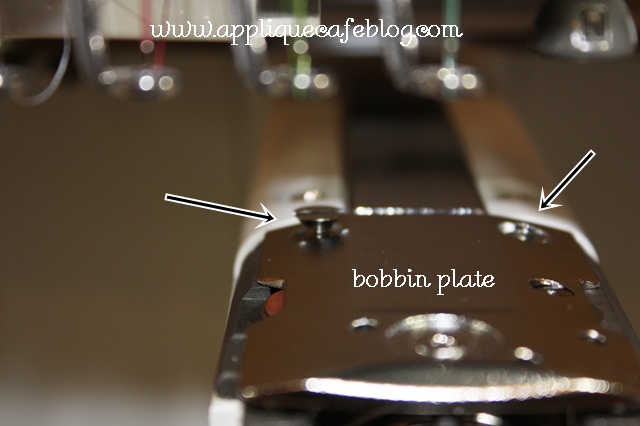
Mine has a little bit of lint and dust, but is pretty clean because I cleaned everything a week or two ago. It was FULL of tiny pieces of thread!
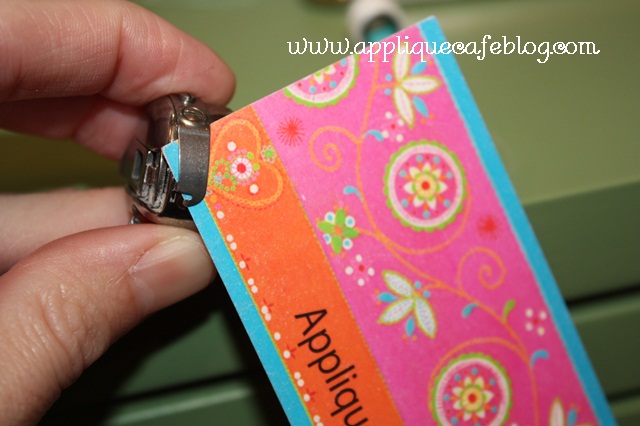
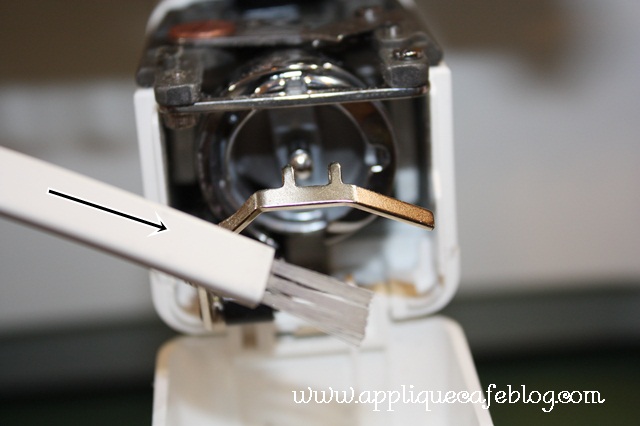
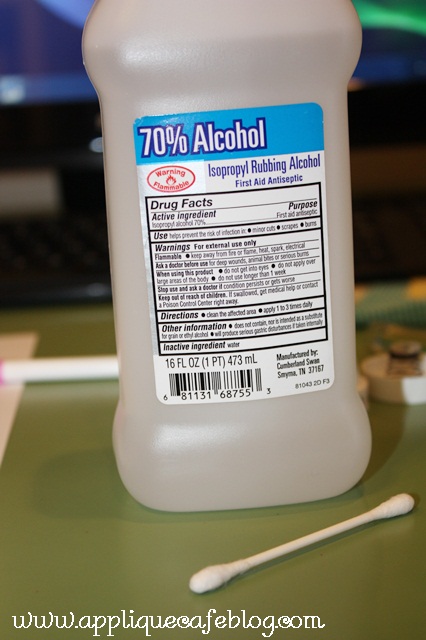
Your bobbin case can get dusty and gunky too. Fuzz can get caught under the clip which can cause your machine to stop or not sew right. Steve said to take a business card and slide it under the clip to remove any lint or dust. You can also clean it with alcohol (rubbing, not the drinking kind) and a Qtip.
Your machine tool kit most likely came with this handy little brush. I use it in the bobbin case (and all over) to dust the machine. Again, it is AMAZING how much dust and lent can accumulate as you can see in my photos!
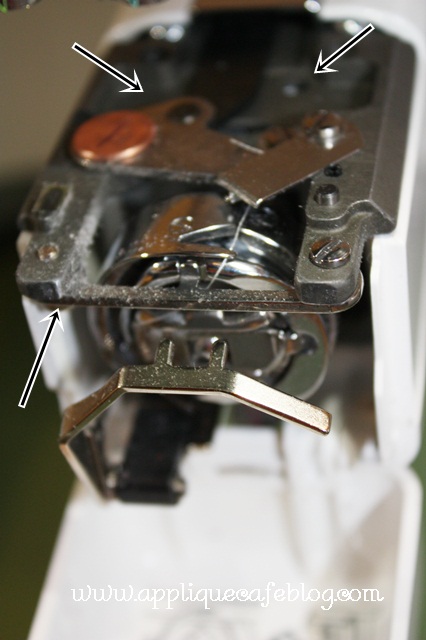
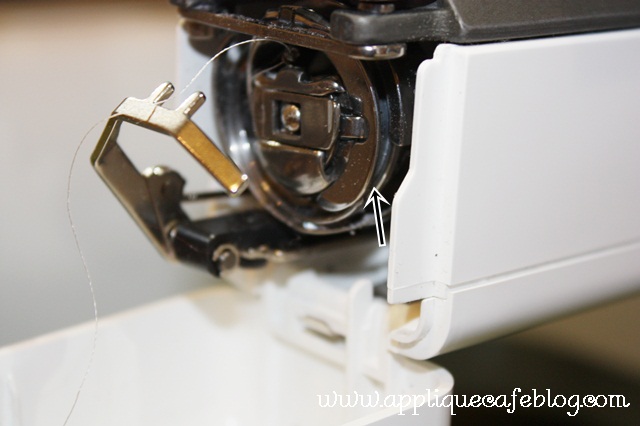
Your machine will also tell you to “please put a drop of oil on the hook once a day” when you turn it on each time. I turn the knob on the back of the machine until I can see V in the the hook, then put a drop of oil with my oil pen. I then turn the knob back and forth so that the oil disperses on the hook. I also clean the bobbin area with my brush, a Qtip and alcohol also, to get rid of any oil+lint buildup. You can see a video on how to do this properly HERE at sewingmachine.com!
You have probably all gotten the error message “check upper and bobbin” or something to that effect. Your machine stops and you get that message and wonder what is wrong! If your bobbin is full, then it’s probably lint under the clips OR the silver tension disk is “stuck” and not turning properly (see below). I also did a post on NEEDLE 4 you can read which is notorious for that error message! If you get the message, check your clips and try to remove any lint or dust. You can use a business card corner, move the thread back & forth or use the little brush above to clean it out. Just don’t force the clip b/c it’s part of the tension system and you don’t want to break it.
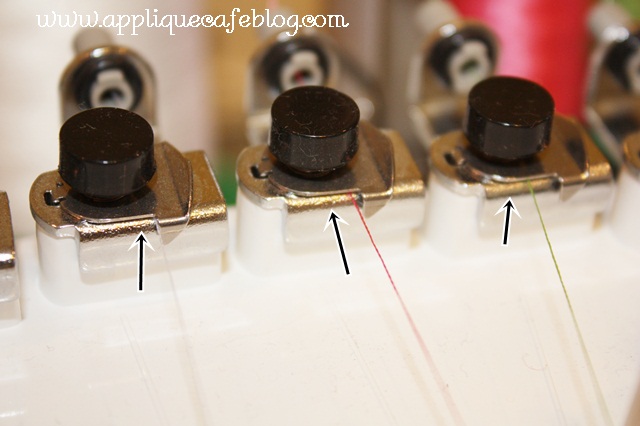
Your thread guides can also get wax buildup from your embroidery thread. Not sure if you can see the tiny “gunk” on the guides. You can clean it off with, again, a Qtip and rubbing alcohol.
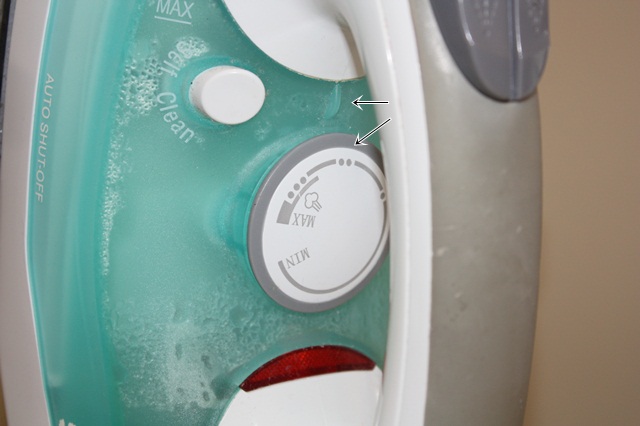
Sometimes when I get the “check your upper and bobbin” error message, I start my machine again and look to see if my silver tension disks are turning properly (the thread wraps around the silver tension disk). If they are jerky or not turning consistently, your machine WILL stop and give you the error message. You can easily take the tension knob off and clean everything. Just pay attention to what order everything is in. Here I unscrewed the top knob.
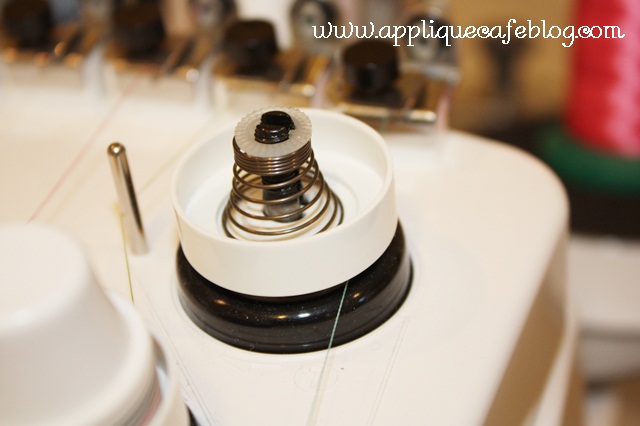
If you take the plastic white piece off along with the spring and the little plastic thing on top, you’ll see this felt pad, the silver tension disk and another felt pad underneath. Please excuse my non-technical terms!!
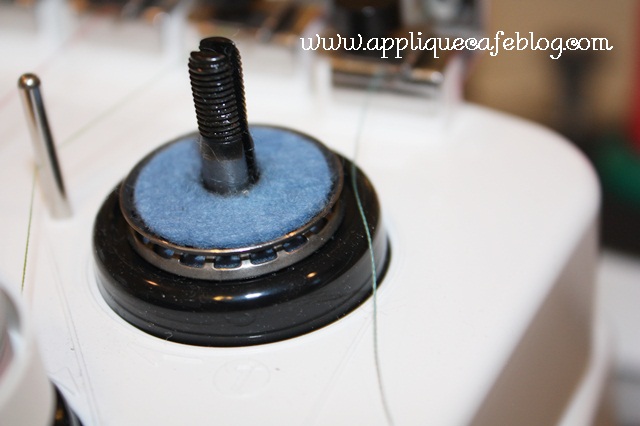
The felt pads can get dusty and pretty gross with lint (see arrow on photo below –> lint). I just use my fingers/fingernails to clean it all off. The silver tension disk can also get dusty and waxy in the grooves from the thread. AGAIN…. good ole Qtip and alcohol. I just go over everything with the alcohol Qtip on both sides of the disk. (these are my stabilizer notes for my weekend class!)

More lint to clean off.
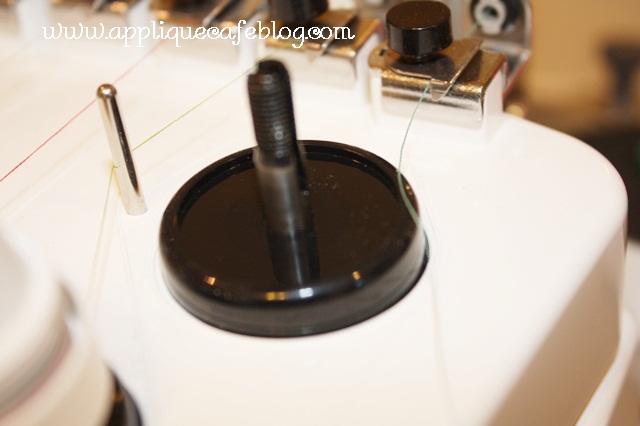
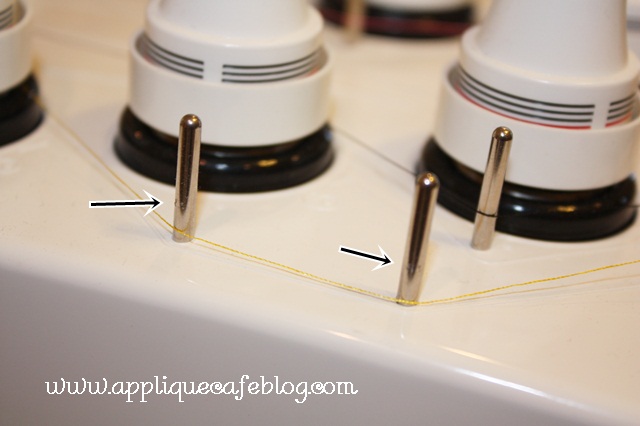
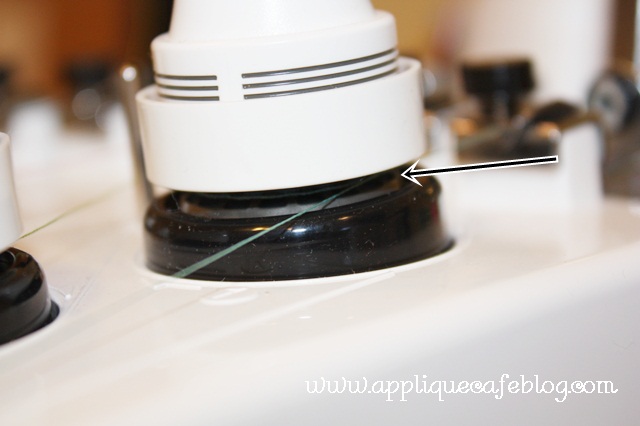
Once everything is clean, it’s time to put it all back together. Put the blue felt pad down, then your silver tension disk, MAGNET side down, then the other felt pad on top. You then put the white plastic piece/spring/plastic little piece on top back on and screw the white knob back on. You then wrap the thread around it as it is supposed to go.
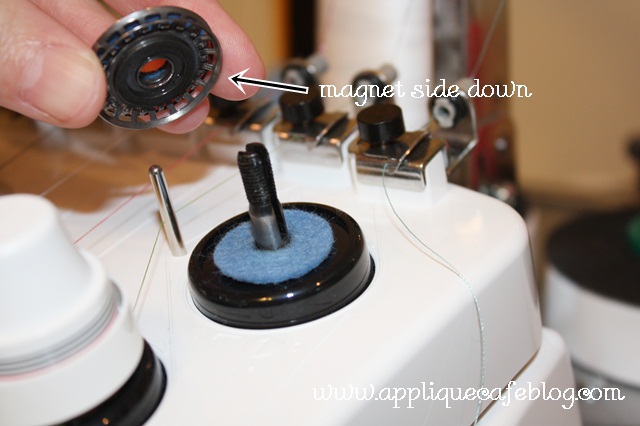
There is a red line on the tension knob that tells you approximately how far down the knob should be screwed on. Here is a better shot of the silver tension disk. If your machine is running and the disk is not turning properly, the machine will cut off and give you the error message! Gosh my photos show a lot of DUST!!
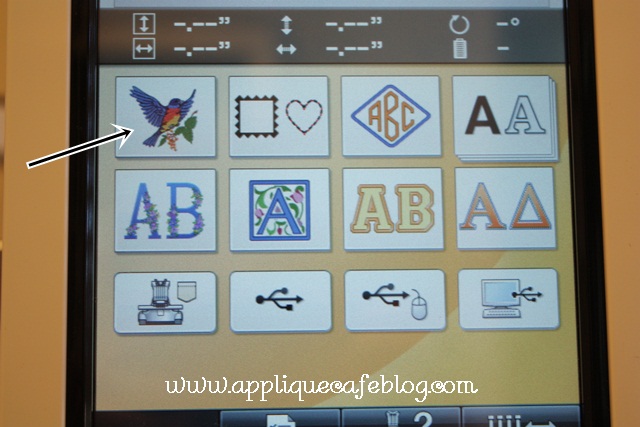
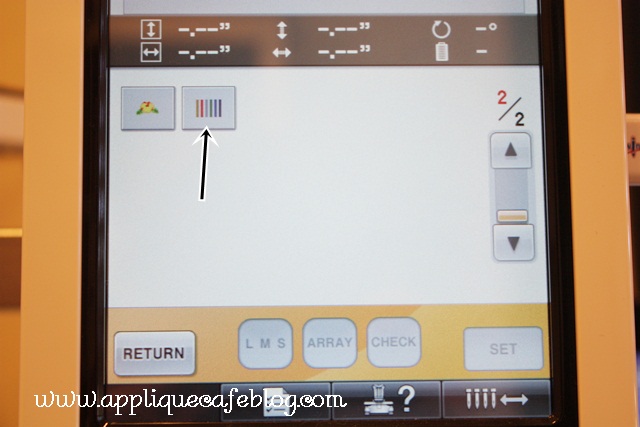
So you’ve put everything back together and your tension isn’t quite right. Luckily these machines come with a built in tension test! That is one great thing about multi needle machines. A lot of issues you might have you can solve yourself! If you have tension issues on a single needle, that usually results in a trip to the shop! If you keep your multi needle maintained and clean, a trip to the shop is only required for standard maintenance (every so many hours you should have your machine serviced). On your main screen, hit the button with the blue bird on it where your built in designs are stored!
Then go to Page 2 for your tension test.
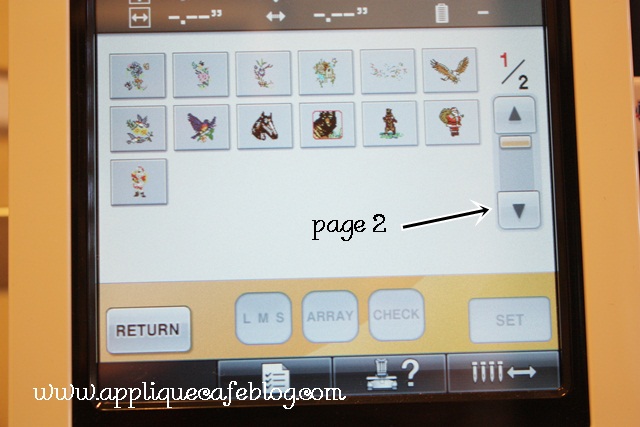
Click the button with 6 rows of thread.
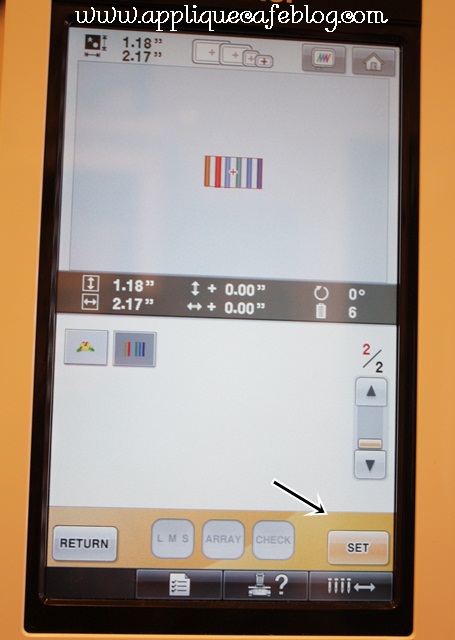
Press SET to get the tension test ready! I assign the colors on my machine to the tension test so that each needle is tested. I hoop a piece of stabilizer or two and do my test on it. If any adjustments need to be made, you do it yourself by adjusting the tension knobs (tighter or looser) and you can then do the tension test again. When you look on the back of your tension test, a good rule of thumb is 1/3, 1/3, 1/3 ~ you should see left 1/3 your colored thread, middle 1/3 white bobbin thread, and right 1/3 your colored thread. If you see too much bobbin thread, loosen your tension on that needle. If you see very little bobbin thread, tighten your tension on that needle. Steve describes this as a tug of war between bobbin and upper thread! He explains better how to do this in his video ~ HOW TO ADJUST YOUR TENSION ON THE PR/EMP SERIES 6 NEEDLE.
I hope that helps!! p.s. I use Fil-Tec Magnetic Core Bobbins (MagnaGlide-L-). I just ordered a new box today! 100 come in a box which lasts a looonnnnggg time.
Let me say it again, I am not a PR650 expert!! Your dealer may have taught you different or you may have other tricks and tips to share! However, I have found these tips to be helpful in maintaining my machine and solving those pesky little problems!


Recent Comments