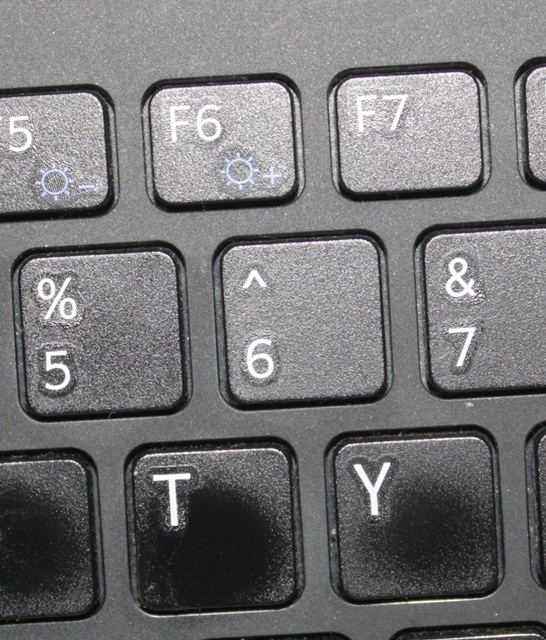
As promised, I have another trick I learned on the Monogram Wizard Plus Facebook Page. This is great in 2 instances that I can think of off the top of my head. 1) You’re doing a name in Monogram Wizard Plus and you or your customer wants each letter a different color thread. You can do one of a few things ~ if it’s a name with 5 letters or less, you can do it in layers in MWP. You could also manually stop your machine as it’s sewing in between each letter and change your thread color (if you are using a single needle machine). OR….. here is a neat trick! Between each letter, type in the “^” symbol, which is located on your 6 key. Another instance where this comes in handy is 2) You’re using “Specs” font (MWP) and if you have Specs, you know it is spaced all crazy so your name may or may not line up the way you want it too. I LOVE Specs and it’s great for monograms (3 letter monograms). Names are another story. Anyway, you can use this trick to rearrange the letters IF you have Sew What Pro or other editing software. First you will save it this way (there are more pictures below) and then you would bring it up in SWP to edit. 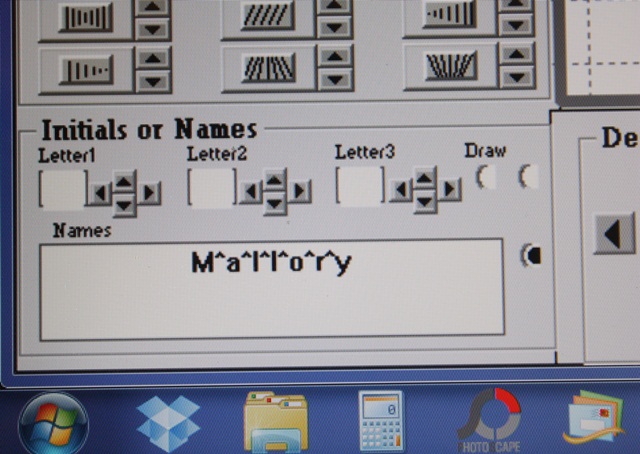
Here is the key!
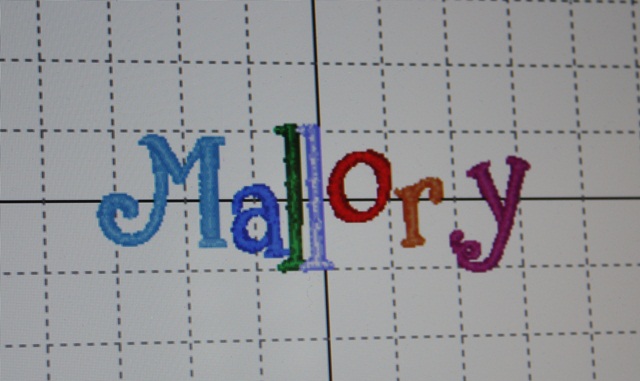
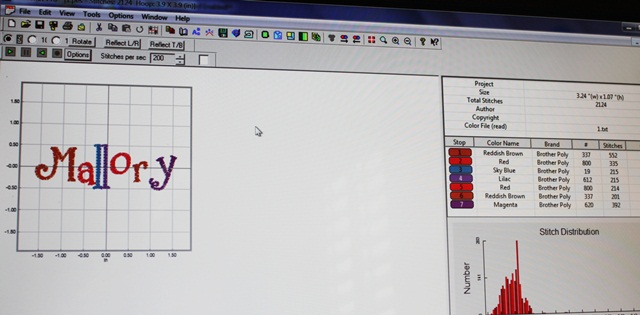
Here is my name with the ^’s in between each letter and this is Specs font. As you can see it’s all crazy! But, when you put the ^ in between each letter, it makes each letter a different thread color. Normally in MWP your name or initials are all the same color UNLESS you layer. So I’m going to save this on my computer in a folder where I can find it in a minute to edit in SWP.
Here it is in Sew What Pro. If you look at the thread chart on the right you can see all 7 letters are a different color and a different step. If you click on each thread color, you can then move the letter around. It’s a little tricky since when you select a letter it only shows you that letter to move, but I was able to line the letters all up on the middle line pretty easily. There may be another way to do this, but I’m not sure what it is. If you know, comment and let us all know!
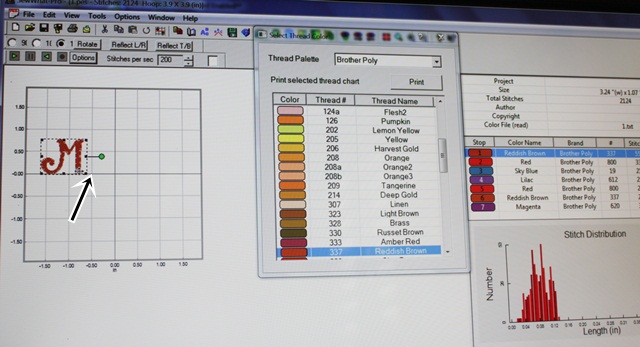
As you can see here I clicked on thread color 1 on the thread chart which shows me my “M”. If you click on the name on the left part of your screen, it will select the whole name, so you have to click on each thread color to select each letter. What I did was line up the M on the middle horizontal line on my grid. I then clicked on step 2, the “a”, and lined it up on the middle line next to the M, then 3, 4, 5 and so on until all the letters were sitting on the line. I did have to go back and adjust them a little to the left and right, but it didn’t take me long at all.
Here is the name after I’m done and I’ve clicked the “CENTER” button to center the name in my hoop. I will then save the name to my machine and it’s ready to sew. Again, since each letter is a different color it’ll stop in between each letter if you want to sew the name with different color threads. If you don’t, you can change each letter to the same thread color and JOIN THREADS to have the name sew all the same color. Or, you could just keep sewing after each stop using the same color thread. I did not take pictures of the joining threads part but will try to do so later. I didn’t want to get too confusing!
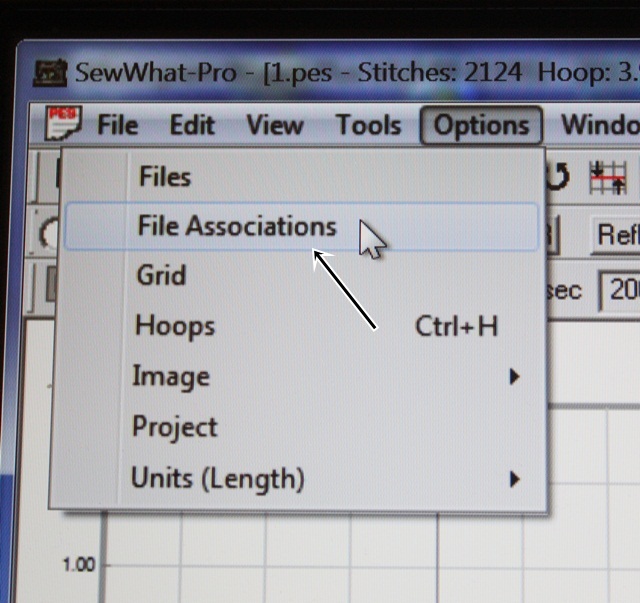
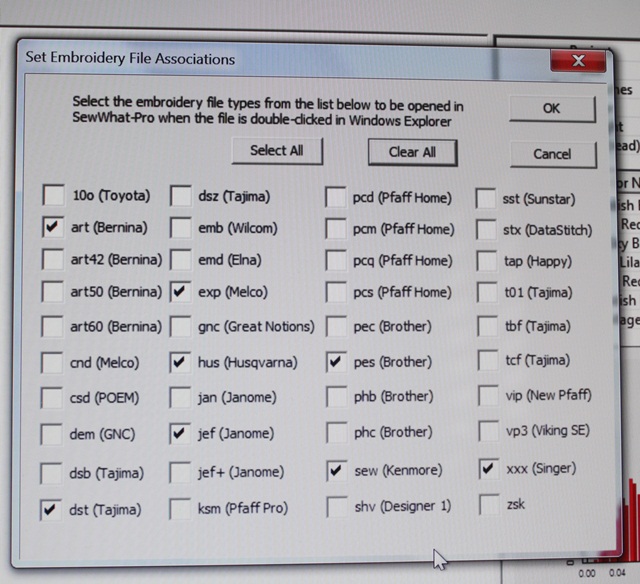
I also found a couple of neat features in Sew What Pro that I don’t really use but I thought I’d share. If you click Options, then File Associations, you can select all the different type of embroidery files you might open on your computer. That will allow you to double click on those embroidery files and Sew What Pro will automatically open them. Otherwise, your computer might ask you what to use to open the file.
I clicked most of the embroidery file types we offer, so now I can open any of those files in SWP automatically! I like to SEE what I’m working on, so I use SWP whether I am merging or editing or not. My machine uses PES and DST, but we often have to look at other file types so this is great! It’s also a great little cheat sheet as to what formats the different brands of machines use!
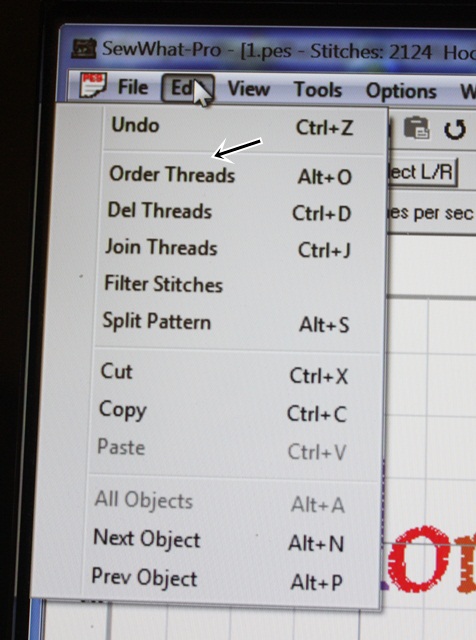
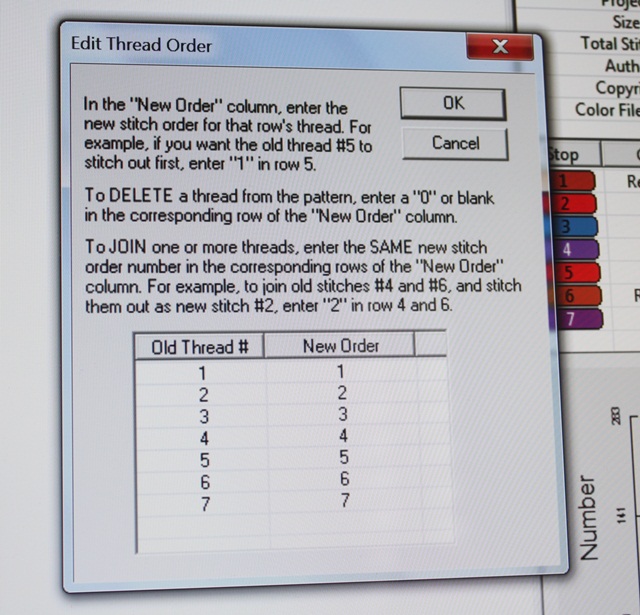
Another feature I have never used is Edit, Order Threads. (And you can see Join Threads down below that). You can switch around the order of whatever you are sewing with this feature. I would be careful in doing this, but it may be you have a design with a name and maybe you want to sew the name (underneath?) first and maybe the way you saved it it was at the end.
Again, I’ve never used this feature but it might come in handy one day! We like to order our designs in a logical order, but sometimes on single needle machines you can switch the steps around to make sewing it easier if you are using the same thread colors. Again, I’d be careful with this since most designs are ordered in a logical manner!
I get emails a lot asking “how do you do this?” in MWP and SWP. My suggestions is to open them up and just play around! When I started there was no Facebook Group (or Facebook for that matter) so I learned through the manuals and just experimenting and TRIAL AND ERROR! See Helpful Posts for more posts on MWP and SWP.
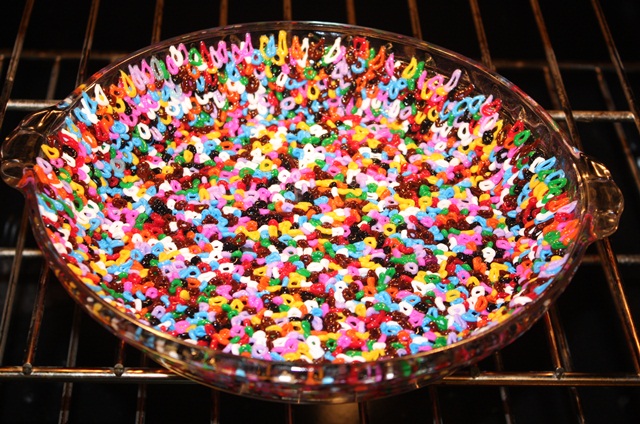
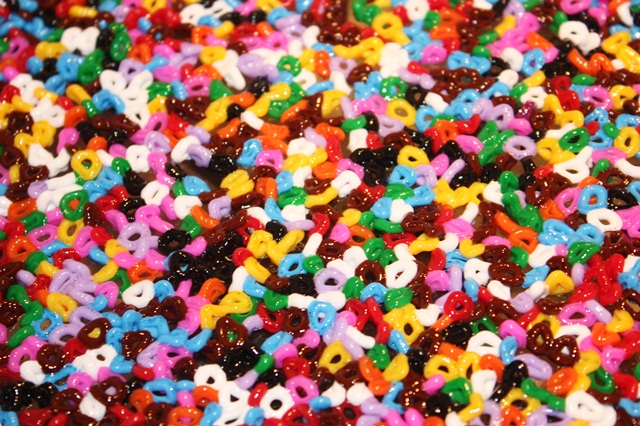
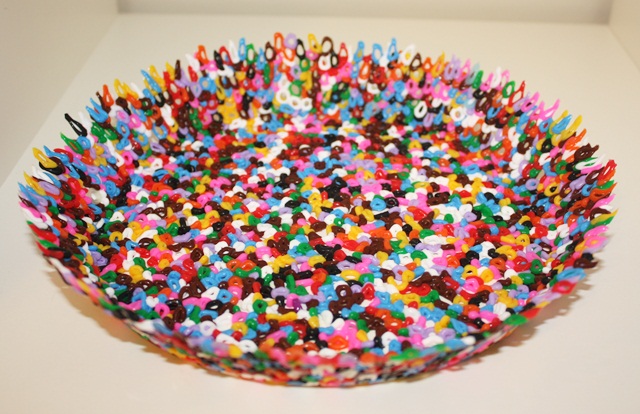
Now on to the craft section of my post thank-you-Pinterest! My kids have a vat of Perler Beads I got at Ikea. We usually keep them hidden because they get them all over the floor and Jeff gets all crazy. I saw this on Pinterest last night so we had to try it out! This is an oven proof Pyrex pie dish. First I sprayed it with Pam (oil would work) and then wiped most of it off with a paper towel. We then layered the Perler beads on the bottom and on the sides in the best single layer we could come up with. They actually stacked on the sides pretty well thanks to the light grease! We put it in the oven at 350 degrees first for 10 minutes, then another 5 minutes. This is what it looked like after it cooked.Pretty cool!
I then took it out of the oven and let it cool. I’d say 10-20 minutes. On this first one we put it in the freezer for 5 minutes or so and then the “bowl” came right out of the dish. We did 2 more later and skipped the freezer step and they came right out.
Pretty neat! I’ve also seen metal cookie cutters (put the beads inside and cook) and muffin tins. I’m sure we’ll be doing this again with every oven safe dish we can find!!
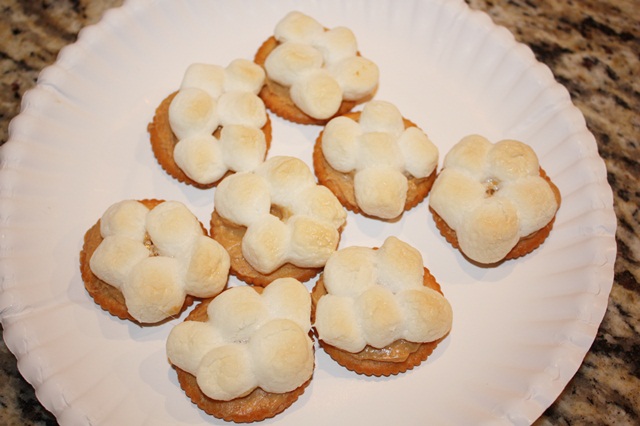
Now on to a snack my grandmother used to make when I was little. It came to mind this week so I made some last night. You might think this looks funny but I promise it’s good! These are Ritz crackers with peanut butter (thin layer) and mini marshmallows on top.
I bake/toast them in the toaster oven until the marshmallows begin to brown.
Let them cool and then eat up!! Try them! They are really good!! I will always remember my grandmother when I make these!
The sale continues at Applique Cafe, and we’ll be listing 6 new designs probably in the morning!
















Recent Comments