Sample Makeover and HNBL

A little history on Applique Cafe… we started in August 2009, so 3+ years ago. Bless my heart, some of my old samples are just sad! The fabrics are yuck so-so, but some of the photos are worse than so-so. We now have over 575 designs, so while I can’t re-do ALL of the “bad” samples, I’m working on it here and there. I also just recently started removing the background (i.e. white stabilizer or shirt or whatever I used) from my photos. Again, I can’t do all 575+ but work on them here & there. I use Photoscape to edit my photos (rotate, crop, lighten, add watermark, etc), but also have Photoshop Elements (Adobe Photoshop Elements 10) to remove my backgrounds. I really need to learn more about Elements so I could do it all in there, but for now I toggle back and forth between the 2 programs. Photoscape is FREE, BTW.

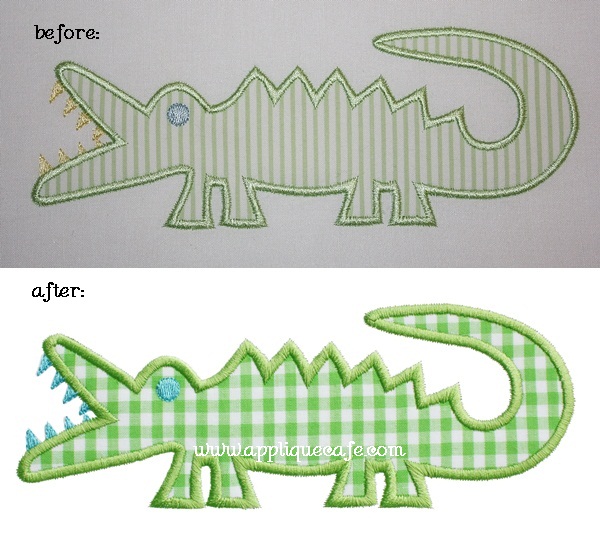
We also sell some of our designs at SWAK Embroidery and also on Etsy. Here’s a prime example of a design that we were getting ready to list on Etsy. Our Alligator design is one of our originals (#60 out of 575) and I shrieked a little when I saw this picture! The fabrics are cute enough, but I think I must have taken this picture in a closet somewhere! So…. this morning I re-did the sample with a brighter chunky lime gingham with turquoise teeth and eye. I also got a brighter picture (outside even tho it’s dreary here) and removed the background in my photo. It looks MUCH better, eh? One design at a time…… A good photo and fabric can make ALL the difference!

alligator 600-vert

 Now, on to further discussion on Heat N Bond Lite (see this POST for more info). I saw a post or two last week on Facebook regarding Heat N Bond Lite versus Steam A Seam Lite (2?). You can find it at most sewing stores like Joann, Hancocks, Hobby Lobby etc. It’s described as “double stick fusible web”. Years ago before I discovered HNBL I tried it (and Wonder Under), but found it a little stickier than I liked for my machine. I HAVE NOT tried it since, and they may have changed it and I noticed a SASL2 so that may even be the new thing (vs. just LITE). Anyway, a question was posed on Facebook asking if people were going to switch, or stick with HNBL. I am choosing to stay with HNBL. I’ve been using it for years, it’s easy to work with and my machine has no problems with it! I encourage everyone to try SASL if you feel inclined (Wonder Under too for that matter), and figure out what YOU like! Figure out what works best for you and your techniques, and your machine, and your finished product. Just because I use HNBL doesn’t mean everyone else has to. But, I do recommend it!

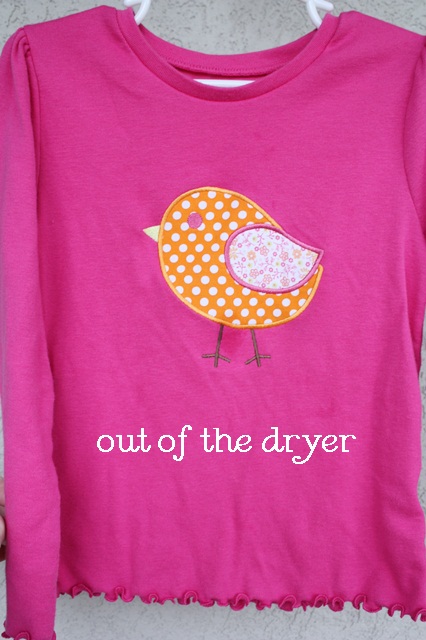
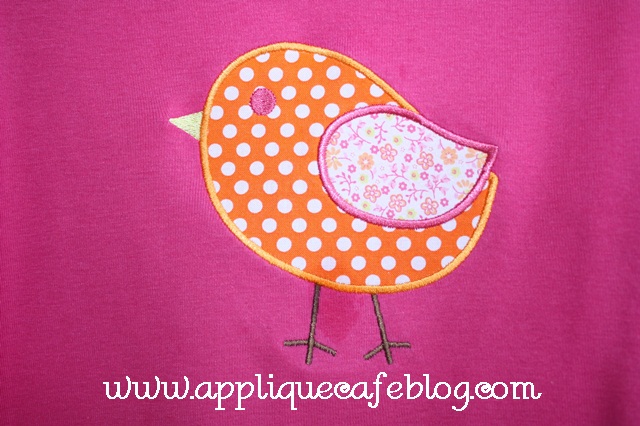
I thought I would post a few pics I took of a shirt I did recently for my daughter. I wanted to show what the shirt looked like straight out of the dryer. This is a Garanimals long sleeved tee from Walmart (60% cotton/40% polyester), and our Bird 3 design. As you can see it’s a little wrinkled, which is normal for a t-shirt I believe and this was probably after 3 fluff cycles since it takes me 3 days to get clothes out of the dryer to fold them.

IMG_7109

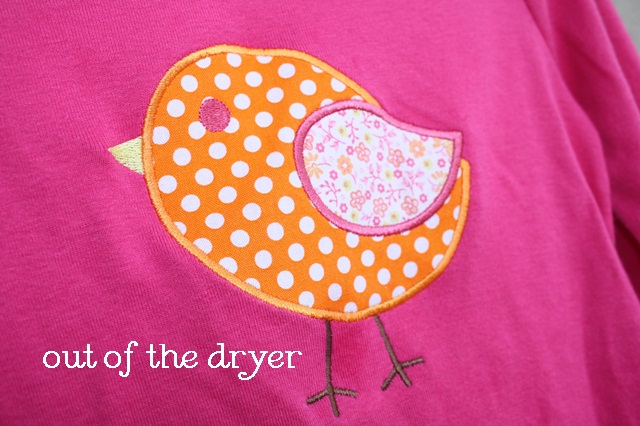
The applique itself looks pretty good. Most of the “wrinkle” in my opinion is in the shirt. The applique fabric is still fused to the shirt with no bubbles.

IMG_7110

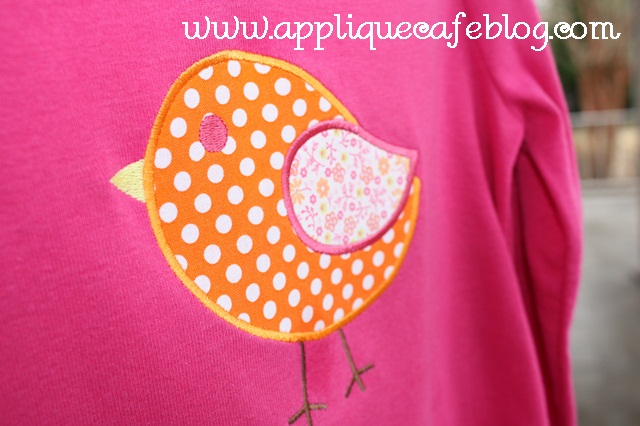
I ran an iron over the shirt a time or two, and this is how it looks. There is a “wet spot” between little birdie’s legs, which is probably a stain of grease or cheese dip or something. Sissy is 4 so most of her shirts have something on them!

IMG_7111

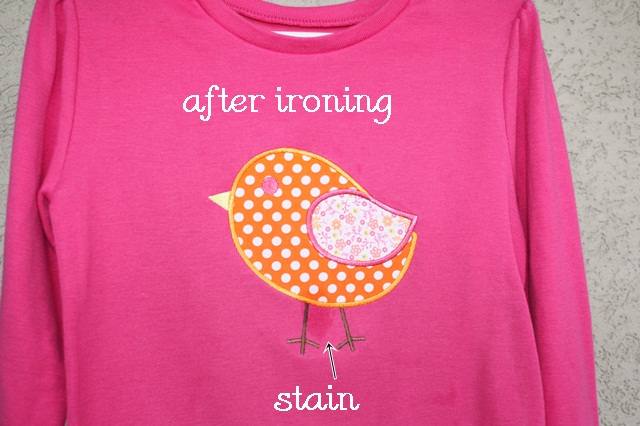
The applique looks crisp and wrinkle-free!

IMG_7112

Here is a side view – no bubbles.

IMG_7113

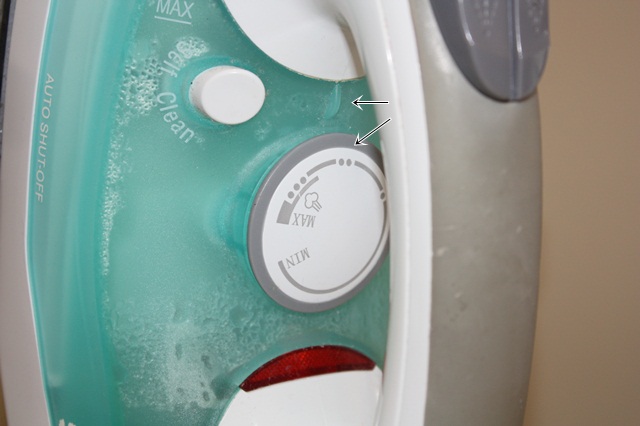
I use a cheap Shark iron that most likely came from Target.

IMG_7119

The instructions on HNBL say: Preheat iron to medium heat, no steam. I do keep water in my iron but do not use the steam setting. The water comes in handy ~ squirt it on any hoop burns and iron and they go away. Also, if you stitch an applique design on a shirt and feel as though your fabric is a little bubbly, squirt a little water on it and iron well. For me, it takes the bubbles out and fuses the applique fabric to the shirt. In case anyone is wondering, I do not prewash shirts, fabric or anything. No dryer/hanging to dry is probably good practice for applique shirts, but I have 3 kids and doing laundry is a daily chore. I dry just about everything and have no issues!

IMG_7120

Please comment with any questions!

Happy 2013!!

 Happy New Year!

photo (17)

Happy New Year ladies and gents!! It was a looonnnngggg…. Christmas break. My kids were out of school for well over what seemed like a month 2 weeks. We had a very relaxing break and school has now started back for 2 out of 3 (3rd starts back tomorrow). It’s nice to have some routine and normalcy back. Jeff was off work for a while over the break too, so we got lots of new designs done. Here are the ones just listed today, and I’m quite fond of the Carrot Trio and the Loopy Giraffe (if I do say so myself). These are all featured on our home page!

bunny 4 300-horz

This past week I did some work for a local clothing designer (PBJ ~ Pieces by Jola). She brought over a couple of Blanks Boutiques shirts which are great! She was very specific about the location of the applique (1″ to 1.5″ below the neckline). I’ve never paid much attention to this with the way I hoop and do my shirts, but I snapped a picture yesterday so I thought I’d share. The idea is for the applique NOT to end up on the belly area of the shirt, which happens if you hoop too low. So, for these I marked my center from armpit seam to armpit seam (which is usually an even number – 14″, 13.5″, etc). I also made a mark on my shirt around 1″ from the top neckline. I then moved my needle to the top placement on my machine (should have taken a pic of this) and got it as close as I could. Here I’m using a Durkee 9×9 hoop which is great for multi needle machine users. It allows you to do a 5×7 design that might fill up a 5×7 hoop PLUS a name underneath!

IMG_7082

Here is the finished product, and as you can see the shark‘s top fin is probably about 1.25-1.5″ below the neckline. I love this design! I use Monogram Wizard Plus “Tipsy” for the name Aaron.

IMG_7084

I also did this girl shirt with our Seahorse design. Again, good placement of the design on the shirt and I love these SIMPLE one fabric designs. They stitch out so quickly and easily! Jola is a clothing designer, so she has certainly made cute bottoms to go with these tops! Below I used Monogram Wizard Plus “Party Time (aka Curlz)” as my font. Again, a Blanks Boutique top. The shirt seems really LONG in this photo. It was a size 6 and the wind was blowing!

IMG_7087

In my last post I showed you this cute Old Navy hoodie dress Mallory got for Christmas. As I was outside taking new design pics today she decided to get in the bushes and pose. I love this dress! It’s super soft and I love the colors. She wore white cableknit stockings and some matching pink sparkly Keds to school today with it. I would love some orange leggings but haven’t found any yet. This is Monogram Wizard Plus “MC Center” font which is a new favorite. It’s a “sister font” to Master Circle which is more of a rounded monogram.

IMG_7091

I love this girl! She was actually taking a break from playing soccer with her brothers and 3 other boys from down the street. She’s going to be TOUGH!!

IMG_7094

I mentioned in my previous post thread colors, so today I decided to do my reds. I was going to take some pics with some of my red polka dot fabrics, but I was afraid that would be too confusing and lead to too many questions! I use #3 and #4 90% of the time, probably because they are 5000M spools. Here they are L to R:

1. Exquisite ES213 ~ this one is borderline burgundy

2. Exquisite ES3015 ~ I would say a deep red

3. Isacord 1904 ~ Again, deep red, but not too dark (I probably use this one the most)

4. Isacord 1704 ~ I would say cherry red

I get my Exquisite thread from www.kenssewingcenter.com and my Isacord from www.sewingmachine.com! I would say 2 and 3 are very similar being different brands.

IMG_7097

Mark your calendars if you are “local” ~ I’ll be doing a class at Beth’s Heirloom Sewing in Wetumpka, AL on Saturday, February 2nd! I’m planning a trip up there maybe this week to make some notes and start working on what I’d like to teach/share. The class will be held that morning from 9:00 to 11:30 AM and will cost $35. You can find Beth’s on Facebook ~ HERE! More info will be in their January newsletter or you can call them for more details!

Fabric Bundle Giveaway!!

If you’re on Facebook, you may have seen my post recently about a FABRIC GIVEAWAY!! I’m so sorry it has taken me so long to get it together. Patsy of The Sewing Room was so gracious to send me some fabric to give away to my Applique Cafe fans! Before I give you the details, here’s what I know about The Sewing Room! If any of you attended the Everything Applique Conference back in April, you may have seen or met Patsy and her daughter Margaret Ann, as they were vendors. The Sewing Room is located in Birmingham, AL at 1040 Inverness Corners and they’ve been in business a year (they just had their 1 year anniversary October 1!!). You can find them online (www.patsyssewingroom.NET) and on Facebook. They sell everything you need for any sewing project you have lined up. Whether it be smocking, embroidery, applique, making an outfit, etc. they have fabric, stabilizer, notions (thread, etc), trim, smocking plates, you name it! They also carry some great blanks including the new striped PJ’s you might be seeing all over Facebook. I found myself in a bind a couple of months ago when I appliqued a design on a customer’s shirt and realized it was not centered. I called The Sewing Room and had a new blank shirt in the mail the very next day! Did I mention they are a Babylock dealer? Yes they also sell the machines!

Here’s a photo from their website to give you an idea of the cute fabrics they carry (that we all know and love)!! If you are in the Birmingham area look them up and stop by! Items are also available online and they are adding new items and fabrics all the time! You can purchase their fabric online by the 1/4 yard, 1/2 yard, 3/4 yard, 1 yard and more if needed.

So here’s the deal! I have 3 fat quarter fabric bundles to give away to 3 lucky winners. Each bundle contains the 5 fabrics shown below and all 3 bundles are the same.

Chevron is all the rage this season!

Here’s what’s included L to R below:

1.Jolly Holiday by Jennifer Heynen for In The Beginning Fabrics ~ this would be great on our Snowman Patch design!

2.Remix by Robert Kaufman ~ possibilities for this one are endless!

3.Lime with Red Dot by Fabric Finders ~ anything Christmas!

4.Tone on Tone Green Chevron by Riley Blake ~ Christmas tree??

5.Tone on Tone Red Chevron by Riley Blake ~ Ornament? Patch? Stocking? So many possibilities!

Check out all of our Christmas designs to see where you might use this fabric!

Thank you to The Sewing Room!!

So, how do you win?

1. Simply *LIKE* The Sewing Room at Inverness Corners on Facebook! You can even comment telling them Applique Cafe sent you!

2.Comment HERE on my blog under this post telling me your FAVORITE fabric designer! Is it Michael Miller? Is it Riley Blake? Is it Fabric Finders? or Moda?

That’s all you have to do! LIKE and COMMENT. There is no purchase necessary to win and I will draw 3 random winners from those who LIKE and COMMENT. The designer part is just for fun! This Giveaway ends this Sunday, October 21st at midnight. I will draw the winners Monday morning! Please 1 comment per person.