Give Life to an Old Design!

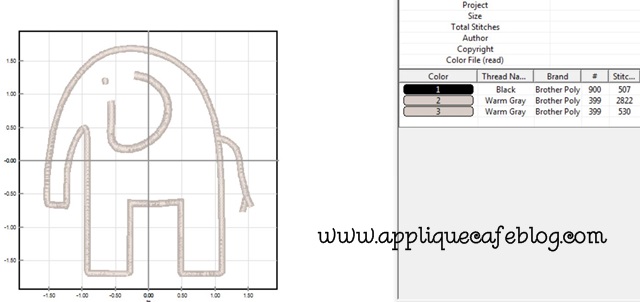
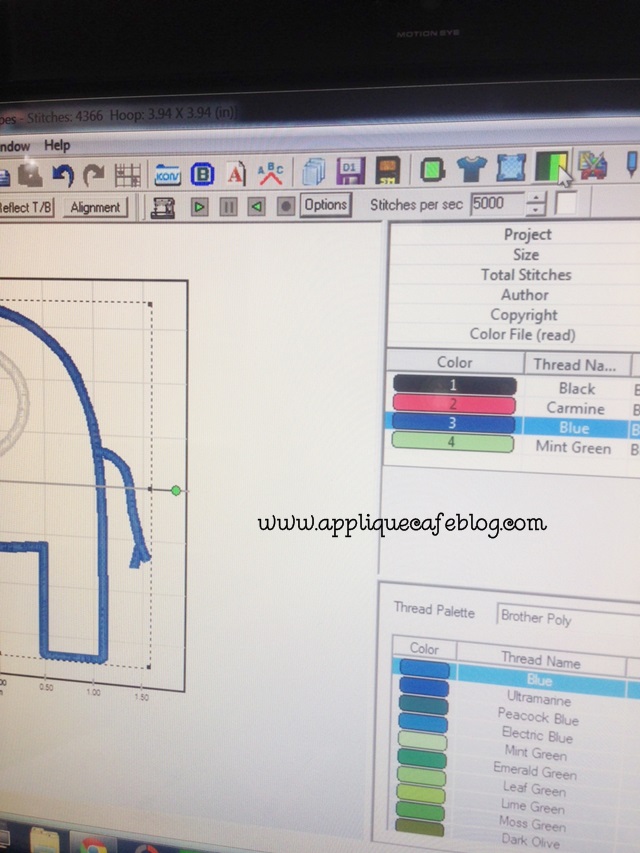
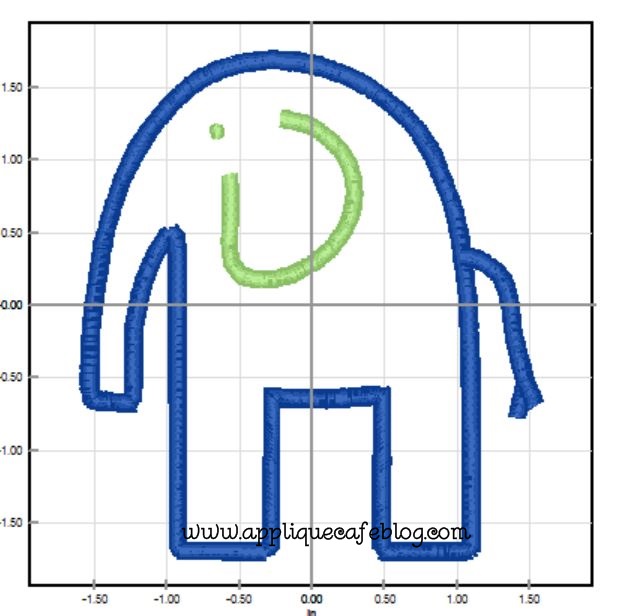
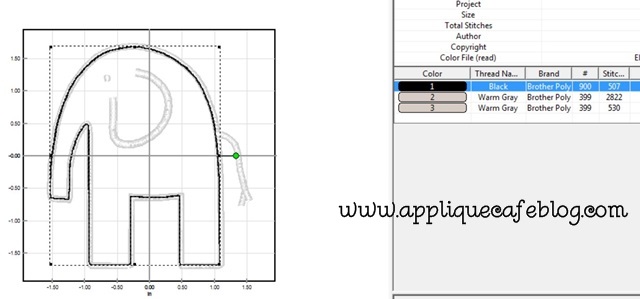
So I had a longtime customer email me the other day, and she wanted a baby gown with an *old* design on it that I had not sewn in years. It was the below elephant design and I bought it YEARS ago on Etsy, like in 2009 or before! I don’t believe the seller sells it [or any designs for that matter] anymore. I had done a gown or onesie for my customer’s son and she wanted the same to give as a baby gift. So…. I searched and found the design on my computer, and quickly remembered the design was digitized a little wonky. The design had 1 marking stitch (#1 black below) and then elephant outline satin stitch (#2 below) and then the eye and ear (#3 below) . What does that mean? NO TACKDOWN STITCH. In the good old days I would just repeat the marking stitch after I placed my fabric down, trimmed around the design and then proceed with the satin stitch around the elephant. However, I decided this week to give this old design a makeover using Sew What-Prolong thread

First on the list, create a tackdown stitch! I click on step 1, which is the marking stitch. long thread marking
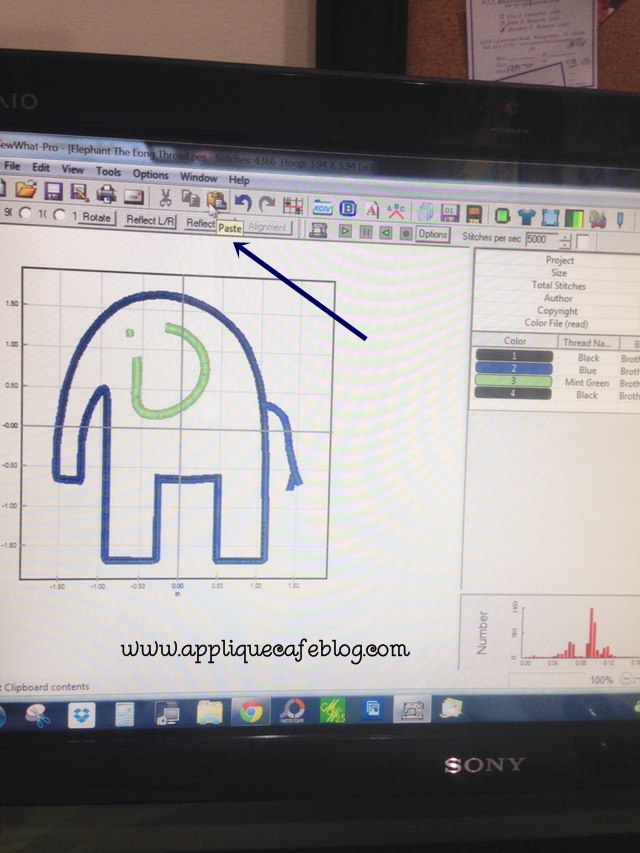
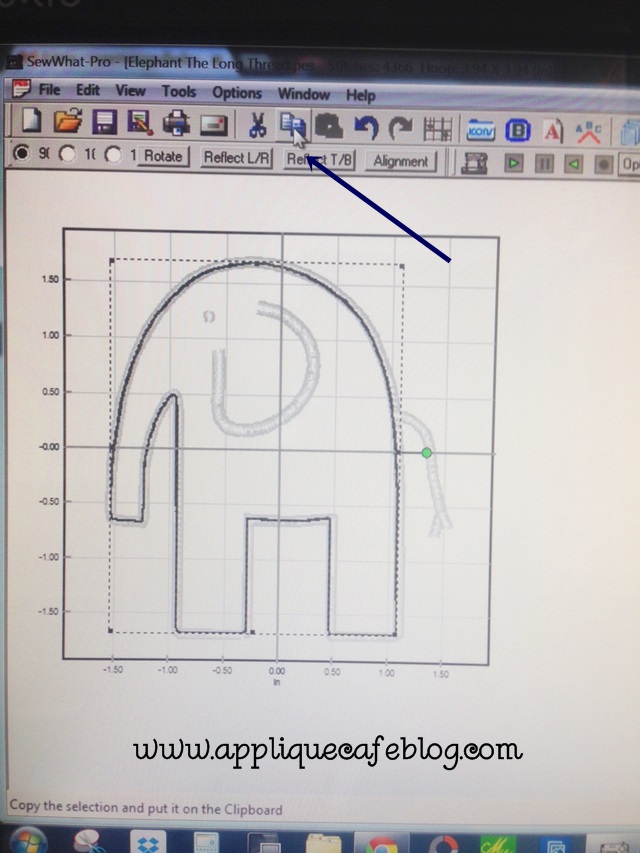
Next I click on the COPY icon in my menu bar. This will copy that step 1 marking stitch.

IMG_6323

Next I click the PASTE icon in my menu bar, which pastes another marking stitch step 1 (aka tackdown stitch) in my design. How handy! It does place that new step at the end, so it’s step #4 of my design which wouldn’t work. No fear… we can reorder our steps to make this right!

IMG_6324

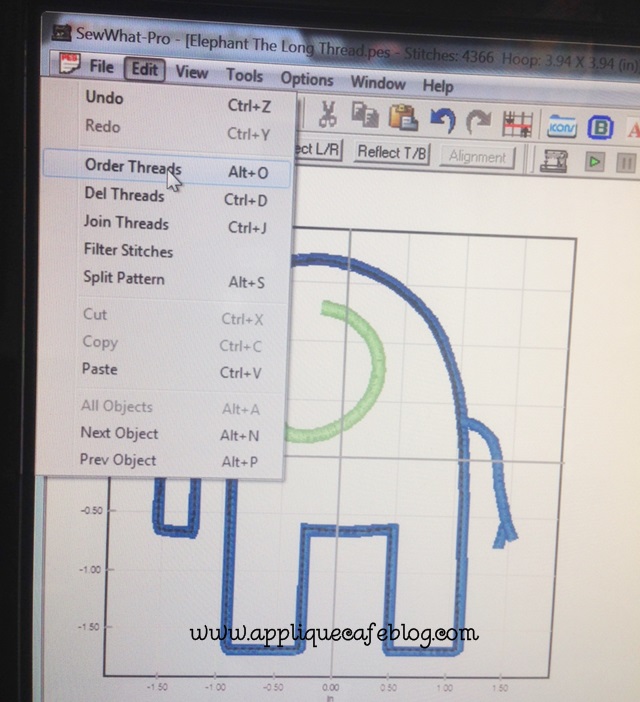
Click Edit, then Order Threads in the toolbar.

IMG_6325

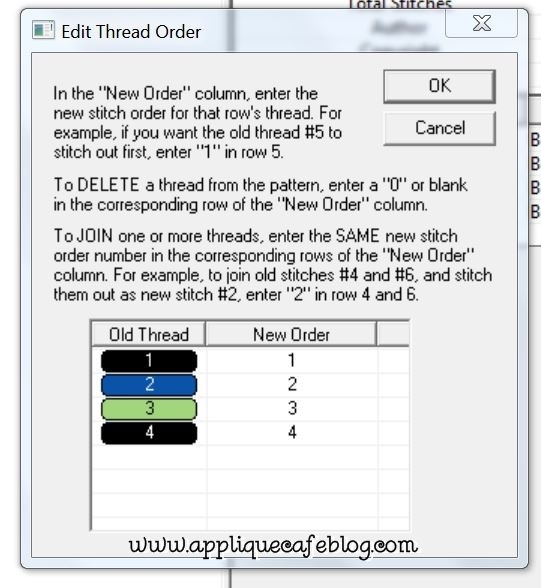
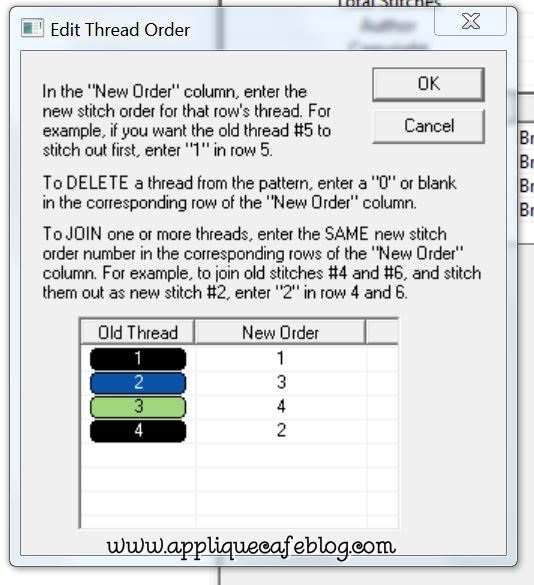
This is the order of the steps after I have copied and pasted that marking stitch. I want to move step 4 up to step 2 so that the design stitches 1) marking, 2) tackdown, 3) satin elephant and 4) eye and ear. The satin stitch and eye/ear are 2 different steps in case you might want to sew those in 2 different colors.

long thread order

Below I have typed in the New Order, and when I click OK it reorders the steps.

long thread order 2

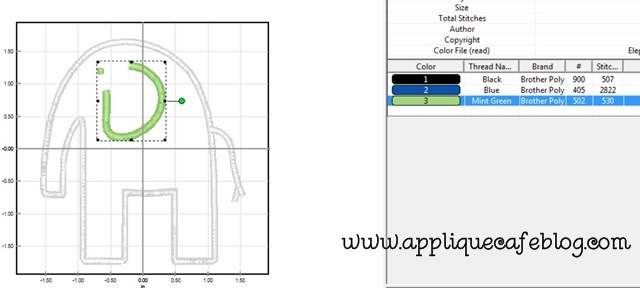
Now, since this is an old design, the satin stitches are really thin. Guess what? I can make them thicker in Sew What-Pro! I first click on the ear/eye step in my thread chart. Just pick one of the satin stitch steps – it doesn’t matter which one.

long thread ear and eye

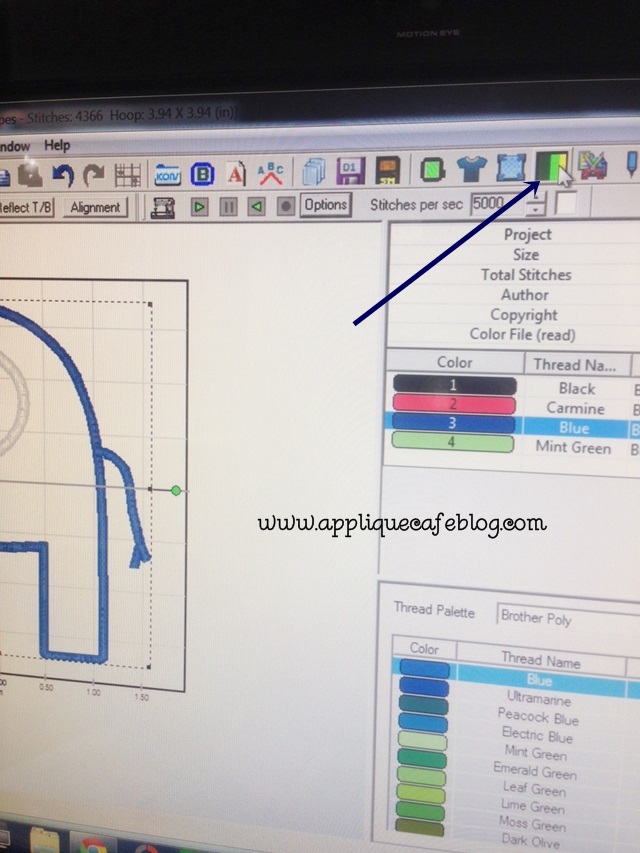
I then click on the Stitch Density and Pull Compensation icon.

IMG_6326

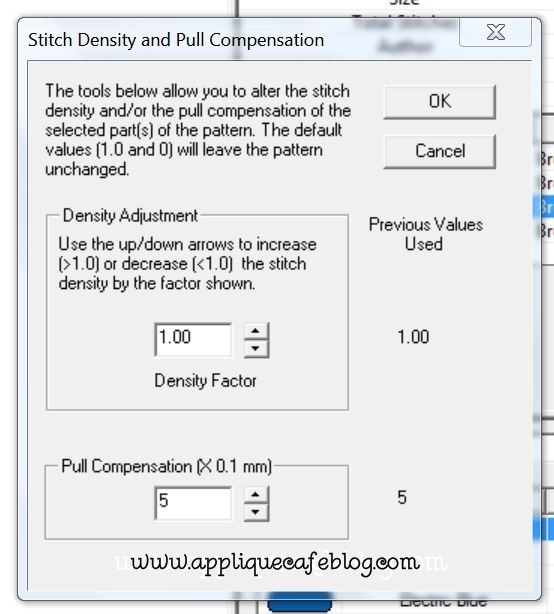
On the bottom you see Pull Compensation, which makes the satin stitch thicker. I bumped it up to 5 and when I click OK, my satin stitch becomes thicker. You can go all the way up to 20, but 5 to 10 is usually enough. Please note that I do not mess with density!

long thread density

I do the same for the satin stitch of the elephant step. I click on that step in my thread chart.

IMG_6326

Again, bump the pull compensation up to 5. Again, you can do more, but 5 is plenty for this project!

long thread density

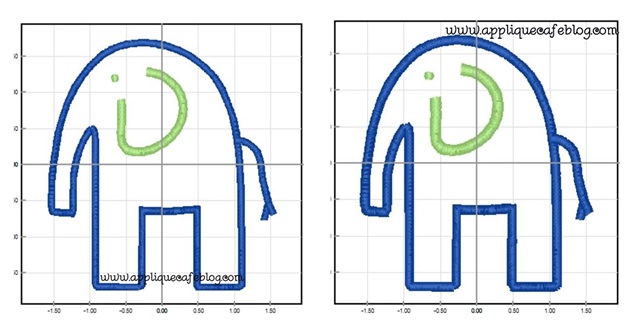
As you can see below, my satin stitch is noticeably thicker.

long thread outline satin thicker

Here is a side by side comparison! Again, this is bumping my pull compensation up to 5. You could do more if you like really thick satin stitches. So… I was able to add in the needed tackdown step to my design AND make my satin stitches thicker!

long thread thinner satin-horz

And here is the finished layette gown! I used Monogram Wizard Plus “Kazoo” font. I also did all of my satin stitches and my name in a light green color.

IMG_6327

To see and read more about increasing Pull Compensation using Sew What-Pro, check out my previous blog post where I show several different variations of increasing the PC of the satin stitch (5, 10 and 20) – that post is HERE! Pretty cool, eh? Sew What-Pro is a great investment at only $65! Please note that SWP is a Windows embroidery software. I get asked a lot if you can use it with a Mac, and you CAN, but only with a Windows Emulator. PlayOnMac Windows is a free emulator available on the Sands Computing website – click HERE for more info. Applique Cafe is an authorized dealer of Sew What-Pro!

Here are a few new designs we added last week! I LOVE LOVE LOVE the Girly Turkey! She has been a popular design since we added her! The Vintage Christmas Tree is a fast and easy design too! You can see all of these at Applique Cafe!

girly spider 500-horz

Lastly, our new Digitizer’s Pick which is $1.50 for a limited time….
adigitizerspick 500

Labor Day Specials

Needleheads gift card sale

My Monogram Wizard Plus People…. Take note:
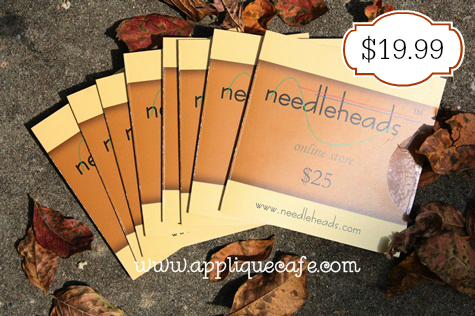
1) We are now selling $25 gift cards to the Needleheads {Font} Store and they are on sale for $19.99/each. (Save $5 herehttp://www.appliquecafe.com/catalog.htm?item=892)
2) Needleheads has a few *new* fonts in the store, and several of their fonts are on SALE (Save $2-3 here)
3) More Discounts (Save MORE here):
$10 off a $35 or more Purchase
$25 off a $60 or more Purchase
$50 off a $100 or more Purchase
4) Some of my *favorite* fonts from the Needleheads Store: Bistro, Camp, Happy, Kazoo, Library and Sweet Script! You can also add new Alpha Paks like Master Circle, Blackboard, Pendant, etc.
5) Who doesn’t love fonts? It’s right up there with my fabric addiction. 
labor day sale

We are having a Labor Day SALE at Applique Cafe! All designs are 35% off through Thursday, September 10th!

Craftsy is also having a great sale on classes & supplies this weekend! On my blog, search “Craftsy” for several blog posts I’ve done in the past 6 months or so on awesome embroidery & product photography classes!

craftsylaborday

Lastly, check out our new Digitizer’s Pick which is our Pumpkin 13 Design! This pumpkin could be sewn with a wide variety of cute fabrics! I am obviously partial to polka dots and ginghams, but would love to see this in some other cute fall fabrics! adigitizerspick 500

Widening Satin Stitches!!

I taught a class last Thursday night at Beth’s Heirloom Sewing in Wetumpka, AL. I’ve taught a couple of “intro to embroidery & applique” classes before but this time she asked me to teach Embroidery Software. Since I use Monogram Wizard Plus and Sew What Pro, those were the 2 I chose to teach. I took 3 pages of notes (front and back) and ended up spending a good hour on Monogram Wizard Plus and the last hour on Sew What Pro. We didn’t even take a break! People really ARE interested in software!! Check out Beth’s website ~ they are now selling fabric online and she said they were still in the process of adding all of it! If you are in the area, you can also sign up for their newsletter and hear about upcoming classes. I need to take my notes and put them in a good outline form ~ I will work on that in my spare time!

beths

photo (10)

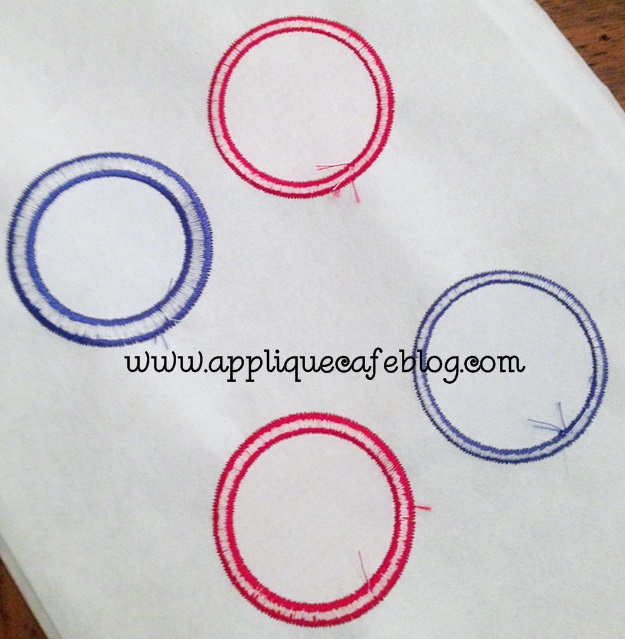
One of the most impressive features of Sew What Pro is that you can adjust PULL COMPENSATION, or in other words, you can WIDEN YOUR SATIN STITCHES on your appliques and fonts! Say what???? I posted a picture of a demo I did on Facebook last week and got a huge response!

I will walk you through the process, and also include a link to a video from the Sands Computing website so you can also watch the process. It’s SUPER easy to do!

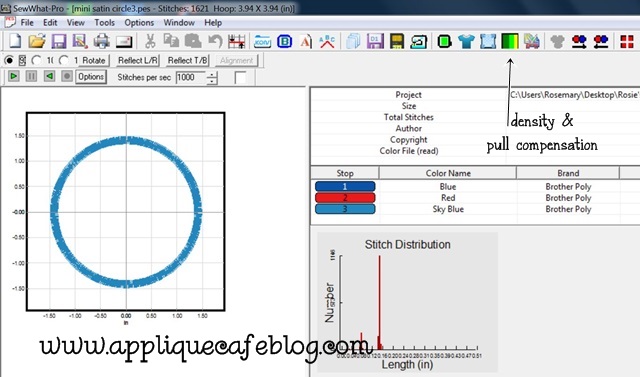
Here is your Sew What Pro workspace screen and I did my demo using our Mini Satin Circle Applique Design. There is an icon up top for adjusting your density and PULL COMPENSATION. Click on that button (which says “Adjust Density”). I don’t mess with density by the way. I found this when googling Embroidery Density ~ “Density is the distance between individual stitches in a satin column or rows of stitches in a fill. The closer the rows are to each other, the more dense an area of stitches is.” You can read more about density here. Again, I typically don’t mess with density!

pull comp


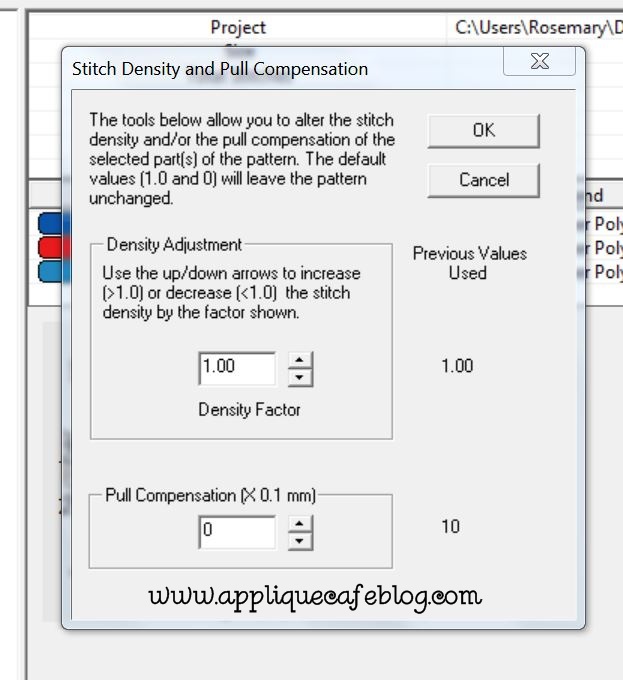
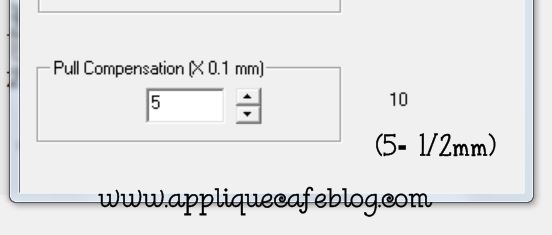
On the bottom you will see Pull Compensation and X.1mm. You can adjust your PC up to 20, which would be 2mm. You can also go -20 which would make your satin stitch 2mm thinner. Basically, 5= 1/2 mm, 10=1 mm, 15 = 1.5 mm, and 20 would be 2 mm. You will see my examples down below.

pull comp 2

pull comp 3

pull comp 4

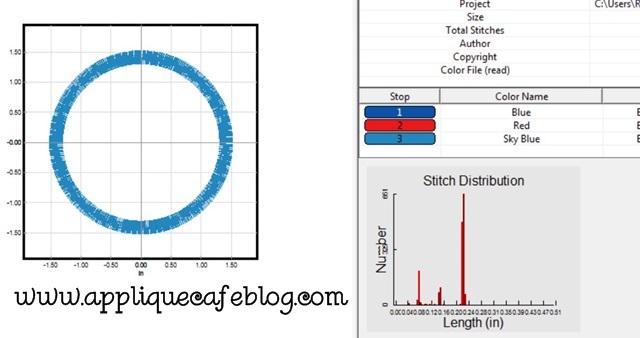
This is what my adjusted design looks like after changing my PC to 10. This, I thought, was a good increase for PC and it didn’t make it too thick.

pull comp 5

Here is the demo I did! As you can see, 20 is almost too thick unless you just like super duper thick satin stitches!

IMG_9108

Here is a shot of the back of each applique. As you can see the bobbin distribution looks great (about 1/3, 1/3, 1/3)  so adjusting Pull Compensation does not mess up how the design stitches.

photo (28)

And now, here is the video you can watch from the Sands Computing website: http://sandscomputing.com/sitebuildercontent/sitebuilderfiles/PullComp/PullCompensation.swf

There are also other helpful videos on their website! Let me know if you have any questions! This is just one of the cool features of Sew What Pro, which you can find at Applique Cafe! There is a 30 day free trial if you are interested in trying it out, and it’s only $65 to purchase. Well worth every penny!!

Check out our new Digitizer’s Pick for Christmas. This is a great design for the BOYS and it’s $1.50 for a limited time!

appcafeframe1loopy cmas tree 2