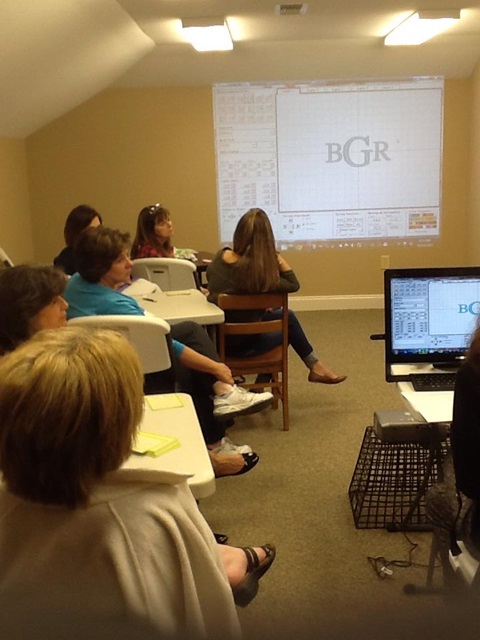
I taught a class last Thursday night at Beth’s Heirloom Sewing in Wetumpka, AL. I’ve taught a couple of “intro to embroidery & applique” classes before but this time she asked me to teach Embroidery Software. Since I use Monogram Wizard Plus and Sew What Pro, those were the 2 I chose to teach. I took 3 pages of notes (front and back) and ended up spending a good hour on Monogram Wizard Plus and the last hour on Sew What Pro. We didn’t even take a break! People really ARE interested in software!! Check out Beth’s website ~ they are now selling fabric online and she said they were still in the process of adding all of it! If you are in the area, you can also sign up for their newsletter and hear about upcoming classes. I need to take my notes and put them in a good outline form ~ I will work on that in my spare time!
One of the most impressive features of Sew What Pro is that you can adjust PULL COMPENSATION, or in other words, you can WIDEN YOUR SATIN STITCHES on your appliques and fonts! Say what???? I posted a picture of a demo I did on Facebook last week and got a huge response!
I will walk you through the process, and also include a link to a video from the Sands Computing website so you can also watch the process. It’s SUPER easy to do!
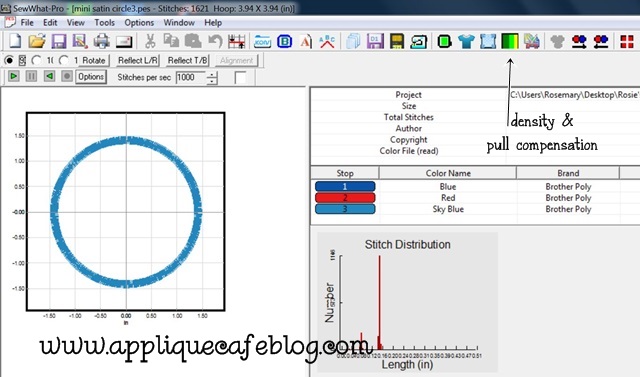
Here is your Sew What Pro workspace screen and I did my demo using our Mini Satin Circle Applique Design. There is an icon up top for adjusting your density and PULL COMPENSATION. Click on that button (which says “Adjust Density”). I don’t mess with density by the way. I found this when googling Embroidery Density ~ “Density is the distance between individual stitches in a satin column or rows of stitches in a fill. The closer the rows are to each other, the more dense an area of stitches is.” You can read more about density here. Again, I typically don’t mess with density!
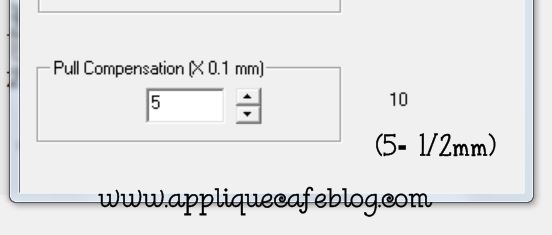
On the bottom you will see Pull Compensation and X.1mm. You can adjust your PC up to 20, which would be 2mm. You can also go -20 which would make your satin stitch 2mm thinner. Basically, 5= 1/2 mm, 10=1 mm, 15 = 1.5 mm, and 20 would be 2 mm. You will see my examples down below.
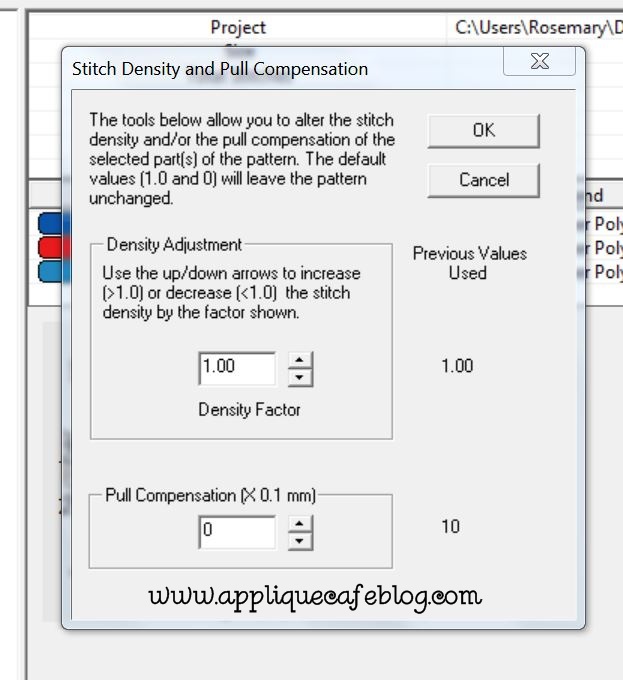
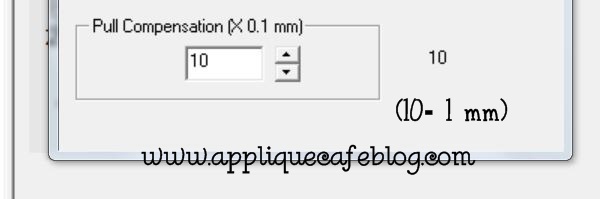
This is what my adjusted design looks like after changing my PC to 10. This, I thought, was a good increase for PC and it didn’t make it too thick.
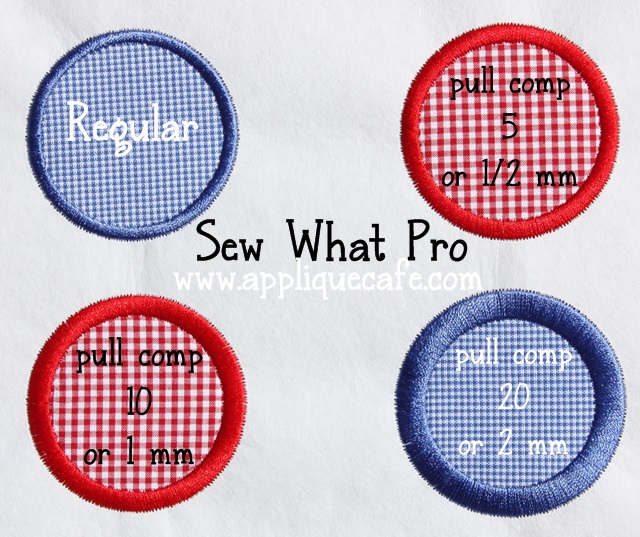
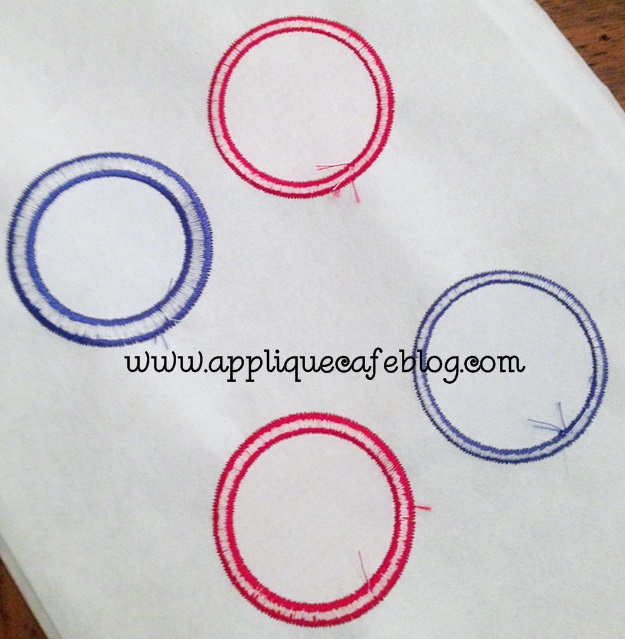
Here is the demo I did! As you can see, 20 is almost too thick unless you just like super duper thick satin stitches!
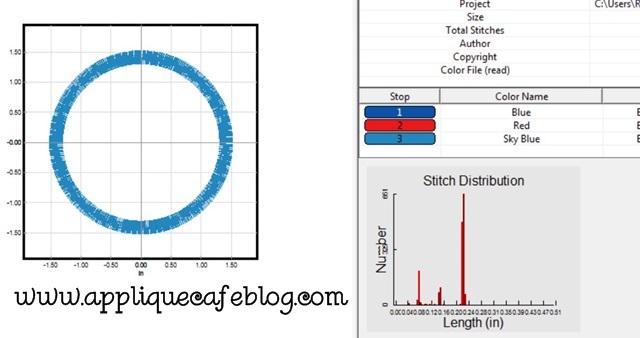
Here is a shot of the back of each applique. As you can see the bobbin distribution looks great (about 1/3, 1/3, 1/3) so adjusting Pull Compensation does not mess up how the design stitches.
And now, here is the video you can watch from the Sands Computing website: http://sandscomputing.com/sitebuildercontent/sitebuilderfiles/PullComp/PullCompensation.swf
There are also other helpful videos on their website! Let me know if you have any questions! This is just one of the cool features of Sew What Pro, which you can find at Applique Cafe! There is a 30 day free trial if you are interested in trying it out, and it’s only $65 to purchase. Well worth every penny!!
Check out our new Digitizer’s Pick for Christmas. This is a great design for the BOYS and it’s $1.50 for a limited time!

Recent Comments