Big Monograms!

mwp

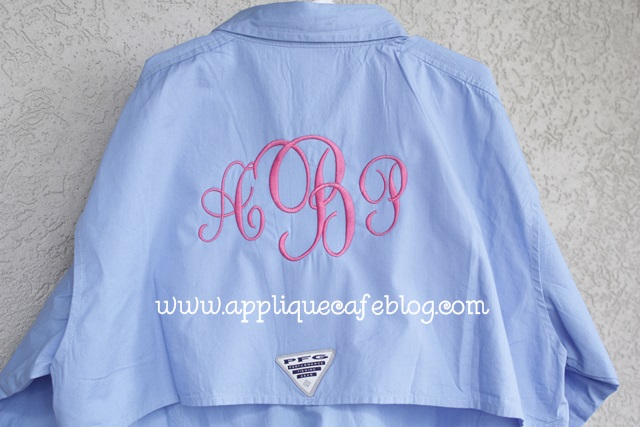
Good afternoon! I’m excited to be “back to work” this week after being lazy at the beach all last week with my family. When I say family, I mean throughout the week we had 17 people under one roof. My entire family goes for a week every summer to the Seagrove/Seacrest Beach area. We are enjoying summer and trying to stay cool! I posted this PFG (Performance Fishing Gear) shirt a few weeks ago. I did this for my 13 year old niece. I’m sure she saw it on Pinterest or something! This shirt led me to this post on adjusting fonts in Monogram Wizard Plus to make your monograms BIG. It’s certainly not rocket science, but perhaps you haven’t thought about it much. You can adjust the width of your fonts so that the end result is a big monogram that fills the hoop as much as possible!

IMG_7924

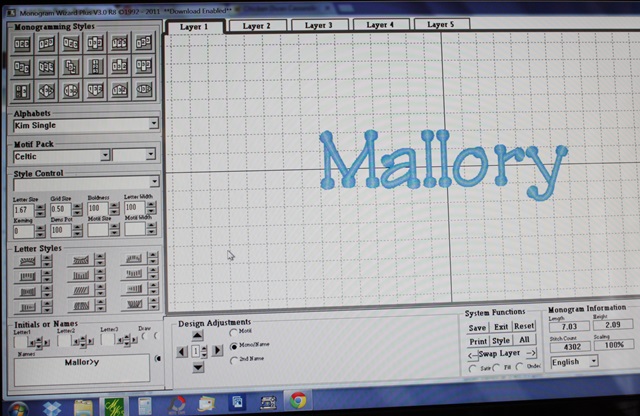
Pardon my photos. I’m sure there is a screen-capture-something that is easier to use than Prt Sc, then opening and pasting in Paint, blah blah blah. I’ll do my research on that. In the meantime, here are MY screen shots via my camera. This is just a regular monogram done in Monogram Wizard Plus using Kim Single font. As you can see (with your magnifying glass perhaps), the Letter Size is 1.67 and everything else (i.e. boldness, letter width, kerning, etc) is default 100. At Letter Size 1.67, the name turns out to be 2.09″ tall and 7.03″ wide, which would probably fit in your 5×7 hoop just fine. Not too bad, but by adjusting the Letter Width, you can make the name taller which appears bigger even though you are still in the 5×7 hoop.

IMG_7950

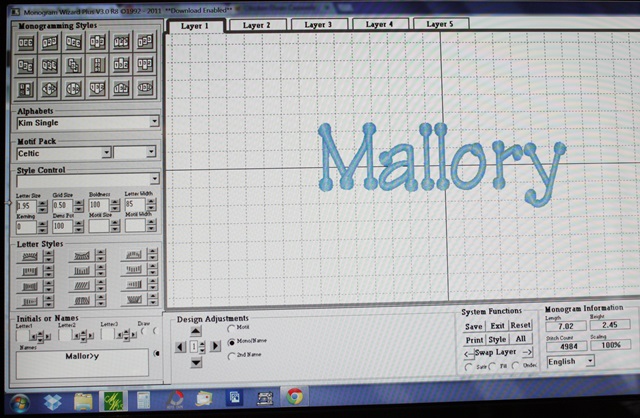
Here I adjusted the Letter Width to 85 and the Letter Size to 1.95. My name is now 2.45″ tall and 7.02″ wide. Basically what I am doing is making the letters “skinnier” and taller. Width of the name stays about the same to fit in the 5×7 hoop.

IMG_7951

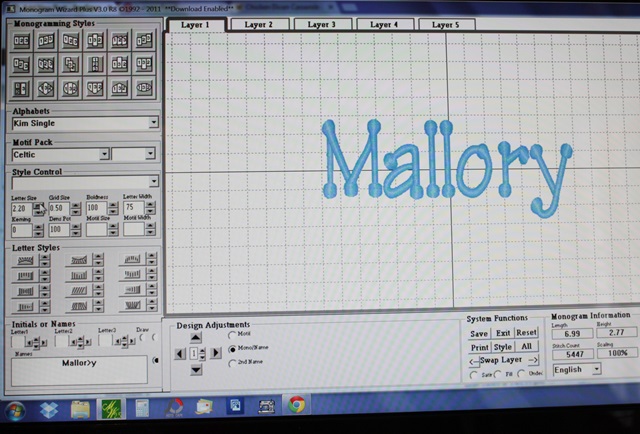
Here I decreased the Letter Width down to 75 and Letter Size to 2.20. Now my name is 2.77″ tall and 6.99″ wide. By decreasing the Letter Width and increasing the Letter Size, Mallory is now almost 3/4″ taller than what I started out with! With some fonts you can also adjust the Kerning, which makes letters closer together or farther apart. With this particular font I can’t really get them any closer together.

IMG_7952

You might notice above, the “>” in Mallory (Mallor>y). See THIS POST for an explanation of that! If your letters are spaced unevenly with certain fonts, check out the post!

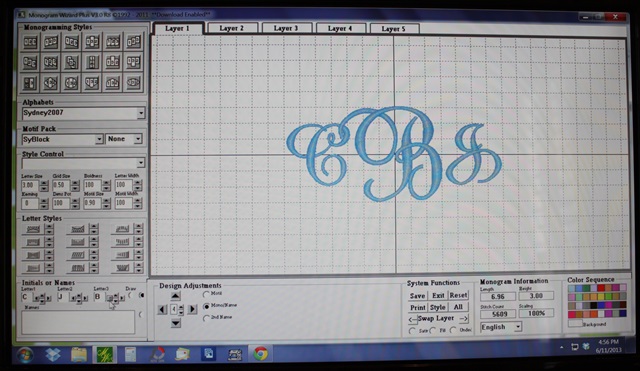
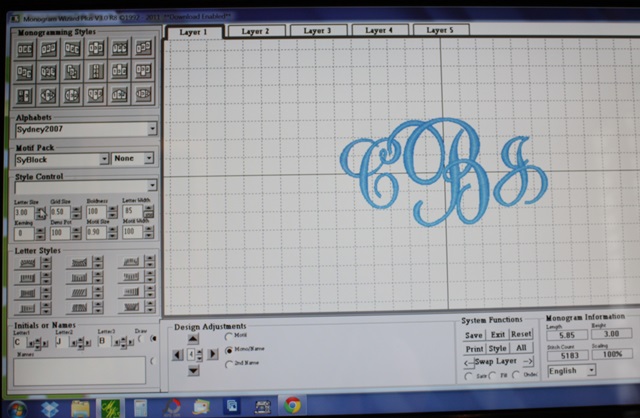
So now on to another PFG shirt I did for my other niece. I want the monogram as big as I can get it and I want to use my 5×7 hoop. As you can see below, Letter Size is 3.00 and everything else is default. The monogram size at these settings is 6.96″ wide to fit the 7″ wide hoop, and 3.00″ tall. Not bad, but I can get it a little bigger. This is Monogram Wizard Plus “Sydney” font.

IMG_7981

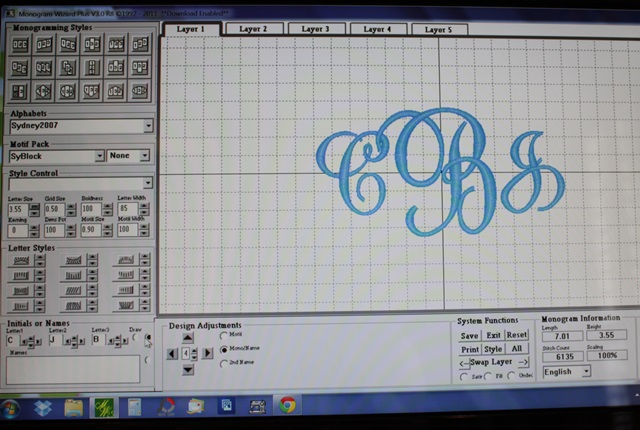
Below I adjusted the Letter Width to 85, which “skinnies” up the monogram to 5.85″ wide (still 3″ tall). I can now increase the Letter Size to get the width back up to closer to 7″.

IMG_7982

I bumped the Letter Size up to 3.55 (Width is still 85) and now the monogram width is 7.01″ and 3.55″ tall. Bigger!

IMG_7983

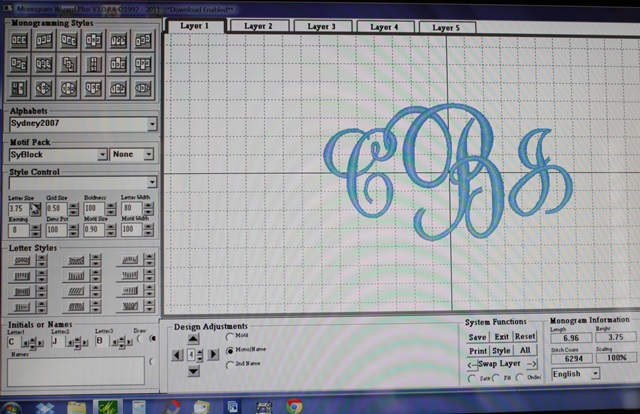
Below I adjusted my Letter Width a little more, down to 80, and Letter Size up to 3.75. NOW my monogram is 6.96″ wide and 3.75″ tall. By making these adjustments, my monogram went from just 3″ tall to 3.75″ tall. It fills the hoop much better and the monogram will be much bigger on the shirt.

IMG_7984

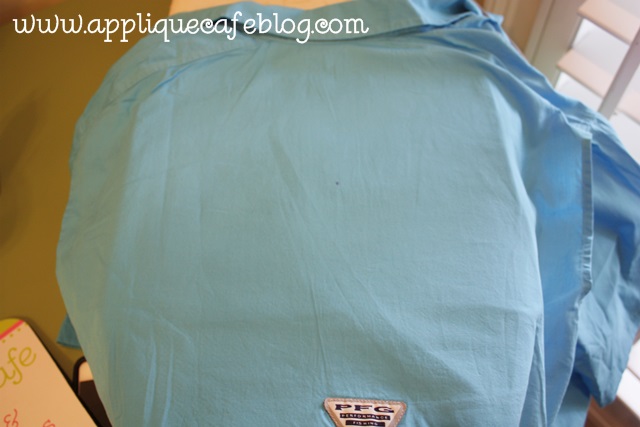
I took a few shots of the shirt as I got it ready to monogram. I marked my center on the back of the shirt (top panel).

IMG_7985

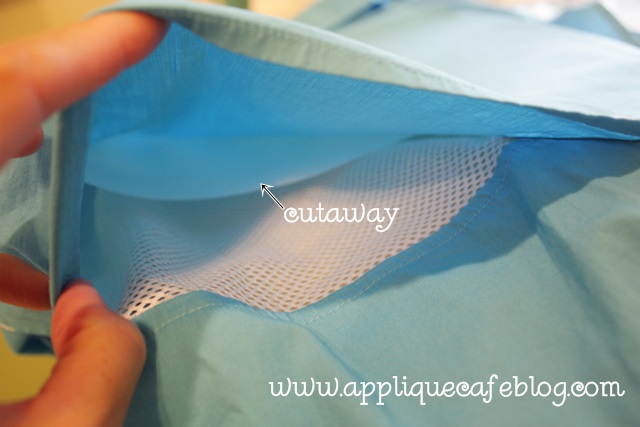
These shirts are “vented” so I inserted a piece of cutaway between the top layer I’m monogramming and the “net vent stuff”.

IMG_7986

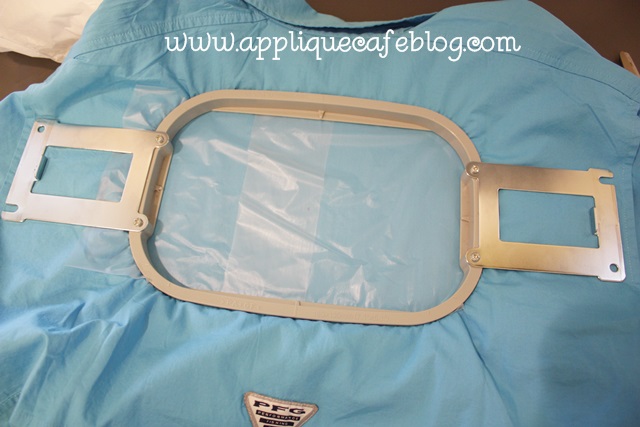
On my 6 needle machine, I hoop with the frame inside the shirt. Again, I’m using cutaway on the inside and I am using water soluble on top (just for extra stabilization). I only had precut squares of the solvy so that’s why you see 2 pieces.

IMG_7987

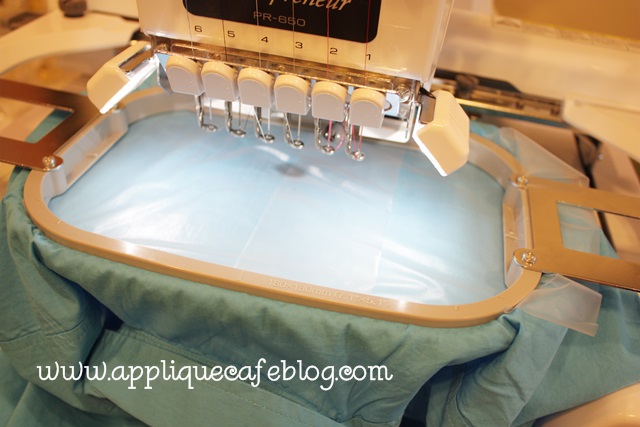
I put the hoop on my machine upside down, so the monogram is rotated upside down and I had to make sure the arm of my machine was inside the 2 layers of shirt! Sorry this part is a little confusing! If you ever try to monogram one of these shirts, this will make sense.

IMG_7988

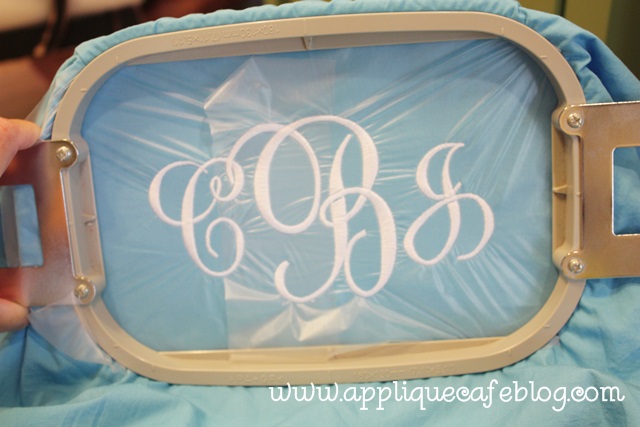
Here is the finished shirt. When finished I unhoop, trim the excess cutaway stabilizer from the inside and then just pull away all the water soluble from the top.

IMG_7989

I hope that helps! Again, NOT rocket science with the width/letter size adjustments, but if you are a newbie you may not have realized you could make your monograms a smidge bigger!
Monogram Wizard Plus and Sew What Pro

mwp

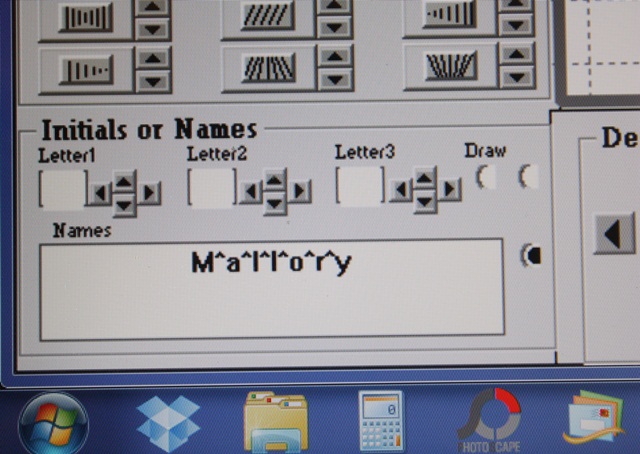
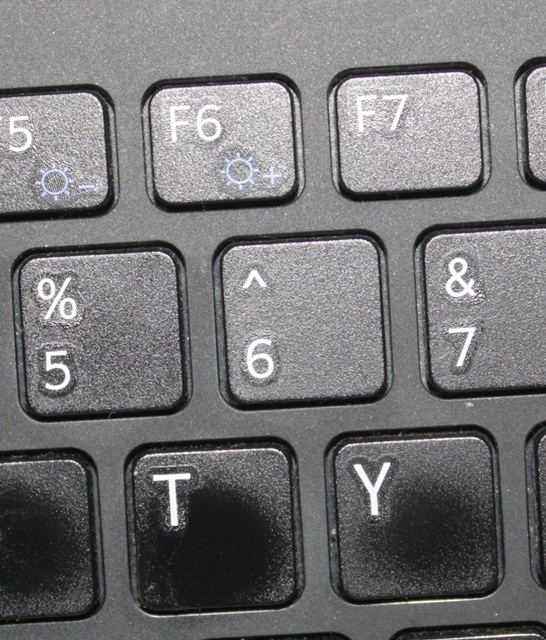
As promised, I have another trick I learned on the Monogram Wizard Plus Facebook Page. This is great in 2 instances that I can think of off the top of my head. 1) You’re doing a name in Monogram Wizard Plus and you or your customer wants each letter a different color thread. You can do one of a few things ~ if it’s a name with 5 letters or less, you can do it in layers in MWP. You could also manually stop your machine as it’s sewing in between each letter and change your thread color (if you are using a single needle machine). OR….. here is a neat trick! Between each letter, type in the “^” symbol, which is located on your 6 key. Another instance where this comes in handy is 2) You’re using “Specs” font (MWP) and if you have Specs, you know it is spaced all crazy so your name may or may not line up the way you want it too. I LOVE Specs and it’s great for monograms (3 letter monograms). Names are another story. Anyway, you can use this trick to rearrange the letters IF you have Sew What Pro or other editing software. First you will save it this way (there are more pictures below) and then you would bring it up in SWP to edit. 

 Here is the key!

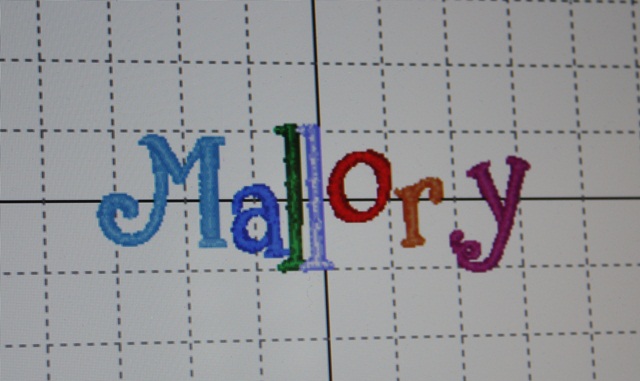
 Here is my name with the ^’s in between each letter and this is Specs font. As you can see it’s all crazy! But, when you put the ^ in between each letter, it makes each letter a different thread color. Normally in MWP your name or initials are all the same color UNLESS you layer. So I’m going to save this on my computer in a folder where I can find it in a minute to edit in SWP.

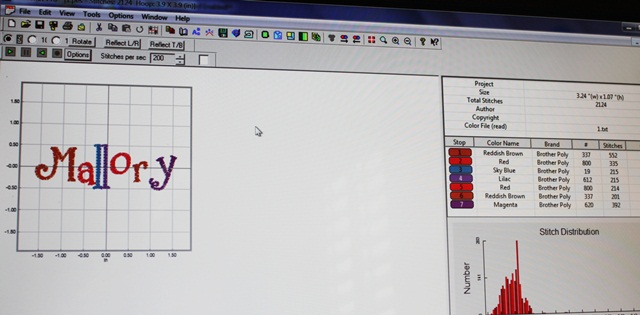
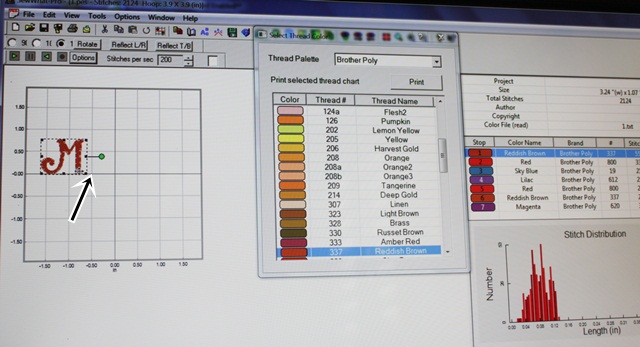
 Here it is in Sew What Pro. If you look at the thread chart on the right you can see all 7 letters are a different color and a different step. If you click on each thread color, you can then move the letter around. It’s a little tricky since when you select a letter it only shows you that letter to move, but I was able to line the letters all up on the middle line pretty easily. There may be another way to do this, but I’m not sure what it is. If you know, comment and let us all know!

 As you can see here I clicked on thread color 1 on the thread chart which shows me my “M”. If you click on the name on the left part of your screen, it will select the whole name, so you have to click on each thread color to select each letter. What I did was line up the M on the middle horizontal line on my grid. I then clicked on step 2, the “a”, and lined it up on the middle line next to the M, then 3, 4, 5 and so on until all the letters were sitting on the line. I did have to go back and adjust them a little to the left and right, but it didn’t take me long at all.

 Here is the name after I’m done and I’ve clicked the “CENTER” button to center the name in my hoop. I will then save the name to my machine and it’s ready to sew. Again, since each letter is a different color it’ll stop in between each letter if you want to sew the name with different color threads. If you don’t, you can change each letter to the same thread color and JOIN THREADS to have the name sew all the same color. Or, you could just keep sewing after each stop using the same color thread. I did not take pictures of the joining threads part but will try to do so later. I didn’t want to get too confusing!

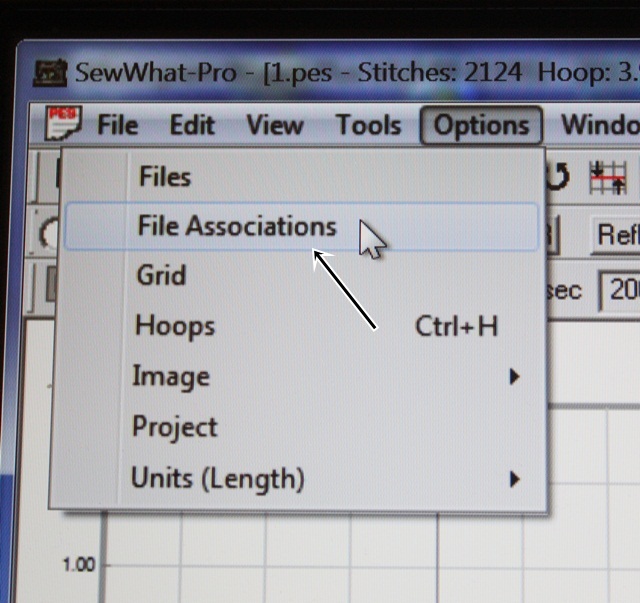
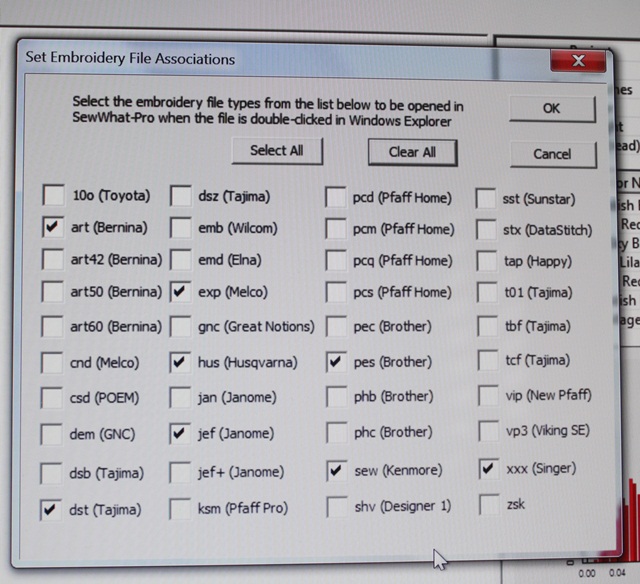
 I also found a couple of neat features in Sew What Pro that I don’t really use but I thought I’d share. If you click Options, then File Associations, you can select all the different type of embroidery files you might open on your computer. That will allow you to double click on those embroidery files and Sew What Pro will automatically open them. Otherwise, your computer might ask you what to use to open the file.

 I clicked most of the embroidery file types we offer, so now I can open any of those files in SWP automatically! I like to SEE what I’m working on, so I use SWP whether I am merging or editing or not. My machine uses PES and DST, but we often have to look at other file types so this is great! It’s also a great little cheat sheet as to what formats the different brands of machines use!

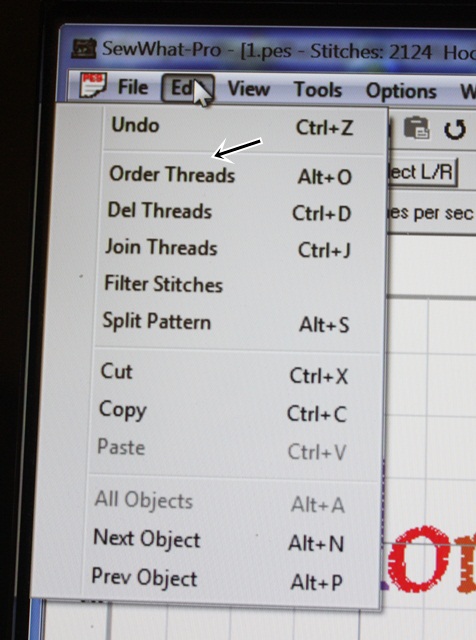
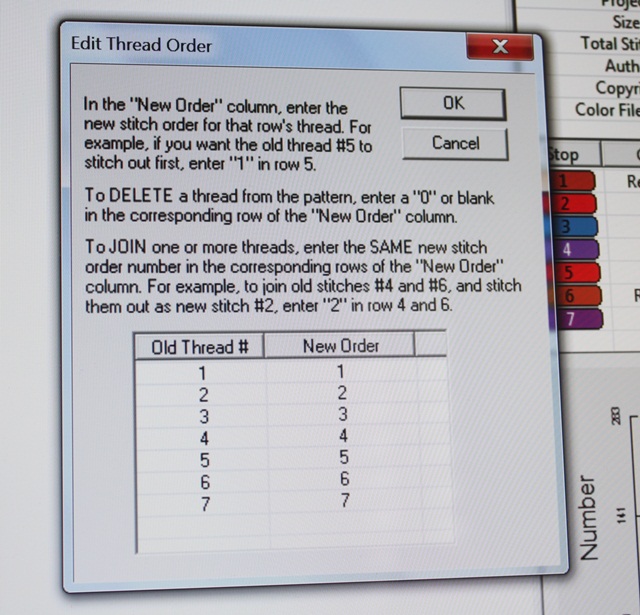
 Another feature I have never used is Edit, Order Threads. (And you can see Join Threads down below that). You can switch around the order of whatever you are sewing with this feature. I would be careful in doing this, but it may be you have a design with a name and maybe you want to sew the name (underneath?) first and maybe the way you saved it it was at the end.

 Again, I’ve never used this feature but it might come in handy one day! We like to order our designs in a logical order, but sometimes on single needle machines you can switch the steps around to make sewing it easier if you are using the same thread colors. Again, I’d be careful with this since most designs are ordered in a logical manner!
I get emails a lot asking “how do you do this?” in MWP and SWP. My suggestions is to open them up and just play around! When I started there was no Facebook Group (or Facebook for that matter) so I learned through the manuals and just experimenting and TRIAL AND ERROR! See Helpful Posts for more posts on MWP and SWP.
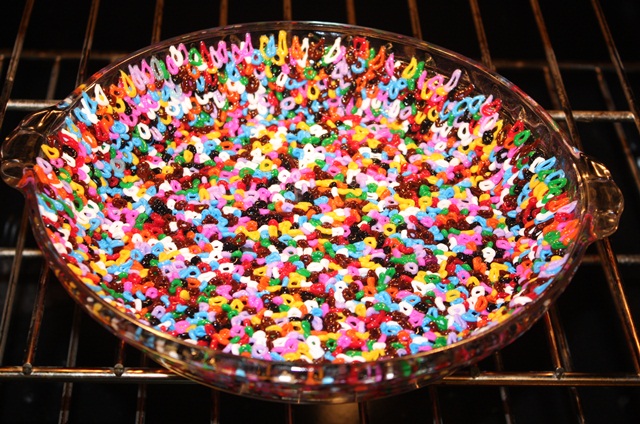
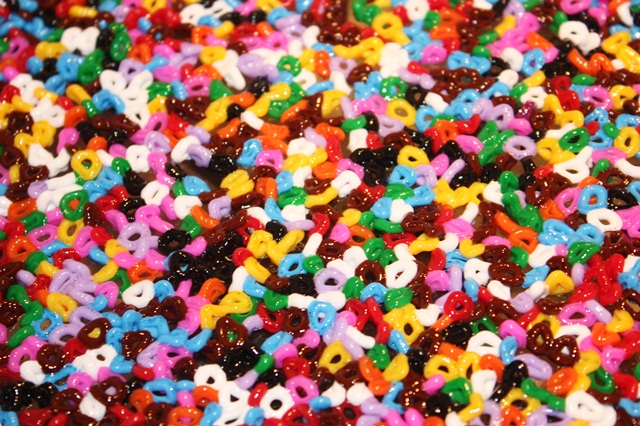
 Now on to the craft section of my post thank-you-Pinterest! My kids have a vat of Perler Beads I got at Ikea. We usually keep them hidden because they get them all over the floor and Jeff gets all crazy. I saw this on Pinterest last night so we had to try it out! This is an oven proof Pyrex pie dish. First I sprayed it with Pam (oil would work) and then wiped most of it off with a paper towel. We then layered the Perler beads on the bottom and on the sides in the best single layer we could come up with. They actually stacked on the sides pretty well thanks to the light grease! We put it in the oven at 350 degrees first for 10 minutes, then another 5 minutes. This is what it looked like after it cooked.Pretty cool!


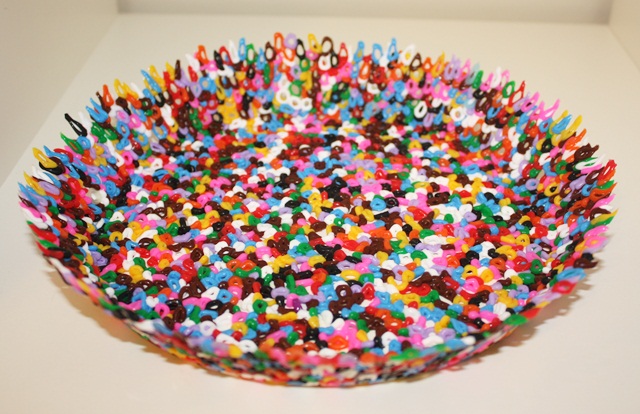
 I then took it out of the oven and let it cool. I’d say 10-20 minutes. On this first one we put it in the freezer for 5 minutes or so and then the “bowl” came right out of the dish. We did 2 more later and skipped the freezer step and they came right out.

Pretty neat! I’ve also seen metal cookie cutters (put the beads inside and cook) and muffin tins. I’m sure we’ll be doing this again with every oven safe dish we can find!!

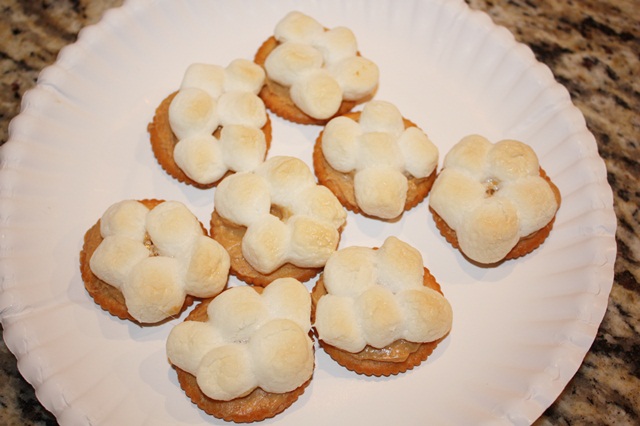
 Now on to a snack my grandmother used to make when I was little. It came to mind this week so I made some last night. You might think this looks funny but I promise it’s good! These are Ritz crackers with peanut butter (thin layer) and mini marshmallows on top.

I bake/toast them in the toaster oven until the marshmallows begin to brown.

Let them cool and then eat up!! Try them! They are really good!! I will always remember my grandmother when I make these!

The sale continues at Applique Cafe, and we’ll be listing 6 new designs probably in the morning!

More on Fast Frames

Yay another post! Today has been a crazy day! Some days I get sucked in to Facebook and then it takes me all day to keep up with all the comments and replies. Today has been one of those days. I managed to monogram a backpack (not the one in this post) and edit these pics for a new blog post on Fast Frames. I also have a great new post on Monogram Wizard Plus but will save that one for tomorrow or another day this week.

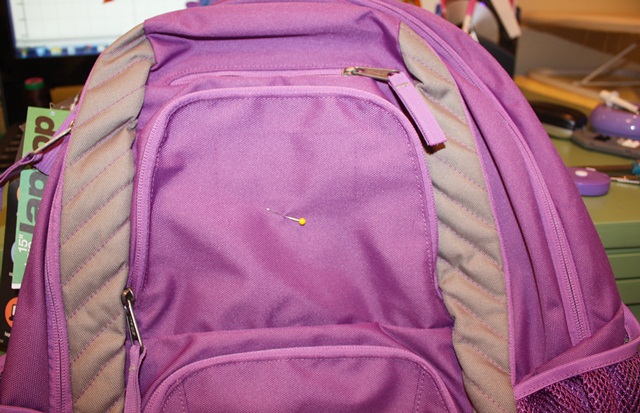
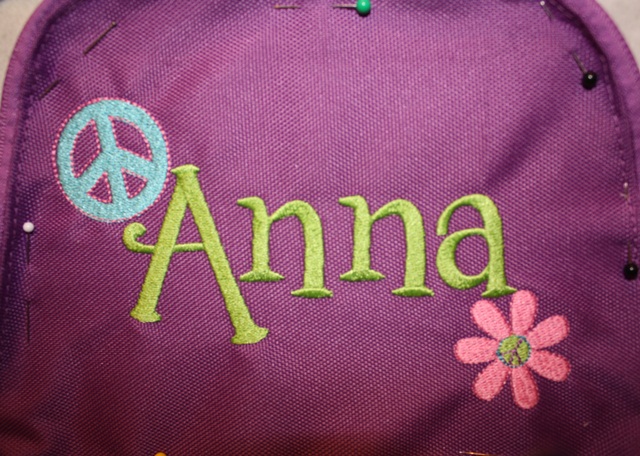
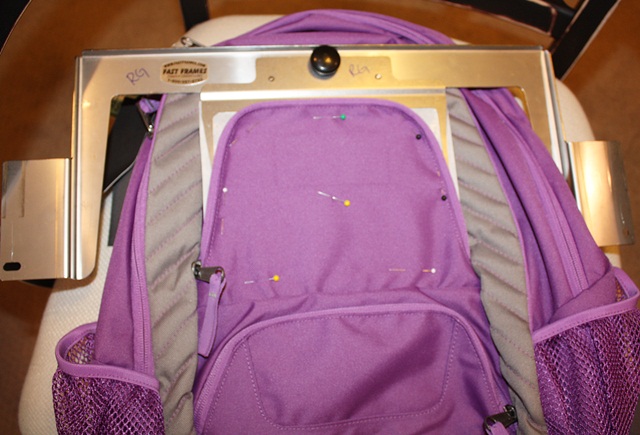
This, my friends, is a backpack (duh). You may be able to tell that my friend who sent this to me to monogram took the tag off (right above my straight pin). Her daughter is going in to 4th grade (I think??) so she said do her name, and that she’s in to peace signs! Sounds like a call for MINI DESIGNS! First I pinned my center of the top part of the front pocket (flap, we’ll call it). 

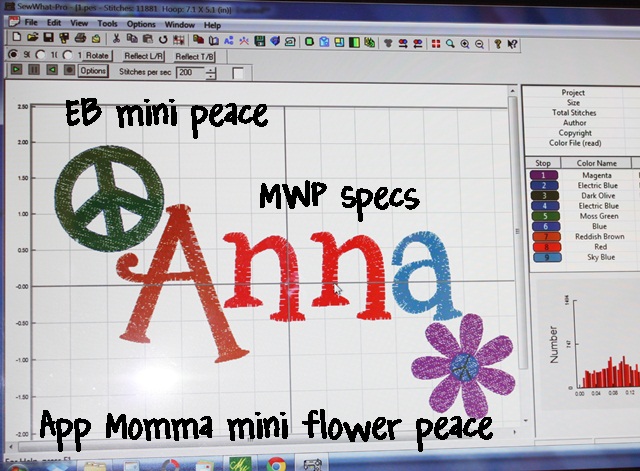
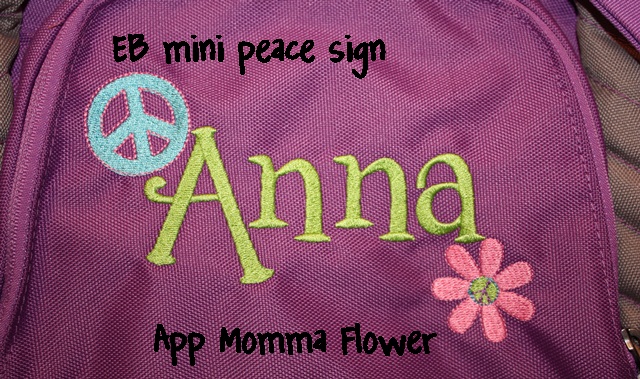
 I got my name together merged with a couple of cute mini designs. The peace sign is from Embroidery-Boutique and the Flower is from Applique Momma (it also has a peace sign in the middle). I used Monogram Wizard Plus Specs font. I love the font and it’s great for initials, but names are tricky. It spaces out rather strangely. I will explain all that in my next MWP post this week, but in the meantime you can see that I layered this name together IN Monogram Wizard Plus so that it all lined up and/or was spaced correctly. Layer 1 – A, Layer 2 – nn, Layer 3 – a. I then saved it and merged it in to my Sew What Pro. I added the mini designs, centered the whole thing and then saved it to my machine. I saved this in a 5×7 hoop space but will use my Fast Frames.

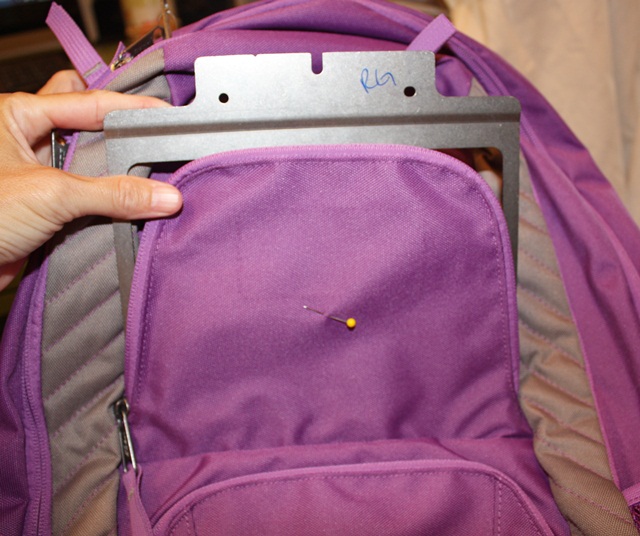
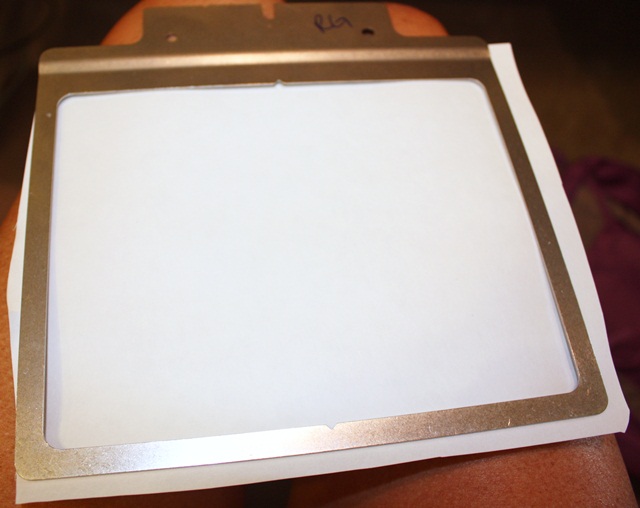
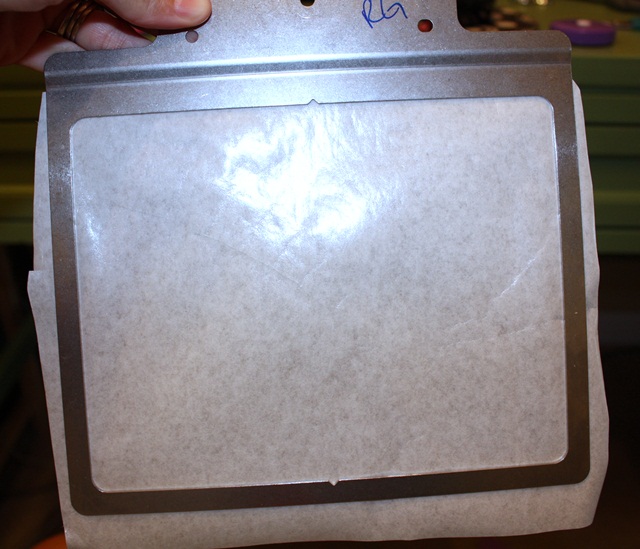
Now it’s time to pick out the right sized Fast Frame. This one measures 7″ x 8″.

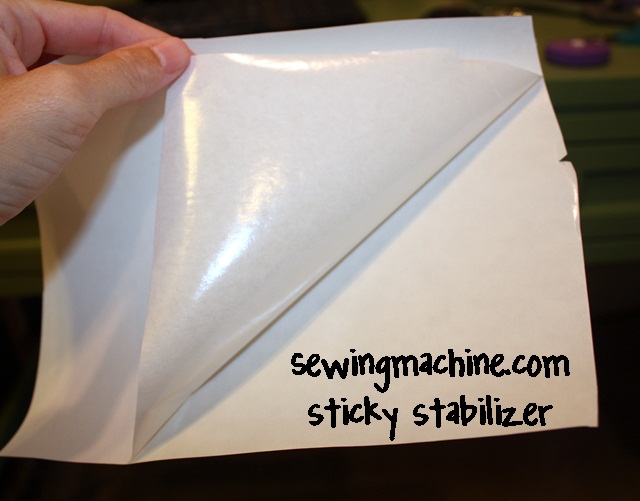
I very loosely cut my sticky stabilizer (from Sewingmachine.com). You want to cut it bigger than your frame so that it’ll overlap the edges of your frame.

Peel the paper side off to reveal the sticky side.

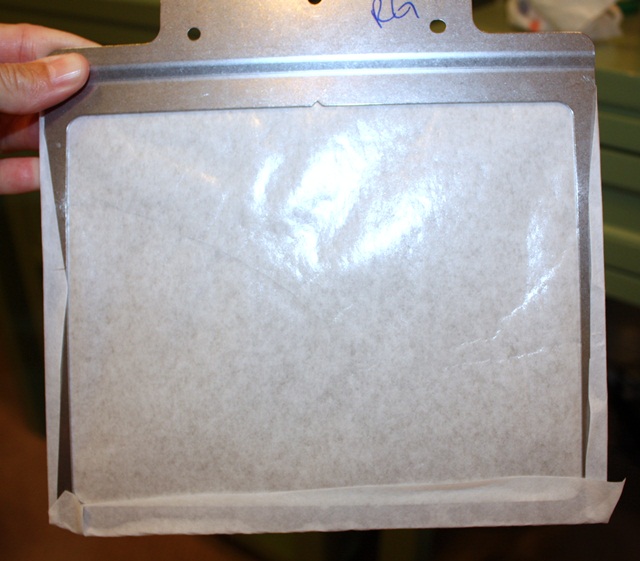
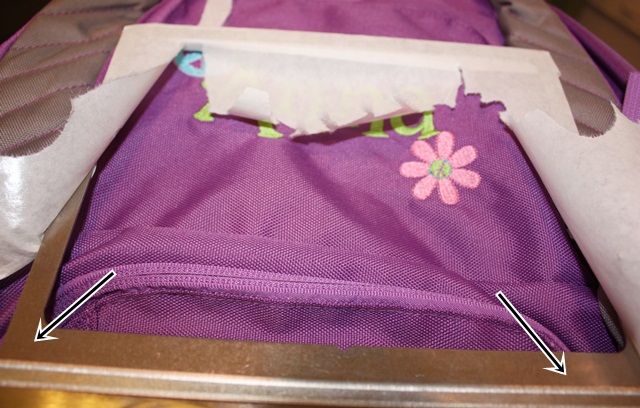
 Stick it to the bottom side of your frame (see photo down below which illustrates a little better what the “bottom” is). Hint: Your frame should slope down from where you attach it.

Wrap the edges around the frame. Doesn’t have to be all neat and perfect.

I then “stick” the backpack flap to the sticky paper on my fast frame. I usually line the top of the flap up with the top of the frame and then pin it in place with straight pins. This also shows me my borders. Since multi needle machines don’t technically recognize fast frames, you have to check the outer border of your design to make sure the needle won’t hit the edges of your frame.

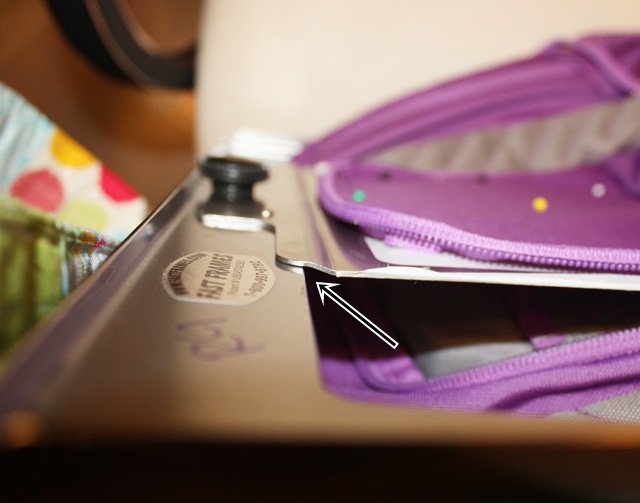
Here is how your fast frame should attach to the frame ~ it slopes down. That’s how you know what the bottom of your fast frame is to attach the sticky paper (believe me, I have stuck it on there upside down and backwards).

 Blah blah blah sew the design AFTER testing your borders and here’s the outcome! I use FILL STITCH instead of satin stitch. Since this is a backpack I wouldn’t want the satin stitch to get snagged or pulled.

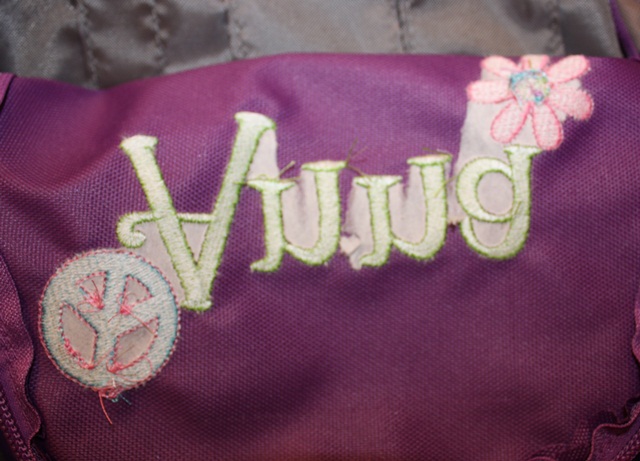
 I peel the sticky stabilizer/fast frame off the flap and as you can see it leaves a little inside the letters. You can peel that away easily. Get under it w/ scissors if need be. The sewingmachine.com sticky stabilizer is just sticky enough and comes off great!

I then peel the sticky paper off my frame. As you can see it comes off very easily with no residue left on the frame.

Here is my finished backpack!

Again, stay tuned for my next post on another Monogram Wizard Plus trick.

Followup to my last post on MWP ~ here is a link to the Facebook Page – click HERE. As far as the Yahoo Group I mentioned… I am not a member of it. I just heard about it on the Facebook page. Evidently it’s a private closed group and they are currently not accepting new members! Check out the Facebook page! So far I’ve seen a few great tips on there!

We are celebrating 3 years of Applique Cafe, so all designs are 1/2 off through next Wednesday, August 15th!