So…. it has been raining here for 2 solid days. All of the snow and ice is north of us, so all we have had is rain and cold and cold and rain all.day.long. yesterday and today. I’m over it and ready for SPRING! and Nike shorts! I had a customer bring me some Nike shorts to monogram this week, and after asking around to see if anyone had done them before, I “figured out” which stabilizer to use. After I was done, I realized it might be handy information for those of you out there who haven’t done any yet.
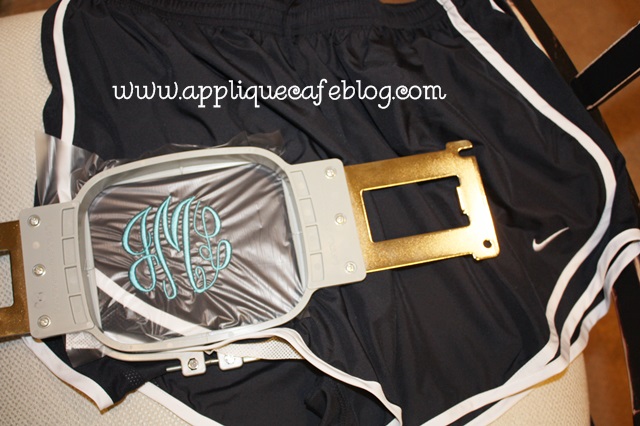
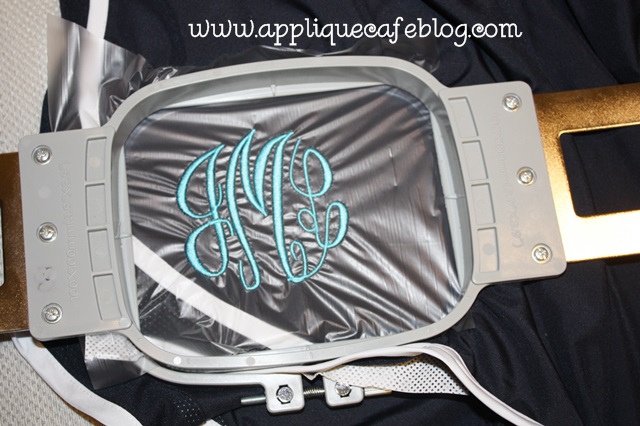
I used water soluble “solvy” on top. Yes, it’s water soluble, but I just pick and pull it off when I’m done.
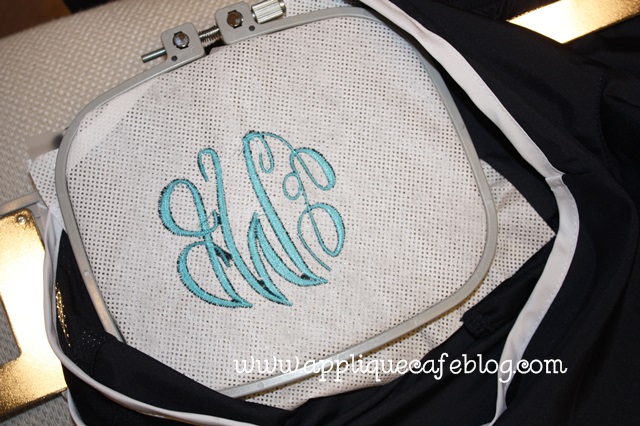
I used Waffle Tearaway on the bottom. As you can see, I hooped it all together and also used a little Sulky KK2000 spray adhesive to “stick” the tearaway to the underside of the shorts to keep it in place. This type of tearaway is a little thicker than the standard iron on tearaway, which is like paper, which I normally use on towels and bibs. Nike shorts are made of a thin polyester type material, and I wanted to avoid any puckering with the weight of a monogram. I considered using cutaway (medium) but went with the tearaway and it did fine.
Do you notice anything “off” on my monogram below? There is no bobbin thread showing, which means my tension is off. This doesn’t affect this particular monogram, but it might if you were working on another project. I will show you in a minute how to check your tension on a 6 needle machine.
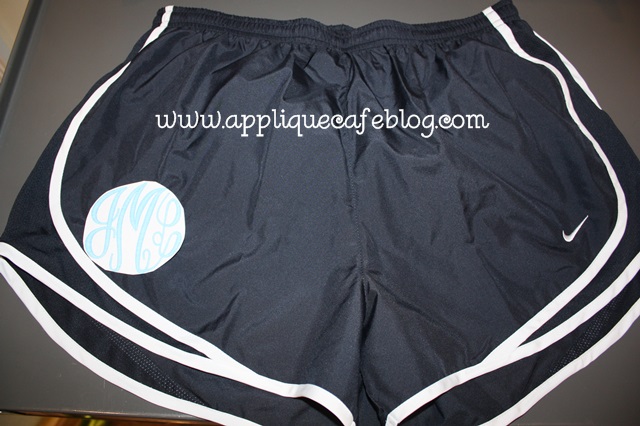
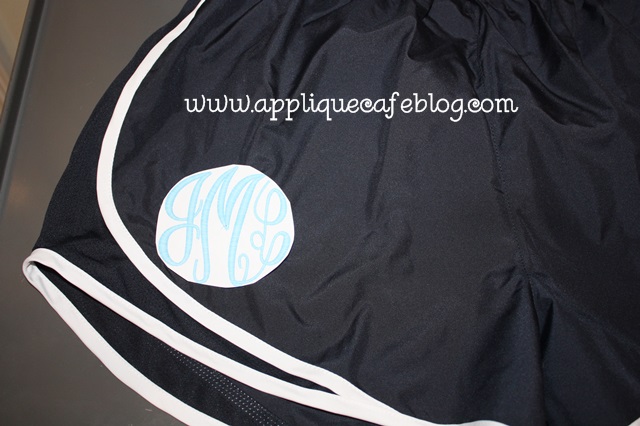
Before I actually did the monogram, I wasn’t sure what size I should do. I looked around on Pinterest and saw a bunch of monogrammed Nike shorts in a variety of fonts and size monograms. I was between a 2.5″ and a 3″ monogram, so I printed both and cut the monogram out to see which size looked best, and also it helped with placement. I used Monogram Wizard Plus “Master Circle” as my font. MWP has a print option which comes in handy when you are deciding size and placement.
I went with the 3″ monogram after consulting with my customer!
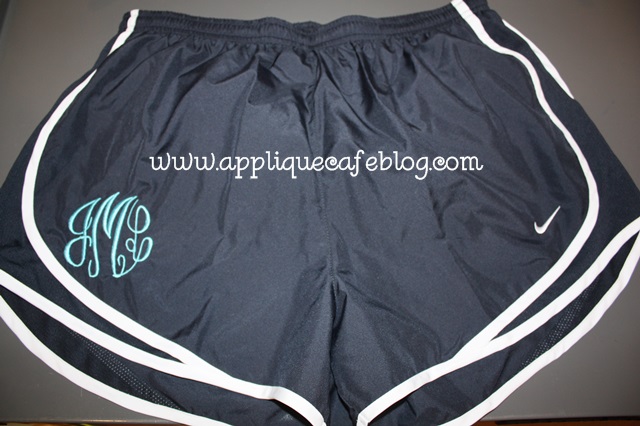
Here’s the finished product! As I mentioned, if you search “monogrammed Nike shorts” on Pinterest, you will see all kinds of fonts and placement. I love the way these turned out! These are navy with a turquoise monogram. Hot pink would have been cute too!
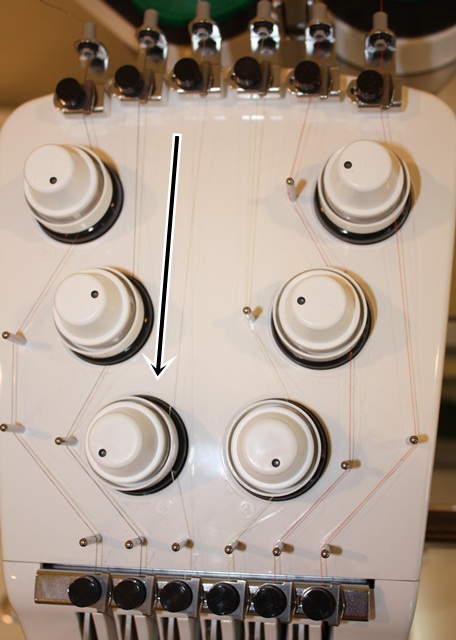
Now on to my tension issue. I have a Brother PR650 6 needle embroidery machine, which comes with a handy dandy tension test feature. On machines such as mine, your tension is controlled by knobs on top of the machine.
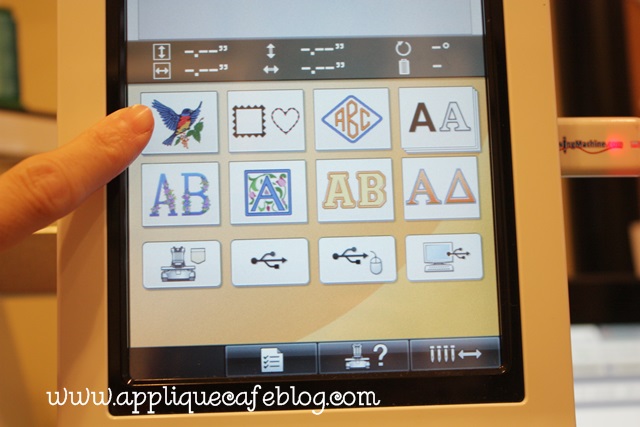
Looking at your Home screen, select the button with the bird on it.
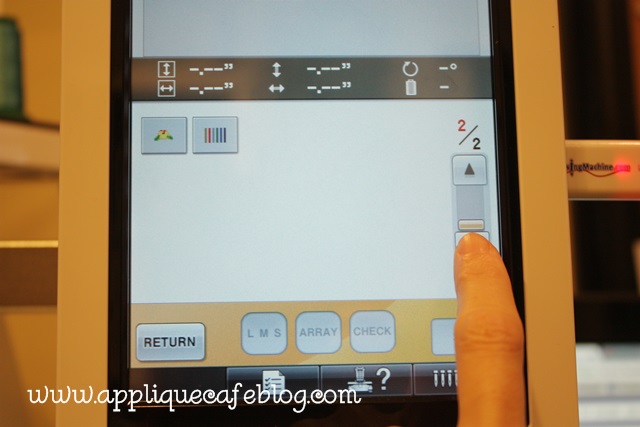
It will pull up some embroidery designs built in to your machine. Go to page 2 and you will see the tension test.
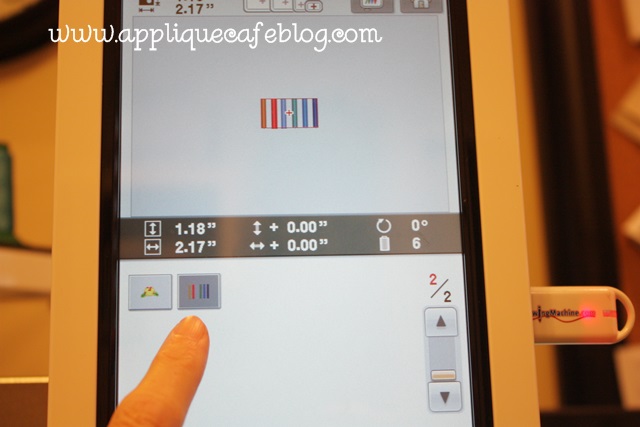
6 color bars or lines = 6 needles = 6 thread colors.
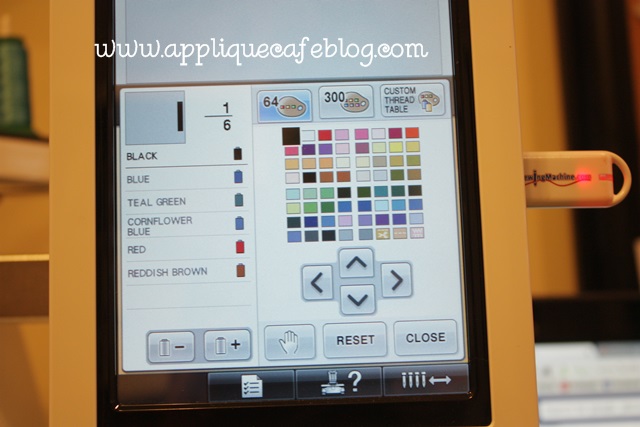
I go in and program each step according to the colors of thread on my machine. Huh? I assign black for needle 1 because black thread is on my machine for needle 1. Etc…
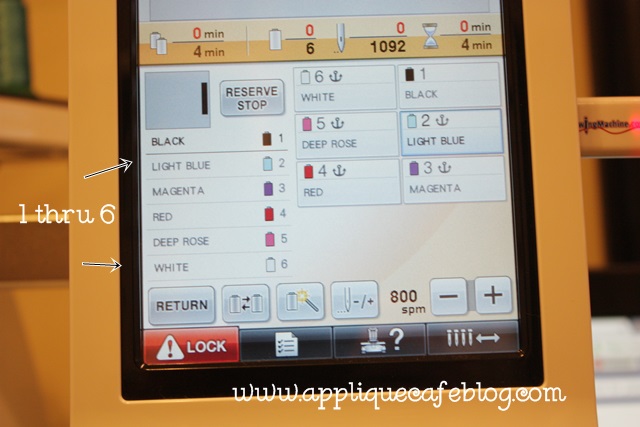
As you can see below, I’ve assigned my colors and it shows the 6 steps with needles sewing in order to test each needle, 1, 2, 3, 4, 5 & 6.
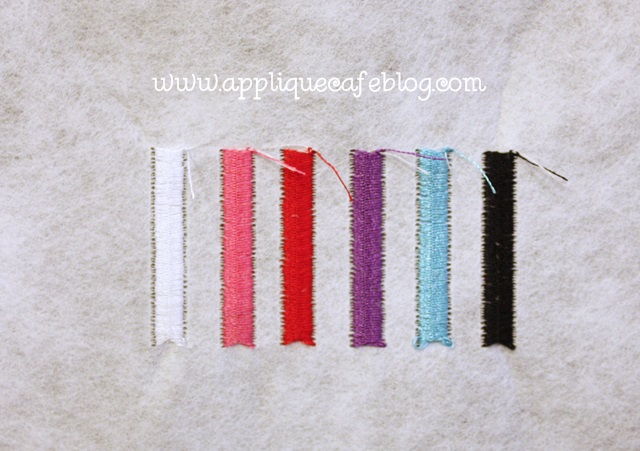
Here are the results of my first tension test. Again, no bobbin thread showing. Since all 6 rows are lacking in bobbin thread, I have to assume there’s an issue with my bobbin! Had it been only 1 needle, then I could assume there was an issue with that 1 needle and the rest were fine with no bobbin issues.
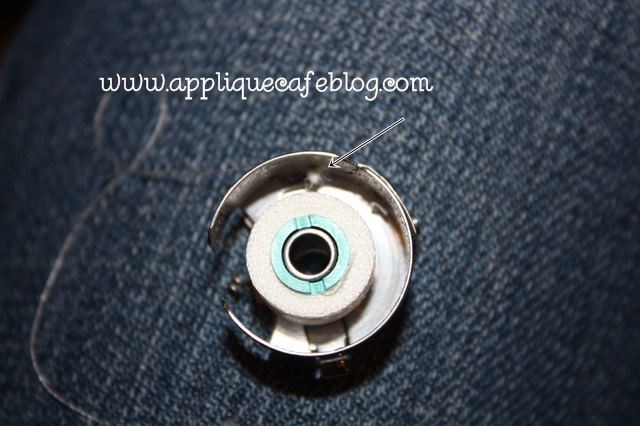
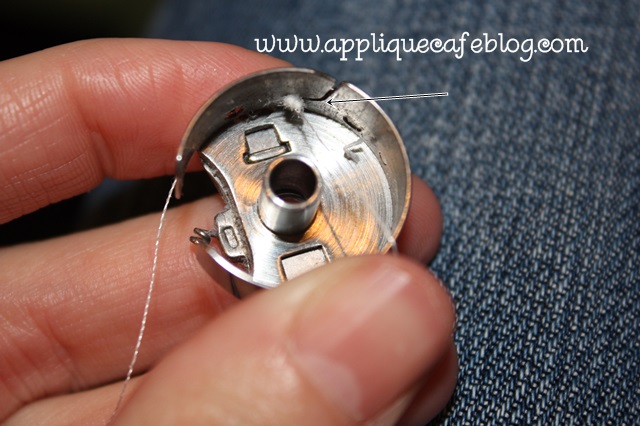
After taking my bobbin case out, I quickly found the culprit. It looks like the thread is caught and is balling up before it can come out of the bobbin case.
Bingo! I removed the “knot”, re-threaded and put my bobbin case back in. I use Magna Glide Prewound L bobbins.
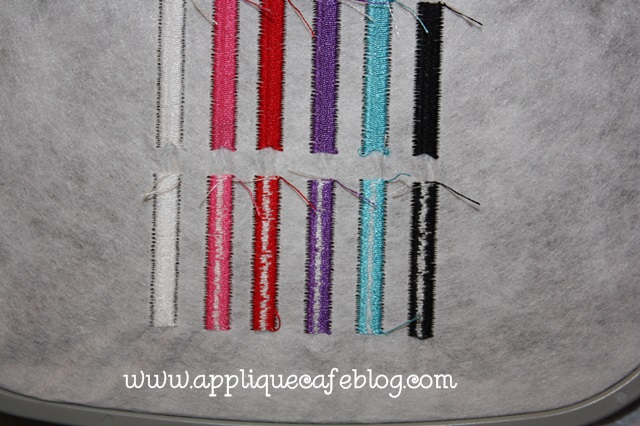
Tension test #2 results are below, and you can see the bobbin thread. A good rule of thumb per Steve at Sewingmachine.com, is 1/3-1/3-1/3. 1/3 colored thread, 1/3 bobbin thread in the middle and 1/3 colored thread on the other side. Mine is not exactly 1/3 each but it looks much better and I can work on the tension up top!
I hope that was helpful ~ both the stabilizer with the Nike shorts AND the tension test! You can find more helpful videos regarding 6 needle machines at Sewingmachine.com!
Before you go, check out Whimsical Fabric’s latest blog post! I had the pleasure of being their “Featured Customer” for February! Find out more about me and running my own business! WF has great fabric, shipping supplies and sewing patterns for those of you who sew. She also hosts a “Sew Along” each month so check out her blog to find out more. She’s also on Facebook and has a sew along Facebook group if you are interested in joining! Basically she picks a pattern to sew each month and blogs about each and every step. There are discussions on Facebook and lots of photos!
Lastly, all of our designs are on sale through Tuesday, February 18th at Applique Cafe! Below are a few new ones listed last week.
I’m off to snuggle with my Maggie. She is scheduled for surgery in the morning to be spayed!! She has already begun her first heat cycle (eeek!!), so the timing was perfect and we’re anxious to get through tomorrow. Have a great rest of the week! We are hoping for some sunshine tomorrow!

Love your blog! I’ve never used the waffle tearaway before. It looks like you trimmed it when you were finished instead of tearing all the excess off. May I ask why?
I did tear all the excess off. You may be looking at the photo of the PRINTED monogram on a piece of paper? I printed it out (and cut it out) and placed it on the shorts to figure out what size was best and placement. It’s a few photos down.
Yes, that’s what I was looking at! I mistook the paper for the tearaway. I should have looked closer, and I would have noticed that the paper didn’t have the waffle design! Thank you!
Rosemary – I love the shorts, but have a (hopefully) quick question. I monogrammed some last summer and struggled with getting the monogram STRAIGHT up against a slanted leg seam. Does that make sense? Of course marking the center of the design is easy – but how did you make sure it was straight once you got it hopped? If this is clear as mud, let me know and I will try and reword it! Thanks in advance for any suggestions or tips! LOVE LOVE your work!
I think it’s all in hooping it straight or parallel w/ the top elastic of the shorts? I saw lots on Pinterest and the monogram was tilted to the right.
Thx Rosemary for the great post….Ive been wondering how the waffle tear away works, so Im glad to know how you used it….also thought your tutorial on tension was very helpful! Keep em coming, Ive been at this for about 9 years but always good to see how others do things….I learn something everytime!
I like the waffle weave b/c it’s a little thicker than the paper iron on tearaway! Gives a little more stability!
You are such a HUGE help!!! I’m looking to purchase my first embroidery machine and love all the info. I hope I’m as blessed as you are and able to stay home with my little ones. Guess you gotta crawl before you can walk/run 😉
I enjoyed the blog with the shorts but have 2 questions…I thought I had some of everything but I have never heard of the waffle weave. Where can I get some? It’s tearaway? How did you decide how far over to put the monogram? Was there a guide to help up or was it jut eyeing it? Thanks!
Go to http://www.sewingmachine.com and search WAFFLE. It will pull up precut squares, a roll, etc. Yes it’s tearaway! I printed the monogram on paper first, then decided on size and placement!
Just read your blog for the first time. Glad I found it. I have a new PR655 and am learning as I go how to manage this Big Bertha. My old single needle Ellageo was so much easier. Have a granddaughter who might like those shorts, too, so I am going to check into your suggestions.
Thank you so much for this info. I googled monogram Nike shorts and yours popped right up. We’ve purchased many of your fonts and appliqués. Your blog is so helpful and we love your designs. Thank you!!