Simply Classic!

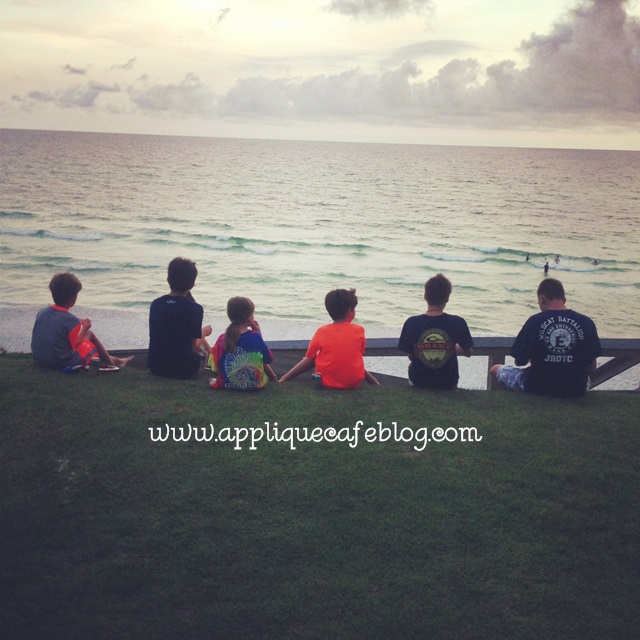
Good afternoon! I am back to work full steam ahead today after having been on vacation all last week at the beach with my whole entire (party of 17) family. It’s good to be home! We missed Maggie and it’s always good to get back to reality and turn my machine on again! Here are a few pics from our trip. This was our 9th year going to the Seagrove/Seacrest area of Florida (which is near Seaside in between Destin and Panama City Beach). It’s BEAUTIFUL!!

Sissy sporting her MONOGRAMMED visor I did for her! I used Monogram Wizard Plus “Camp” font with motif SySerif 26 dots in between. Check out my recent blog post on doing VISORS.

photo (18)

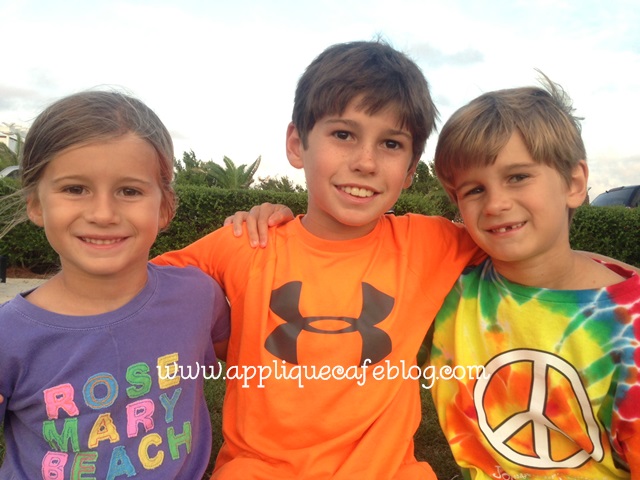
Here are all the cousins minus one that is older. All boys but Sissy!

photo (19)

My 3 at a concert at Alys Beach. G lost one of his front teeth the 1st night we were there!

photo (20)

My oldest teaching little brother how to skim board. The sand is gorgeous and the water is beautiful! We had red flags a few days but overall it was a great beach week!

photo (21)

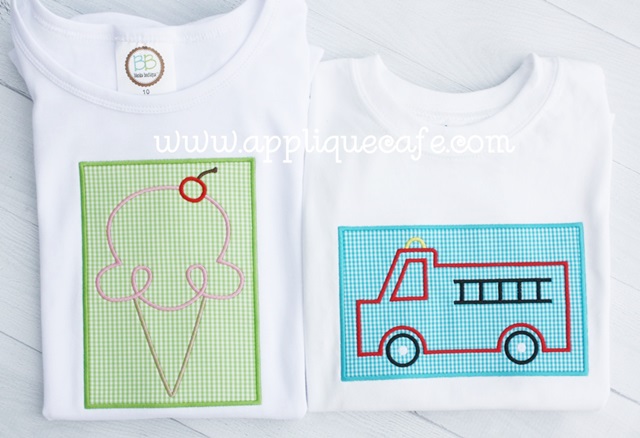
Before I left we listed a couple of “new” designs, meaning they were new to the website, and sort of a “new” style to Applique Cafe. These are 1 FABRIC PATCH DESIGNS. The base fabric is done in 3 steps just like any applique designs (marking, tackdown & satin). After that, it’s all thread and super easy and fast to stitch. As you can see, I’ve used a lot of old school ‘good ole’ gingham fabric on these designs. There’s much controversy over whether or not CHEVRON is here to stay or (some hope) heading out of style. Gingham is both CLASSIC and SIMPLE!! Polka dots work too and even stripes.

This is our Ice Cream Cone Patch & Fire Truck Patch, both of which are available on our website now.

IMG_8944


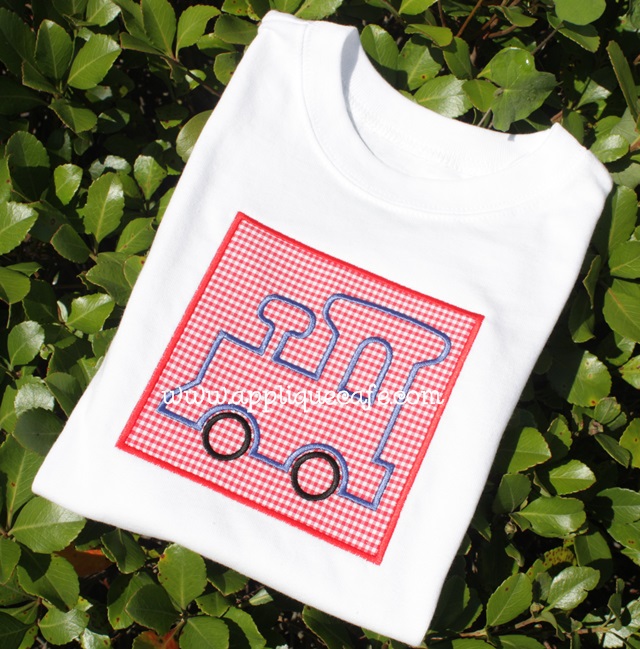
This Train Patch is a new design and will be listed hopefully sometime tomorrow.

train blog

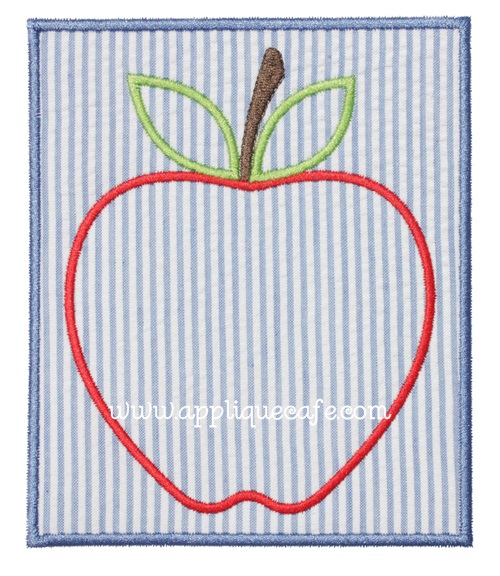
Did I mention it was PATCH WEEK? We are already thinking of BACK TO SCHOOL. Here’s a quick and easy APPLE PATCH that will also be listed this week. I used seersucker striped fabric on this one.

apple patch 2 500

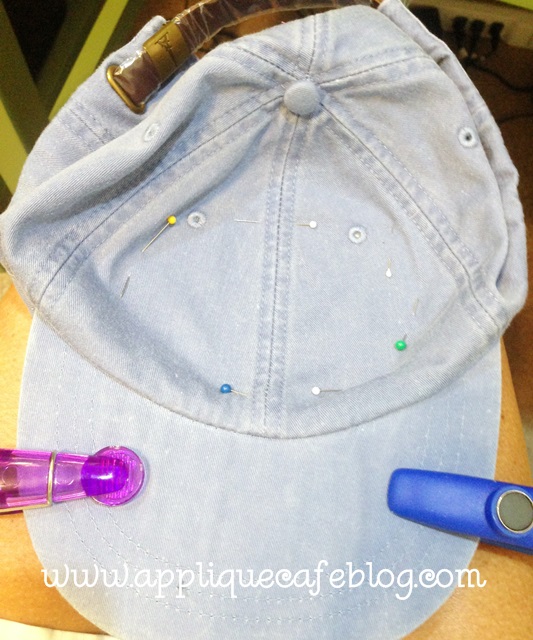
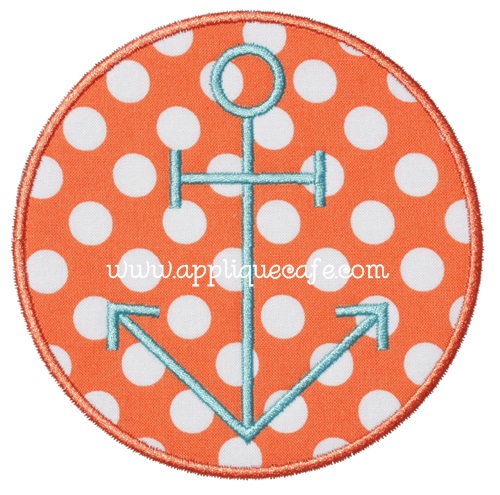
Also new is an Anchor Patch which will come in our regular 4×4, 5×7 and 6×10 sizes + we are including a smaller size (2.70″ X 2.70″) which is great for hats. This is an Adams brand pigment dyed hat and I stitched it this morning using my Fast Frames. You could also hoop a piece of sticky stabilizer I believe and do the same thing on a single needle machine (or any machine with no fast frames). The key is to get the bill of the hat flat, and also to get the front part of the hat where the applique (or monogram) will go flat and straight. *Check out my other recent post on doing HATS! I used chip clips to keep the bill of the hat flat and attached to the frame. I also smoothed the hat fabric and pinned it down. The seam of the hat is a great marker for your center.

photo 1 (8)

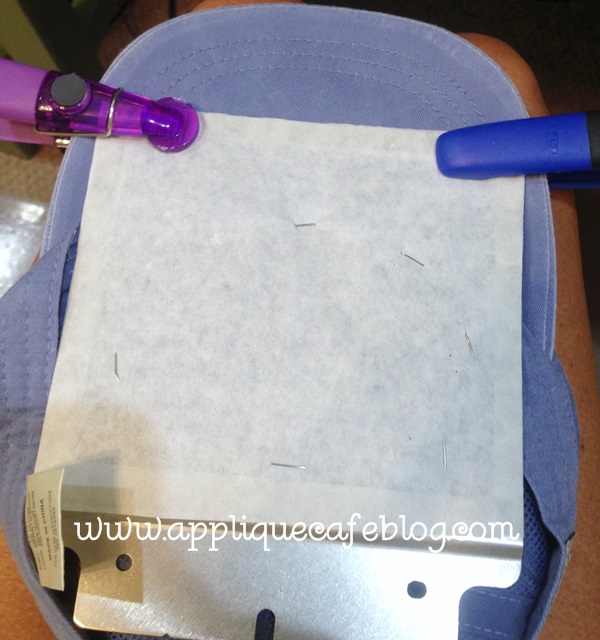
This is what it looks like from underneath.

photo 2 (8)

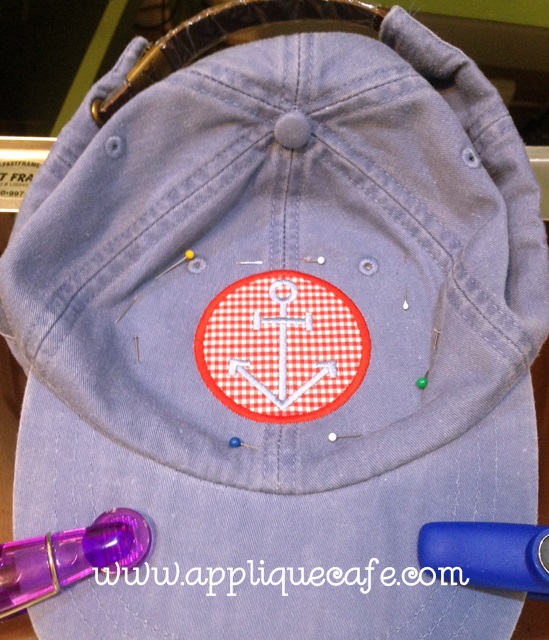
I used a red gingham fabric, and I applied Heat N Bond Lite to the fabric and fused it to a piece of medium weight cutaway stabilizer. I also applied HNBL to the stabilizer. Why did I use stabilizer? I was afraid the cotton gingham would be too thin on its own so the stabilizer makes it thicker and more stable for the applique.

photo 3 (5)

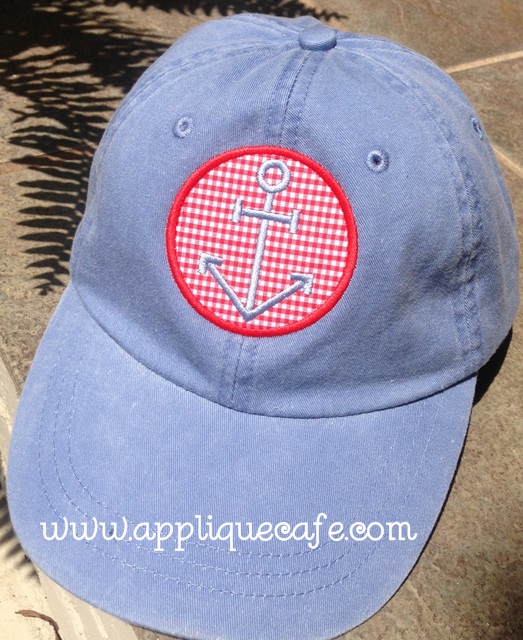
Finished product!

photo 5 (4)

I also sewed the Anchor Patch in the 5×7 size. It is new and will also be listed this week. anchor patch 5x7 500
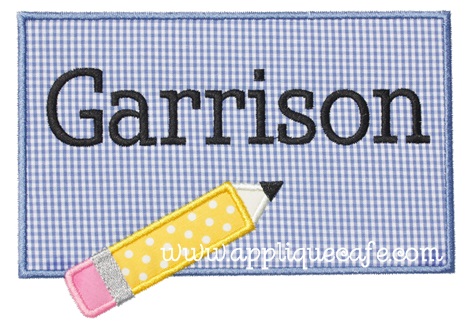
One more new design for this week ~ Pencil Patch. This is great for BACK TO SCHOOL (yikes!!) and I used Monogram Wizard Plus “Kazoo” font which is for idea purposes only. Be on the lookout for a Crayon Patch similar to this!

pencil patch name 500

Hats are really popular right now as well as visors. The “pigment dyed” is also super popular!

I wanted to mention that I would not be at the Everything Applique Conference in Atlanta this weekend. I was leary about committing to do it back in April because I knew it was going to fall right after my first summer vacation. I thought I could swing it, but then realized it was going to be too much to get back from vacation and then leave town again for a long weekend with half of my sewing room. Summer is so short so I’m enjoying spending time with my kids and just having fun! Have a great week, and check Applique Cafe in a day or two for our new designs (and maybe a summer SALE).

Visors, Part 2

Another post! 2 in a row. This is a follow up to my previous post on MONOGRAMMING VISORS using a CAP FRAME. Check out that post if you are just tuning in. A friend brought over several youth visors today so guess what I did all afternoon? My original thought was that the 6 year old daughter would love a monogrammed visor this summer. This thought came after she wore mine at the pool yesterday. It didn’t take long for my niece to claim one (and want it monogrammed right then and there) and the boys to claim theirs too. So that’s what I did all afternoon, and I figured out a trick or two I wanted to share!

First, when using your CAP FRAME, your machine (multi needle) knows you’ve installed the cap frame on there and assumes you are monogramming hats or caps. A) When “hooping” your cap or hat on a cap frame, the hat is actually upside down on your machine. SO…. your machine automatically flips your monogram upside down. B)When “hooping” a visor using your cap frame, the visor is actually right side up. This creates a problem when your machine flips the monogram upside down. Today I found myself rotating the design to right side up several times while editing my design on my screen (selecting and assigning colors, etc.)

LIGHT BULB!!!! After the 2nd visor, I formatted my monogram in Monogram Wizard Plus and saved it on my computer. I then opened the saved monogram in Sew What Pro, rotated it upside down, and saved the file to my thumb drive to stick in my machine. Are you confused yet?? Now, when I put the upside down monogram on my machine to stitch on my visor, when I’m done editing, it will flip it upside down for me, which makes it RIGHT SIDE UP for my visor!

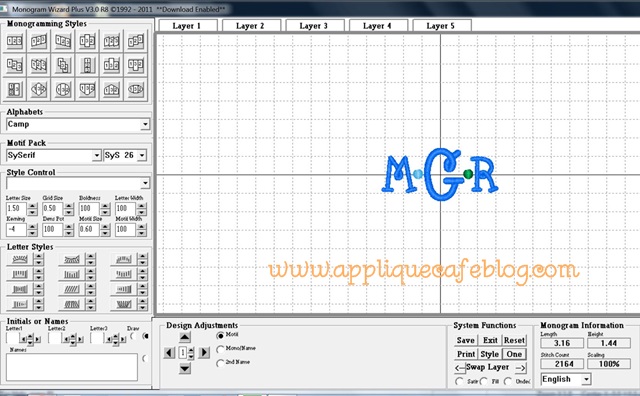
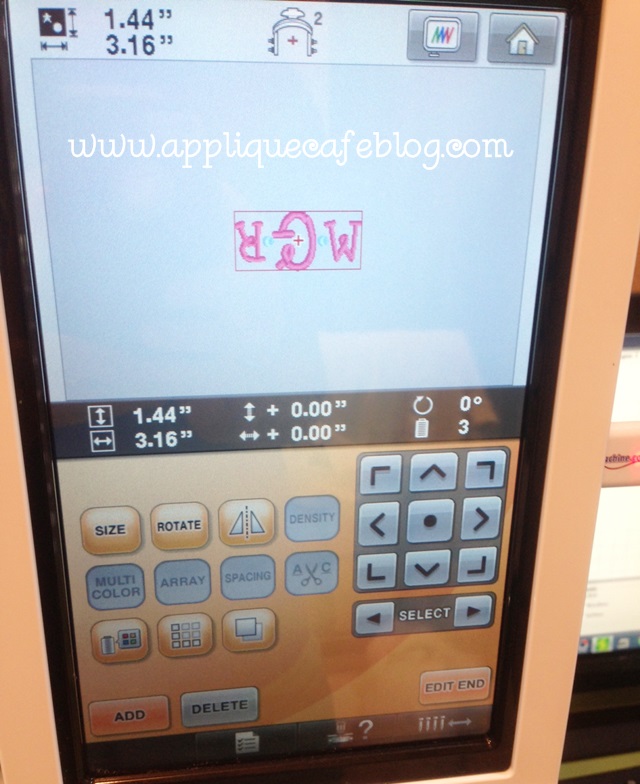
Here is my MWP screen and I used Camp font. I also inserted dots in between my letters using SySerif Motif 26 so I could use 2 thread colors on my lime green visor. If you have MWP and don’t have the free motifs (punctuation), go to the Needleheads Sewing Studio and download them for free. So I saved this file on to my computer just like this.

VISORS

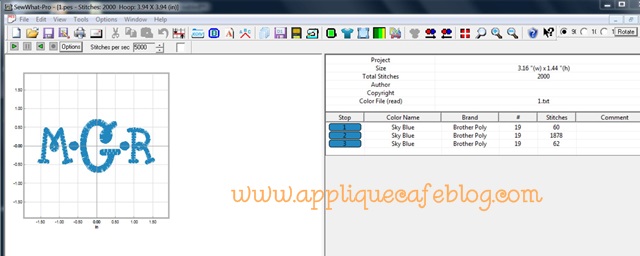
I then opened the saved file in my Sew What Pro. I couldn’t figure out a way to rotate a design upside down in MWP. If there is a way, let me know!?

visors2

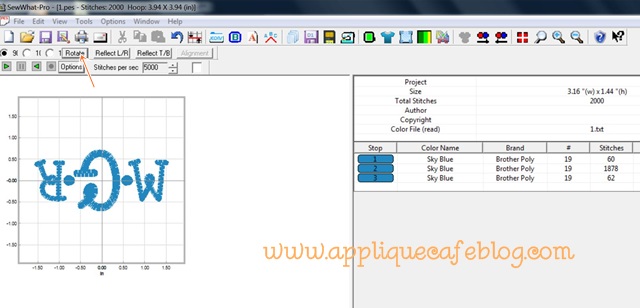
I rotated the design and saved it as upside down!

visors3

Another LIGHT BULB moment…

If you check out my last post on VISORS, I explain how when hooping a visor on the cap frame, the clamp that folds over barely grips the top of the visor. Here is a pic:

photo 2 (7)

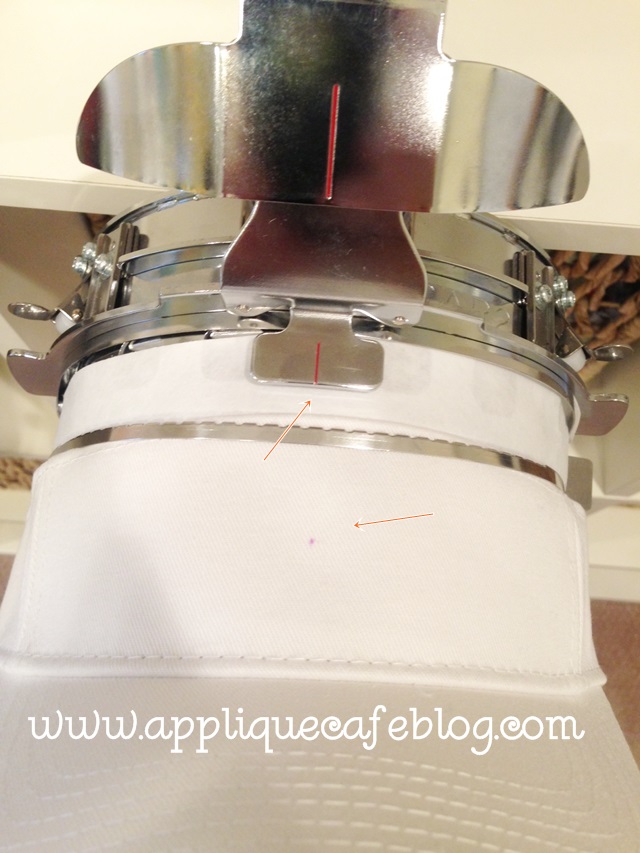
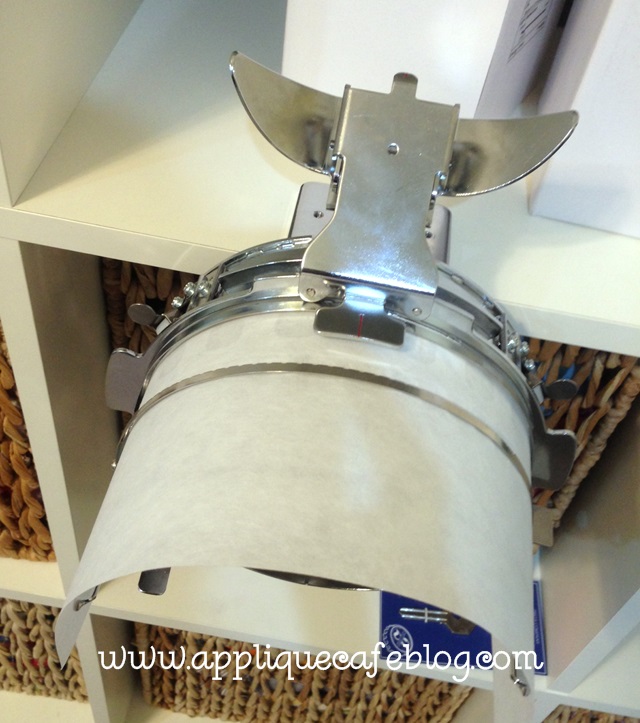
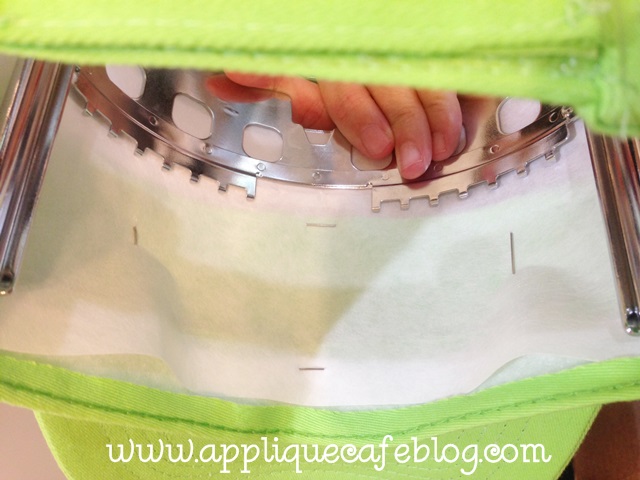
Today I found that this gives little room for your monogram on the visor. You are limited to like 2″ in height anyway, and with the visor up that high on the frame, I was having to shrink my monogram to make it fit and centered. So…. I decided to instead “hoop” the tearaway cap stabilizer strip and then pin my visor lower on the stabilizer on to the frame. It worked!! Below you can see where I clamped down my stabilizer on the frame. You can buy tearaway cap backing in pre-cut strips from sewingmachine.com.

photo 2 (6)

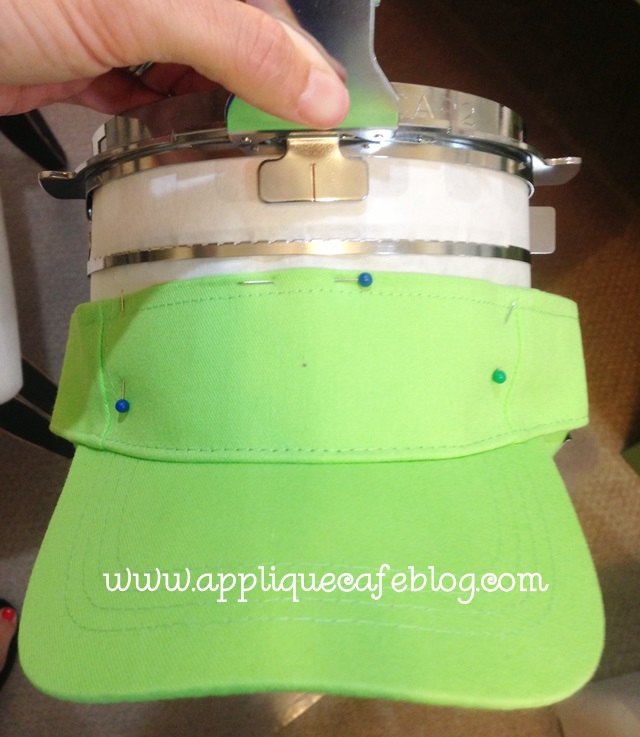
I then pinned the visor to the stabilizer to keep it in place. You have to be gentle and careful, but it works.

photo 3 (4)

The little lining strip is folded down on the visor and I pinned that to the stabilizer also.

photo 4 (2)

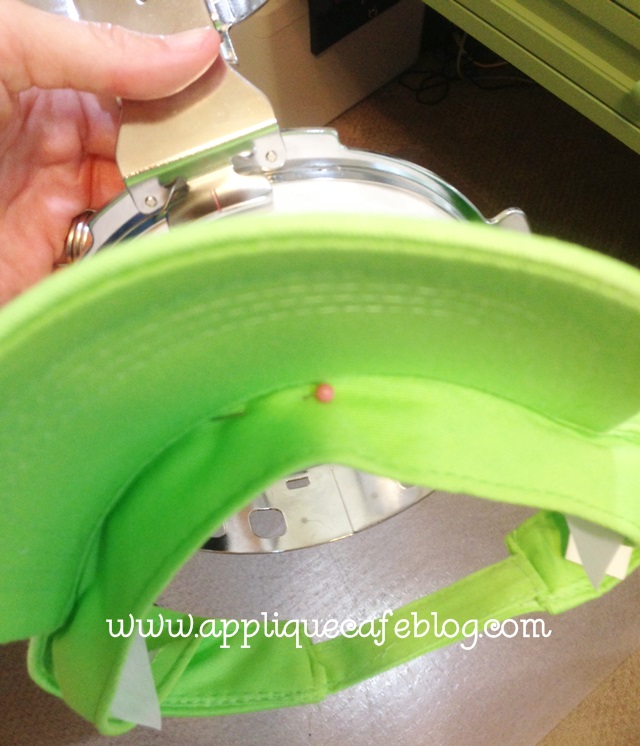
Here is what it looks like underneath. 

photo 5 (2)

Here is a shot of the visor on the frame on my machine. I will line up the needle with the center mark on my visor before sewing.

photo 2

First I want to assign colors to my monogram. As you can see below, I put the design on my machine and it’s upside down like I saved it  in SWP  and it will stay upside down for thread color editing.

photo 2 (7)

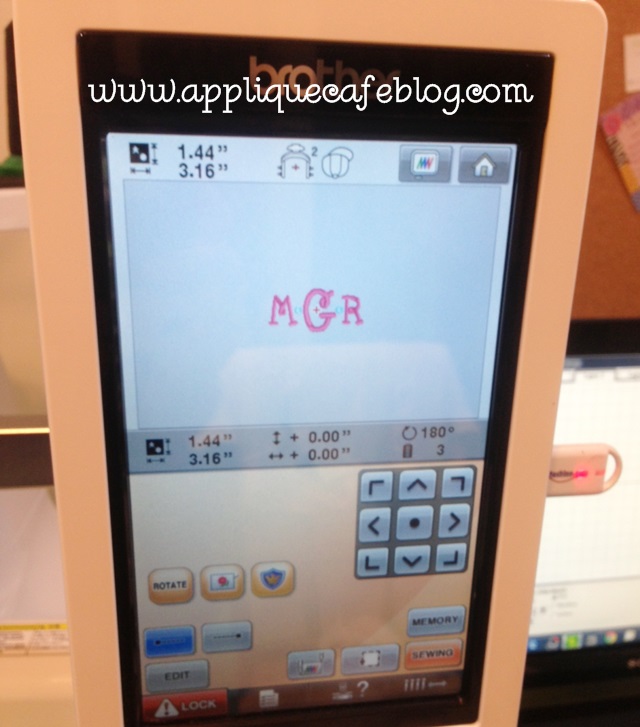
I’ve assigned my colors, hot pink letters and turquoise dots. 

photo 1 (7)

When I click Edit End, my machine automatically flips the design upside down thinking it’s a cap. For me, it flips it right side up for my visor since I saved it upside down. I line my needle up with the center mark on my visor and now I’m ready to sew!

photo 1 (6)

Here it is when it’s finished sewing. I unpin and remove all of the stabilizer.

photo 3

Here is my lovely assistant modeling Mallory’s new visor!

photo 4

And here are my 3 kiddos in their summer visors!! I used MWP Natural Circle font on the boys and MWP Happy on Mallory’s other visor.

photo 5

Comment or email me with any questions! If you are familiar with the cap frame and visors then hopefully this will make sense and help! Recap: save your monogram upside down for visors AND clamp the stabilizer on your cap frame, then pin the visor to the stabilizer!

Umbrellas and Hats

Good afternoon friends! Yesterday I opened the mail to find a copy of Creative Machine Embroidery magazine and was pleased to find that my BLOG was noted in the magazine as “One to Follow“!! While sometimes I struggle to find the time to blog, or struggle to come up with anything to blog about, it has always been my passion to share what I’ve learned with all of you! I know sometimes it’s boring (WAKE UP!!!) and sometimes I go a month 2 weeks with nothing posted, but please know I’m here and hope to bring you helpful info as often as I can!! Thanks for reading and thanks for the comments and encouragement! 😉

photo (27)2

Now, as promised…. I monogrammed a hat Friday using FAST FRAMES and took some pictures to show you. I posted the other day about doing a visor on my BROTHER PR650 using the cap frame. You can do hats with the cap frame also, but if you don’t have a cap frame or want to unpack it from the box, you can use fast frames. I’m not promising this will work on all hats, but the ones I’ve done have been NOT-stiff and easy to work with.

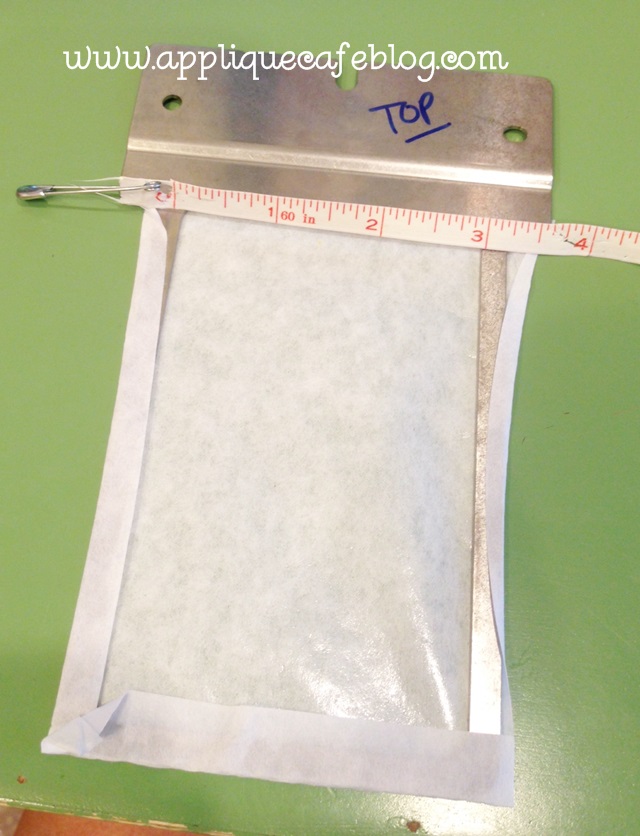
I used the below frame, as the monogram for my hat was around 2″ tall and wide. You could always do your monogram bigger. I did this hat for myself. A) I rarely wear hats but thought it might come in handy this summer {I typically wear a visor if anything on my head}. B) Being someone in the business of monogramming, I never wear anything monogrammed!!! As you can see I’ve used sticky stabilizer on my fast frame and wrapped it around the edges. Am I the only one who stares at my frames to determine which side is the top and bottom….

photo 4 (5)

The first thing I did was get the liner out of the way so I don’t monogram it. I simply pinned it out of the way! As you can see, this is one of those cute “pigment dyed” hats that are so popular right now (like the Comfort Colors tees). It’s ADAMS brand and I got this from a friend, but have recently discovered Apparel N Bags website where you can buy the Comfort Colors tees, these hats and other cute things!
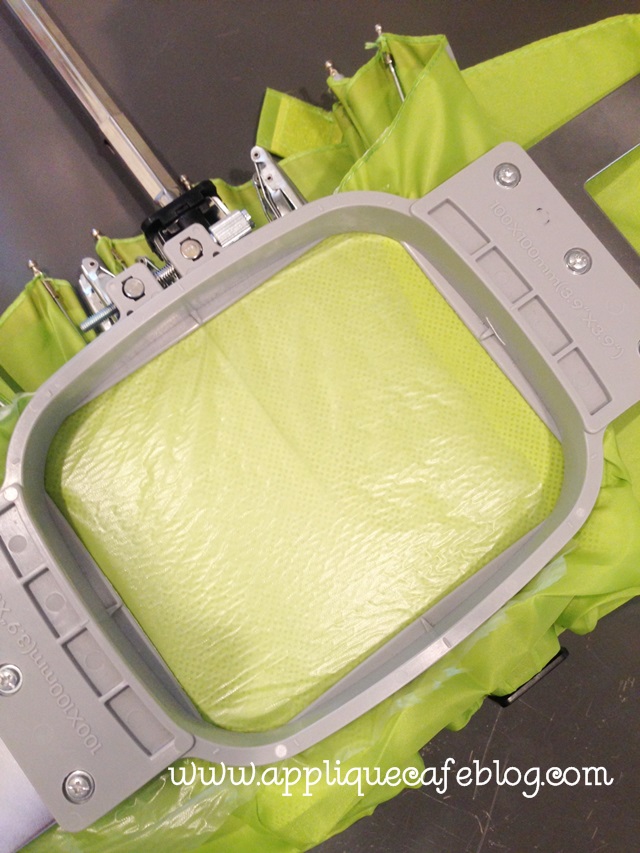
photo 3 (10)

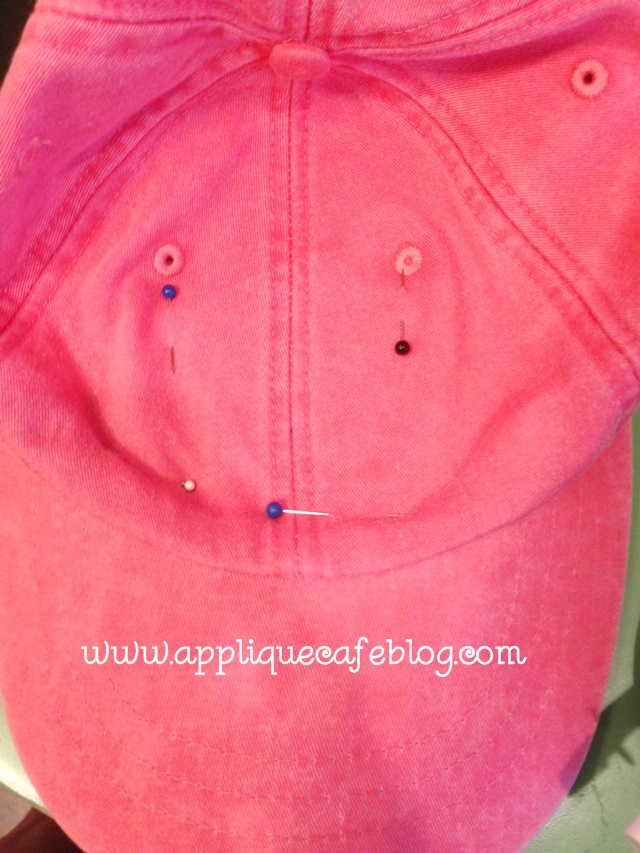
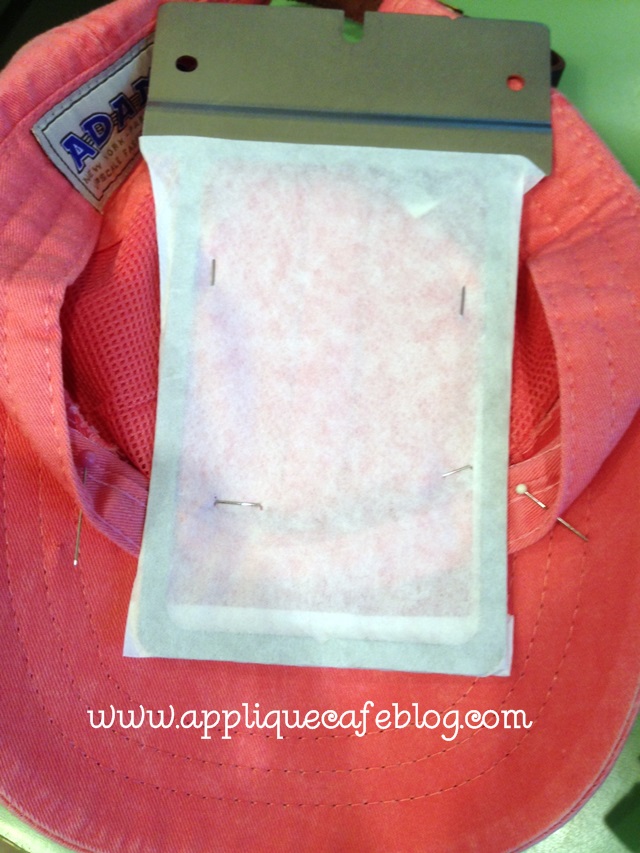
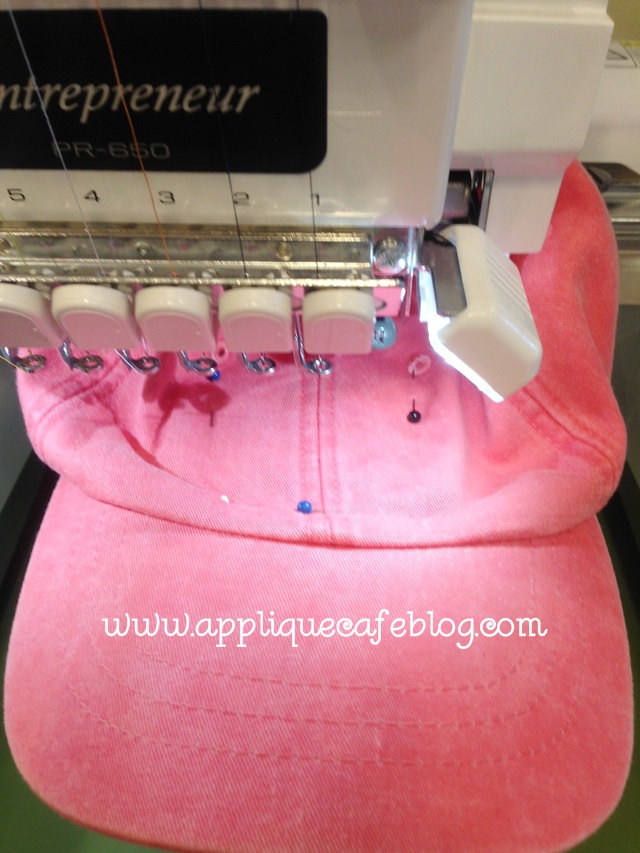
I flattened the bill of the hat out so that I could attach the face of the hat {where the monogram will go} to the fast frame and sticky stabilizer. As you can see below, I pinned my monogram area in place and tried to line up the center seam of the hat with the center of the fast frame. This takes some practice and I had to adjust and move the hat several times to get it right. As I said, my monogram is only around 2″ so I didn’t need much space.
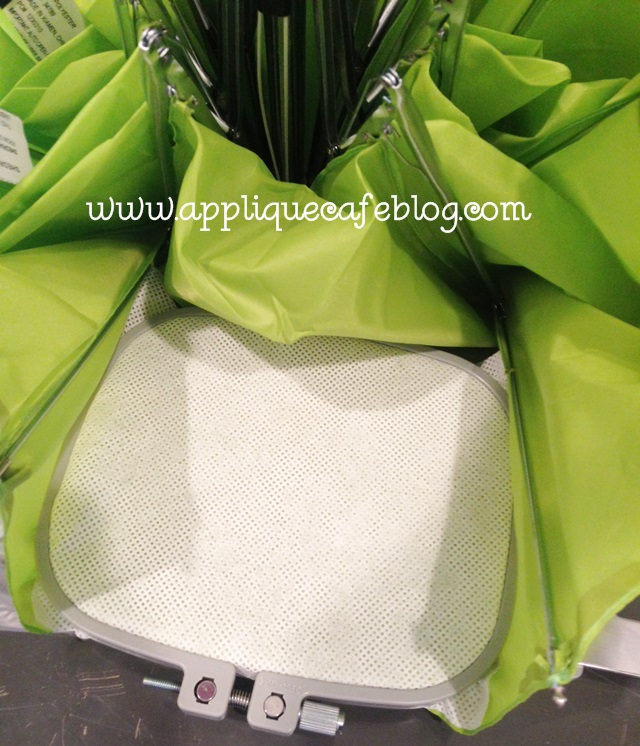
photo 5 (4)

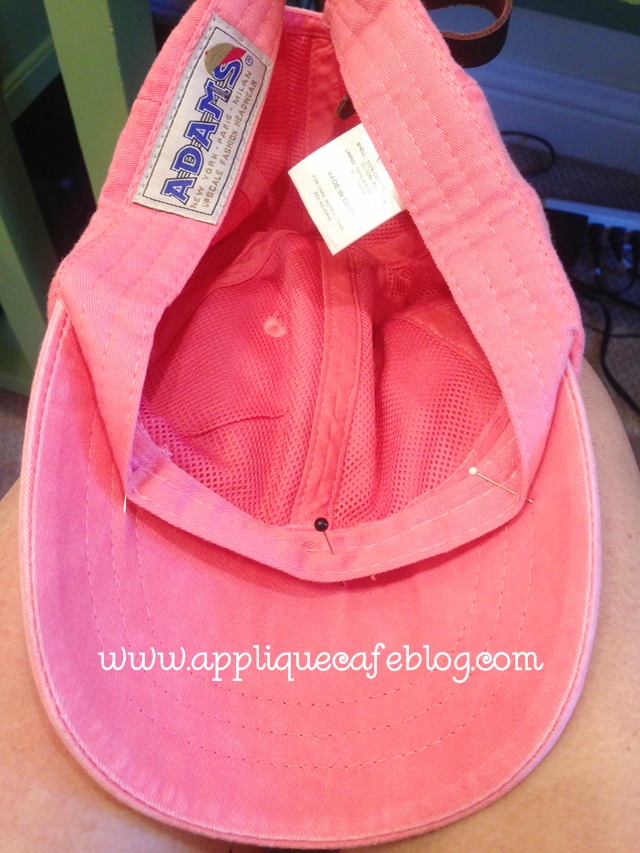
This is what it looks like underneath. My lining is pinned down, and the face of the hat is also pinned in place.

photo 1 (15)

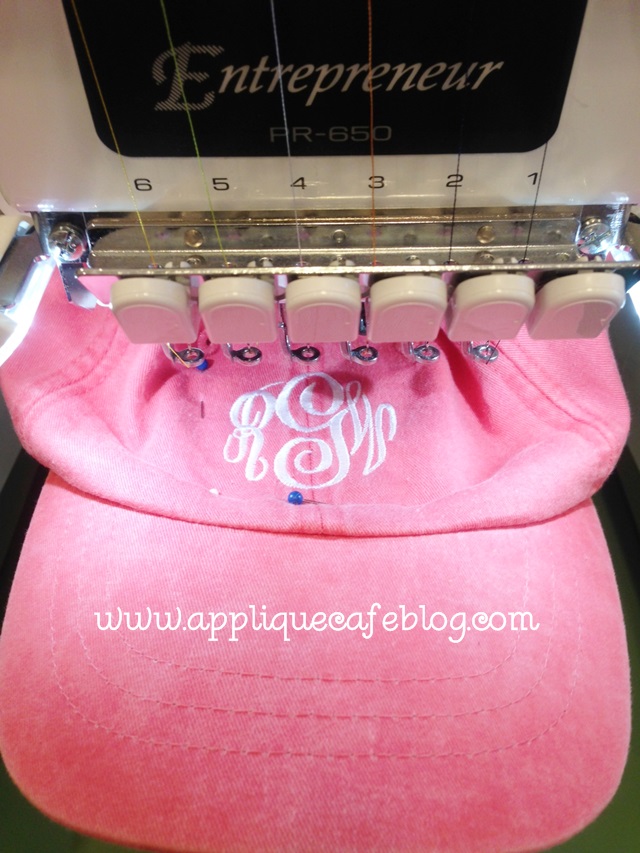
My hat is on the machine now ready to sew. Just make sure the excess hat is out of the way on all sides! Also, since this is a FAST FRAME and my machine doesn’t recognize it as any particular hoop, I checked my borders to make sure my monogram would fit INSIDE the area on the face of the hat. You don’t want your needle to hit the frame on either side!! I lined my lead needle up with the center seam on the hat.

photo 2 (14)

My monogram is complete. I used Monogram Wizard Plus “Master Circle” font.

photo 4 (9)

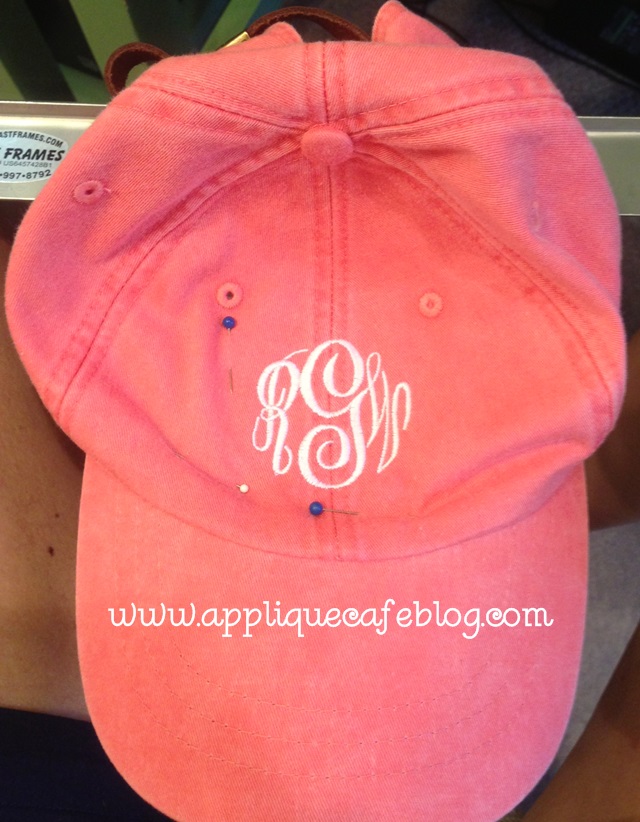
When done I remove the hat and frame from my machine, unpin it and remove the hat from the sticky stabilizer. I then remove any sticky stabilizer from inside the hat, unpin the liner and it’s ready to wear! Again, some hats have seams like the one below which shows you where to center the design!

photo 5 (9)

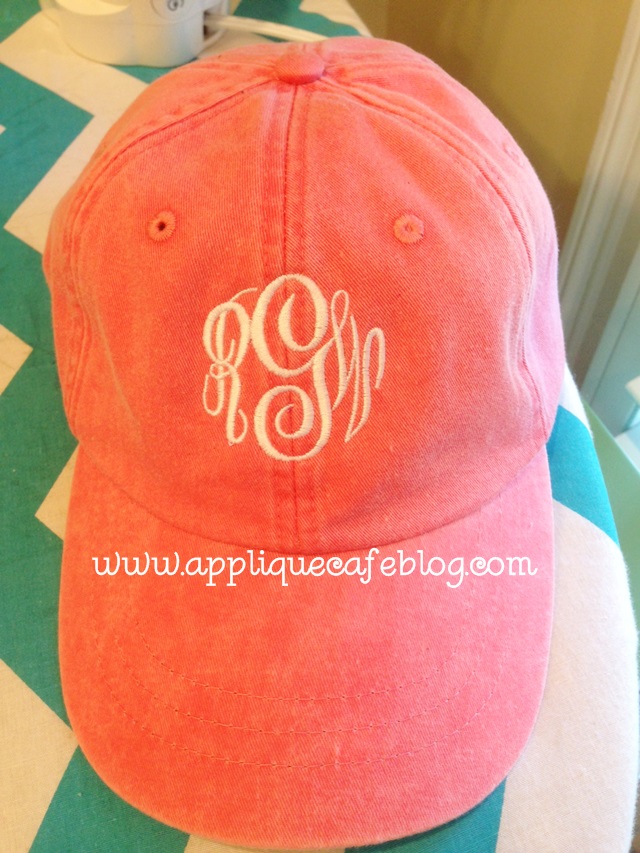
Here’s the finished product!

photo 1 (14)

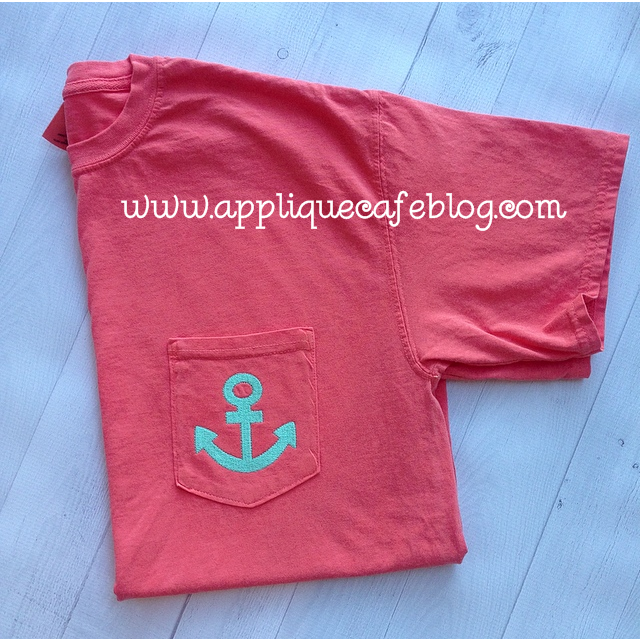
I am a little obsessed with the color of the hat and the below T-shirt, which is Comfort Colors Bright Salmon! The hat may be Poppy or Nautical Red (Adams brand)? These are all samples for my upcoming class at Ruthie’s Notions {this coming weekend!!}. In lieu of initials, I put our 3″ Mini Embroidery Anchor on the below Comfort Colors tee. I’m also using my vinyl backdrop I got recently from Bubble Gum Backdrops on Etsy! This is a 36″ X 36″ pale wood vinyl backdrop. It really makes the t-shirt pop!

photo 2

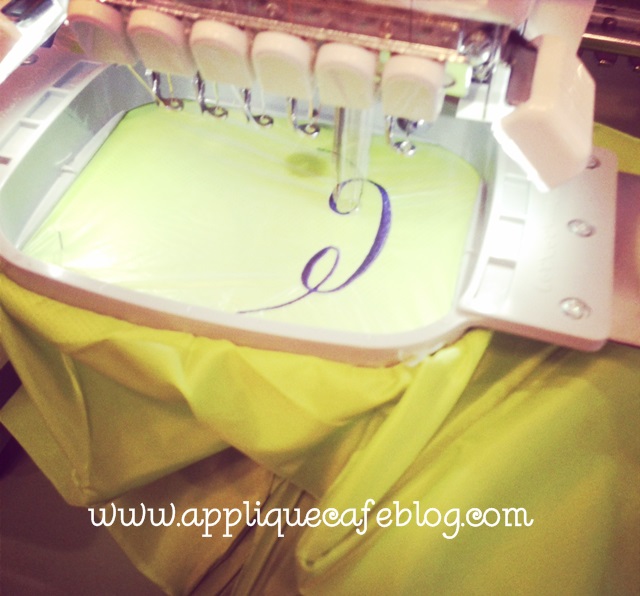
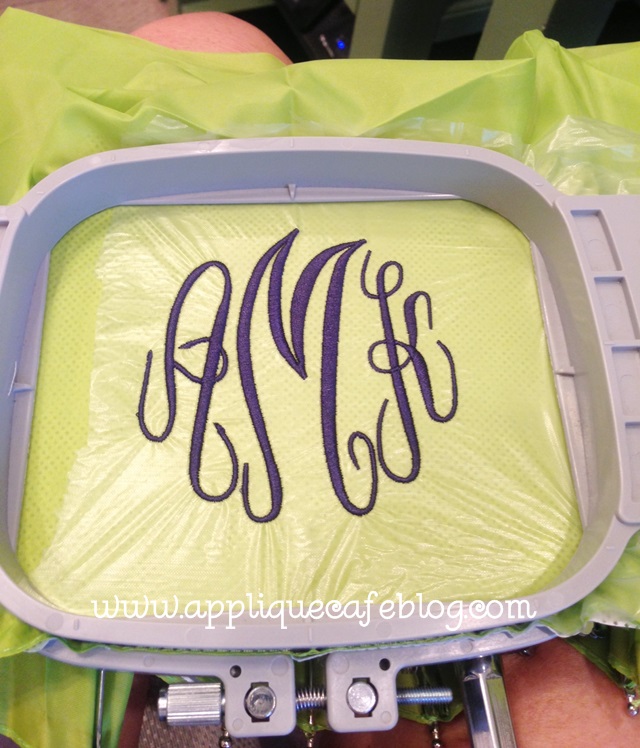
Also this week, I monogrammed a few UMBRELLAS! EEEekkkk!! Scary I know! They were really pretty easy to do and I took pictures along the way! First of all, I did use my 4×4 hoop as opposed to fast frames. The material of an umbrella is so thin that I was afraid sticky stabilizer would not come off easily or cause the umbrella fabric to tear in the process of removing it. I used waffle tearaway and water soluble “solvy” stabilizer on top.

photo 5 (10)

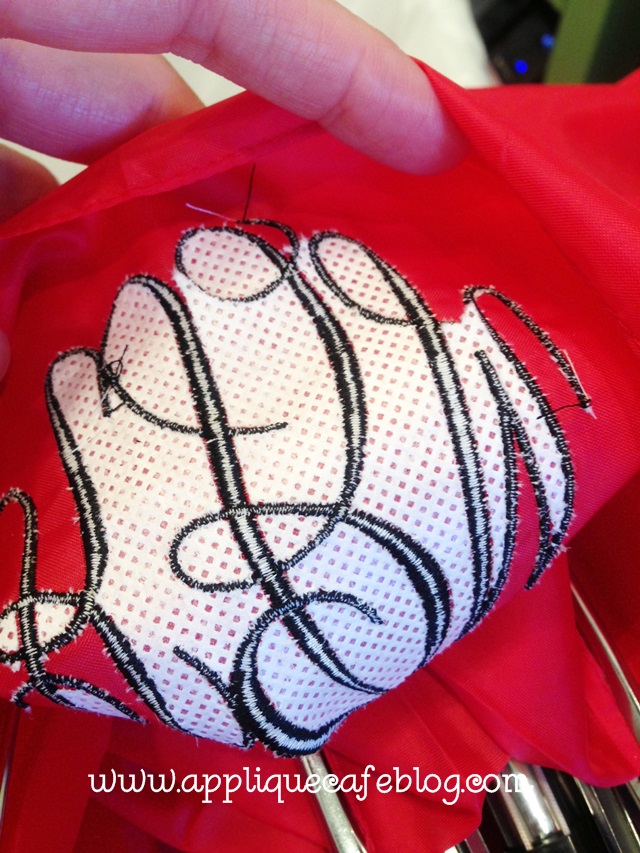
Here’s what it looks like from the inside. I love the waffle tearaway when I need a little more substance than regular iron on tearaway! I “stuck” it in place with a little temporary spray adhesive (Sulky KK2000).

photo 4 (10)

I put the hoop on the machine and rotated the design upside down so it would sew correctly. Again, I used Monogram Wizard Plus “Master Circle” font.

photo 1 (16)

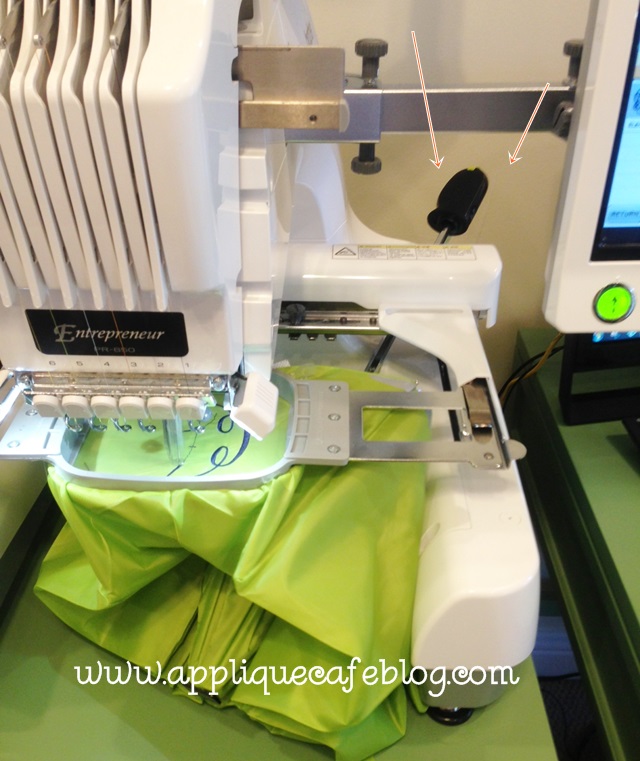
As you can see below, the handle of the umbrella simply rested underneath the arm. I kept an eye on it so it didn’t hit anything causing the machine to mess up.

photo 2 (15)

This is what it looked like when I was done. I did 3, so these pictures have different initials on them. I removed the hoop and stabilizer from both sides, including inside the letters.

photo 1 (13)

The waffle stabilizer is very easy to pick off. {I think I need some lotion!!!!}

photo 2 (13)

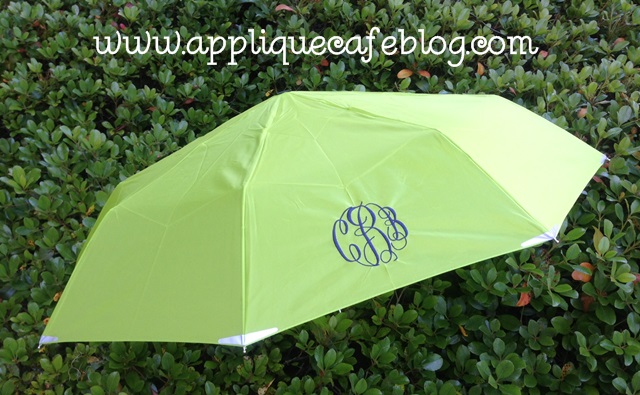
Finished product! This would make a great personalized gift!!

photo 3 (12)

I hope this is helpful! Please have a blessed week and live each day to the fullest!