First of all, I seem to have this thing with taking photos of stuff tilted to the right!? I guess straight on can be boring sometimes. Second of all, the new Friends of Applique Cafe Facebook Group is going great! We are up to about 775 members, and I can tell already that creating a group was the right move! Someone commented on my last post that FB PAGES are more for ME to post what’s going on, but other than that, there is not much interaction if no one likes or comments. Basically, you see what I post IF it shows up in your news feed. You rarely actually visit someone’s Facebook page unless you are looking for something. On the other hand, with a group, it’s more like a community. The people in the group are seeing what you post and are actually *liking*, commenting, etc. Very refreshing!!
So… these “vintage” simple stitch (aka redwork) designs are pretty popular right now. I though I would share what stabilizers I use for these, since the first one I did didn’t turn out perfectly. Below are several that we have listed at Applique Cafe, and they can all be found under the Zig Zag | Vintage | Raggy category. I also just sampled a new one which is Stitch the Dog. We haven’t done anything with Stitch in a WHILE. It’ll be listed in the next day or two! 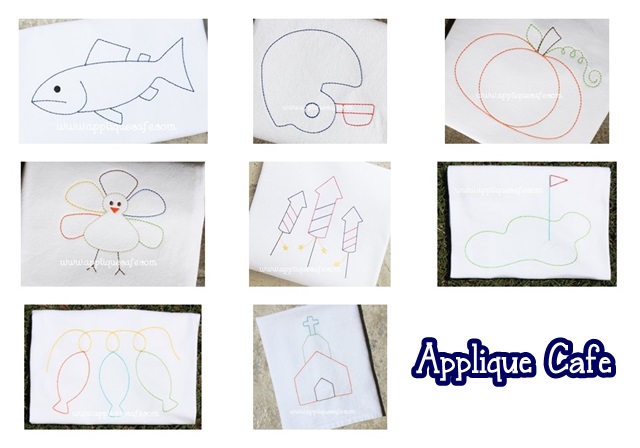
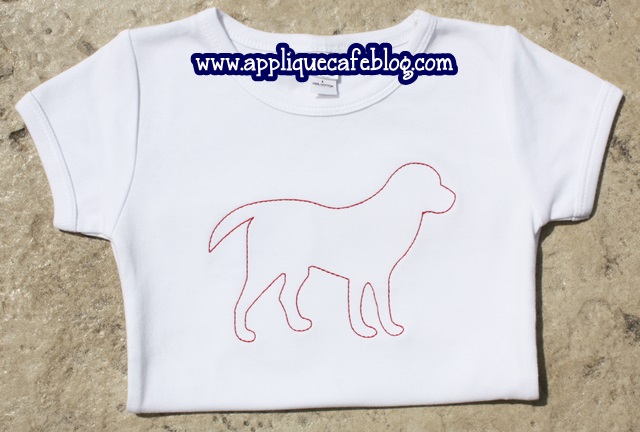
I have found {by trial and error} that Solvy (water soluble) stabilizer should be used on top with these designs. You can’t really see it in the below picture, but I hooped medium cutaway stabilizer underneath the shirt and solvy on top. I am a hooper btw… This is an old Monag shirt someone gave me to sample on and their shirts are pretty thick, so I went with medium cutaway. On a thinner shirt, you might use a thinner cutaway such as polymesh or no show mesh cutaway that won’t show through. 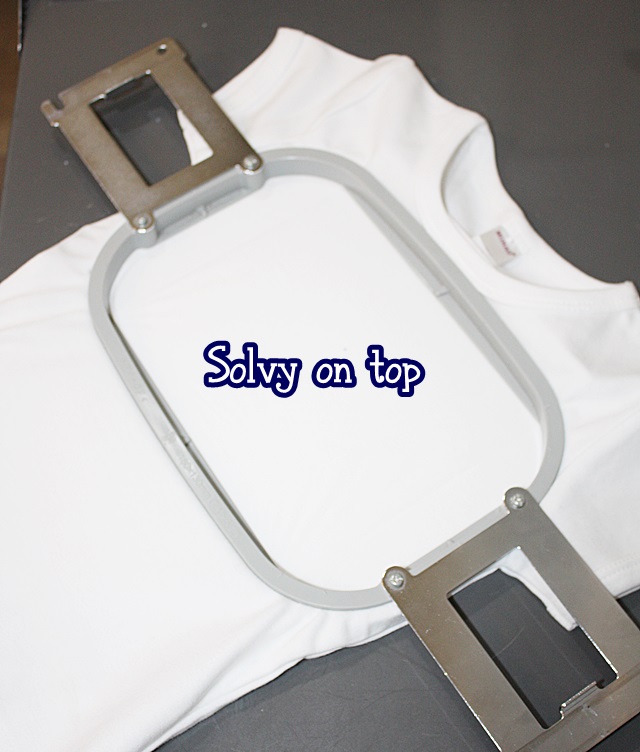
The stitch time on our new Stitch the Dog is 2 MINUTES. These designs are super fast! 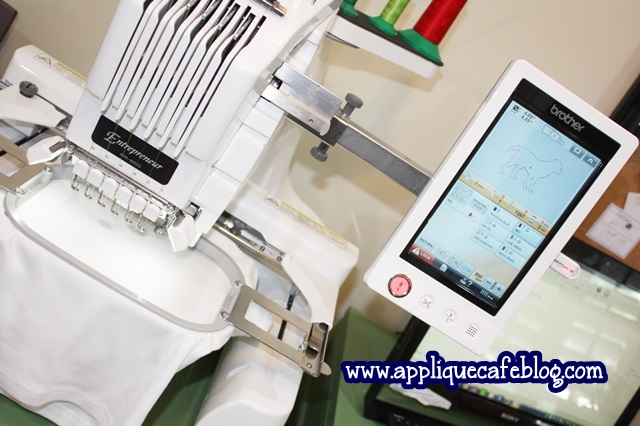
The solvy on top helps prevent the stitches from a) sinking and b) puckering the shirt. 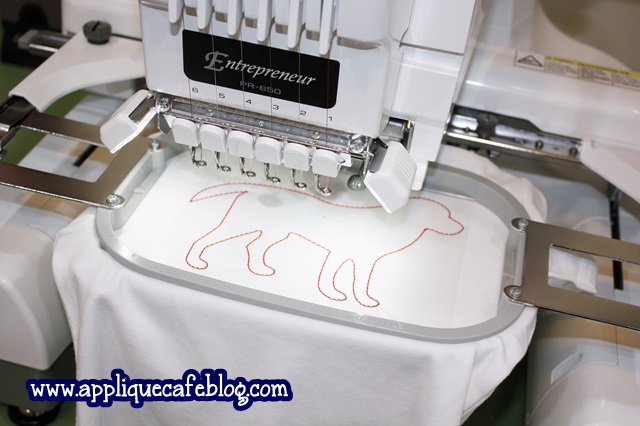
This is the back of the design and you can see the big piece of medium cutaway. I trim around the design when I’m done, getting close to the stitching. For this shirt I also trimmed in between the front and back legs, as well as around the tail. 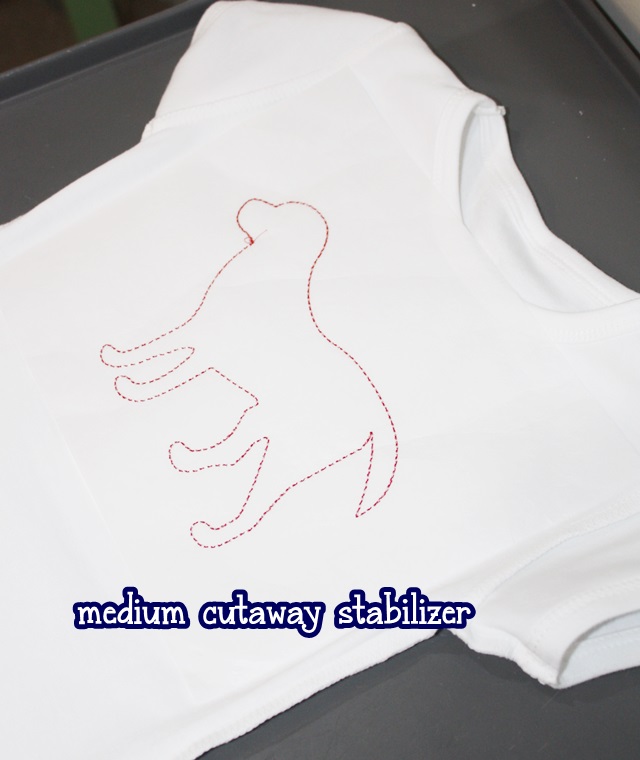
I had someone ask how you remove the solvy without pulling the stitches. I haven’t really noticed a problem, but for this post I did wet a couple of Q-tips and went over the stitching/outline of the design on the solvy. Since it’s water soluble, the wet Q-tip helps loosen up the solvy so it’s a little easier to pull away.
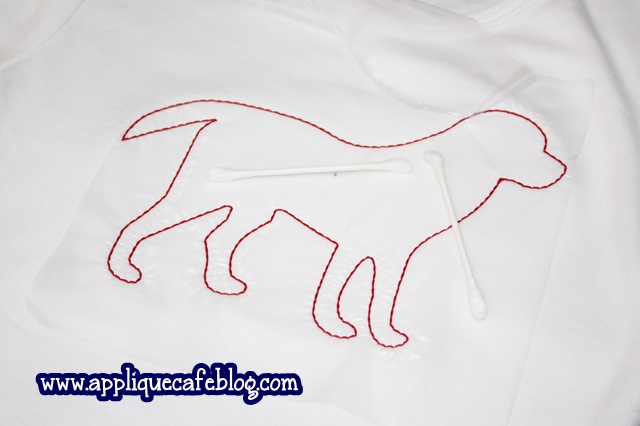
There were a few stray pieces of the solvy sort of underneath some of the stitching. You can either pull it off, or squirt some water on it from your iron and it should dissolve. 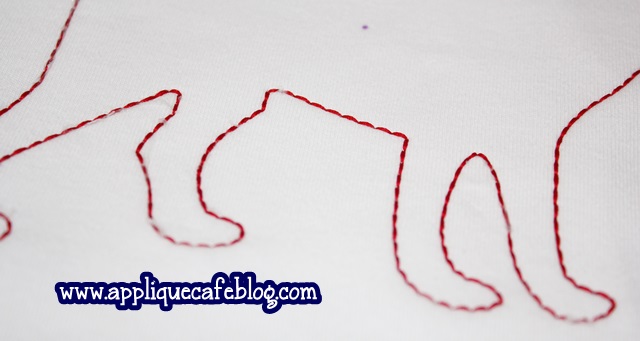
Here is the finished product! Again, this is a thick cotton shirt so you can’t see the medium cutaway stabilizer through the shirt at all. The red gingham ruffle shorts are from EllieO. These vintage/simple stitch designs are great with simple gingham bottoms! 
So here is the first designs I did of this type and I DID NOT use solvy on top. It’s sort of hard to see in the pictures, but there was some definite puckering. I added solvy on the next one and it stitched MUCH better! No puckering and the design and shirt lays flat. The arrows point to the pucker/wrinkles.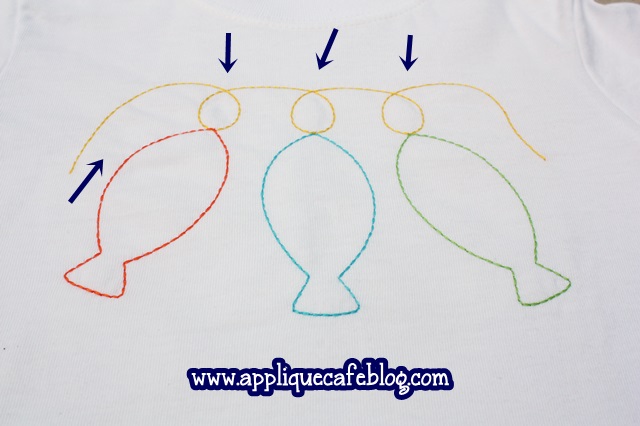
You can see the little dimples in the loops. USE SOLVY! 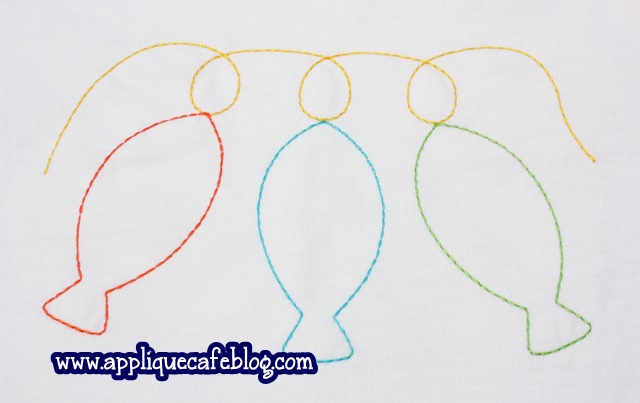
As you can see on the Stitch shirt, the design lays flat with no puckering! 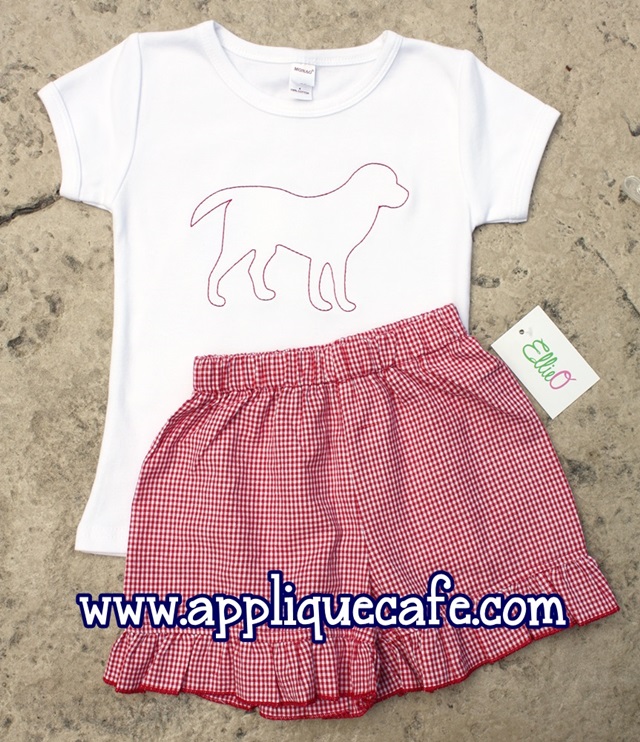
Here are several of our other designs in this style. The Turkey was done on a Monag shirt as well, so thick cotton and I used medium cutaway and solvy on top. It lays flat perfectly!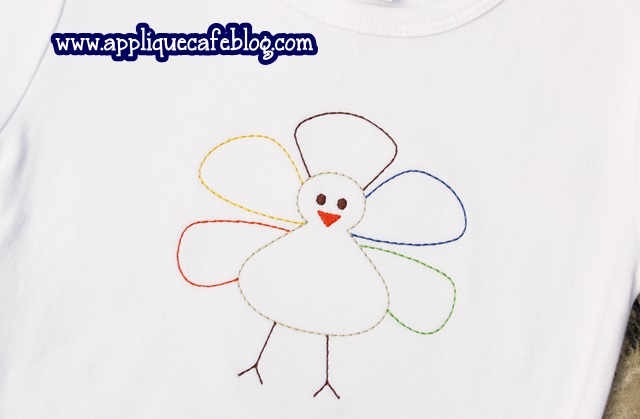
The church… I did this one on a flour sack dish towel, which is rather thin. Since it’s a towel, I didn’t want cutaway stabilizer left on the back of the towel, so I used waffle weave tearaway with solvy on top for this one, then removed ALL of the stabilizer. 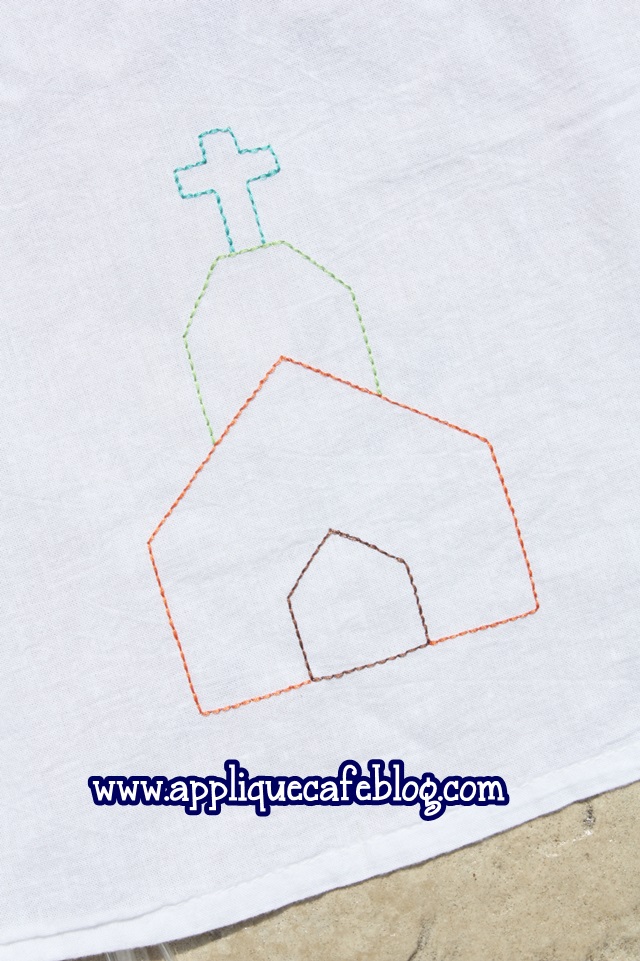
I did our Pumpkin on another thick cotton Just Blanks shirt I had laying around. I used medium cutaway again as well as solvy. 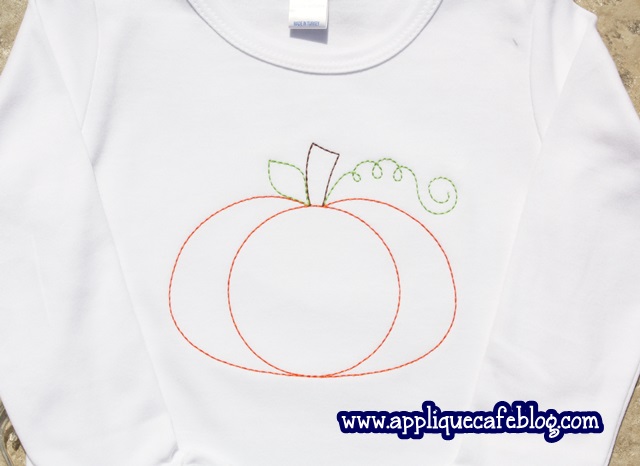
For thinner cotton shirts, you might try polymesh or no show mesh cutaway such as below. Some people use this type all the time with all shirts. I got mine from Sewingmachine.com and it’s on a big roll. The medium cutaway I use is Sulky Cutaway Plus, or the commercial cutaway from Sewingmachine.com. I recommend 2.2 oz or no more than 2.5 oz for the commercial. More than that is pretty thick. 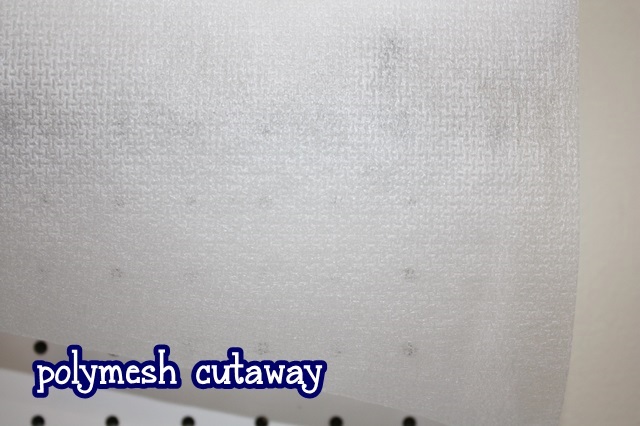
I also love the waffle weave tearaway that I used on the flour sack towel! 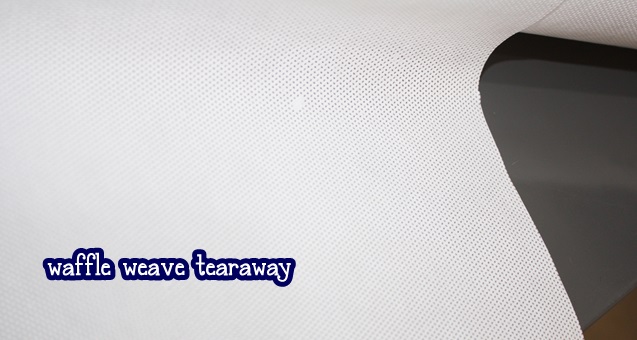
I hope this helps! I think the quality of your shirt also plays a part. The String of Fish design I did above was on a much thinner shirt, but I think the solvy on top would have added a little extra support for the stitches!
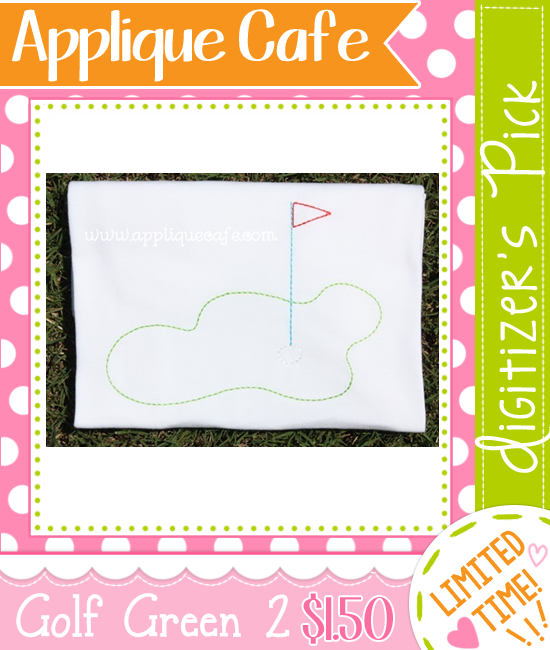
Try our Golf Green 2 {vintage/simple stitch} design now for $1.50 ~ our new Digitizer’s Pick!
Recent Comments