Umbrellas and Hats

Good afternoon friends! Yesterday I opened the mail to find a copy of Creative Machine Embroidery magazine and was pleased to find that my BLOG was noted in the magazine as “One to Follow“!! While sometimes I struggle to find the time to blog, or struggle to come up with anything to blog about, it has always been my passion to share what I’ve learned with all of you! I know sometimes it’s boring (WAKE UP!!!) and sometimes I go a month 2 weeks with nothing posted, but please know I’m here and hope to bring you helpful info as often as I can!! Thanks for reading and thanks for the comments and encouragement! 😉

photo (27)2

Now, as promised…. I monogrammed a hat Friday using FAST FRAMES and took some pictures to show you. I posted the other day about doing a visor on my BROTHER PR650 using the cap frame. You can do hats with the cap frame also, but if you don’t have a cap frame or want to unpack it from the box, you can use fast frames. I’m not promising this will work on all hats, but the ones I’ve done have been NOT-stiff and easy to work with.

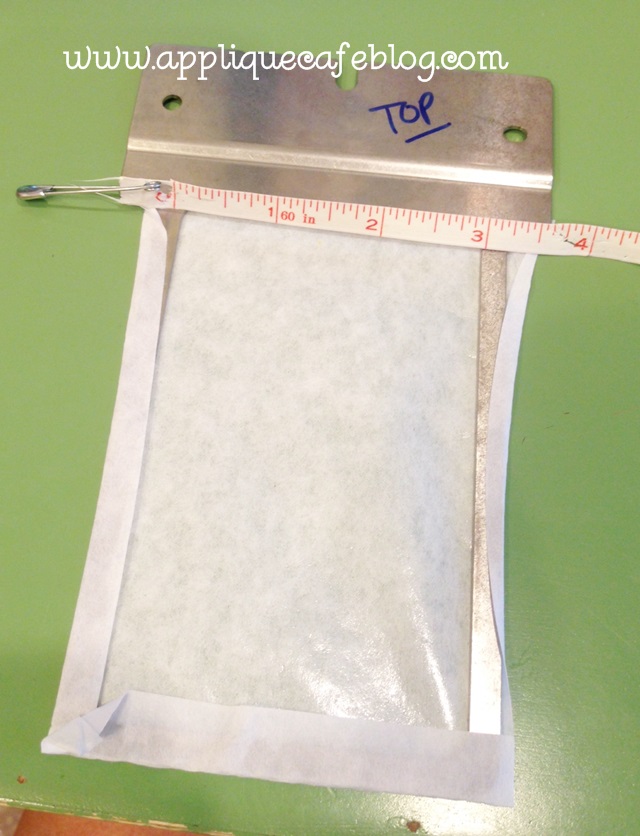
I used the below frame, as the monogram for my hat was around 2″ tall and wide. You could always do your monogram bigger. I did this hat for myself. A) I rarely wear hats but thought it might come in handy this summer {I typically wear a visor if anything on my head}. B) Being someone in the business of monogramming, I never wear anything monogrammed!!! As you can see I’ve used sticky stabilizer on my fast frame and wrapped it around the edges. Am I the only one who stares at my frames to determine which side is the top and bottom….

photo 4 (5)

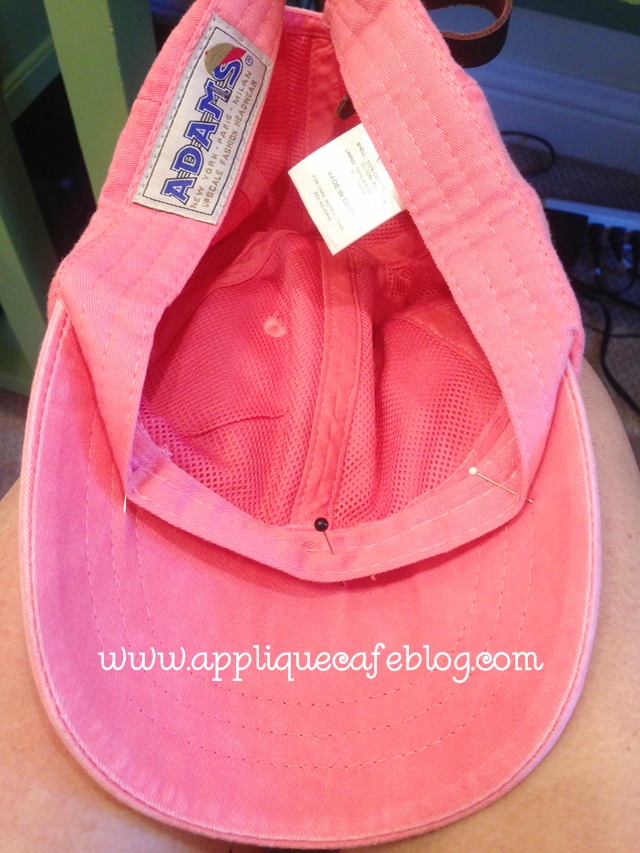
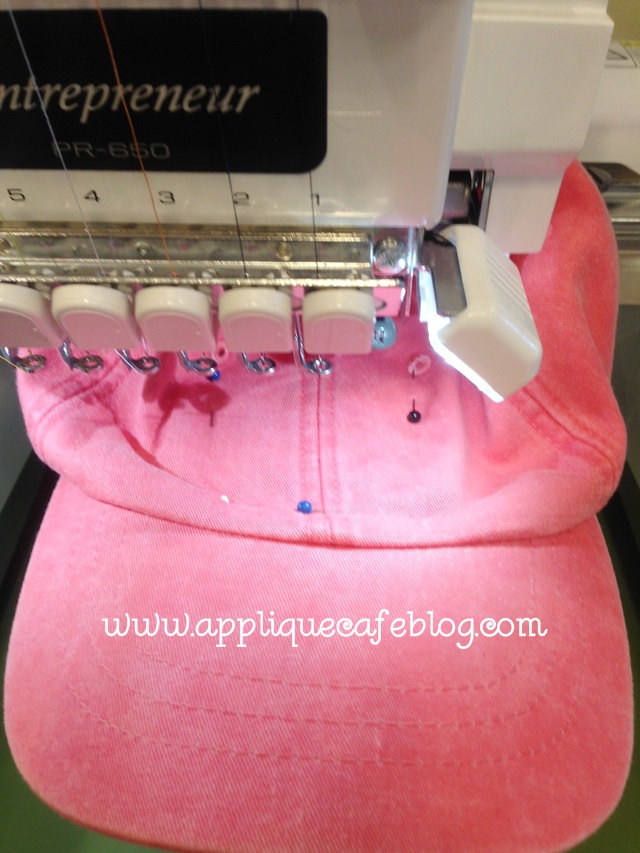
The first thing I did was get the liner out of the way so I don’t monogram it. I simply pinned it out of the way! As you can see, this is one of those cute “pigment dyed” hats that are so popular right now (like the Comfort Colors tees). It’s ADAMS brand and I got this from a friend, but have recently discovered Apparel N Bags website where you can buy the Comfort Colors tees, these hats and other cute things!

photo 3 (10)

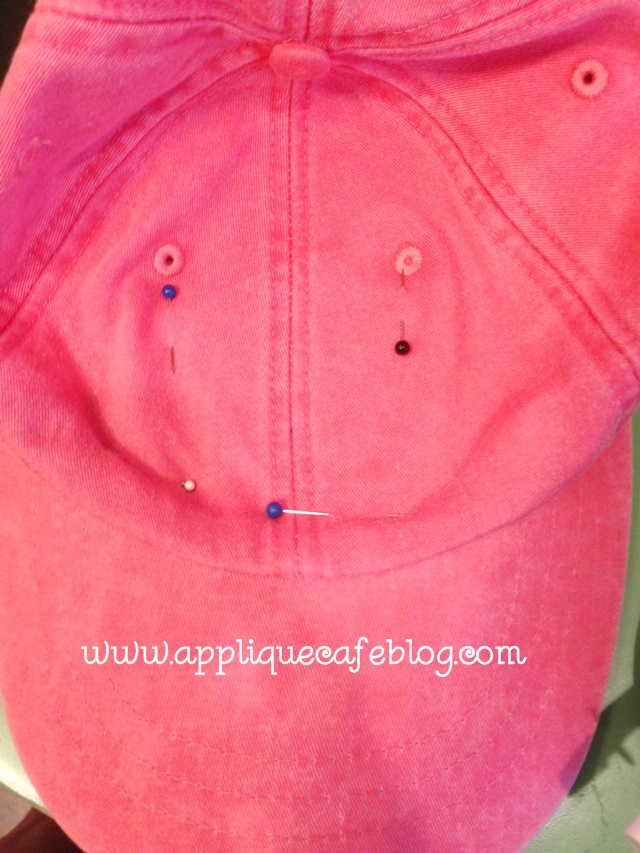
I flattened the bill of the hat out so that I could attach the face of the hat {where the monogram will go} to the fast frame and sticky stabilizer. As you can see below, I pinned my monogram area in place and tried to line up the center seam of the hat with the center of the fast frame. This takes some practice and I had to adjust and move the hat several times to get it right. As I said, my monogram is only around 2″ so I didn’t need much space.

photo 5 (4)

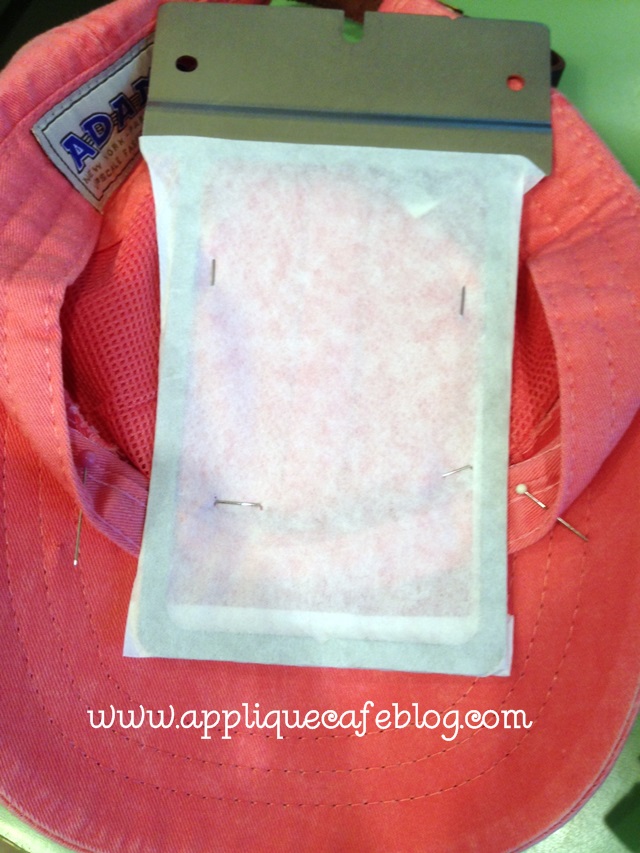
This is what it looks like underneath. My lining is pinned down, and the face of the hat is also pinned in place.

photo 1 (15)

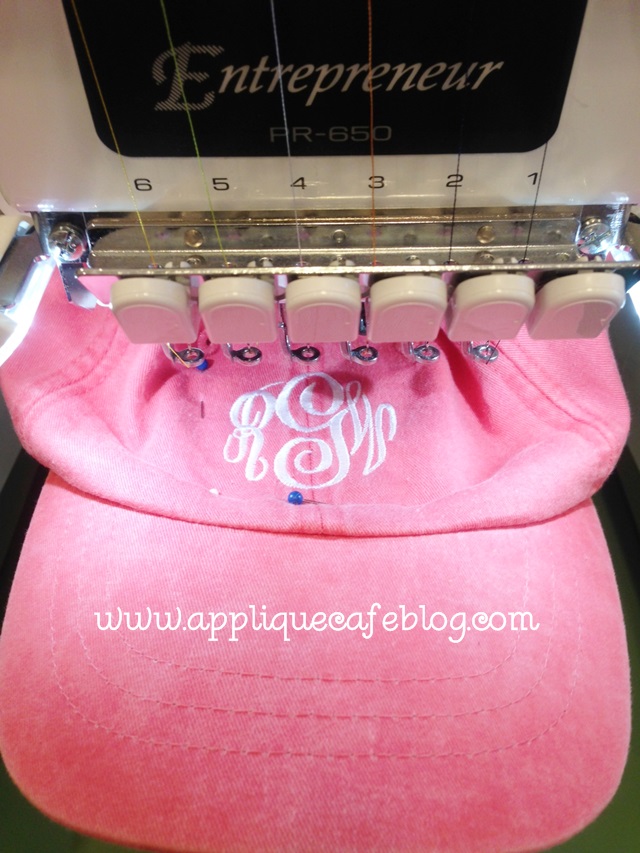
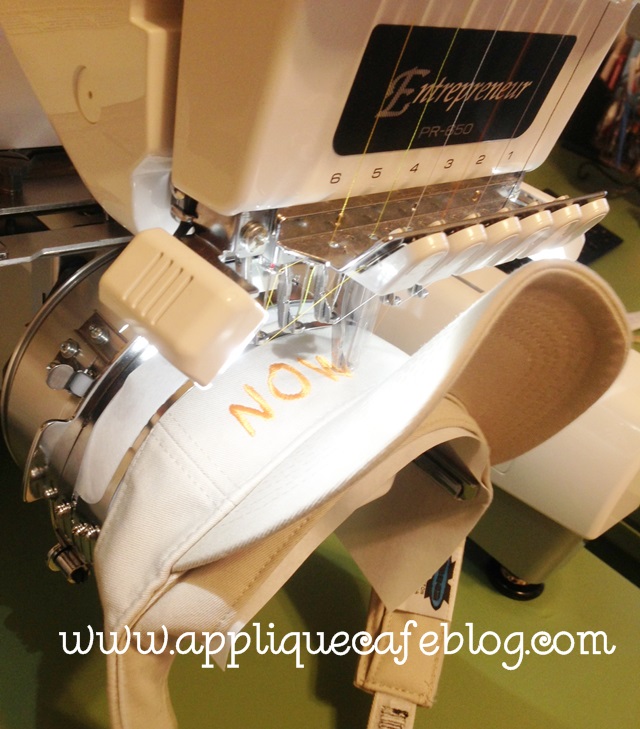
My hat is on the machine now ready to sew. Just make sure the excess hat is out of the way on all sides! Also, since this is a FAST FRAME and my machine doesn’t recognize it as any particular hoop, I checked my borders to make sure my monogram would fit INSIDE the area on the face of the hat. You don’t want your needle to hit the frame on either side!! I lined my lead needle up with the center seam on the hat.

photo 2 (14)

My monogram is complete. I used Monogram Wizard Plus “Master Circle” font.

photo 4 (9)

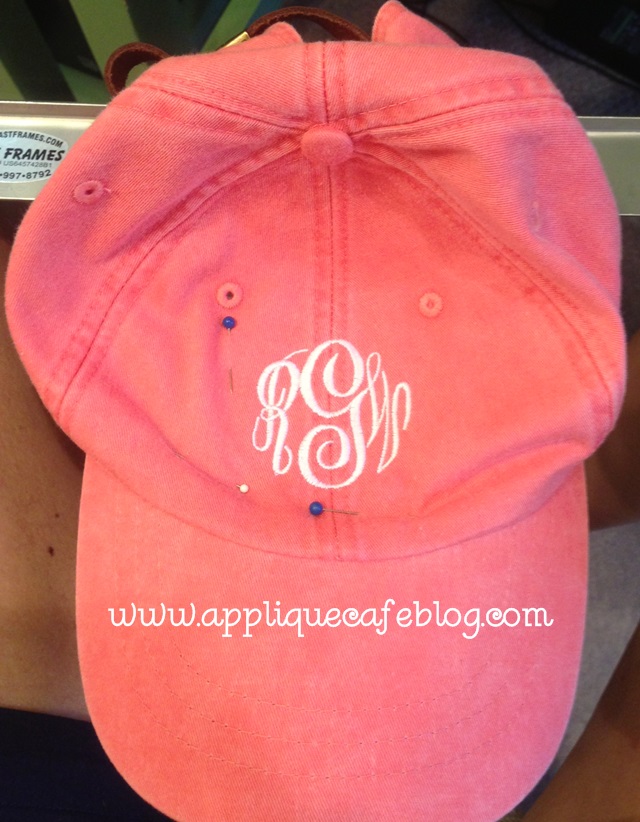
When done I remove the hat and frame from my machine, unpin it and remove the hat from the sticky stabilizer. I then remove any sticky stabilizer from inside the hat, unpin the liner and it’s ready to wear! Again, some hats have seams like the one below which shows you where to center the design!

photo 5 (9)

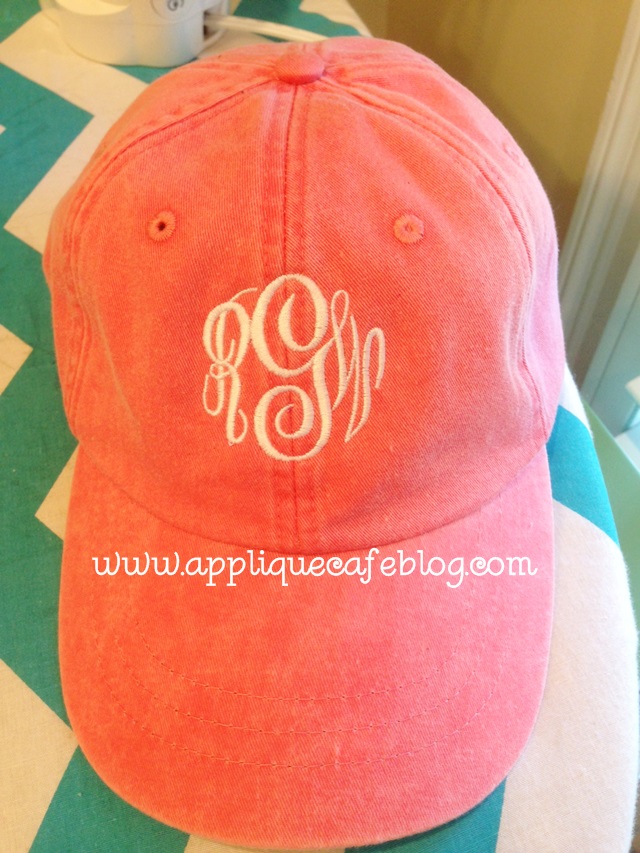
Here’s the finished product!

photo 1 (14)

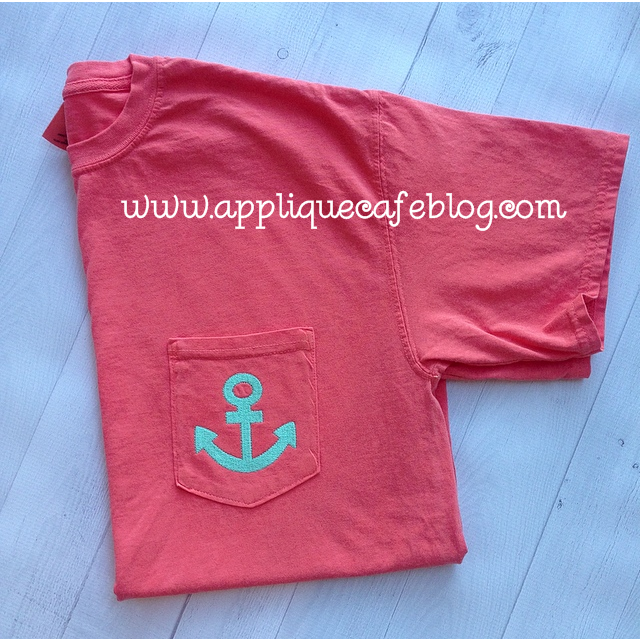
I am a little obsessed with the color of the hat and the below T-shirt, which is Comfort Colors Bright Salmon! The hat may be Poppy or Nautical Red (Adams brand)? These are all samples for my upcoming class at Ruthie’s Notions {this coming weekend!!}. In lieu of initials, I put our 3″ Mini Embroidery Anchor on the below Comfort Colors tee. I’m also using my vinyl backdrop I got recently from Bubble Gum Backdrops on Etsy! This is a 36″ X 36″ pale wood vinyl backdrop. It really makes the t-shirt pop!

photo 2

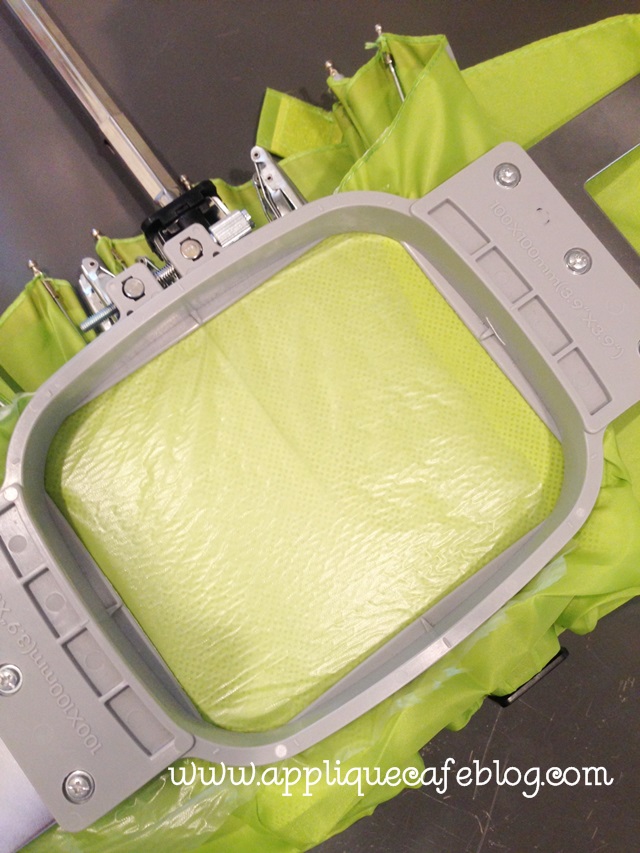
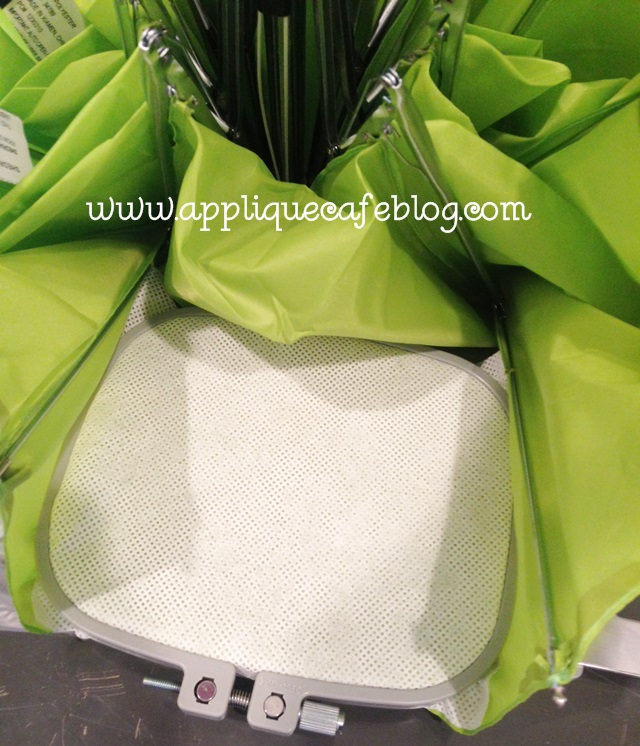
Also this week, I monogrammed a few UMBRELLAS! EEEekkkk!! Scary I know! They were really pretty easy to do and I took pictures along the way! First of all, I did use my 4×4 hoop as opposed to fast frames. The material of an umbrella is so thin that I was afraid sticky stabilizer would not come off easily or cause the umbrella fabric to tear in the process of removing it. I used waffle tearaway and water soluble “solvy” stabilizer on top.

photo 5 (10)

Here’s what it looks like from the inside. I love the waffle tearaway when I need a little more substance than regular iron on tearaway! I “stuck” it in place with a little temporary spray adhesive (Sulky KK2000).

photo 4 (10)

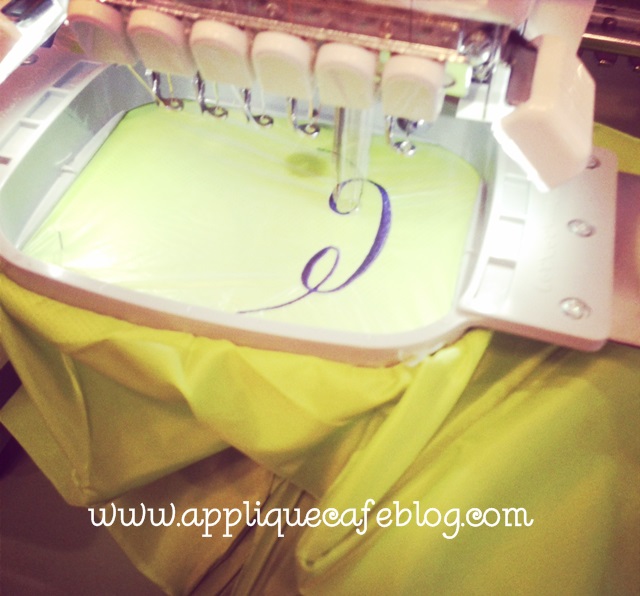
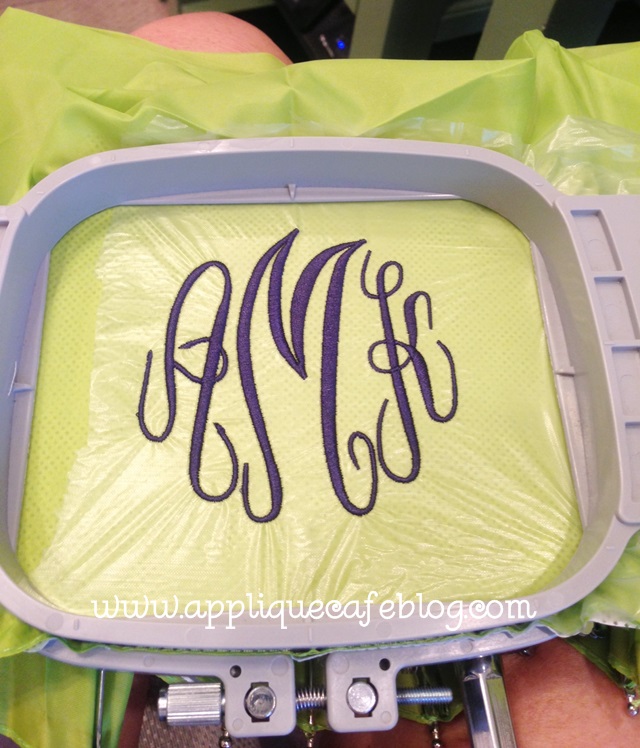
I put the hoop on the machine and rotated the design upside down so it would sew correctly. Again, I used Monogram Wizard Plus “Master Circle” font.

photo 1 (16)

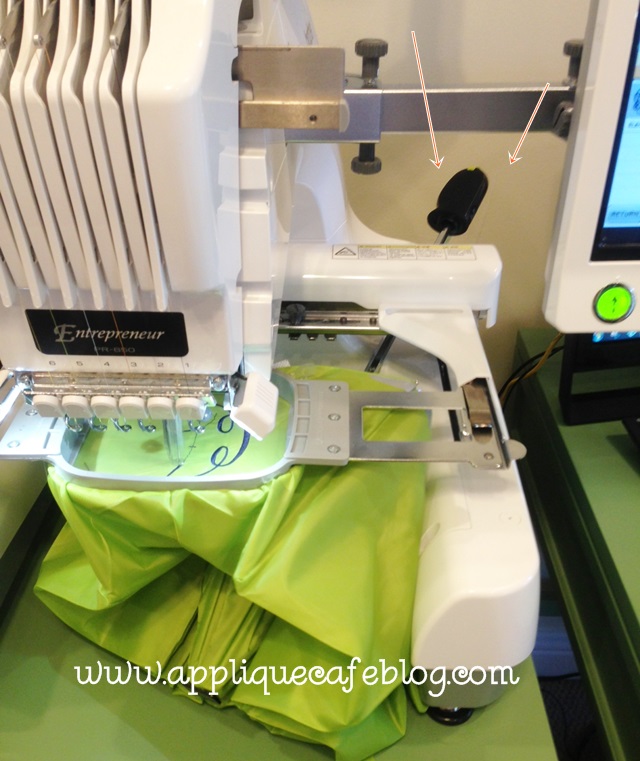
As you can see below, the handle of the umbrella simply rested underneath the arm. I kept an eye on it so it didn’t hit anything causing the machine to mess up.

photo 2 (15)

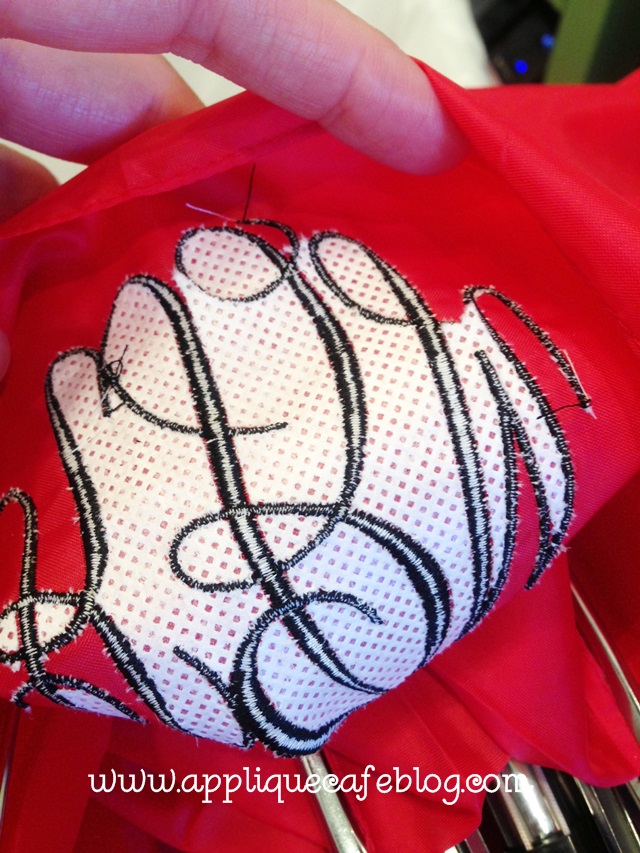
This is what it looked like when I was done. I did 3, so these pictures have different initials on them. I removed the hoop and stabilizer from both sides, including inside the letters.

photo 1 (13)

The waffle stabilizer is very easy to pick off. {I think I need some lotion!!!!}

photo 2 (13)

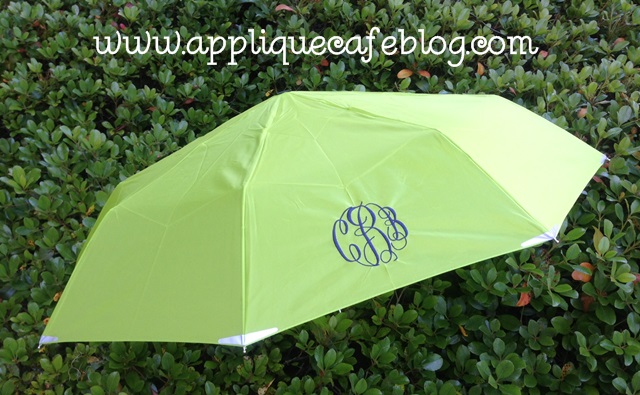
Finished product! This would make a great personalized gift!!

photo 3 (12)

I hope this is helpful! Please have a blessed week and live each day to the fullest!
Visors and Cap Frames 101

Well, I said I was going to do a post on monogramming hats with fast frames (as opposed to a cap frame). I have 1 photo of a hat I did recently and I also have a real {cute} hat to monogram. I plan to post photos of the process, but visors came first today. I do monogramming for a local store and on tap for today were several logos on shirts & visors. I tried and tried and even asked on Facebook how to monogram a visor WITHOUT the cap frame, but I could.not.figure.it.out. I think it has to do with the size of the monogram (or logo in my case) and how flimsy the visor is. So…. I dug out my cap frame after not having used the thing in at least 2 years. I was dreading it and cursing along the way, but it ended up not being as hard as I thought! Lucky for you I took a gazillion cell phone pics along the way….

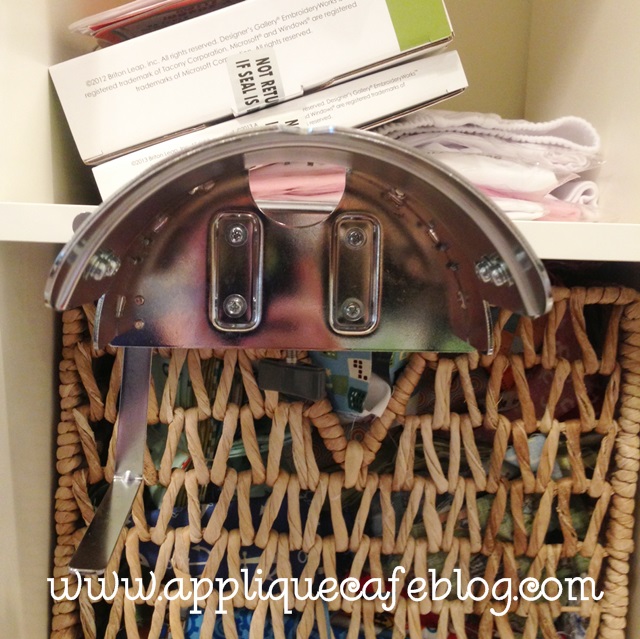
The cap frame consists of 3 parts and the sewing field is typically 2.5″ X 5″ if you get the cap hooped perfectly. The part below is the CAP HOOP HOLDER FRAME. I got my cap frame from Sewingmachine.com, which has a GREAT video on how to use your cap frame. I watched the video to refresh myself on the process, and I remembered from my training with Steve that you hoop visors upside down. WATCH the VIDEO!! I will explain the upside down thing more later. The holder frame attaches to a table or any surface ~ I attached mine to my Ikea Expedit shelf.

photo 2 (9)

This is the mechanism that helps you get the cap or visor hooped.

photo 3 (7)

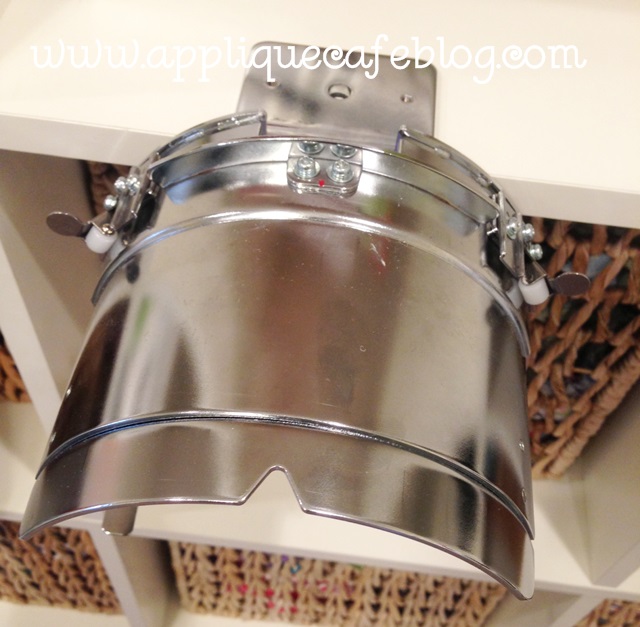
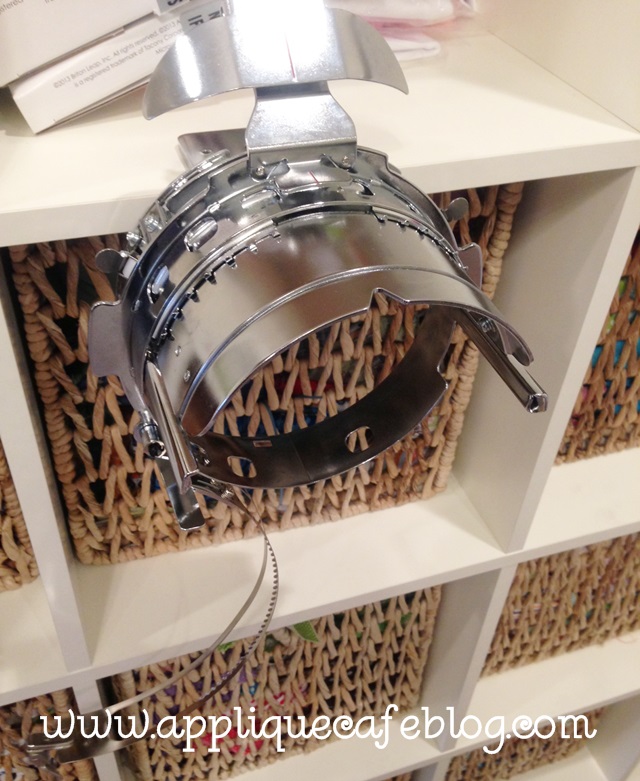
Here is a photo of the actual CAP FRAME or CAP HOOP clamped on the holder. As you can see, there is a piece hanging down which is what secures or clamps on to the visor or hat. This part is hard to explain! Hopefully the photos will help, and again, WATCH THE VIDEO!

photo 4 (7)

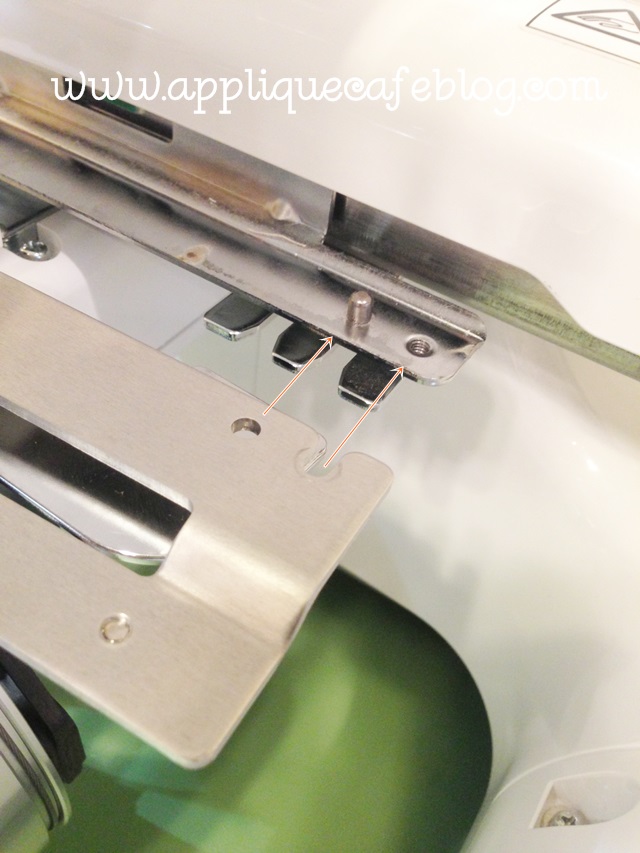
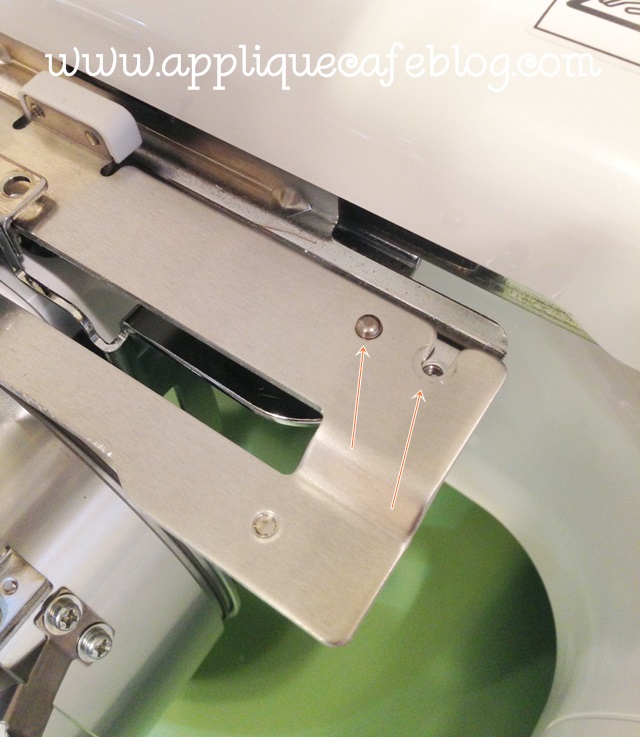
There is also a DRIVER which fits on to your machine. You take the arm of the machine off by loosening the small screws and removing them and the arm. You then put the driver on which fits around the bobbin case area of the machine.

photo 3 (9)

photo 1 (12)

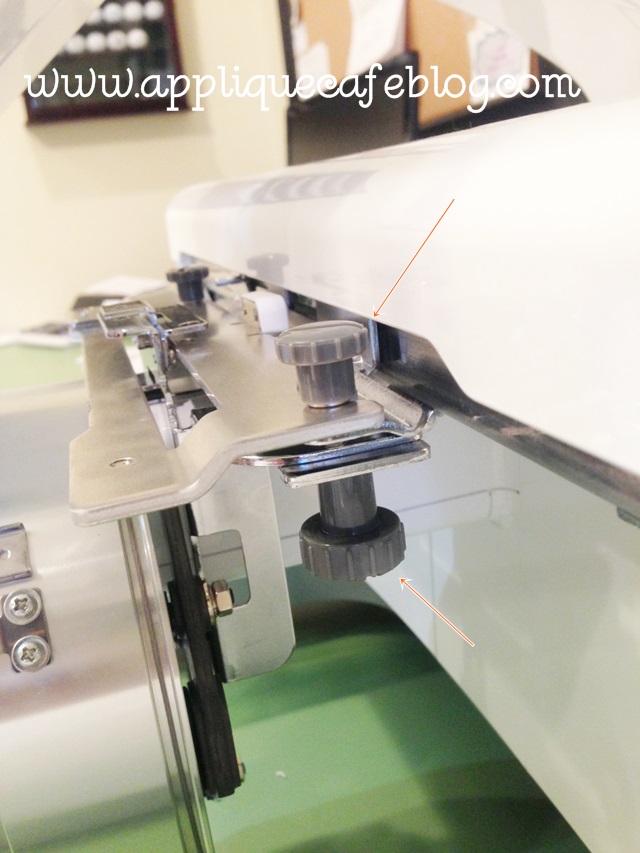
This is what the driver looks like when it’s attached. Screws are tightened. There are 2 small screws on top and 2 bigger ones on bottom.

photo 3 (4)

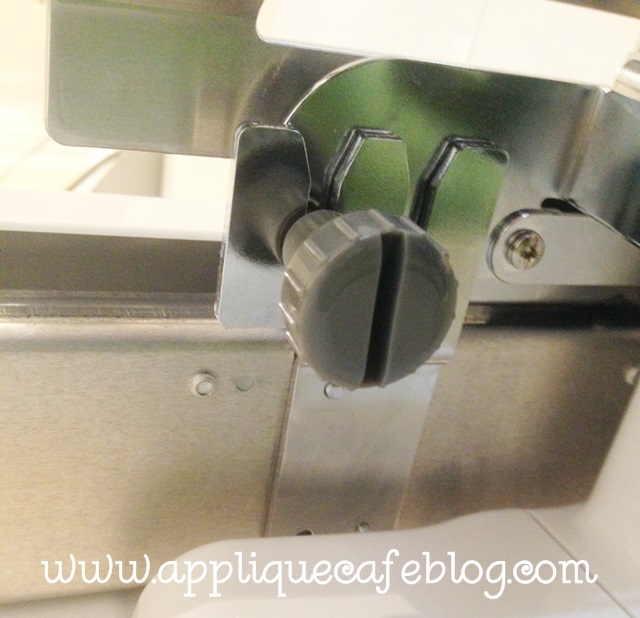
This is what it looks like from underneath. I know this is a bit confusing and hopefully you may know how to install the cap frame already. This is the bigger screw tightened on the bottom, and there are 2 of these.

photo 2 (12)

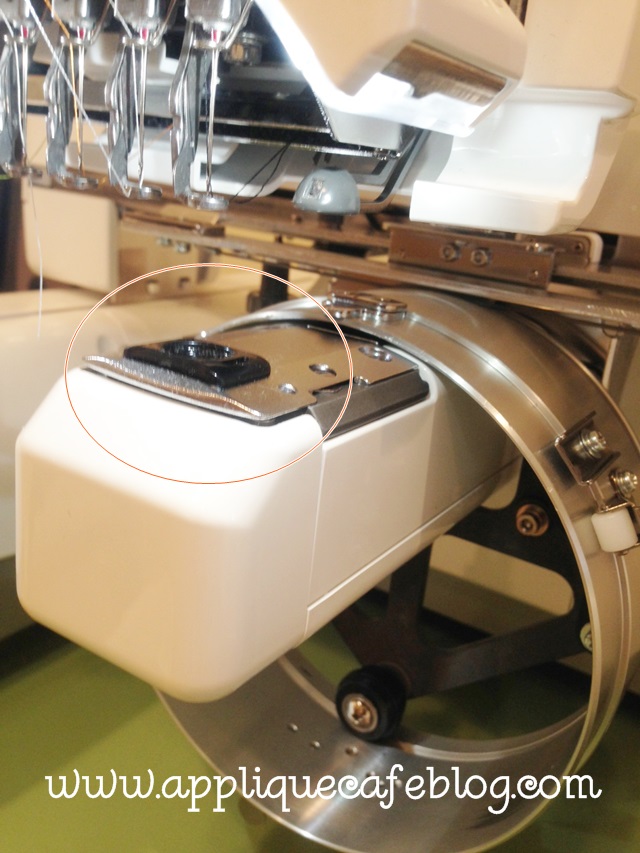
Your machine came with a handy dandy tool box, and you must insert this RISER. Since the cap or visor is curved, this helps the cap or visor glide back and forth as it is monogramming. The photo below also shows you how the drive fits on to the machine.

photo 2 (6)

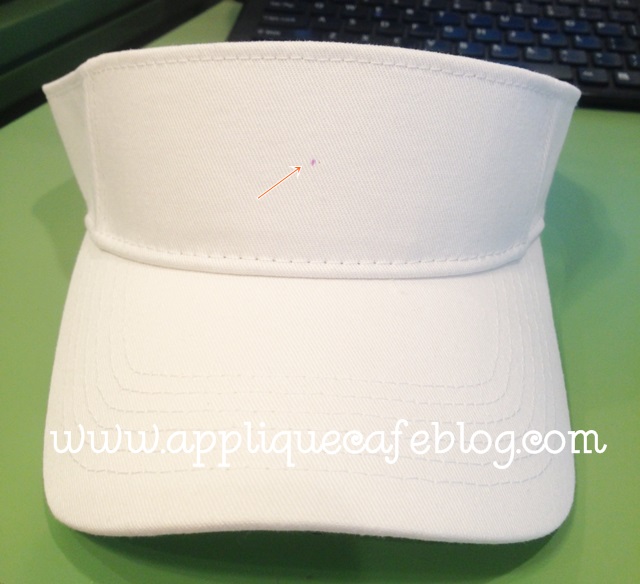
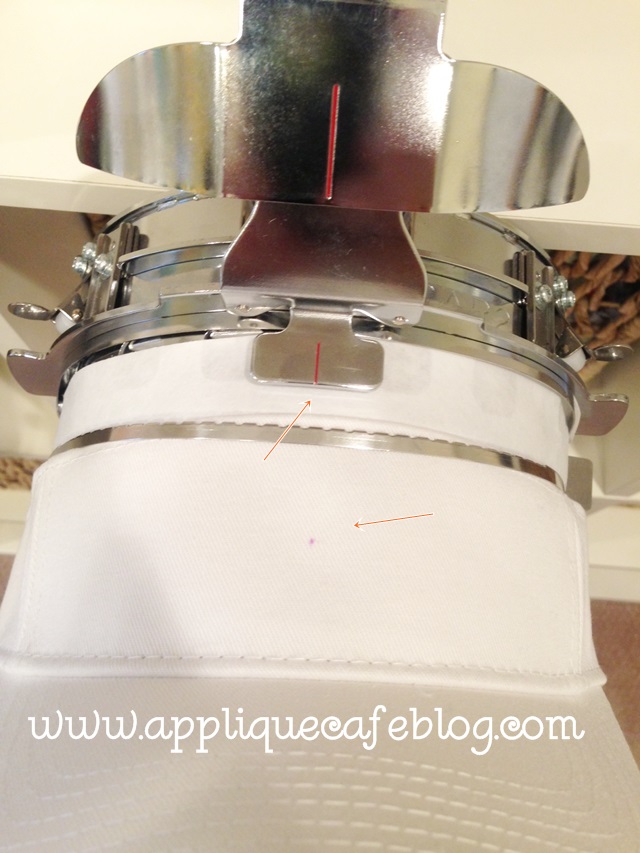
Now it’s time to get my visor ready. I’ve marked the center and am ready to get the visor hooped.

photo 1 (9)

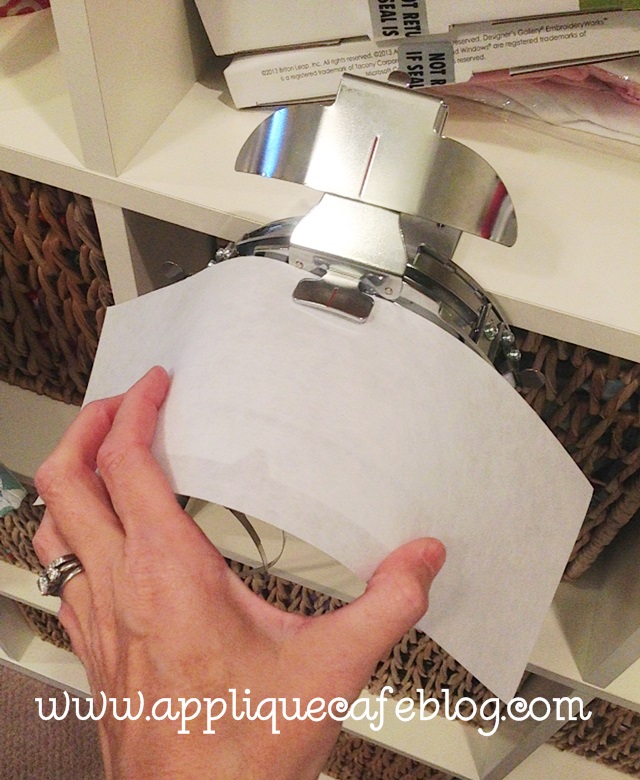
I use cap backing stabilizer and lay it across the hoop {which is on the holder}.

photo 1 (8)

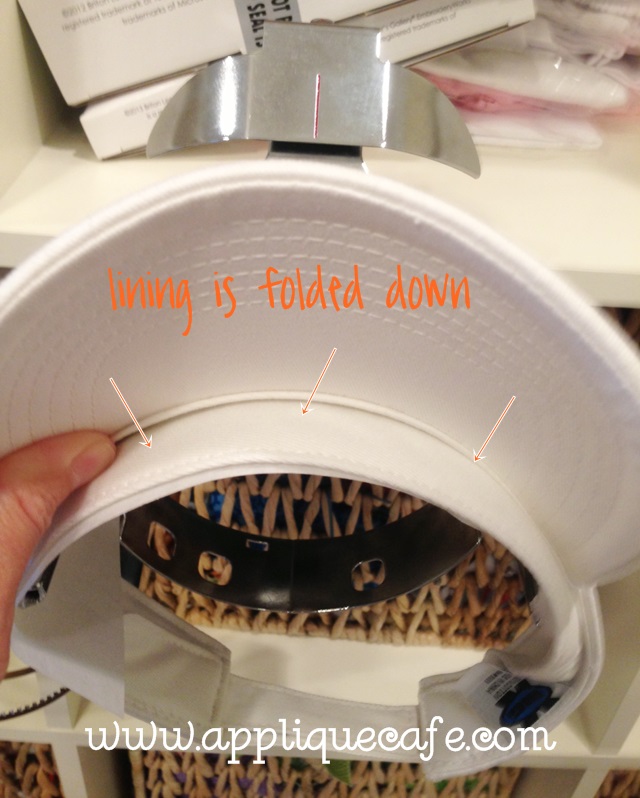
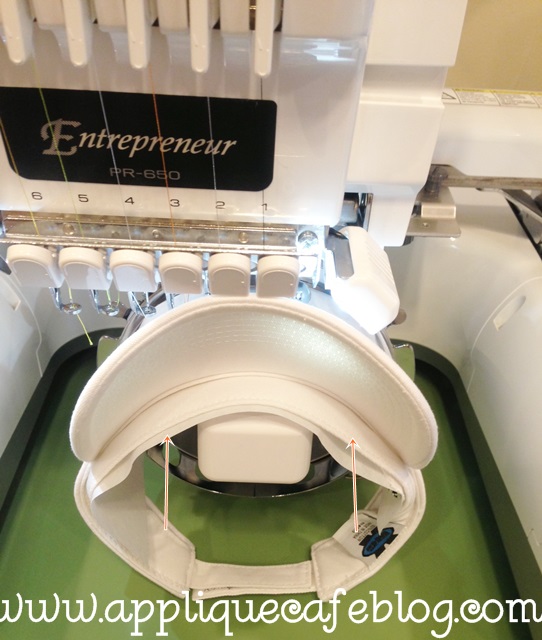
Most visors have a little bit of lining ~ fold that down.

photo 3 (6)

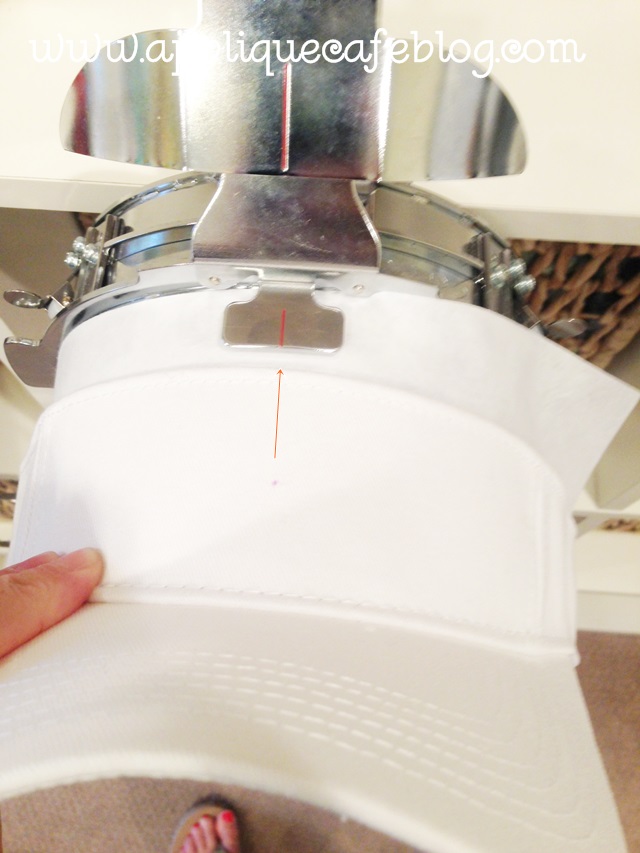
Try to line up the center mark on the visor with the center line on the cap hoop/holder.

photo 2 (8)

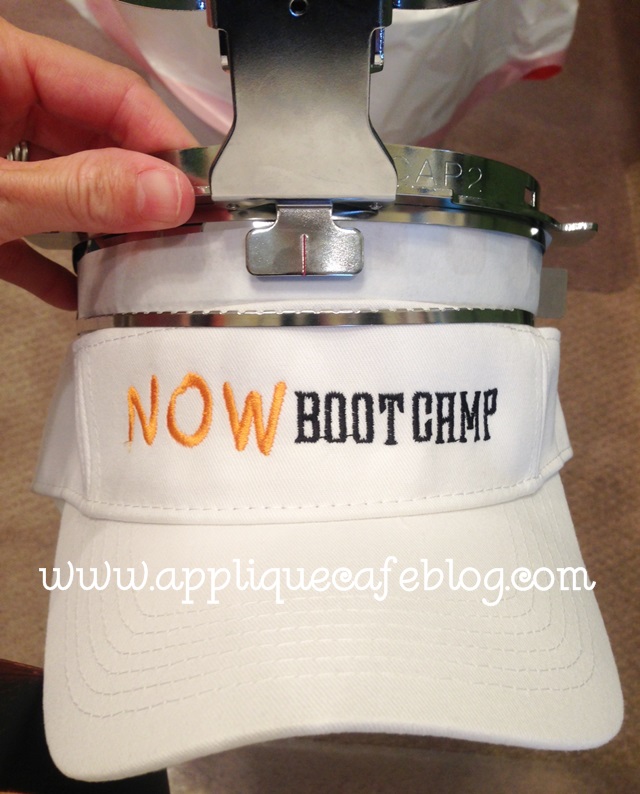
The huge silver piece you see below usually clamps down on the bill of a hat. We are doing a visor, so we hoop upside down and nothing goes inside that clamp. Pull the clamp over that was hanging down in a previous photo, and what you want to do is barely grip the top of the visor to keep it in place. There are teeth on the clamp that hangs down, so they will easily grab and secure the top of the visor. You want to clamp down as close to the edge as possible. If you don’t, you lose some of your sewing area.

photo 2 (7)

You are now ready to put the hooped visor on the machine. As you can see below, the lining is out of the way.

photo 5 (6)

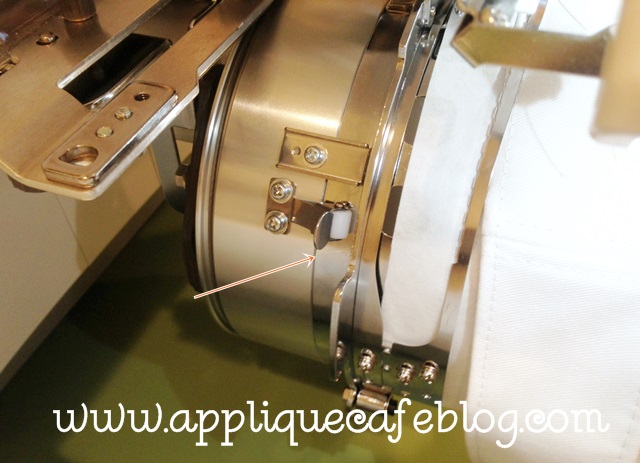
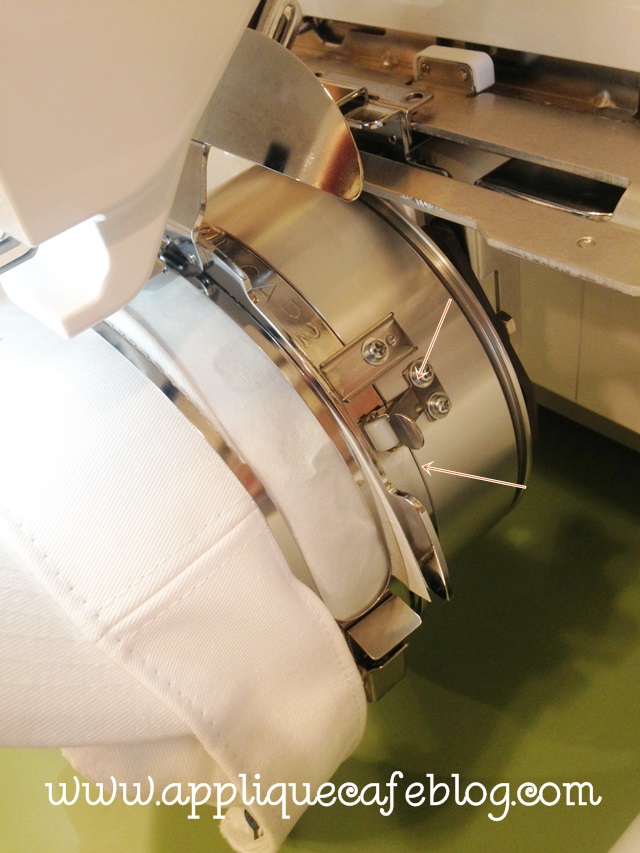
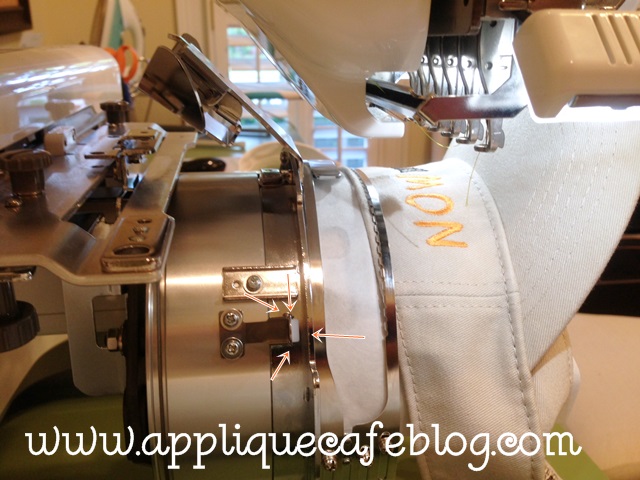
The hoop is locked in place and secure on both sides.

photo 5 (5)

photo 4 (6)

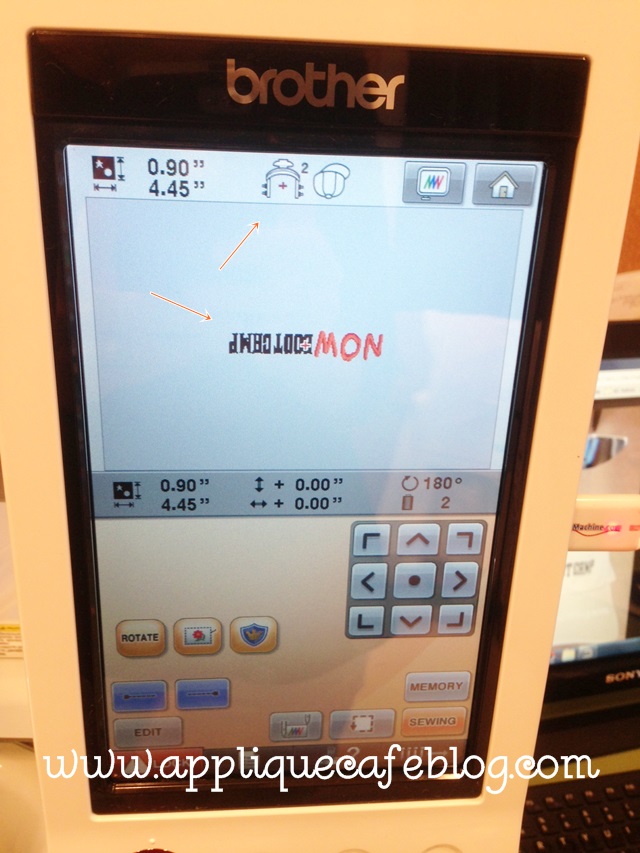
With the CAP FRAME on the machine, your machine knows it’s on there {as opposed to the regular machine arm and standard hoops}. As you can see on the screen, it shows an image of the cap frame and it shows an upside down cap/hat. The logo is also automatically turned upside down so that it will stitch correctly on the cap. We, however, are doing a visor! That visor is hooped the opposite way so you have to rotate the logo or design to stitch normally and not upside down.

photo 1 (7)

Double check to make sure it is right side up! Mine flipped upside down again in editing so make sure it’s rotated the right way.

photo 2 (11)

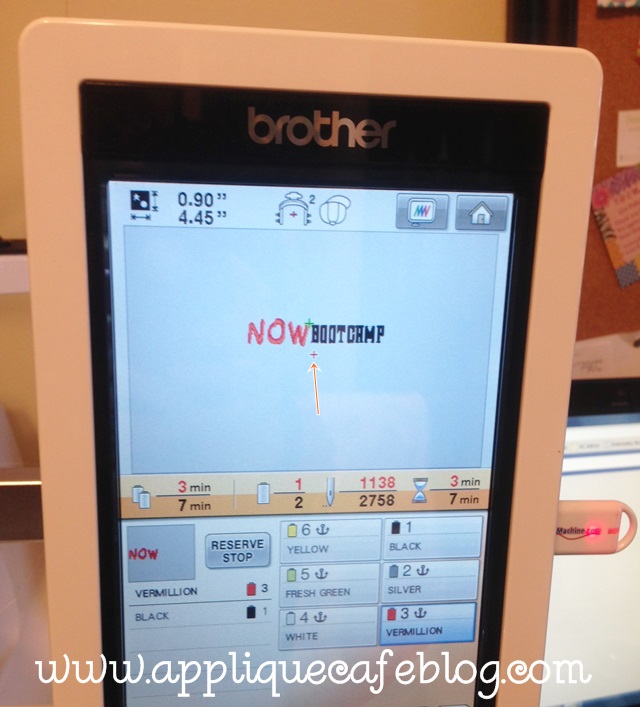
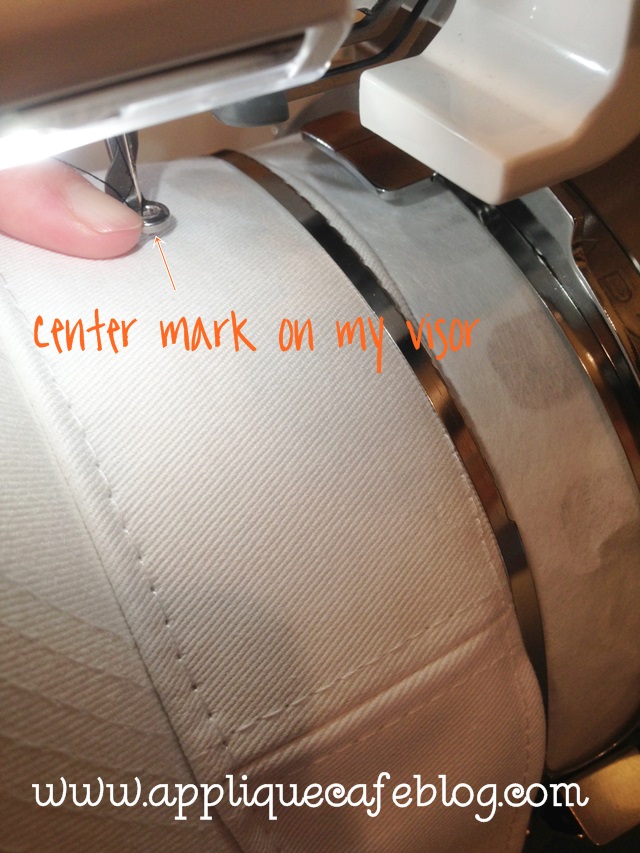
I’ve assigned my colors and am ready to line up my needle and sew. I line up the lead needle and make sure it is lined up with the center mark on my visor. That way the logo will be centered on the visor.

photo 3 (5)

The visor is now stitching, and you can see below how everything looks.

photo 1 (11)

Here is another photo of how the cap hoop/frame is locked in place (on both sides).

photo 1 (10)

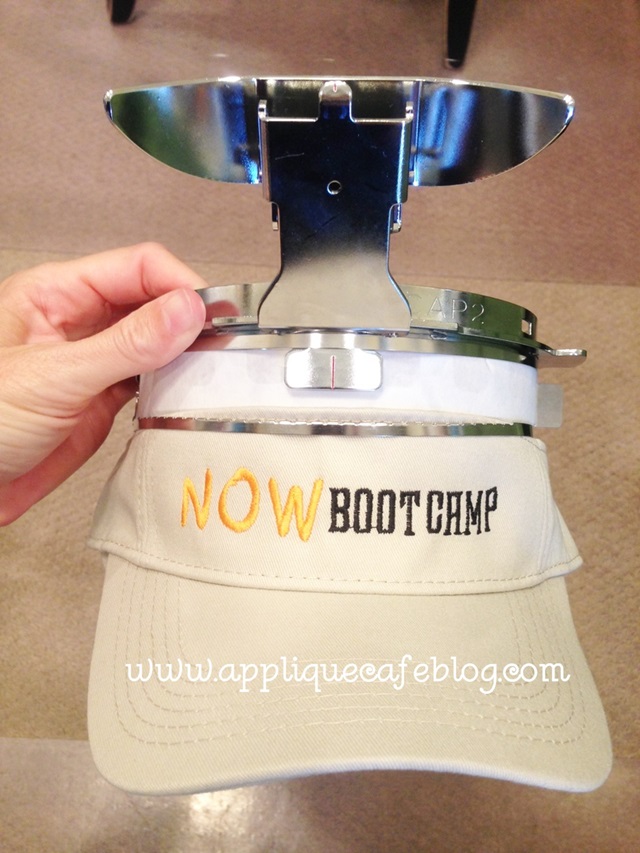
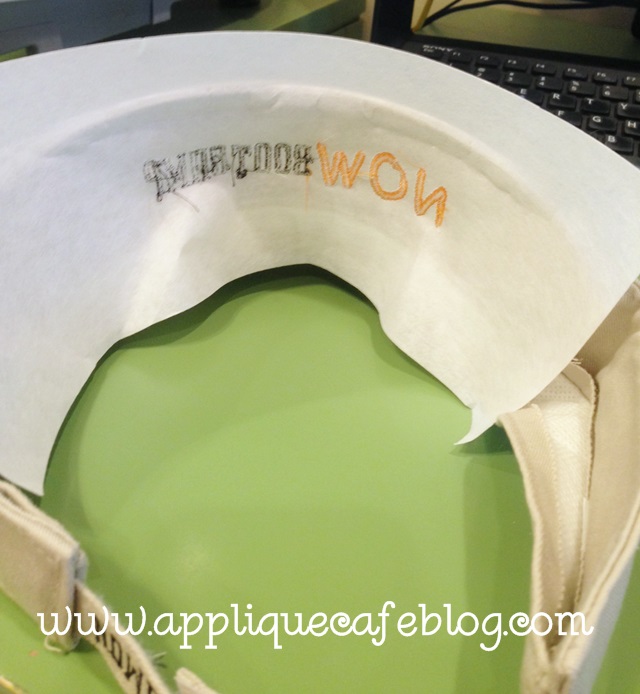
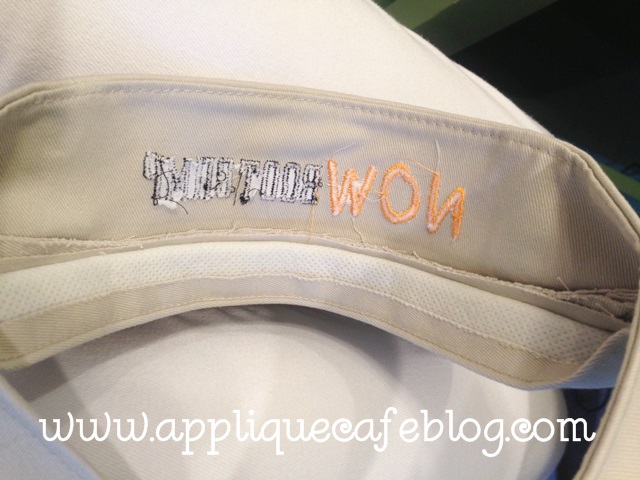
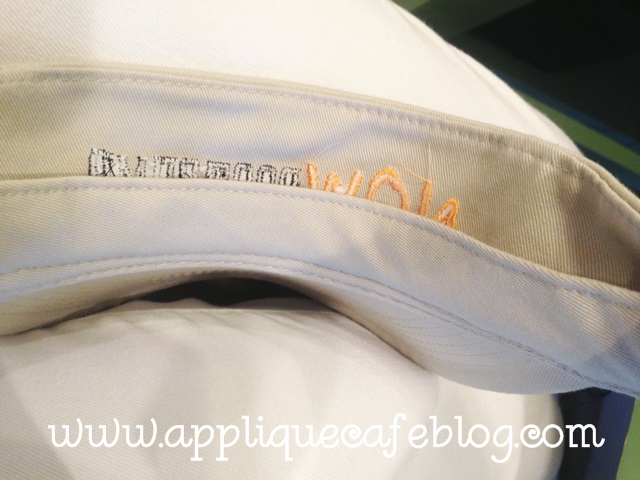
Here are 2 photos of the visors after I’m finished. I did a white and khaki one, both with the same logo. I trimmed the jump stitches in between the letters.

photo 1 (6) photo (26)

I’ve taken the visor off the frame and will pull away the cap stabilizer which is tearaway and comes in strips.

photo 3 (8)

I usually pull away all of the stabilizer inside the letters.

photo 4 (8)

Flip the lining back up and your visor is ready!

photo 5 (8)

Here are the finished products!

photo 4 (4)

Are you either thoroughly confused, or scared to death?? It’s really easier than it seems, and I highly recommend the video! I have not used my cap frame in like 2 years, but it only took me 15 minutes or so to get it all set up and the visors embroidered.

I will work on my blog post ASAP on monogramming a regular hat or cap using FAST FRAMES! Stay tuned!!

Monogramming Nike Shorts

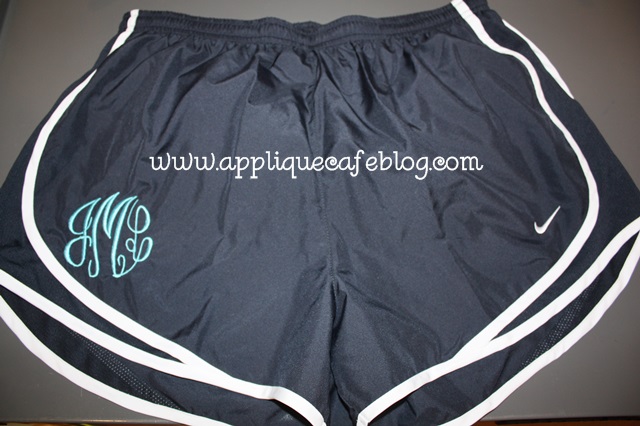
So…. it has been raining here for 2 solid days. All of the snow and ice is north of us, so all we have had is rain and cold and cold and rain all.day.long. yesterday and today. I’m over it and ready for SPRING! and Nike shorts! I had a customer bring me some Nike shorts to monogram this week, and after asking around to see if anyone had done them before, I “figured out” which stabilizer to use. After I was done, I realized it might be handy information for those of you out there who haven’t done any yet.

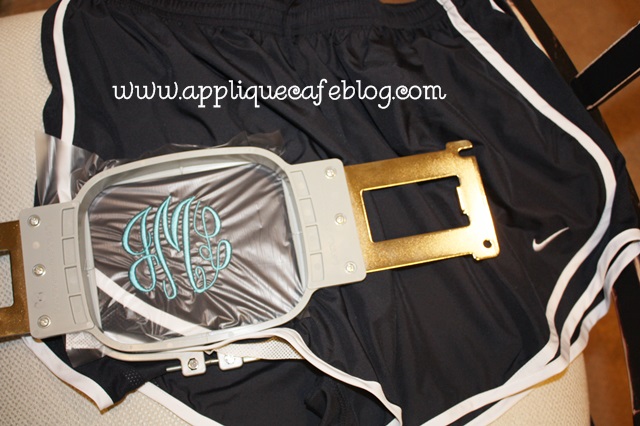
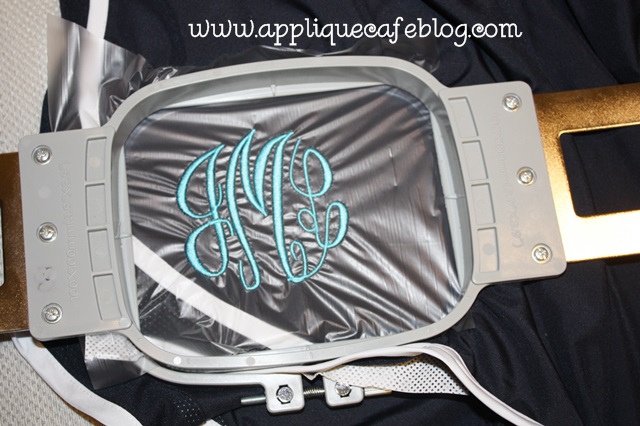
I used water soluble “solvy” on top. Yes, it’s water soluble, but I just pick and pull it off when I’m done.

IMG_8781 IMG_8782

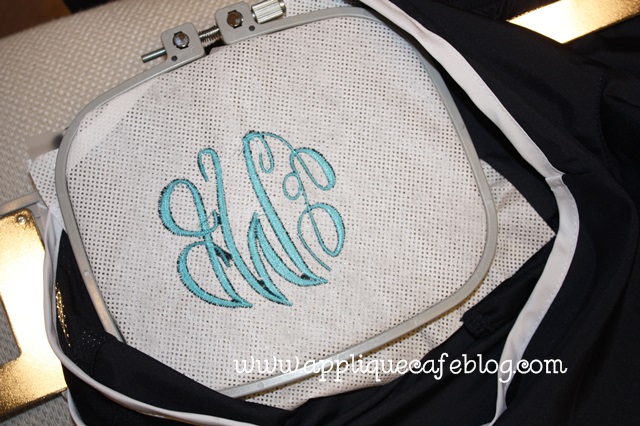
I used Waffle Tearaway on the bottom. As you can see, I hooped it all together and also used a little Sulky KK2000 spray adhesive to “stick” the tearaway to the underside of the shorts to keep it in place. This type of tearaway is a little thicker than the standard iron on tearaway, which is like paper, which I normally use on towels and bibs. Nike shorts are made of a thin polyester type material, and I wanted to avoid any puckering with the weight of a monogram. I considered using cutaway (medium) but went with the tearaway and it did fine.

Do you notice anything “off” on my monogram below? There is no bobbin thread showing, which means my tension is off. This doesn’t affect this particular monogram, but it might if you were working on another project. I will show you in a minute how to check your tension on a 6 needle machine.

IMG_8783

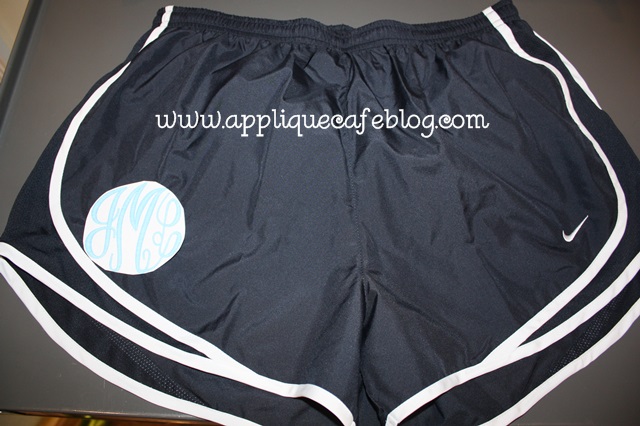
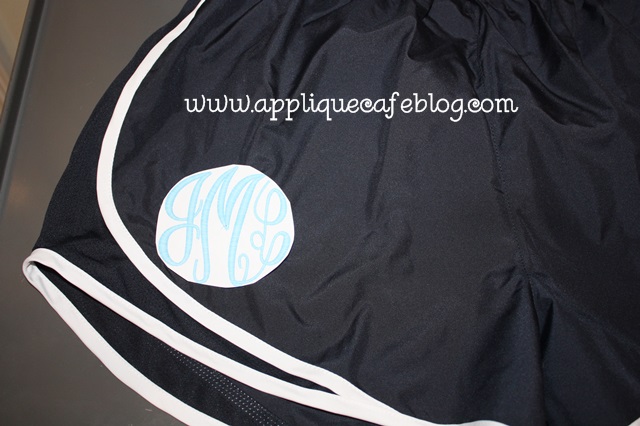
Before I actually did the monogram, I wasn’t sure what size I should do. I looked around on Pinterest and saw a bunch of monogrammed Nike shorts in a variety of fonts and size monograms. I was between a 2.5″ and a 3″ monogram, so I printed both and cut the monogram out to see which size looked best, and also it helped with placement. I used Monogram Wizard Plus “Master Circle” as my font. MWP has a print option which comes in handy when you are deciding size and placement.

IMG_8784

I went with the 3″ monogram after consulting with my customer!

IMG_8785

Here’s the finished product! As I mentioned, if you search “monogrammed Nike shorts” on Pinterest, you will see all kinds of fonts and placement. I love the way these turned out! These are navy with a turquoise monogram. Hot pink would have been cute too!

IMG_8786

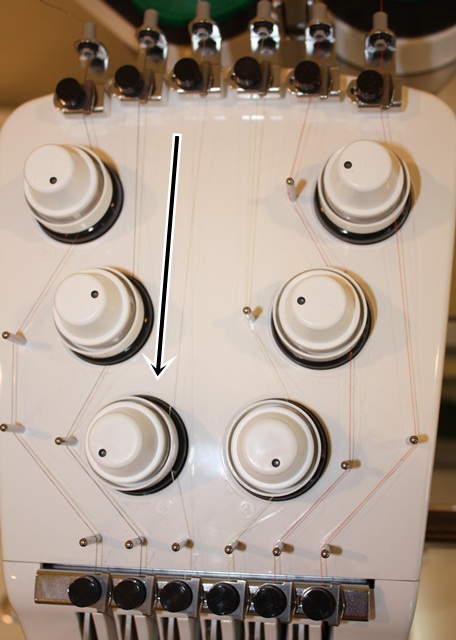
Now on to my tension issue. I have a Brother PR650 6 needle embroidery machine, which comes with a handy dandy tension test feature. On machines such as mine, your tension is controlled by knobs on top of the machine.

IMG_6970

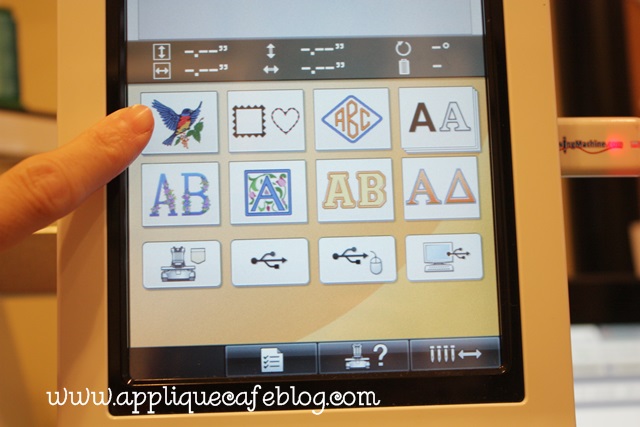
Looking at your Home screen, select the button with the bird on it.

IMG_8788

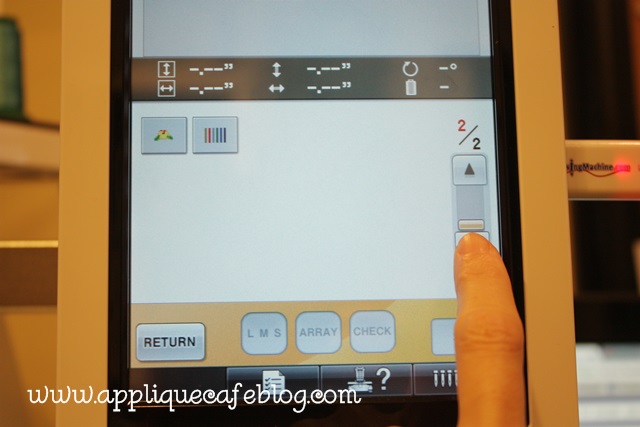
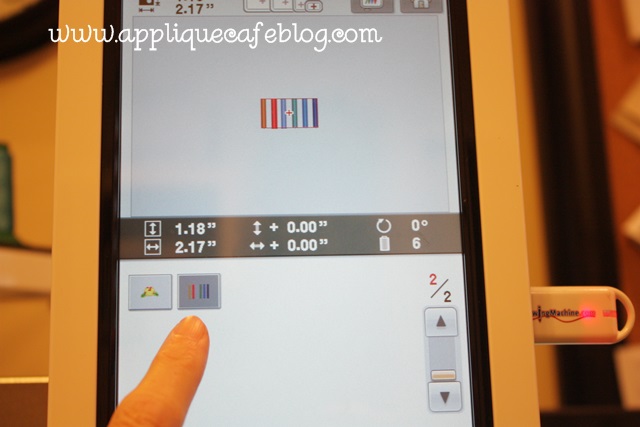
It will pull up some embroidery designs built in to your machine. Go to page 2 and you will see the tension test.

IMG_8789

6 color bars or lines = 6 needles = 6 thread colors.

IMG_8790

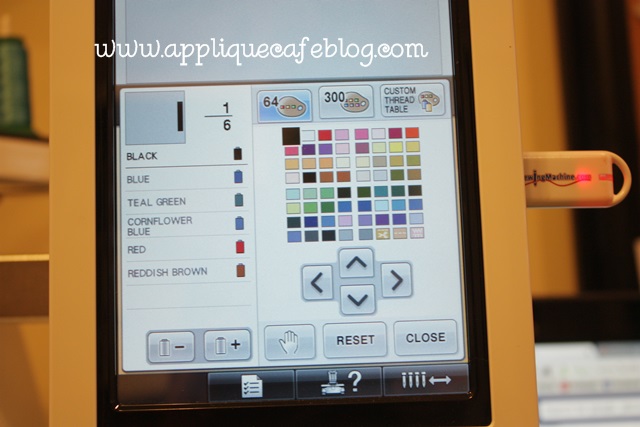
I go in and program each step according to the colors of thread on my machine. Huh? I assign black for needle 1 because black thread is on my machine for needle 1. Etc…

IMG_8791

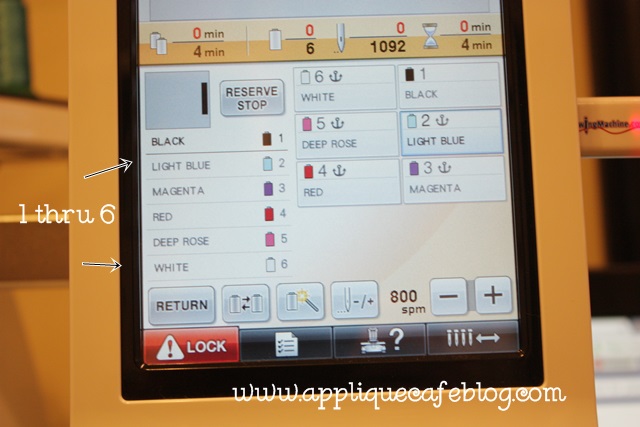
As you can see below, I’ve assigned my colors and it shows the 6 steps with needles sewing in order to test each needle, 1, 2, 3, 4, 5 & 6.

IMG_8792

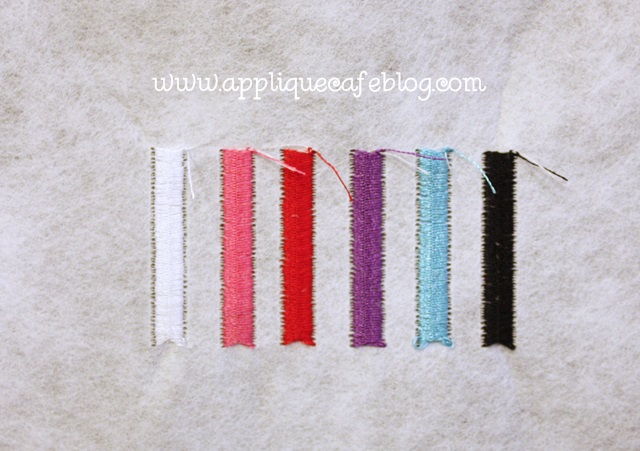
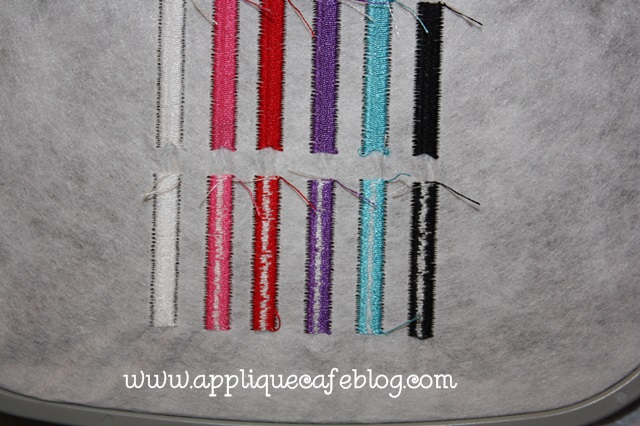
Here are the results of my first tension test. Again, no bobbin thread showing. Since all 6 rows are lacking in bobbin thread, I have to assume there’s an issue with my bobbin! Had it been only 1 needle, then I could assume there was an issue with that 1 needle and the rest were fine with no bobbin issues.

IMG_8793

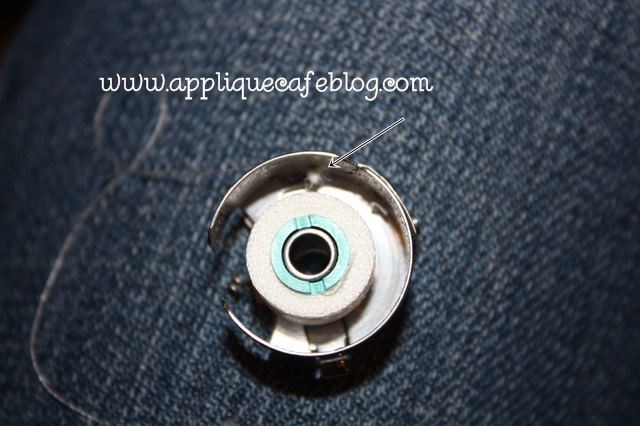
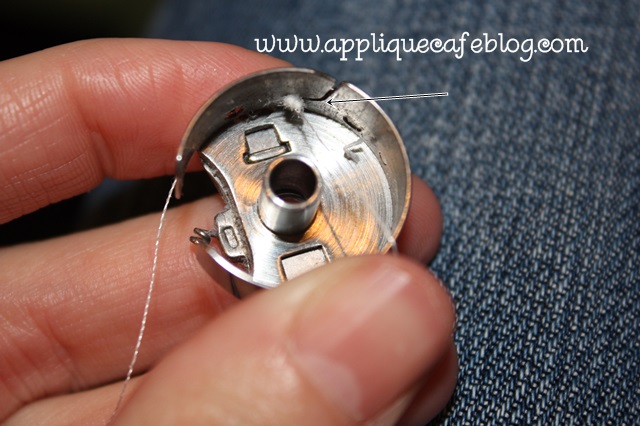
After taking my bobbin case out, I quickly found the culprit. It looks like the thread is caught and is balling up before it can come out of the bobbin case.

IMG_8794

Bingo! I removed the “knot”, re-threaded and put my bobbin case back in. I use Magna Glide Prewound L bobbins.

IMG_8795

Tension test #2 results are below, and you can see the bobbin thread. A good rule of thumb per Steve at Sewingmachine.com, is 1/3-1/3-1/3. 1/3 colored thread, 1/3 bobbin thread in the middle and 1/3 colored thread on the other side. Mine is not exactly 1/3 each but it looks much better and I can work on the tension up top!

IMG_8796

I hope that was helpful ~ both the stabilizer with the Nike shorts AND the tension test! You can find more helpful videos regarding 6 needle machines at Sewingmachine.com!
Before you go, check out Whimsical Fabric’s latest blog post! I had the pleasure of being their “Featured Customer” for February! Find out more about me and running my own business! WF has great fabric, shipping supplies and sewing patterns for those of you who sew. She also hosts a “Sew Along” each month so check out her blog to find out more. She’s also on Facebook and has a sew along Facebook group if you are interested in joining! Basically she picks a pattern to sew each month and blogs about each and every step. There are discussions on Facebook and lots of photos!
wf

Lastly, all of our designs are on sale through Tuesday, February 18th at Applique Cafe! Below are a few new ones listed last week.

feb sale

I’m off to snuggle with my Maggie. She is scheduled for surgery in the morning to be spayed!! She has already begun her first heat cycle (eeek!!), so the timing was perfect and we’re anxious to get through tomorrow. Have a great rest of the week! We are hoping for some sunshine tomorrow!

photo (58)