Happy November blog readers! Once again, it has been a while since my last post! Fall is so busy… blah blah blah…. 🙂 Back in February I did a blog post about Mighty Hoops. They are the fantabulous magnetic secondary hoops that you can use with various brands of multi-needle embroidery machines. I have had the 7.25″ x 7.25″ mighty hoop for a while now, and I’ve just used it solo without any stand or fixture. I was contacted recently by one of the co-owners of HoopMaster about trying a smaller hoop and the fixture. I have seen these things demonstrated over the years and have always been intrigued, so I was excited to give it a try. So now I have the 6.5″ mighty hoop and fixture/stand. I’ve used it quite a bit over the last week or so and I.LOVE.IT! It’s an investment, but like any embroidery investment (like software, that bigger machine, etc.), it’s worth it if this is what my job is! If this is what I’m going to do, why not spend the money on the things that make my job easier! Monogram Wizard Plus seemed like a lot of money to spend on font software back in 2008 (or whenever I got it), but when you put in to perspective that I’m still using it in 2015, it makes it seem so worth it and not such a huge investment! Might Hoops will be that same great investment!
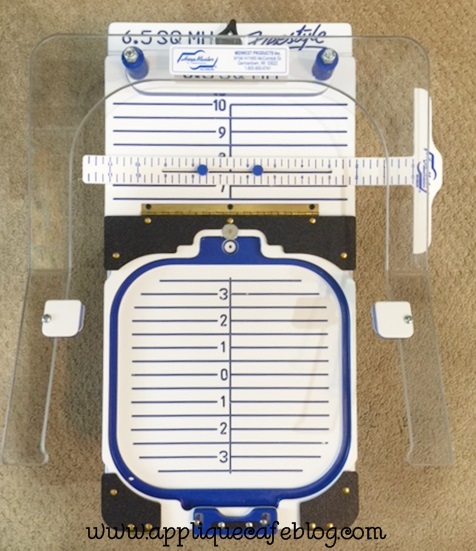
Here is the Fixture/Stand. When I first put it together, I will admit I had no idea how to work it. Luckily there are several videos out there so I got the hang of it very quickly. Here are a few things to note:
The -0- is the center of the hoop.
The T-bar is used when you are monogramming something like a hand towel. I will post a photo of that later.
It’s really hard to understand the whole Fixture/Stand without having one in front of you, so hopefully my pictures and explanations will kind of help you get it!
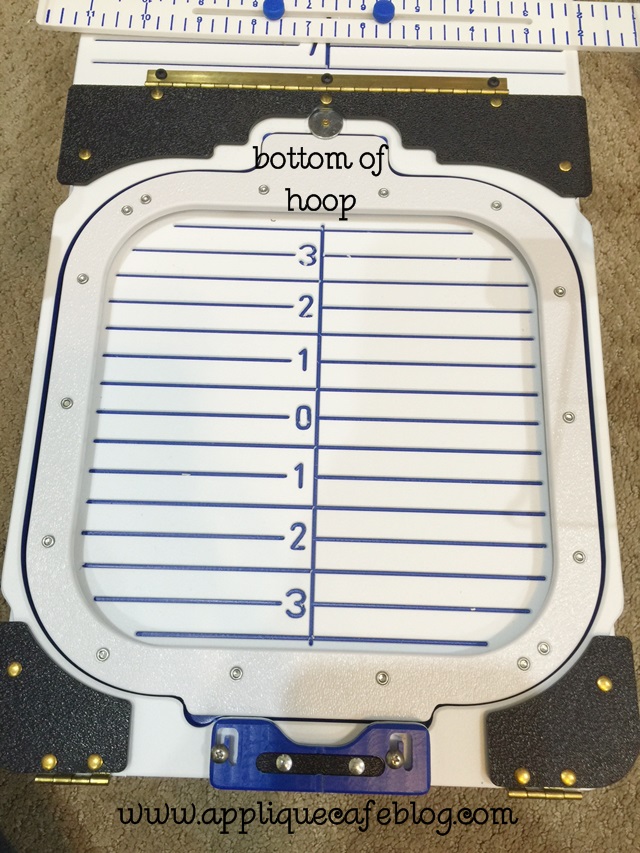
I monogrammed some baby blankets recently and took some pictures along the way. See if you can follow me! The bottom of the hoop, which typically goes on the bottom of the garment, is placed neatly in the fixture. It fits like a puzzle. It simply keeps the bottom of the hoop in place until you can get your garment centered and ready to hoop.
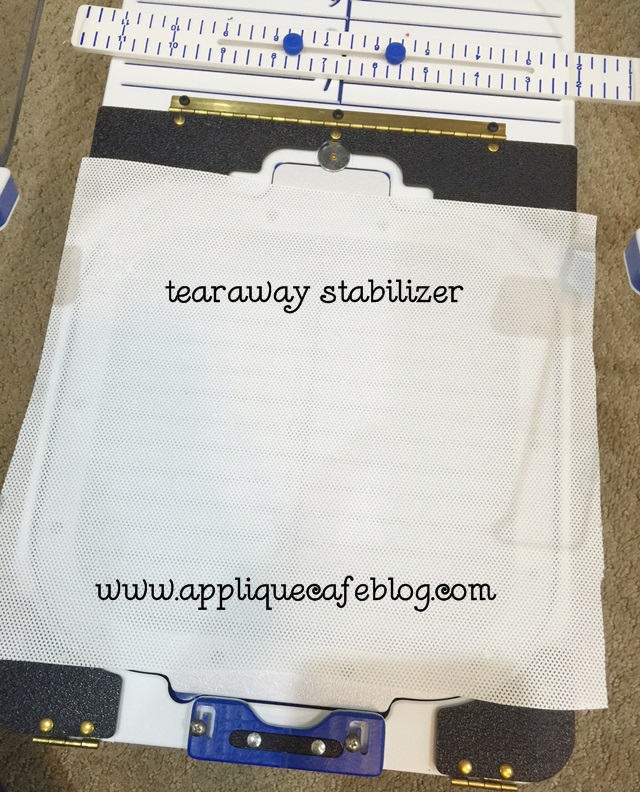
Next, you lay your stabilizer on top of the bottom of the hoop. I’m using a waffle weave tearaway on the bottom of my baby blanket. Note: the black corners and top piece flip back (see the hinges) and can hold the stabilizer in place. Pre-cut stabilizer would come in handy here. I just laid mine on top which worked great too.
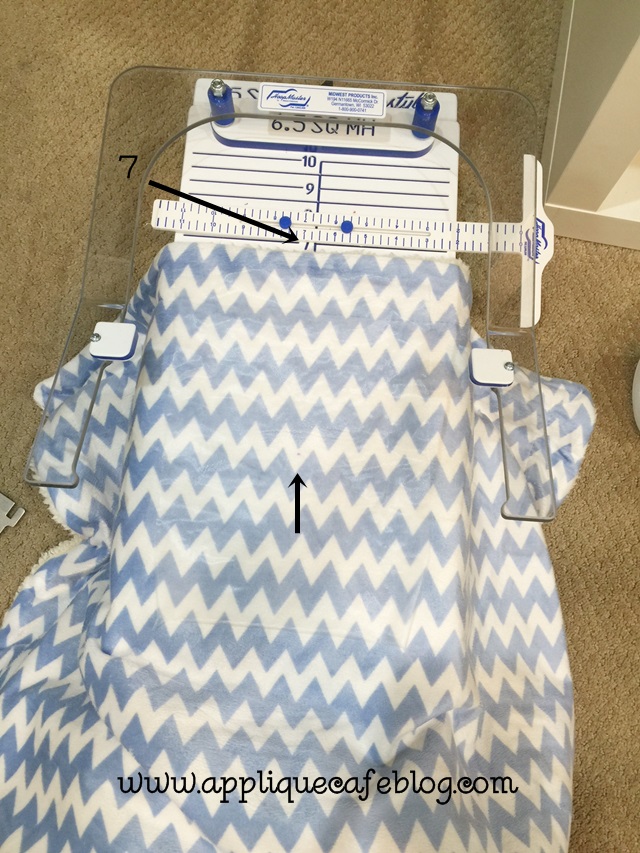
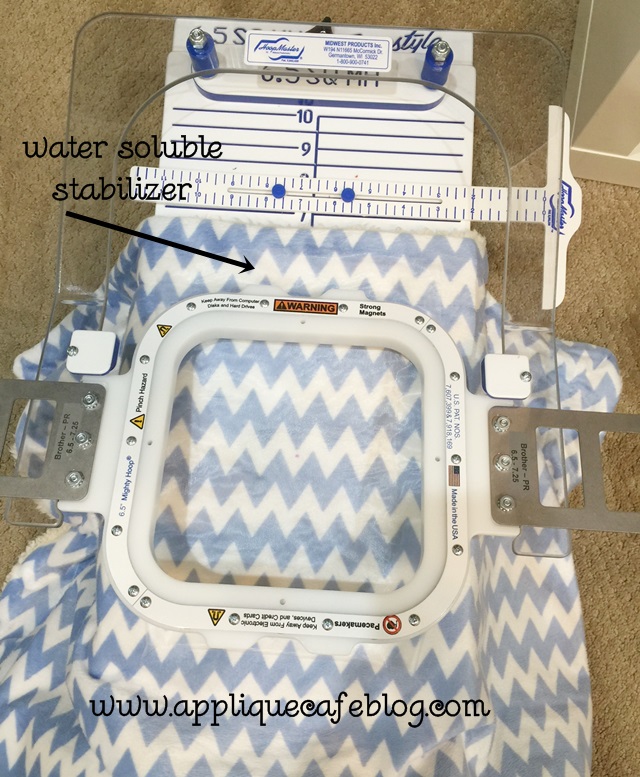
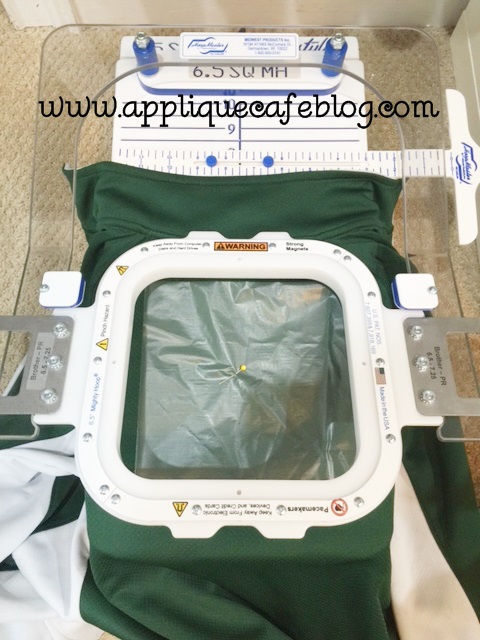
I marked my center of the blanket which was about 6.5″ from the bottom. The lines on the fixture count up from -0-, which is the center of the hoop. If I want my monogram centered 6.5″ from the bottom, I line the end of the blanket up with the 6.5″ line on the fixture. I also lay a piece of water soluble stabilizer on top of the blanket because it’s a minky material and I don’t want my monogram thread to sink in to the blanket. Note: the clear part on top bounces up and down, and is used for the top part of my hoop. Note 2: I did not use the T-bar for this particular blanket, but will show a photo later of when I did use it on a hand towel.
Next I rest the top part of my hoop on the clear part of the fixture. It fits perfectly in between the clear arms. Now I am ready to actually hoop the blanket with the Mighty Hoop!
I pressed down on the top hoop/clear arms and the top of the hoop snaps to the bottom of my hoop because of the MAGNETS in the hoop. You can also see my center mark on the blanket is centered in the hoop below. You can also see closer that the edge of my blanket is lined up with the 6.5″ line on the fixture. If I wanted the monogram centered 10″ from the edge, I would line the edge of the blanket up with the 10″ line.
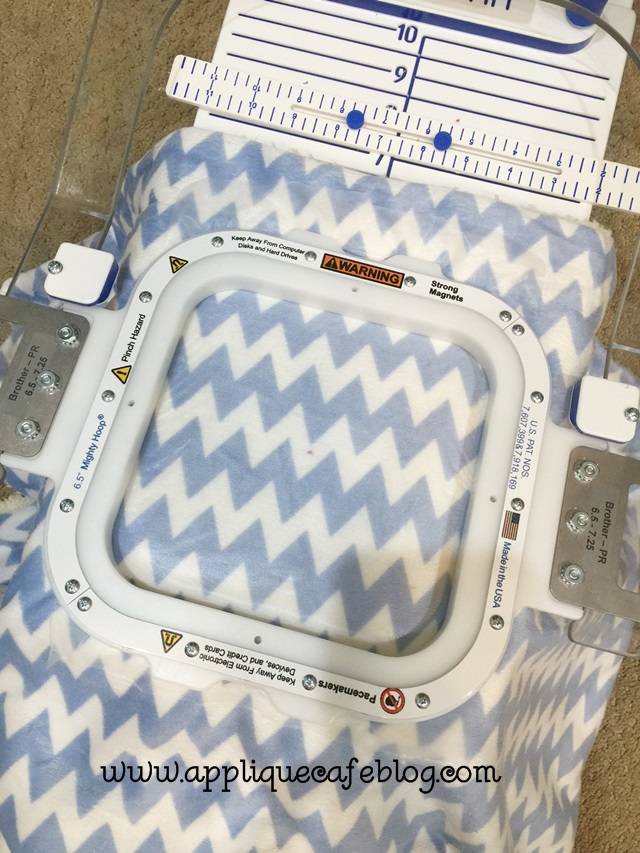
As you can see below, my tearaway stabilizer is in the hoop also on the bottom. I am now ready to monogram the blanket! So my layers are: bottom hoop, tearaway stabilizer, blanket, water soluble stabilizer and then top of the hoop on top.

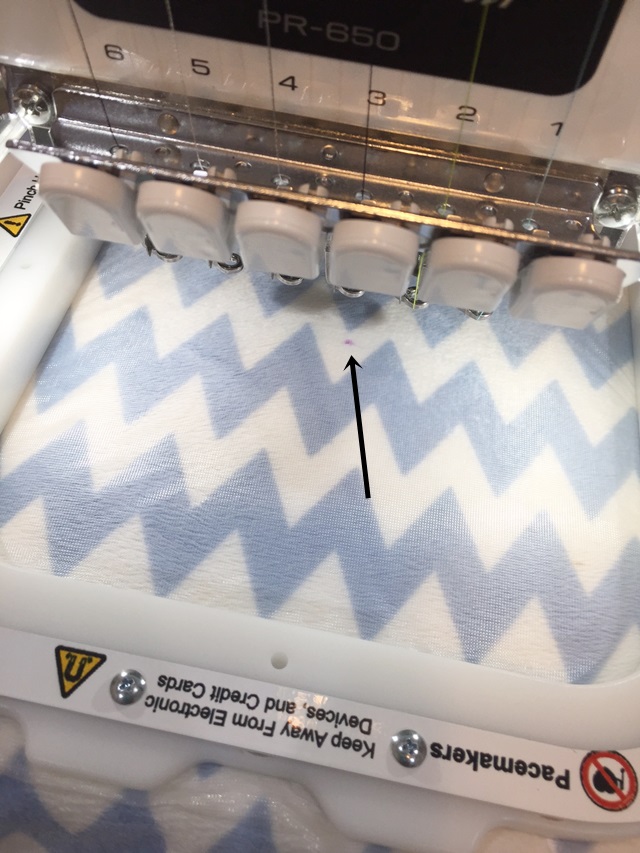
Below is the hoop on my machine, and as you can see, my center dot is already lined up with needle because my blanket is hooped (almost) perfectly centered!
Wouldn’t you know I didn’t take a photo of the finished monogrammed blanket! Sorry!
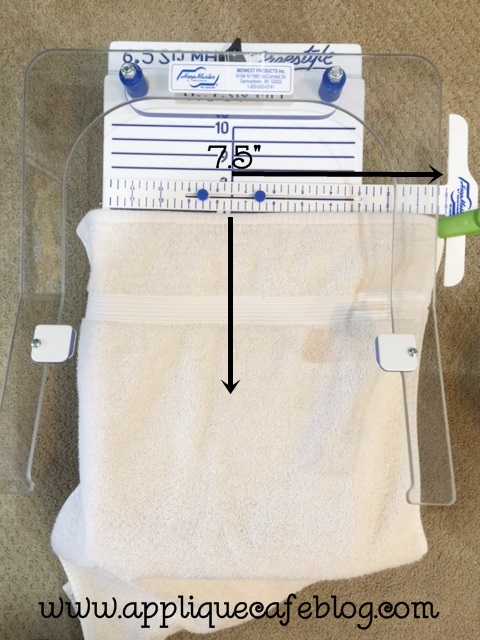
Here is a hand towel and maybe this will help with the T-bar explanation. (From the HoopMaster website: “The T-square is to assist you in measuring the horizontal distance from the edge of a garment to where the center of a logo is to be embroidered.”) The hand towel is 15″ wide, so if you adjust the T-bar to line up the center of the fixture with the 7.5″ mark ON the T-bar, your towel will be centered if you line up the corner on the right where the T is. I didn’t have any way to hold it AND take a picture, so I used a clip. I know this is hard to understand!! Trust me… if I had 15 hand towels to do, this would REALLY come in handy! No measuring tape and marking the center. It’s all done on the fixture!
I also used the hoop/fixture/stand today to hoop the back of a jacket! I had marked the center where I wanted my monogram, but used the fixture to keep it all in place so I could hoop it. The magnets draw the 2 pieces of the hoop together, so it’s SUPER EASY and there’s no hoop burn!
You can find more information about Mighty Hoops on the HoopMaster website – click HERE! They have several videos you can watch also. Click HERE to see those! There’s one on setting up the T-square that might explain it better than my 1 photo.
I posted a photo of this on Instagram last week and got lots of comments and questions! Please let me know if you have any questions! You can also email info@hoopmaster.com if you have any questions that I might not be able to answer! I know this is hard to comprehend without the Hoops in front of you! Or maybe you DO have the hoop and fixture but aren’t sure how to use it? Several people commented that they had the hoops and/or station and LOVED them! I’d love to hear from you!
Recent Comments