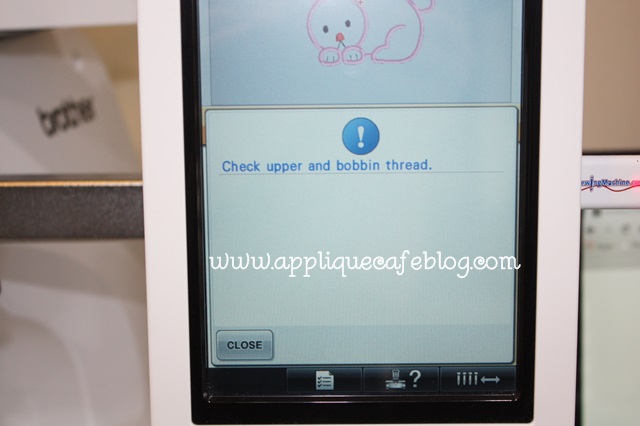
Multi-needle users… how often do you get this error message? “Check upper and bobbin thread.” Sometimes this message is legitimate and you are out of bobbin thread or top thread. Sometimes you get it and realize one of your needles is not threaded correctly ~ you missed a guide or the thread has wandered around the wrong guide. Sometimes you get this message and everything appears to be FINE and you want to throw your machine out the window because it keeps happening every 7 stitches and you keep closing the error message and starting the machine again only to get the message again and again and again. Hypothetically. 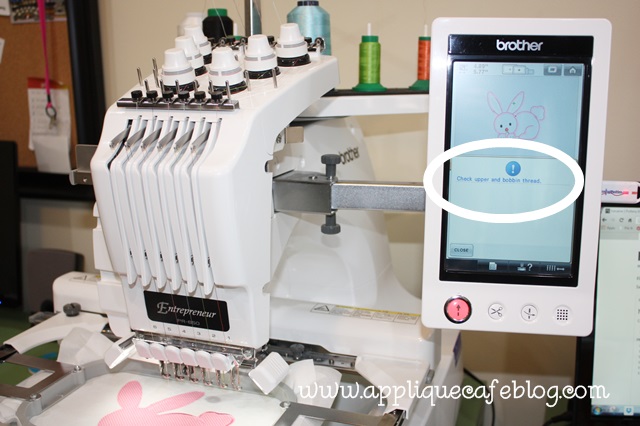
I was having this issue with needle 1 and 6 on my machine recently and had my machine serviced a couple of months ago. I haven’t sewn a whole lot since I got it back, but noticed needle 6 was still giving me trouble. I emailed Steve at Sewingmachine.com last week about it and he sent me a GREAT list of “try this” for this error message issue. I took some pictures today to include and hopefully this will help if you are having the error message problem.
Please note: If you have this problem with needle 4, which has the shortest route from the spool of thread to the needle, wrap the thread around the tension disk twice! I did a short blog post on this – click HERE to read it! It worked for me!!
The following are suggestions from STEVE:
When your machine stops and says check upper and lower thread, it stopped because the machine did not “sense” the tension disc turning. The tension disc is the little (silver) wheel under your tension knob that you wrap the thread around 1-1/2 times when you thread up the machine.
Tension Disc:
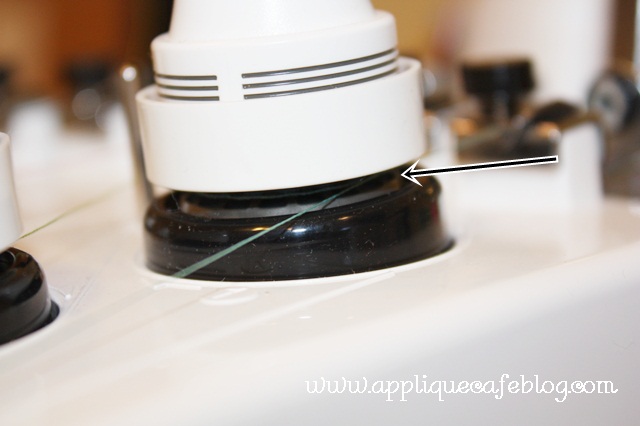
There are two reasons for your to be getting a “false thread break” error. The first reason, and it is very uncommon, is that the electronic sensors that sense the motion (turning) of your tension discs are bad. We very rarely see that as the problem. The other reason is that your tension discs are just not turning steadily.
The first thing you want to try is to wrap your thread around the tension a second time to see if this stops the error message. The tension assembly is supposed to looped around one time during your threading of the machine – try looping it twice. This is just a test to see if it helps stop the error message. If that works then we know that your tension discs are not turning properly and it is not a sensor. (I tried this FIRST and this WORKED FOR ME! However, you still need to troubleshoot the issue with the following steps. Double wrapping the thread will eventually fail you, but it’s an easy fix to get through a project. RG)
Next if you pull straight down on a thread at the needle on one that is not giving you any issues you will see that the tension disc spins smoothly. (pull slowly) Next pull on one of the threads that is giving you problems and watch – the disc will spin erratically. If the disc was turning smoothly and steadily we would have to check the electronic sensor, but ninety times out of a hundred the disc or the felts, or a threading issue are to blame. Cleaning can also help and I will go into detail on that in a moment.
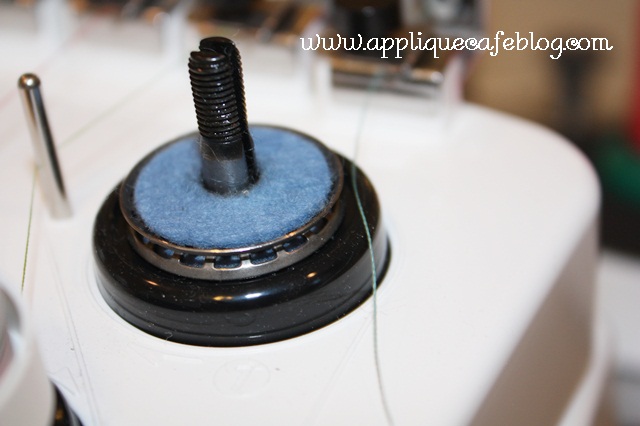
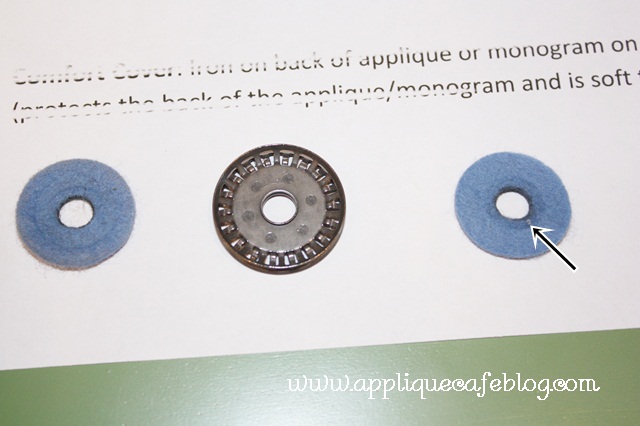
Disc & Felts:
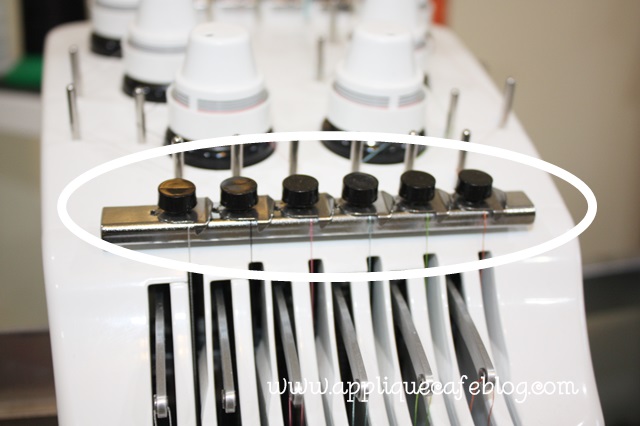
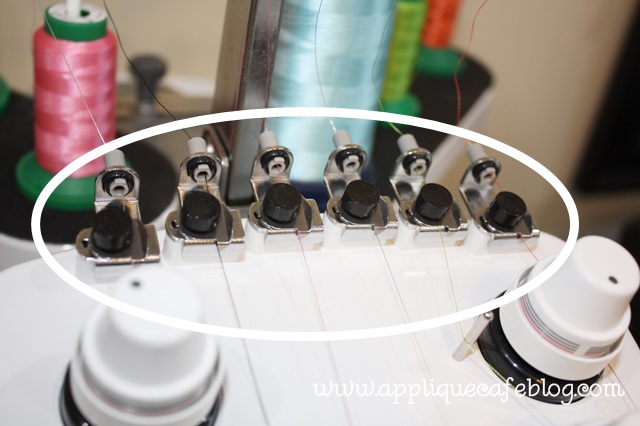
Below pics are from a blog post I did on 6 needle maintenance (found HERE):
Tension can be an issue if the tension knobs are twisted down too tight and not allowing the tension disc to turn steadily. Try loosening the tension a little to see if the discs spin more smoothly.
The most common threading issue is that the little clips (pretensions) at the back and front of the head are not threaded correctly. The thread will only be half way under the clip or not at all and that will cause an issue. These pretensions help to hold your thread taut so that the when you wrap the thread around the tension disc the thread will “grip” the disc and spin it. Incorrect threading of the machine will also cause the error message. If the tensions and threading are correct then it may require cleaning to solve the issue.
Pretension Clips:
Here are the instructions for cleaning your tensions:
At the back and front of the head are two metal clips you run the thread under, these are called pretensions. Start by cleaning out under them. The space is very small under the clip so what we do is to cut a long skinny strip of fabric and run that under the clips. Soaking the fabric in rubbing alcohol can help to clean out any waxes or oils or dust that is trapped under the pretensions.
Next move onto the tension assembly itself and screw the cap off. Take each component of the tension off and stack them in a row for reassembly. As you take off the tension wheel that you wrap the thread around look at the underside and you will see a round ridge, that is the magnet the machine sense is turning, so that it knows that your thread is feeding and not broken. Clean any lint off of the blue felt disks, take a Q-tip or a fabric strip and clean inside the groove of the tension wheel. Use rubbing alcohol again to clean the tension wheel as you cannot have your thread slipping on this wheel. Be sure that when you reassemble the tension wheel that you put the side with the magnet facing down. After reassembly pull on your thread down at the needle and watch the tension wheel to assure that it is spinning. Pull slowly and the wheel should spin smoothly and not start and stop. If it will do that then you are good to go!
Tension Assembly:

The blue felts should be replaced every so often – and the tension discs too. But cleaning is a first step to try, if that fails then replace the felts and discs. make sure and clean under the pretensions though as if you do not have adequate pretensions even new parts will not help.
Blue Felts (again) and the one on the right has a piece of lint on it, which can cause issues:
I hope that helps you with this bothersome error message.
Again, check out my blog post on 6 needle maintenance and see how lint can collect and cause problems with your embroidery!
Steve has tons of great videos on their website ~ www.sewingmachine.com! Click on VIDEOS.
Recent Comments