The Year of Hats

I am declaring the summer of 2014 The Year of Hats, or the Season of Hats, or the SUMMER OF HATS? I’m doing hats every week and this will be my 3rd blog post this summer on doing hats. Check out the first 2 HERE and HERE. I’ve also done 2 posts so far on VISORS, so check them out HERE and HERE.

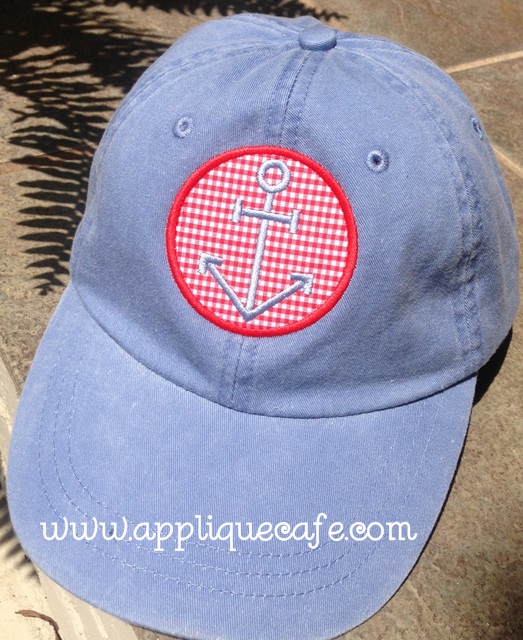
I have mostly done monogramming on hats, but recently did our new Anchor Patch (which comes in a “small size” great for hats).

photo 5 (4)

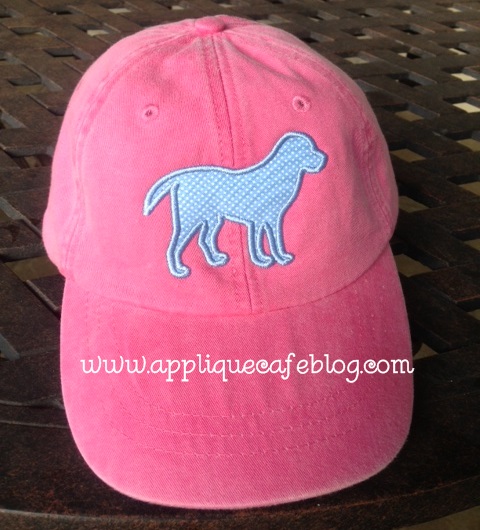
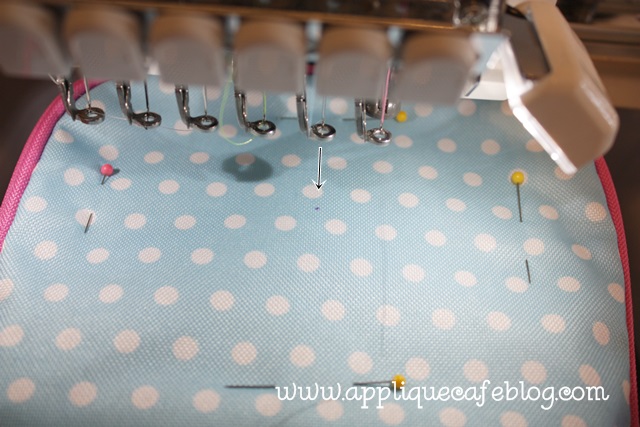
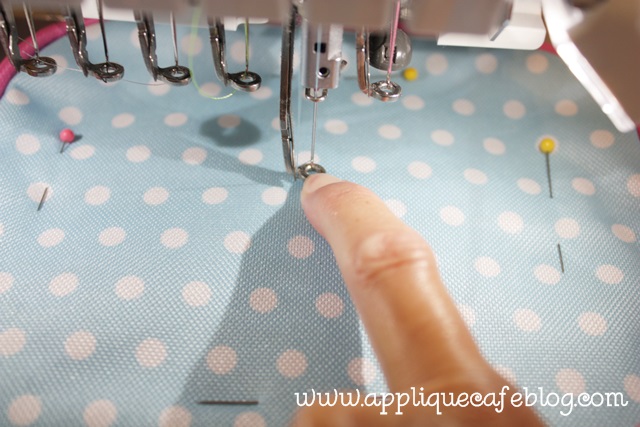
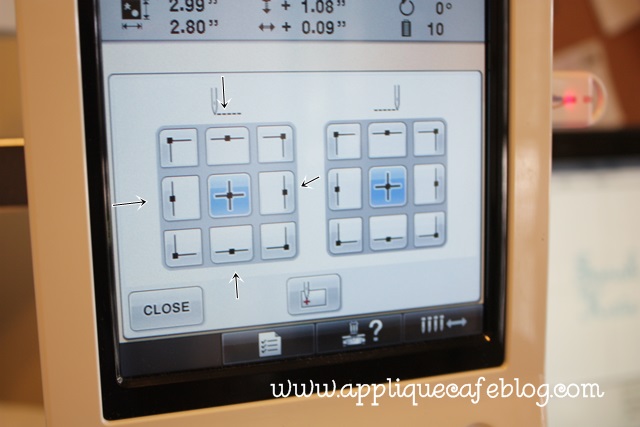
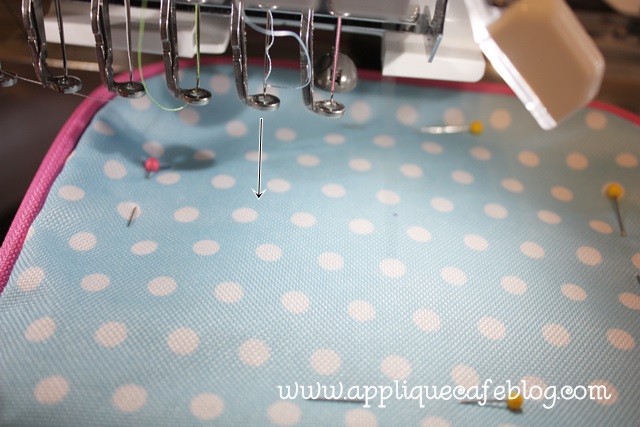
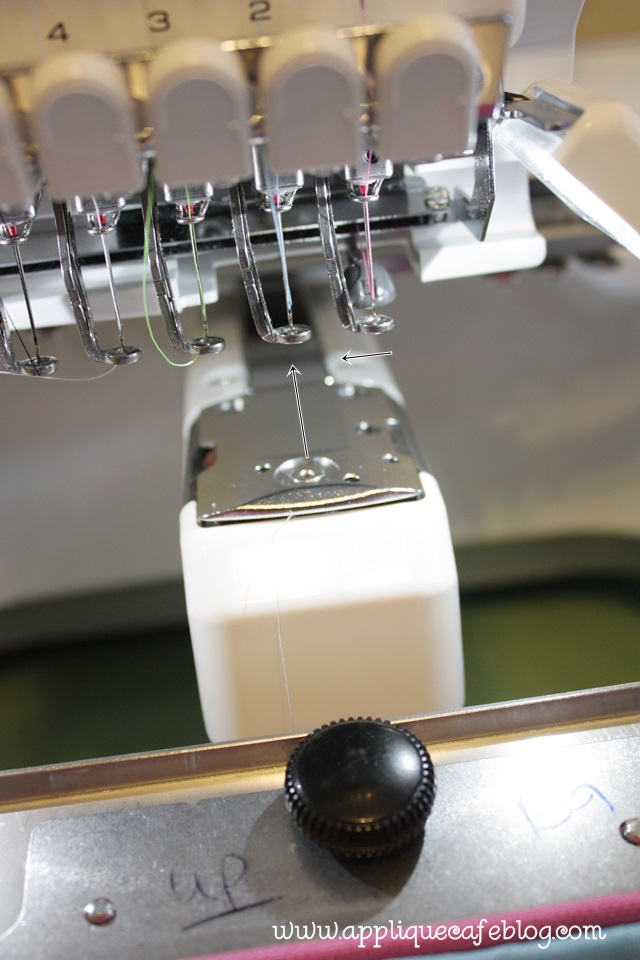
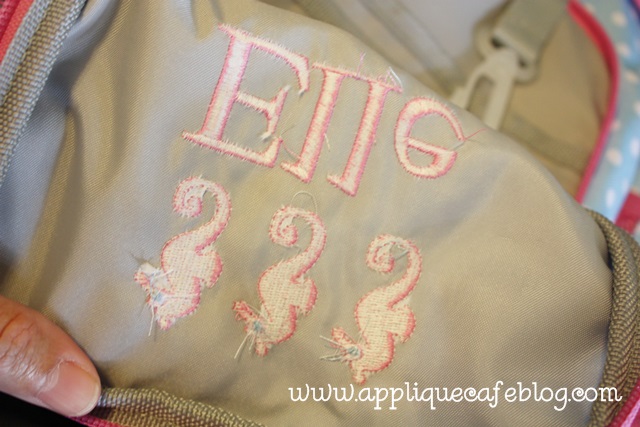
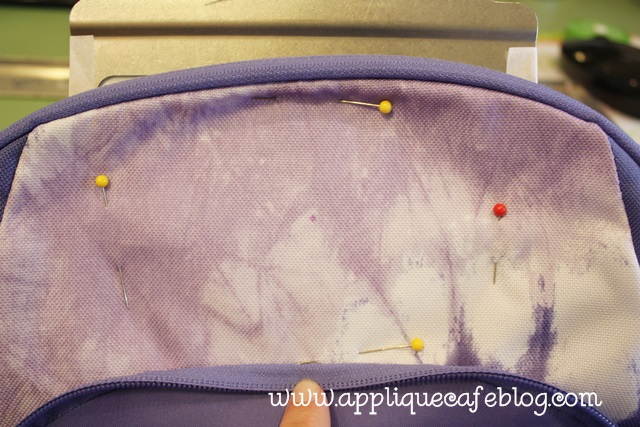
This week we listed a new Mini Dog Applique AKA “Stitch” so I sampled it on a hat as well. It was a little trickier because I had to trim around the small legs of the dog. I typically use Gingher 4″ curved scissors to trim my appliques, but busted out the “Snips” for this hat. I used my 5.5″ X 6″ Fast Frame + sticky stabilizer and pinned the front of my hat to the frame. I use the seam on the front of the hat for my center and it’s best to get the front of the hat as flat as possible and pinned down securely. I also use chip clips to clip the bill of the hat (which is flattened) to the frame.

photo 1 (10)

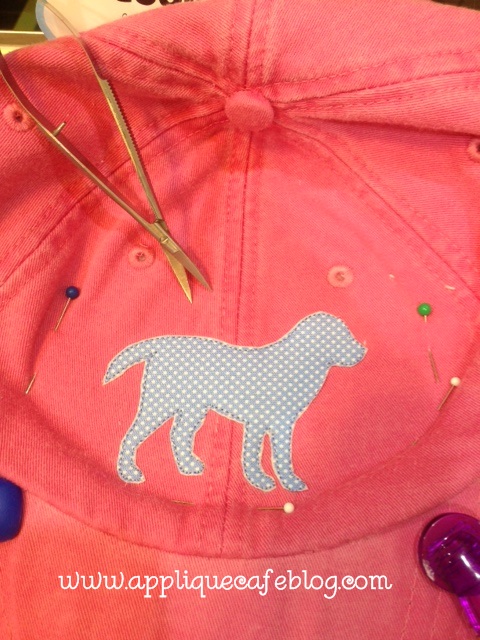
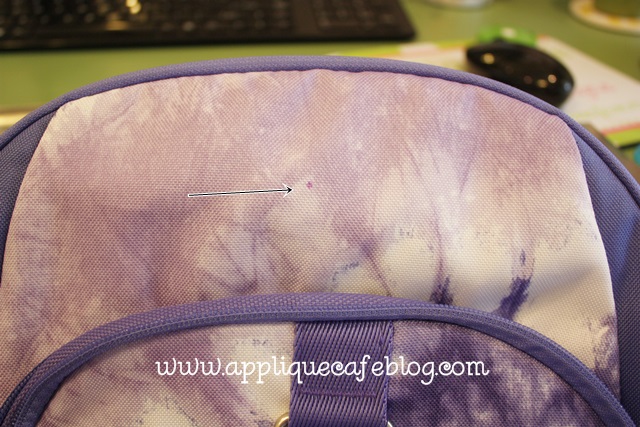
Here it is after I’ve unpinned. I not only use a layer of fabric, but I fuse it to a layer of medium cutaway stabilizer with Heat N Bond Lite so that the seam doesn’t show through my fabric. Fabric alone would probably work, but adding a layer of stabilizer keeps it firm and you can’t see the hat color or seam through the fabric.

photo 2 (10)

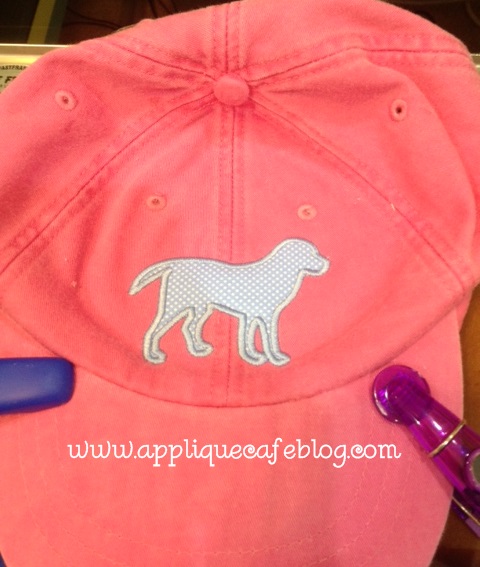
Finished product! Please note that the dog polka dot fabric is not wrinkled. For some reason the camera captured the dots weird and it looks that way, but it’s flat and smooth!

photo 3 (7)

More hats. These cute seersucker striped hats came from the J. Crew Outlet and were about 6 bucks each. My sister in law bought all they had and I have 3 more to do today. Again, flatten the bill, chip clip it to the fast frame and smooth and pin the front of the hat.

IMG_8975

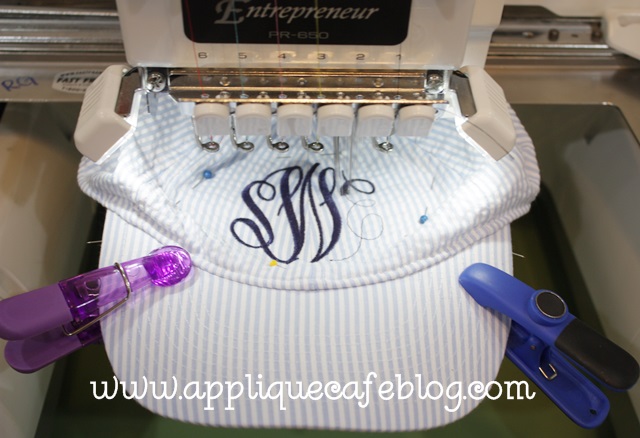
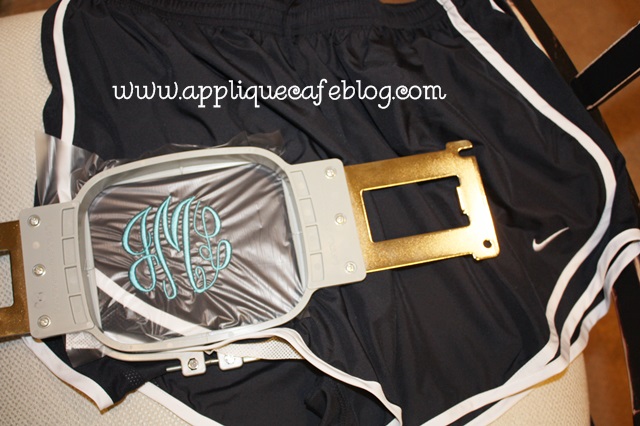
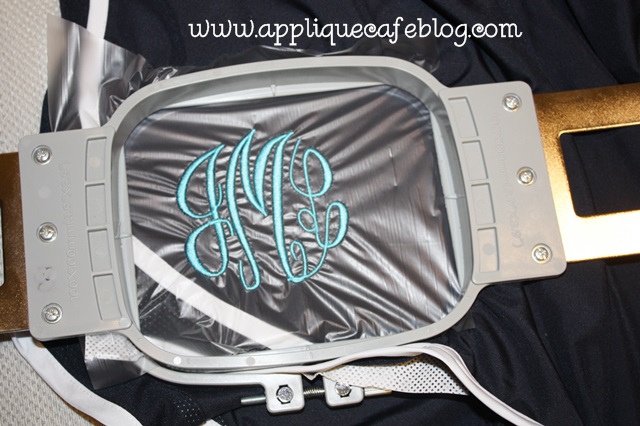
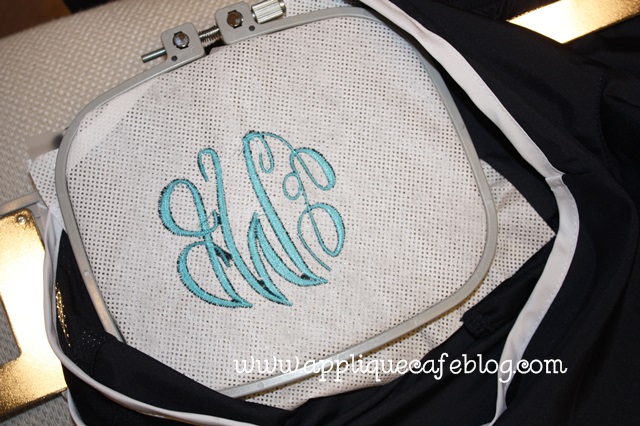
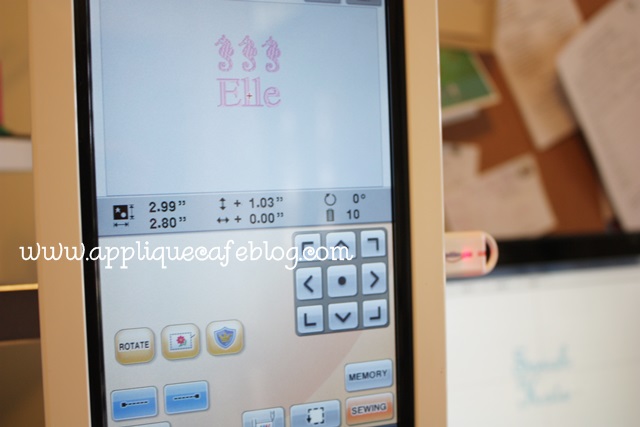
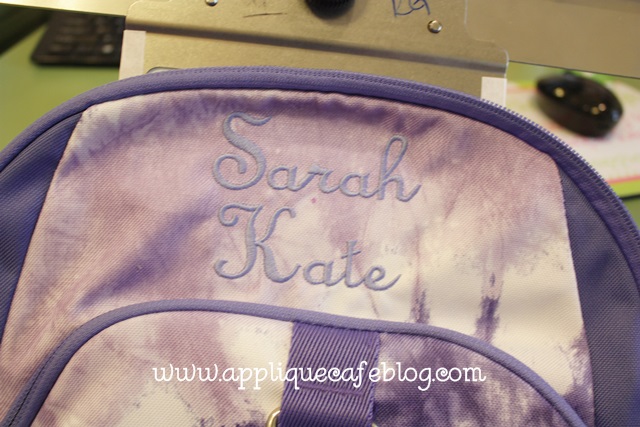
I used Monogram Wizard Plus “Master Circle font and this is roughly 2.75” tall. I think I increased it a couple of times once I got it on my machine and saw that I had a little more room.

IMG_8976

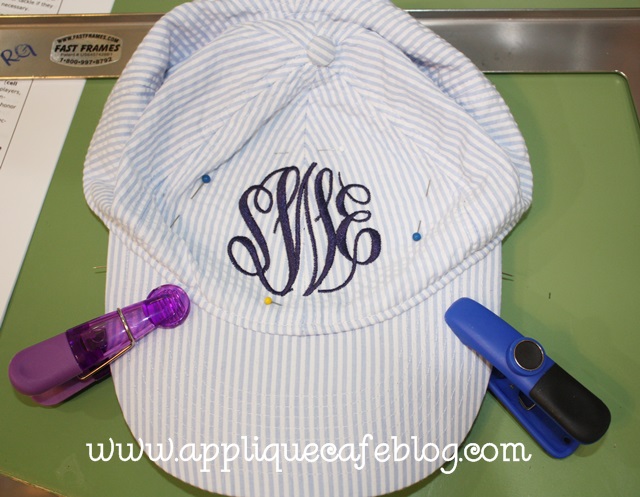
This is what it looks like from the bottom. Most hats come with a “lip” or mini liner (the white part) that folds down – I usually pin it back before I pin the hat to the frame. The chip clips keep the bill flat and in place on the frame.
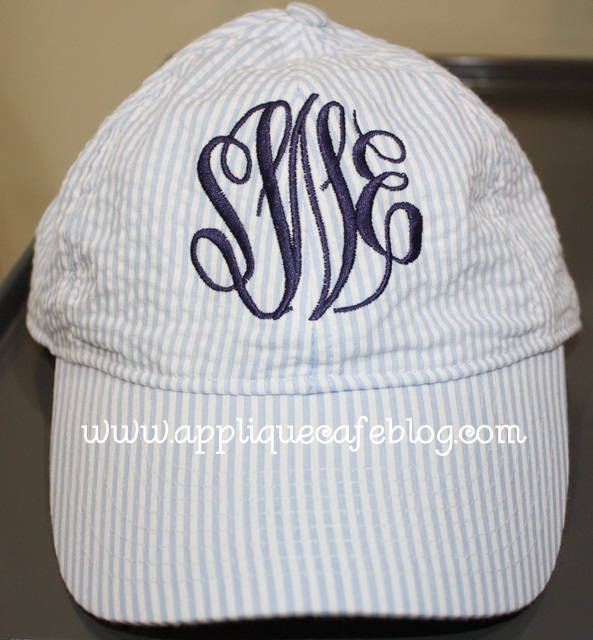
IMG_8977

Finished product!

IMG_8978

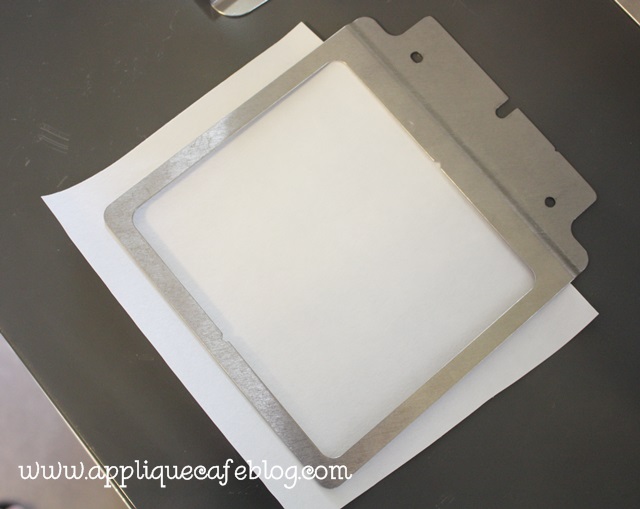
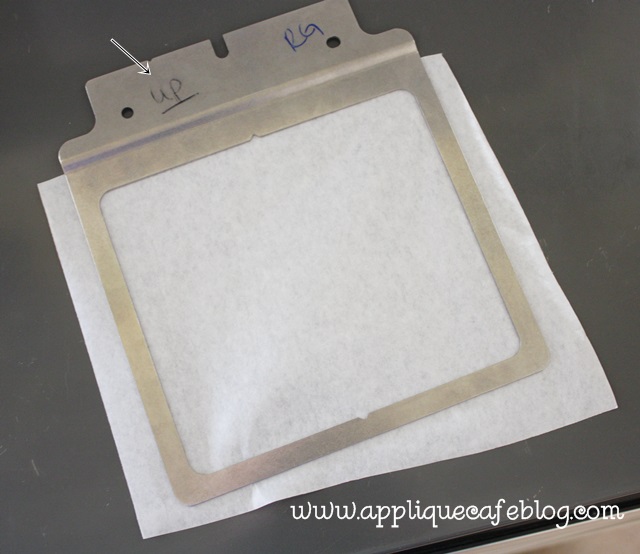
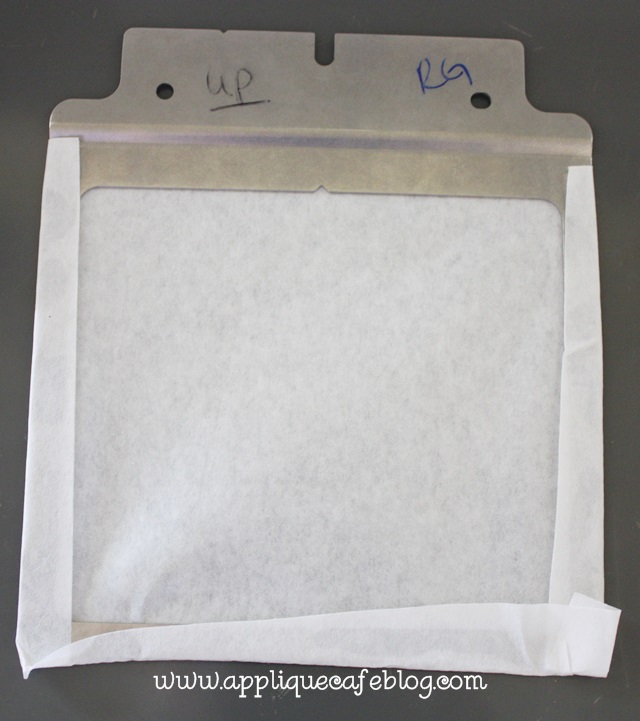
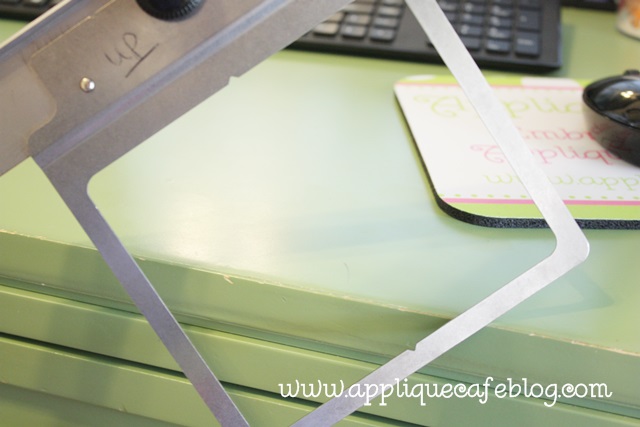
Here is another type of Fast Frame that I was told worked great with hats. It’s a 6″ thin radius frame and this one is from Ken’s Sewing Center. I believe you can also get a 4″ thin radius frame which might also work great for hats. Make sure you get THIN. Most 7 in 1 Fast Frame sets come with a regular radius frame, but I believe the thin will allow you to get closer to the bill on the front. They also sell these frames at Sewingmachine.com, but are currently not on the website. I was told they should be available next week online. Again, I don’t have one yet, but was told they work great for hats!

radius frame

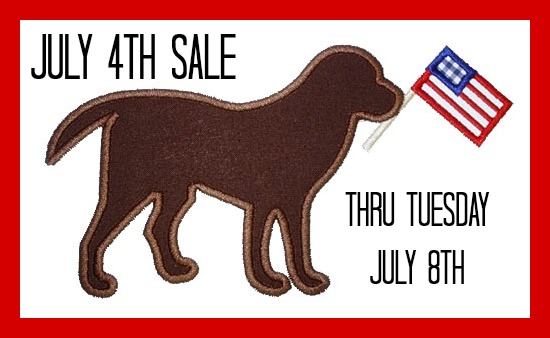
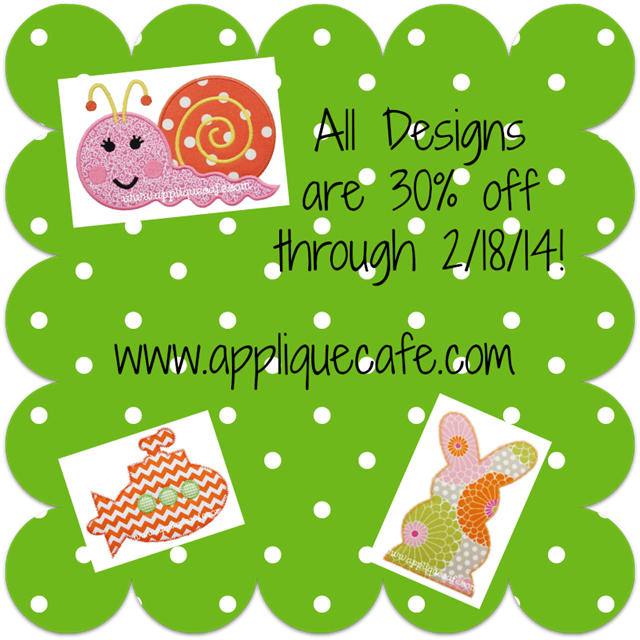
We listed a few new designs this week and are having a quick little July 4th SALE at Applique Cafe.

july 4 sale

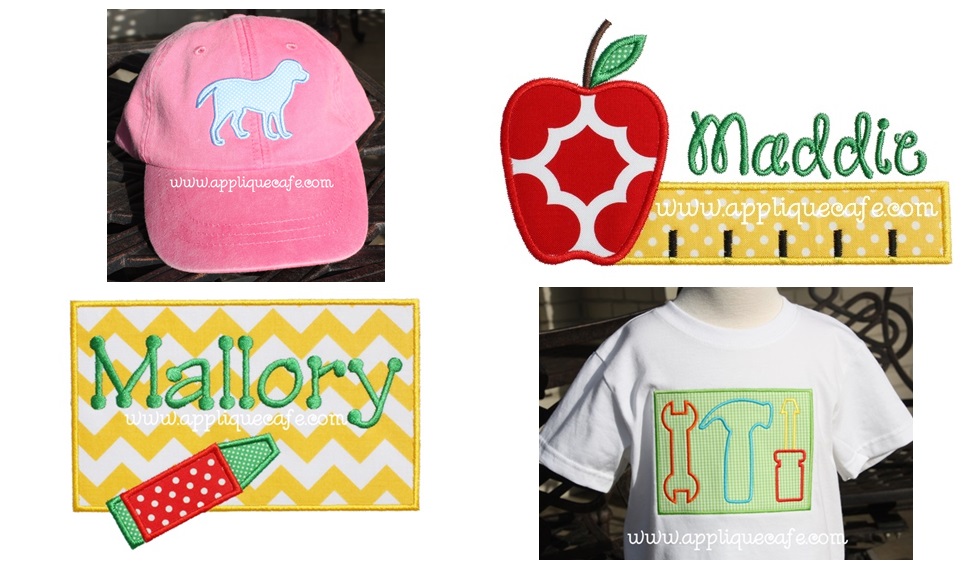
Here are our new designs for this week, which include a couple for BACK TO SCHOOL!! We also added a new “Patch Applique“. I love the TOOLS and these new patch designs are only 1 fabric and super easy to sew.


IMG_8989-tile

Have a safe 4th of July!!

Monogramming Nike Shorts

So…. it has been raining here for 2 solid days. All of the snow and ice is north of us, so all we have had is rain and cold and cold and rain all.day.long. yesterday and today. I’m over it and ready for SPRING! and Nike shorts! I had a customer bring me some Nike shorts to monogram this week, and after asking around to see if anyone had done them before, I “figured out” which stabilizer to use. After I was done, I realized it might be handy information for those of you out there who haven’t done any yet.

I used water soluble “solvy” on top. Yes, it’s water soluble, but I just pick and pull it off when I’m done.

IMG_8781 IMG_8782

I used Waffle Tearaway on the bottom. As you can see, I hooped it all together and also used a little Sulky KK2000 spray adhesive to “stick” the tearaway to the underside of the shorts to keep it in place. This type of tearaway is a little thicker than the standard iron on tearaway, which is like paper, which I normally use on towels and bibs. Nike shorts are made of a thin polyester type material, and I wanted to avoid any puckering with the weight of a monogram. I considered using cutaway (medium) but went with the tearaway and it did fine.

Do you notice anything “off” on my monogram below? There is no bobbin thread showing, which means my tension is off. This doesn’t affect this particular monogram, but it might if you were working on another project. I will show you in a minute how to check your tension on a 6 needle machine.

IMG_8783

Before I actually did the monogram, I wasn’t sure what size I should do. I looked around on Pinterest and saw a bunch of monogrammed Nike shorts in a variety of fonts and size monograms. I was between a 2.5″ and a 3″ monogram, so I printed both and cut the monogram out to see which size looked best, and also it helped with placement. I used Monogram Wizard Plus “Master Circle” as my font. MWP has a print option which comes in handy when you are deciding size and placement.

IMG_8784

I went with the 3″ monogram after consulting with my customer!

IMG_8785

Here’s the finished product! As I mentioned, if you search “monogrammed Nike shorts” on Pinterest, you will see all kinds of fonts and placement. I love the way these turned out! These are navy with a turquoise monogram. Hot pink would have been cute too!

IMG_8786

Now on to my tension issue. I have a Brother PR650 6 needle embroidery machine, which comes with a handy dandy tension test feature. On machines such as mine, your tension is controlled by knobs on top of the machine.

IMG_6970

Looking at your Home screen, select the button with the bird on it.

IMG_8788

It will pull up some embroidery designs built in to your machine. Go to page 2 and you will see the tension test.

IMG_8789

6 color bars or lines = 6 needles = 6 thread colors.

IMG_8790

I go in and program each step according to the colors of thread on my machine. Huh? I assign black for needle 1 because black thread is on my machine for needle 1. Etc…

IMG_8791

As you can see below, I’ve assigned my colors and it shows the 6 steps with needles sewing in order to test each needle, 1, 2, 3, 4, 5 & 6.

IMG_8792

Here are the results of my first tension test. Again, no bobbin thread showing. Since all 6 rows are lacking in bobbin thread, I have to assume there’s an issue with my bobbin! Had it been only 1 needle, then I could assume there was an issue with that 1 needle and the rest were fine with no bobbin issues.

IMG_8793

After taking my bobbin case out, I quickly found the culprit. It looks like the thread is caught and is balling up before it can come out of the bobbin case.

IMG_8794

Bingo! I removed the “knot”, re-threaded and put my bobbin case back in. I use Magna Glide Prewound L bobbins.

IMG_8795

Tension test #2 results are below, and you can see the bobbin thread. A good rule of thumb per Steve at Sewingmachine.com, is 1/3-1/3-1/3. 1/3 colored thread, 1/3 bobbin thread in the middle and 1/3 colored thread on the other side. Mine is not exactly 1/3 each but it looks much better and I can work on the tension up top!

IMG_8796

I hope that was helpful ~ both the stabilizer with the Nike shorts AND the tension test! You can find more helpful videos regarding 6 needle machines at Sewingmachine.com!

Before you go, check out Whimsical Fabric’s latest blog post! I had the pleasure of being their “Featured Customer” for February! Find out more about me and running my own business! WF has great fabric, shipping supplies and sewing patterns for those of you who sew. She also hosts a “Sew Along” each month so check out her blog to find out more. She’s also on Facebook and has a sew along Facebook group if you are interested in joining! Basically she picks a pattern to sew each month and blogs about each and every step. There are discussions on Facebook and lots of photos!

wf

Lastly, all of our designs are on sale through Tuesday, February 18th at Applique Cafe! Below are a few new ones listed last week.

feb sale

I’m off to snuggle with my Maggie. She is scheduled for surgery in the morning to be spayed!! She has already begun her first heat cycle (eeek!!), so the timing was perfect and we’re anxious to get through tomorrow. Have a great rest of the week! We are hoping for some sunshine tomorrow!

photo (58)

Fast Frames and Backpacks!

School is back in session! My kids started back on the 14th of August and it’s been a blur since then. Everyone said “Ohhhhh they will all be at the same school this year {my youngest started Kindergarten}! It’ll be SOOOO much easier and you will have more time!!!!” I don’t know if I agree with this? I feel crazier than ever. As my M-I-L says, I meet myself coming and going. Throw a puppy in the mix and it’s a recipe for chaos! Did I mention I will be 29 41 this month? I have found that if I don’t write it down, it is NOT getting done. Is this ADD? Old age? Yesterday at Target I picked up this handy dandy “NOTES” notebook for 3 bucks. I might go back and stock up. Today I neatly wrote down everything on my to do list, and low and behold it all got done in a timely matter! Success!!

photo (18)

Which leads me to this post…. I took all of these great pictures back on August 9th during my back-to-school-backpack-a-thon. Today is September 5th and I am JUST now sitting down to share them. Sorry school is back in session and you needed this info a month ago. Tuck it away for next year. Or as they say on Pinterest, Pin Now, Read Later.

Here is a backpack I’m going to monogram. The perfect place to monogram it is on the front pocket, and as you can see below I’ve marked (after measuring) my center with my handy dandy air erasable pen.

IMG_8199

I have a Brother PR650 6 needle machine and Fast Frames, so that’s what I’m going to use (no hooping required). If you have a single needle machine and no fast frames, you could still follow along but hoop a piece of sticky stabilizer instead. Here I have cut a piece of sticky stabilizer a little bigger than my frame. p.s. I buy my sticky stabilizer from sewingmachine.com (commercial backing).

IMG_8200

As you can see here, I wrote “UP” on the top of my fast frame. I don’t know about you, but I have to figure out which way is up or down every single time. There is a science to which way is up which you will see later. Here I have also pulled off the paper side of the sticky stabilizer and I’m going to now stick the stabilizer to the frame from the bottom.

IMG_8201

I’ve stuck the stabilizer to the frame and wrapped the excess around the top loosely. No need to smooth it down! Doesn’t have to be perfect or neat either. Don’t worry, it’s not going anywhere! p.s. I put my initials on my frame too so no one steals it from my sewing room. No really I take these to classes sometimes.

IMG_8202

I am now ready to stick my backpack front pocket to the sticky-stabilized-fast-frame. As you can see below, the backpack pocket flap is “stuck” to the sticky stabilizer, but I also pin it in place INSIDE the inner frame of the fast frame. This keeps the backpack in place AND it shows me where my inside borders are. If my monogram goes outside the pins, it is likely to hit the frame which is NOT good. So… stay within the pins! As you can see below my center mark is not exactly in the center of the frame, but it’s close and I will have plenty of room for my monogram. You just need to make sure it’s straight on the frame!

IMG_8203

Here is the science behind the frame and how it attaches. As you can see there is a small dip where the frame attaches, therefore everything is level on the machine. If you attach it upside down, the frame will be tilted up and you’ll know it b/c it will bounce around more and it’ll be louder than usual.

IMG_8204

Now… I’ve attached the fast frame on to my machine. My machine thinks this is my largest hoop, so it doesn’t know how much space I have. These machines don’t recognize Durkee hoops or Fast Frames, so it’s up to you to test your boundaries before you sew anything.

IMG_8205

Before I test my boundaries I need to make sure my monogram is going to be centered on my backpack. The way I do that is to line up my CENTER NEEDLE with the center spot (remember the air erasable pen mark) on my backpack. This is confusing to some people! Your center needle is the needle to the LEFT of the needle threader apparatus. It also lines up with the bobbin arm on the machine. After you’ve done your editing (assigning colors, adjusting size, rotating, etc) and you hit EDIT END on the machine, then you will use the arrows to line up your center needle with the center on the item/garment.

IMG_8206

Those arrows are shown below. If you need to start over, just hit the center dot on the machine (in the middle of the arrows). As you can see here, I have moved the design (Elle + 3 Seahorses) up to line the center needle up with the center on the backpack. The red + on the screen is the center of the “hoop”, but don’t think too much about that b/c it’s too confusing.

IMG_8207

Most of the time you can eyeball it to see if it’s centered.

IMG_8208

You can also pull the needle bar down to make sure it’s centered. The needle will only come down so far, BUT, if you turn the knob on the very back of the machine, the needle will come all the way down and you will be able to tell if it’s centered.

IMG_8209

So your needle is centered which will center your design. NOW you need to check your boundaries to be sure that while stitching, the needle is NOT going to hit any of the edges of your fast frame. This is super important!! If your needle hits an edge of your fast frame, it CAN and WILL mess up your machine. Below is the button to check your boundaries.

IMG_8210

Press the edges and your needle will move around to show you where the edges of the design are. Another option is to press the button (up above) to the right of the check-your-boundaries button. It will trace the design for you and you can see where the needle will hit. Either way will work!

IMG_8211

Below I have hit the left side button and it is showing me where the left of my design will hit. I’m within the pins so I’m good. Another reason the pins come in handy! As you can see, I have plenty of room!

IMG_8213

If you are confused as to which needle is the center needle, as I said earlier, your center needle is to the immediate left of the needle threader thing and also it LINES UP WITH THE BOBBIN ARM. I’m sure there is a more technical name for the arm? As you can see below, needle 2 is currently my center needle. This can change to needle 1, 3, and so on and so forth depending on which needle you threaded or used last.

IMG_8214

I have sewn my design, which is our Mini Seahorse Embroidery Design X 3 and “Elle” done in Monogram Wizard Plus “Library” font. The design fit well within my pins with room to spare.

IMG_8215

Almost done! Once I remove the straight pins and fast frame with sticky stabilizer from the flap of the backpack, you can see I have a little excess sticky stabilizer. No problem! I peel it all off. Use scissors to get it started inside those holes if you need to. Just be careful not to puncture anything.

IMG_8216

While it’s not necessary to remove all of the stabilizer, I always do and it looks a little neater. Again, I use sticky stabilizer from Sewingmachine.com and it comes off with ease.

IMG_8217

Finished backpack! The pinks don’t appear to match, but they do!

IMG_8218

When you’re done, you also need to remove all the sticky stabilizer from the fast frame. The kind I use is not excessively sticky and peels right off.

IMG_8219

One more quick example! Mark my center.

IMG_8221

Pin it in place on to the sticky-stabilizer-fast-frame.

IMG_8222

Monogram. Remove pins.

IMG_8223

Peel away excess stabilizer.

IMG_8224

Here is my table-o-backpacks and a few other things! I was busy that week before school started and I think I actually did about 16 backpacks in a matter of a few days! Some were just monogrammed and some were appliqued. Mini embroidery designs are great too!

IMG_8225

Again, sorry this is coming to you AFTER school has started! File it away for next year! Please comment with any questions! Have a great weekend!

Last p.s….. Applique Cafe fans ~ our site is 30% off through Tuesday, September 10th! We will be adding 4 new designs hopefully tomorrow!